Lenovo ThinkPad Helix S230U User Manual
Hide thumbs
Also See for ThinkPad Helix S230U:
- User manual (142 pages) ,
- Hardware maintenance manual (103 pages) ,
- Reference (53 pages)
Table of Contents
Advertisement
Advertisement
Table of Contents

Subscribe to Our Youtube Channel
Related Manuals for Lenovo ThinkPad Helix S230U


Summary of Contents for Lenovo ThinkPad Helix S230U
-
Page 1: User Guide
User Guide ThinkPad S230u... - Page 2 • Appendix D “Notices” on page 121 The Safety, Warranty, and Setup Guide and the Regulatory Notice have been uploaded to the Web site. To refer to them, go to http://www.lenovo.com/ThinkPadUserGuides and click User Guides & Manuals, then follow the instructions on the screen.
-
Page 3: Table Of Contents
ThinkPad Setup ....Using a projector ... . Main menu ....© Copyright Lenovo 2012... - Page 4 China RoHS....Calling Lenovo ... . . Turkish RoHS ....
-
Page 5: Read This First
© Copyright Lenovo 2012... -
Page 6: Important Safety Information
The information in this document does not alter the terms of your purchase agreement ® or the Lenovo Limited Warranty. For more information, see “Warranty Information” in the Safety, Warranty, and Setup Guide that comes with your computer. -
Page 7: Conditions That Require Immediate Action
Note: If you notice these conditions with a product (such as an extension cord) that is not manufactured for or by Lenovo, stop using that product until you can contact the product manufacturer for further instructions, or until you get a suitable replacement. -
Page 8: Power Cords And Power Adapters
that the power is turned off and that the product is unplugged from any power source. If you have any questions or concerns, contact the Customer Support Center. Although there are no moving parts in your computer after the power cord has been disconnected, the following warnings are required for your safety. -
Page 9: Extension Cords And Related Devices
Hazardous voltage, current, and energy levels are present inside any component that has this label attached. There are no serviceable parts inside these components. If you suspect a problem with one of these parts, contact a service technician. © Copyright Lenovo 2012... -
Page 10: External Devices
In addition, many mobile products, such as notebook computers, utilize a rechargeable battery pack to provide system power when in portable mode. Batteries supplied by Lenovo for use with your product have been tested for compatibility and should only be replaced with approved parts. -
Page 11: Heat And Product Ventilation
• Do not restrict or block any ventilation openings. • Do not operate your computer inside furniture, as this might increase the risk of overheating. • Airflow temperatures into the computer should not exceed 35°C (95°F). © Copyright Lenovo 2012... -
Page 12: Electrical Current Safety Information
Electrical current safety information DANGER Electric current from power, telephone, and communication cables is hazardous. To avoid a shock hazard: • Do not use your computer during a lightning storm. • Do not connect or disconnect any cables or perform installation, maintenance, or reconfiguration of this product during an electrical storm. -
Page 13: Using Headphones Or Earphones
50332-2 can be dangerous due to excessive sound pressure levels. If your Lenovo computer came with headphones or earphones in the package, as a set, the combination of the headphones or earphones and the computer already complies with the specifications of EN 50332-1. - Page 14 User Guide...
-
Page 15: Chapter 1. Product Overview
Chapter 1. Product overview This chapter provides information about the locations of connectors, locations of important product labels, computer features, specifications, operating environment, and the preinstalled Lenovo programs. This chapter contains the following topics: • “Locating computer controls, connectors, and indicators” on page 1 •... - Page 16 Touch pad TrackPoint pointing stick The keyboard contains the Lenovo unique UltraNav pointing device. Pointing, selecting, and dragging are integral process that you can perform without moving your fingers from a typing position. For more information, see “Using the UltraNav pointing device” on page 21.
-
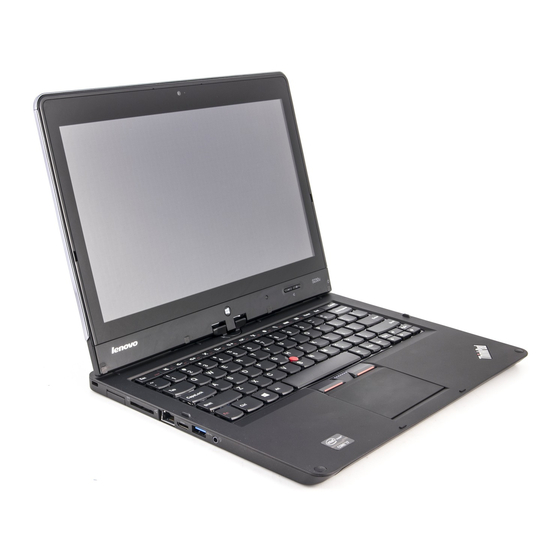
Page 17: Right-Side View
Right-side view Figure 2. ThinkPad S230u right-side view Note: Your computer keyboard might look different from the illustration above. Hard disk or solid-state drive bay Power status indicator ac power connector Fan louvers USB 3.0 connector Power button Mini DisplayPort connector Screen rotation lock button Hard disk or solid-state drive bay Depending on models, your computer might have a large-capacity, customer-upgradable hard disk drive... -
Page 18: Left-Side View
Power status indicator The power status indicator shows the status of ac power. ac power connector Connect the ac power adapter to the ac power connector to provide ac power to the computer and charge the battery. Power button Use the power button to turn on the computer. To turn off the computer, do the following: 1. - Page 19 Combo audio jack To listen to the sound from your computer, you can connect a headphone or a headset that has a 3.5 mm 4-pole plug to the combo audio jack. Notes: • If you are using a headset with a function switch, for example, a headset for a mobile digital device, do not press this switch while using the headset.
-
Page 20: Bottom View
Bottom view Figure 4. ThinkPad S230u bottom view Note: Your computer bottom view might look slightly different from the illustration above. Fan louvers Hard disk drive or solid-state drive Integrated battery Fan louvers The internal fan and louvers enable air to circulate in the computer and cool the central processor. Note: To avoid impeding airflow, do not place any obstacle in front of the fan. -
Page 21: Power Status Indicator
Note: Your computer keyboard might look different from the illustration above. The meaning of the indicator is as follows: • Red: The computer is on (in normal mode). • Fast blinking red: The computer is turning off. • Slow blinking red: The computer is in sleep mode. •... -
Page 22: Locating Important Product Information
Certification label, and the Windows Certificate of Authenticity (COA) label. Machine type and model label The machine type and model label identifies your computer. When you contact Lenovo for help, the machine type and model information helps support technicians to identify your computer and provide faster service. -
Page 23: Fcc Id And Ic Certification Number Label
WAN card” on page 60. Note: Only Lenovo authorized wireless LAN or wireless WAN cards are allowed to be used in your computer. If you install an unauthorized PCI Express Mini Card that is not approved for use in your computer, the computer will not start, but will only display an error message and emit audible beeps. -
Page 24: Specifications
Display The color display uses the Thin Film Transistor (TFT) technology. • Size: 12.5 inches (317.50 mm) • Resolution: – LCD: 1366 x 768 – External monitor: up to 2560 x 1600 • Brightness control • Integrated camera • Built-in microphones Keyboard •... -
Page 25: Operating Environment
To access Lenovo programs, press the Windows key to go to the Start screen. Click a Lenovo program to launch it. If you cannot find the program you need, move the cursor to the bottom-right corner of the screen to bring up the charms. - Page 26 Lenovo Cloud Storage The Lenovo Cloud Storage program enables you to upload and store your local files to a remote Lenovo server. You can view and download the stored files at any time.
-
Page 27: Chapter 2. Using Your Computer
When you register your computer, information is entered into a database, which enables Lenovo to contact you in case of a recall or other severe problem. After you registered your computer with Lenovo, you will also receive quicker service when you call Lenovo for help. In addition, some locations offer extended privileges and services to registered users. -
Page 28: Tablet Mode
44. Is getting connected in different locations a challenge? • To troubleshoot a wireless networking issue, go to http://www.lenovo.com/support/faq. • To learn more about using the wireless features of your computer, refer to “Wireless connections” on page 27. - Page 29 To use your computer in tablet mode, do the following: 1. Open the computer display slowly, holding the upper left and right sides of the computer display with both hands. Your computer is now in notebook mode. 2. Open the computer display by at least 45 degrees, preferably by 90 degrees. Grasp the center of one side of the computer display with one hand while holding the keyboard bezel with the other hand;...
- Page 30 4. Your computer is now in tablet mode. To switch your computer from tablet mode to notebook mode, do the following: 1. Open the display by at least 45 degrees, preferably by 90 degrees. 2. Rotate the display slowly counter-clockwise until the front of the display is facing the keyboard. Your computer is now in notebook mode.
-
Page 31: Using The Multi-Touch Screen
• To allow free ventilation, do not place any obstacle, such as a thick-piled carpet or a soft cushion, in front of the fan. • When you use the computer in picture frame mode, hold the display with one hand and use the Tablet Digitizer Pen. - Page 32 – Display a list of recently opened programs. Swipe in from the left edge of your screen without lifting your finger, and then drag the program back to the left edge. Then a list of recently opened programs is displayed. –...
-
Page 33: Using The Tablet Buttons
Using the tablet buttons On the display bezel near the screen is a row of buttons with which you can control your computer in tablet mode, without the use of the keyboard. Screen Rotation button: Press it to lock the screen rotation function. Power button: Press it to turn on the computer. - Page 34 Function keys Volume and mute keys • F1: Mutes or unmutes the speakers. If you mute the sound and turn off your computer, the sound will remain muted when you turn on your computer again. To turn on the sound, press F2 or F3. •...
-
Page 35: Using The Ultranav Pointing Device
• Fn+P: Has the same function as the Pause key. • Fn+S: Has the same function as the SysRq key. • Fn+K: Has the same function as the ScrLK key. You can toggle the ThinkPad F1-F12 key functionality to use the keys in default mode or in legacy mode. In default mode, you can initiate the special functions illustrated on each key by pressing the corresponding key directly. -
Page 36: Using The Trackpoint Pointing Device
Using the TrackPoint pointing device The TrackPoint pointing device consists of a pointing stick on the keyboard and three click buttons at the bottom of the keyboard. To move the pointer on the screen, you apply pressure to the nonslip cap on the pointing stick in any direction parallel to the keyboard;... -
Page 37: Using The Touch Pad
Note: If you replace the keyboard, a new keyboard is shipped with the default cap. If you wish, you can keep the cap from your old keyboard and use it on the new one. Using the touch pad The touch pad is a pad below the TrackPoint buttons at the bottom of the keyboard. -
Page 38: Adding The Ultranav Icon To The Windows Notification Area
– How bright you make the computer display. To check for detailed battery status information, do one of the following: • Open the Lenovo Support program and click Battery Health. • Open the Lenovo Settings program and click Power. User Guide... -
Page 39: Using The Ac Power Adapter
Charging the battery When you find that the percentage of power remaining is low, for example, the battery alarm goes off, you need to charge your battery by connecting your computer to ac power. The battery will be fully charged in about six hours. -
Page 40: Managing The Power Plans
30 Day Standby function, open the Lenovo Settings program and click Power. • Always On USB function off: The Always On USB drains your battery power. You can disable it when you do not need it. To disable the Always On USB function, open the Lenovo Settings program and click Power. -
Page 41: Ethernet Connections
To access the Location Awareness program, open the Lenovo Settings program and click Location Awareness. Chapter 2... -
Page 42: Presentations And Multimedia
• If you use the wireless feature (the 802.11 standard) of your computer simultaneously with a Bluetooth option, the data transmission speed can be delayed and the performance of the wireless feature can be degraded. Note: You can purchase a wireless network card as an option from Lenovo at http://www.lenovo.com/accessories/services/index.html. Using Bluetooth To send data to a Bluetooth-enabled device, do the following: 1. -
Page 43: Using An External Display
Note: If the monitor connector is not compatible with the Mini DisplayPort connector or the HDMI connector on your computer, you can use a convert cable to establish the connection. Convert cables are available as options from Lenovo at http://www.lenovo.com/accessories/services/index.html. 2. Turn on the external monitor. -
Page 44: Using A Projector
Note: If the projector connector is not compatible with the Mini DisplayPort connector or the Thunderbolt connector on your computer, you can purchase a converter cable on http://www.lenovo.com/accessories/services/index.html. It might take several seconds before the projector displays the image. If you do not see your desktop displayed after 60 seconds, press F7 to switch between different display output locations. -
Page 45: Using The Integrated Camera
If your computer has an integrated camera, you can use the camera to preview your video image and take a snapshot of your current image. To start the camera, press F6 to open the Lenovo Settings program, and then click Camera. When the camera is started, the green camera-in-use indicator turns on. -
Page 46: Inserting A Media Card
• Secure Digital High-Capacity (SDHC) card • Secure Digital eXtended-Capacity (SDXC) card • MultiMediaCard (MMC) Note: While transferring data to or from a media card, such as an SD card, do not put your computer into sleep mode before the data transfer is completed; otherwise, your data could become damaged. For more information on media cards, refer to any of the following topics: Inserting a media card Attention: Before you start installing any of the following cards, touch a metal table or a grounded metal... -
Page 47: Copyright Lenovo
The following topics provide information about arranging your work area, setting up your computer equipment, and establishing healthy work habits. Lenovo is committed to providing the latest information and technology to our customers with disabilities. Refer to our accessibility information which outlines our efforts in this area. -
Page 48: Comfort
Accessibility information Lenovo is committed to providing people with disabilities greater access to information and technology. As a result, the following information provides ways to help users that have hearing, vision, and mobility limitations get the most out of their computer experience. -
Page 49: Traveling With Your Computer
Assistive technologies Some accessibility technologies are available through the Accessibility Options program. Depending on your operating system, the number of accessibility options available varies. In general, accessibility options enhance the way users with hearing, vision, or mobility limitations navigate and use their computer. For example, some users might not have the fine motor skills required to use a mouse or select key combinations. - Page 50 • A quality carrying case that provides adequate cushion and protection • External storage device If you are traveling to another country, you might need to consider an ac power adapter for the country to which you are traveling. To purchase travel accessories, go to http://www.lenovo.com/accessories. User Guide...
-
Page 51: Chapter 4. Security
Refer to the instructions shipped with the mechanical lock. Note: You are responsible for evaluating, selecting, and implementing the locking devices and security features. Lenovo makes no comments, judgments, or warranties about the function, quality, or performance of locking devices and security features. -
Page 52: Power-On Password
9. In the Confirm New Password field, retype the password and press Enter. Attention: You might want to record your password and store it in a safe place. Otherwise, if you forget it, you have to take your computer to a Lenovo reseller or a marketing representative to have the password canceled. - Page 53 Lenovo cannot reset your passwords or recover data from the hard disk drive. You must take your computer to a Lenovo reseller or a marketing representative to have the hard disk drive replaced. Proof of purchase is required, and a fee will be charged for parts and service.
-
Page 54: Supervisor Password
10. Press Fn+F10. The Setup Confirmation window opens. Select Yes to save configuration changes and exit. The next time you turn on your computer, you will have to type the user or master hard disk password in order to start your computer and get access to your operating system. Changing or removing a hard disk password Follow steps 1 through 7 in “Setting a hard disk password”... - Page 55 • The system administrator can use the supervisor password to get access to a computer even if the user of that computer has set a power-on password. The supervisor password overrides the power-on password. • If both a supervisor password and a power-on password are set, you can do the following only if you have the supervisor password: –...
-
Page 56: Hard Disk Security
Lenovo cannot reset your password. You must take your computer to a Lenovo reseller or a Lenovo marketing representative to have the system board replaced. Proof of purchase is required, and a fee will be charged for parts and service. -
Page 57: Setting The Security Chip
To check the BitLocker status on the Windows 8 operating system, do the following: 1. Move the cursor to the top-right or bottom-right corner of the screen to display the charms. Click Settings ➙ Control Panel. 2. Click System and Security ➙ BitLocker Drive Encryption. For details about Windows BitLocker Drive Encryption, see the Windows 8 Help and Support program, or search for “Microsoft Windows BitLocker Drive Encryption Step-by-Step Guide”... -
Page 58: Notice On Deleting Data From Your Hard Disk Drive Or Solid-State Drive
(payware) or service (pay service) specifically developed for the purpose. For disposing of data on the hard disk drive or solid-state drive, Lenovo provides the Secure Data Disposal tool. To download the application, go to: http://www.lenovo.com/support... - Page 59 Lenovo provides a full version of antivirus software on your computer with a free 30-day subscription. After 30 days, you must renew the license to continue receiving the antivirus software updates. For more information about how to use your antivirus software, refer to the help information system of your antivirus software.
- Page 60 User Guide...
-
Page 61: Advanced Startup Options
2. In the Advanced startup section, click Restart now ➙ Troubleshoot ➙ Advanced options. 3. Restart your computer following the instructions on the screen. For more details about the recovery solutions, refer to the help information system of the Windows 8 operating system. © Copyright Lenovo 2012... - Page 62 User Guide...
-
Page 63: Chapter 6. Replacing Devices
5. Click Yes in the Setup Warning window, then the computer will be turned off automatically. Wait three to five minutes to let the computer cool. Replacing the SIM card Before you start, print these instructions. © Copyright Lenovo 2012... -
Page 64: To Replace The Sim Card
Your computer might require a SIM card to establish wireless WAN connections. Depending on the country of delivery, you might need to purchase a SIM card , or a SIM card might already be installed in your computer, or the SIM card is part of the shipping contents that come with your computer. If you find a SIM card included in the shipping contents, a dummy card is installed in the SIM card slot. -
Page 65: Replacing The Hard Disk Drive Or Solid-State Drive
5. Hold the new card with the metal contact facing downwards. Then, insert the card firmly into the slot until you hear a click. 6. Close the SIM card door until it snaps into position. 7. Turn the computer over again. Connect the ac power adapter and all cables. Replacing the hard disk drive or solid-state drive Before you start, print these instructions. - Page 66 • Before removing the hard disk drive or solid-state drive, make a backup copy of all the information on it, and then turn the computer off. • Never remove the hard disk drive or solid-state drive while the computer is operating, in sleep mode. To replace the hard disk drive or solid-state drive, do the following: 1.
-
Page 67: Replacing The Keyboard
5. Insert the new hard disk drive or solid-state drive into the slot and slide the hard disk drive or solid-state drive firmly into place. 6. Reinstall the hard disk drive or solid-state drive door . Then tighten the screw 7. - Page 68 To remove the keyboard, do the following: 1. Disable the built-in battery. See “Disabling the built-in battery” on page 49. 2. Close the computer display, and turn the computer over. 3. Remove the two screws that secure the keyboard at the bottom. 4.
- Page 69 6. Remove the cables by flipping the connectors upwards. Note: Your computer keyboard might look different from the illustration above. To install the keyboard, do the following: 1. Attach the cables by flipping the connectors downwards. Note: Your computer keyboard might look different from the illustration above. Chapter 6 Replacing devices...
- Page 70 2. Insert the keyboard. Ensure that the front edge of the keyboard is under the frame. Note: Your computer keyboard might look different from the illustration above. 3. Slide the keyboard into place in the direction shown by the arrows. Note: Your computer keyboard might look different from the illustration above.
-
Page 71: Replacing A Mini Pci Expresscard For Wireless Lan Connection
4. Close the computer display and turn the computer over. Reinstall the two screws at the bottom. 5. Turn the computer over again. Connect the ac power adapter and all cables. Replacing a Mini PCI ExpressCard for wireless LAN connection Before you start, print these instructions. - Page 72 4. If a tool for removing connectors is included in the package with the new card, use it to disconnect the cables from the card. If no such tool is included, disconnect the cables by picking up the connectors with your fingers and gently unplugging them. 5.
- Page 73 6. Remove the card. 7. Align the contact edge of the new PCI Express Mini Card with the corresponding socket. Chapter 6 Replacing devices...
-
Page 74: Installing Or Replacing The Wireless Wan Card
8. Pivot the card until it snaps into place . Secure the card with the screw 9. Connect the antenna cables to the new PCI Express Mini Card as shown in the following figure. Be sure to attach the gray cable to the connector marked “MAIN” or “M” on the card, and the black cable to the connector marked “AUX”... - Page 75 DANGER Electric current from power, telephone, and communication cables is hazardous. To avoid shock hazard, disconnect the cables before opening the cover of this slot. Attention: Before you start installing a Mini PCI ExpressCard, touch a metal table or a grounded metal object.
- Page 76 6. Remove the card with the bracket. 7. Pull the card out of the bracket. 8. Insert the new card into the bracket. User Guide...
- Page 77 9. Align the contact edge of the new PCI Express Mini Card with the corresponding socket. 10. Pivot the card until it snaps into place . Secure the card with the screw 11. Connect the antenna cables to the new PCI Express Mini Card as shown in the drawing. Be sure to attach the red cable to the connector marked “MAIN”...
- Page 78 13. Turn the computer over again. Connect the ac power adapter and all cables. User Guide...
-
Page 79: Chapter 7. Advanced Configuration
Installing the Windows 8 operating system Before you start, print these instructions. To install the Windows 8 operating system and its related software on your computer, do the following: 1. Start ThinkPad Setup. 2. Select Startup ➙ Boot. © Copyright Lenovo 2012... -
Page 80: Installing Device Drivers
Search. Installing device drivers The device drivers are available at http://www.lenovo.com/Drivers. Click your computer product name to view all the device drivers for your computer. Attention: Always go tohttp://www.lenovo.com/Drivers for the latest device drivers. Do not download them from the Windows Update Web site. -
Page 81: Config Menu
• UEFI BIOS Version • UEFI BIOS Date (Year-Month-Day) • Embedded Controller Version • Machine Type Model • System-unit serial number • System board serial number • Asset Tag • CPU Type • CPU Speed • Installed memory • UUID •... - Page 82 Table 2. Config menu items (continued) Menu item Submenu item Selection Comments Note: The Wake on LAN function does not work when a hard disk password is set. Ethernet LAN Option ROM • Disabled If you select Disable, it loads the Ethernet LAN Option ROM •...
- Page 83 Table 2. Config menu items (continued) Menu item Submenu item Selection Comments USB UEFI BIOS Support • Disabled Enable or disable boot support from USB storage devices. • Enabled USB 3.0 Mode • Disabled Set the USB 3.0 controller mode for the ports shared between •...
- Page 84 Enter after: When enabled, you can enable • Immediately the 30 Day Standby function through the Lenovo Settings • 1 minute program. The function enables • 2 minutes the computer to enter a lower power state after the specified •...
-
Page 85: Date/Time Menu
Table 2. Config menu items (continued) Menu item Submenu item Selection Comments Beep and Alarm Password Beep • Disabled Enable this option to have a beep sound when the system • Enabled is waiting for a power-on, hard disk, or supervisor password. Different beeps will be sounded when the entered password matches or does not match the... - Page 86 • On each submenu, press Enter to show selectable options and select a desired option, or type desired values from the keyboard directly. • Some items are displayed on the menu only if the computer supports the corresponding features. The following table lists the Config menu items. Table 3.
- Page 87 Table 3. Security menu items (continued) Menu item Submenu item Selection Comments Hard Disk2 Password • Disabled Refer to “Hard disk passwords” on page 38. • Enabled Password Status Security Chip Security Chip • Active If you select Active, the security chip is functional.
- Page 88 Table 3. Security menu items (continued) Menu item Submenu item Selection Comments Virtualization Intel (R) Virtualization • Disabled If you select Enabled, a Virtual Technology Machine Monitor (VMM) can utilize • Enabled the additional hardware capabilities provided by Virtualization Technology. •...
-
Page 89: Startup Menu
Table 3. Security menu items (continued) Menu item Submenu item Selection Comments Secure Boot Secure Boot • Disabled Enables or disables the UEFI secure boot feature. • Enabled Enable or disable this function to forbid or allow an unauthorized operating system to run at boot time. - Page 90 2. Turn on the computer, then, while the ThinkPad logo is displayed at the lower-left of the screen, press F12. 3. Select the device you want to start first. Note: The Boot menu will be displayed when the system cannot boot from any device or the operating system cannot be found.
-
Page 91: Restart Menu
UEFI BIOS in order for the new addition to work properly. To update your UEFI BIOS, go to the following Web site and follow the instructions on the screen: http://www.lenovo.com/Drivers Using system management This section is intended primarily for network administrators. -
Page 92: System Management
System management Read this topic to learn more about features of system management: Desktop Management Interface The system UEFI BIOS of your computer supports an interface called System Management BIOS Reference Specification (SMBIOS) V2.6.1 SMBIOS provides information about the hardware components of your system. - Page 93 To enable or disable Wake on LAN, do the following: 1. Start ThinkPad Setup. 2. Select Config. The Config submenu is displayed. 3. Select Network. The Network item submenu is displayed. 4. For Wake On LAN, select one of the following: AC Only, AC and Battery, or Disabled. 5.
- Page 94 User Guide...
-
Page 95: Chapter 8. Preventing Problems
10. Profile your machine at http://www.lenovo.com/support to keep up to date with current drivers and revisions. 11. Ensure device drivers for non-Lenovo peripheral devices are kept up to date. You might want to read the device driver information release notes prior to updating for compatibility or known issues. -
Page 96: Making Sure Device Drivers Are Current
This might eliminate the driver as the potential cause of the problem. Getting the latest drivers from the Web site You can download and install updated device drivers from the Lenovo Web site by doing the following: 1. Go to http://www.lenovo.com/Drivers. -
Page 97: Taking Care Of Your Computer
Taking care of your computer Although your computer is designed to function reliably in normal work environments, you need to use common sense in handling it. By following these important tips, you will get the most use and enjoyment out of your computer. Be careful about where and how you work •... -
Page 98: Cleaning The Cover Of Your Computer
Register your computer Register your ThinkPad computer with Lenovo at http://www.lenovo.com/register. This can help authorities return your computer to you if it is lost or stolen. Registering your computer also enables Lenovo to notify you about possible technical information and upgrades. - Page 99 4. To remove any crumbs or dust from beneath the keys, you can use a camera blower with a brush or cool air from a hair dryer. Note: Avoid spraying cleaner directly onto the display or the keyboard. Cleaning your computer display To clean the computer display, do the following: 1.
- Page 100 User Guide...
-
Page 101: Chapter 9. Troubleshooting Computer Problems
For additional information, refer to the Lenovo Solution Center help system. Note: If you are unable to isolate and repair the problem yourself after running the program, save and print the log files. You will need the log files when you speak to a Lenovo technical support representative. Troubleshooting If your computer has an error, it typically displays a message or an error code, or a beep sounds when you turn it on. -
Page 102: Spills On The Keyboard
3. While the computer is off, remove all external devices that are attached to your computer (keyboard, mouse, printer, scanner, and so on). Repeat step 2. If step 2 is unsuccessful, continue with step 4. Note: The following steps involve removing static sensitive components from your computer. Ensure that you are properly grounded and remove all sources of power attached to the computer. - Page 103 • Message: 0189: Invalid RFID configuration information area. Solution: The EEPROM checksum is not correct (block # 4 and 5). Reset the block # 0 and 1, for example the box Serial Number, and/or block # 4 and 5, for example the UUID. •...
-
Page 104: Errors Without Messages
Solution: Unauthorized battery is connected to the system. Press the ESC to continue • Message: This system does not support batteries that are not genuine Lenovo-made or authorized. The system will continue to boot, but may not charge unauthorized batteries. -
Page 105: Beep Errors
– The ac power adapter is connected to the computer and the power cord is plugged into a working electrical outlet. – The computer is turned on. (Turn the power button on again for confirmation.) If a power-on password is set: –... -
Page 106: Networking Problems
If your memory module is not operating properly, check the following items: 1. Verify that the memory module is installed and seated correctly in your computer. It might be necessary to remove all added memory modules to test the computer with only the factory-installed memory modules, and then reinstall the memory module one at a time to ensure a proper connection. -
Page 107: A Wireless Lan Problem
– Use Category 5 wiring and ensure that the network cable is securely connected. – Connect to a 1000 BASE-T hub/switch (not 1000 BASE-X). • Problem: The Wake On LAN feature is not working. Solution: – Ensure that Wake On LAN is enabled in ThinkPad Setup. –... -
Page 108: Problems With The Keyboard And Other Pointing Devices
Solution: The Windows 8 operating system send PIM items in XML format, but most Bluetooth-enabled devices handle PIM items in vCard format. If another Bluetooth-enabled device can receive a file through Bluetooth, a PIM item sent from the Windows 8 might be saved as a file with the extension .contact. Problems with the keyboard and other pointing devices The following are the most common problems with keyboards and other pointing devices. -
Page 109: Problems With The Display And Multimedia Devices
Problems with the display and multimedia devices This topic includes the most common problems with displays and multimedia devices, including the computer display, the external monitor, audio devices, and the optical drive. Computer screen problems • Problem: The screen is blank. Solution: Do the following: –... -
Page 110: External Monitor Problems
Solution: Press and hold the power button for four seconds or more to turn off your computer; then turn it on again. • Problem: Missing, discolored, or bright dots appear on the screen every time you turn on your computer. Solution: This is an intrinsic characteristic of the TFT technology. - Page 111 7. If more than one monitor type is displayed, select Generic PnP Monitor or Generic Non-PnP Monitor. 8. Click Properties. If you are prompted for an administrator password or confirmation, type the password or provide confirmation. 9. Click the Driver tab. 10.
-
Page 112: Audio Problems
7. Set the resolution for the main display. 8. Click the Monitor-2 icon (for the external monitor). 9. Set the screen resolution for the secondary display. 10. Set the relative position of each monitor by dragging its icon. You can set the monitors in any relative position, but the icons must touch each other. -
Page 113: Battery And Power Problems
Solution: It is normal for the sliders to change position when certain sound applications are used. The applications are aware of the settings in the Volume Mixer window and are allowed to change the settings themselves. An example is the Windows Media Player. Usually the application has sliders available to control the sound from within the application. -
Page 114: Power Problems
• Problem: The operating time for a fully charged battery pack is short. Solution: Discharge and recharge the battery pack. If your battery operating time is still short, use a new battery pack. • Problem: The computer does not operate with a fully charged battery pack. Solution: The surge protector in the battery pack might be active. -
Page 115: A Power Button Problem
If you receive an error message while the operating system is loading the desktop configuration after the POST is completed, check the following items: 1. Go to the Lenovo Support Web site at http://www.lenovo.com/support and search for the error message. 2. Go to the Microsoft Knowledge Base homepage at http://support.microsoft.com/ and search for the error message. -
Page 116: Problems With Drives And Other Storage Devices
Solution: If the system does not return from sleep mode, it might have entered sleep mode automatically because the battery is depleted. Check the system status indicator (illuminated ThinkPad logo). – If the system status indicator (illuminated ThinkPad logo) blinks slowly, your computer is in sleep mode. Connect the ac power adapter to the computer;... -
Page 117: A Software Problem
– The computer is turned on and a CD, DVD, or CD-RW is properly loaded on the center pivot of the drive. (You should hear a click.) – The drive connector is firmly connected to the computer. If you use an option that has a bay for installing the drive, ensure that the option is firmly connected to the computer and works properly. -
Page 118: Problems With Ports And Connectors
• The application is designed to operate with your operating system. • Other applications run correctly on your computer. • The necessary device drivers are installed. • The application works when it is run on some other computer. If an error message is displayed while you are using the application program, refer to the manuals supplied with the application. -
Page 119: Chapter 10. Getting Support
Getting help and service If you need help, service, technical assistance, or just want more information about Lenovo products, you will find a wide variety of sources available from Lenovo to assist you. This section contains information © Copyright Lenovo 2012... -
Page 120: Using Diagnostic Programs
Lenovo and our products, what to do if you experience a problem with your computer, and whom to call for service should it be necessary. Information about your computer and preinstalled software, if any, is available in the documentation that comes with your computer. -
Page 121: Finding Thinkpad Options
You can shop at Lenovo 24 hours a day, 7 days a week directly over the World Wide Web. All you need is an Internet connection and a credit card. - Page 122 For more information about these services, go to: http://www.lenovo.com/accessories/services/index.html User Guide...
-
Page 123: Appendix A. Regulatory Information
• Phone Book Access Profile (PBAP) • Service Discovery Protocol (SDP) • Synchronization Profile (SYNC) • Video Distribution Profile (VDP) • Generic Attribute Profile (GATT) • Proximity Profile • Find Me Profile • Immediate Alert Profile © Copyright Lenovo 2012... -
Page 124: Location Of The Ultraconnect Wireless Antennas
Due to the fact that integrated wireless cards operate within the guidelines found in radio frequency safety standards and recommendations, Lenovo believes they are safe for use by consumers. These standards and recommendations reflect the consensus of the scientific community and result from deliberations of panels and committees of scientists who continually review and interpret the extensive research literature. -
Page 125: Locating Wireless Regulatory Notices
• Consult an authorized dealer or service representative for help. Lenovo is not responsible for any radio or television interference caused by using other than specified or recommended cables and connectors or by unauthorized changes or modifications to this equipment. -
Page 126: European Union - Compliance To The Electromagnetic Compatibility Directive
Geräte der Klasse B. Dieses Gerät ist berechtigt, in Übereinstimmung mit dem Deutschen EMVG das EG-Konformitätszeichen - CE - zu führen. Verantwortlich für die Konformitätserklärung nach Paragraf 5 des EMVG ist die Lenovo (Deutschland) GmbH, Gropiusplatz 10, D-70563 Stuttgart. Informationen in Hinsicht EMVG Paragraf 4 Abs. (1) 4: Das Gerät erfüllt die Schutzanforderungen nach EN 55024 und EN 55022 Klasse B. -
Page 127: Korea Class B Compliance Statement
Korea Class B compliance statement Japan VCCI Class B compliance statement Japan compliance statement for products which connect to the power mains with rated current less than or equal to 20 A per phase Lenovo product service information for Taiwan Appendix A. Regulatory information... - Page 128 User Guide...
-
Page 129: Appendix B. Weee And Recycling Statements
Collecting and recycling a disused Lenovo computer or monitor If you are a company employee and need to dispose of a Lenovo computer or monitor that is the property of the company, you must do so in accordance with the Law for Promotion of Effective Utilization of Resources. -
Page 130: Recycling Information For Brazil
Lenovo. If you use a Lenovo computer at home and need to dispose of a lithium battery, you must comply with local ordinances and regulations. -
Page 131: Battery Recycling Information For Taiwan
For proper collection and treatment, go to: http://www.lenovo.com/lenovo/environment Battery recycling information for Taiwan Battery recycling information for the United States and Canada... - Page 132 User Guide...
-
Page 133: Appendix C. Energy Star Model Information
Windows Help and Support information on your computer. The Wake on LAN function is enabled when your Lenovo computer is shipped from the factory, and the setting remains valid even when the computer is in sleep mode. If you do not need to have Wake on LAN enabled while your computer is in sleep mode, you can reduce the power consumption and prolong the time in sleep mode, by disabling the setting of Wake on LAN for sleep mode. - Page 134 4. In the Power Management tab, clear the Allow this device to wake the computer check box. 5. Click OK. User Guide...
-
Page 135: Appendix D. Notices
Lenovo representative for information on the products and services currently available in your area. Any reference to a Lenovo product, program, or service is not intended to state or imply that only that Lenovo product, program, or service may be used. Any functionally equivalent product, program, or service that does not infringe any Lenovo intellectual property right may be used instead. -
Page 136: Trademarks
Trademarks The following terms are trademarks of Lenovo in the United States, other countries, or both: Lenovo Active Protection System ThinkPad ThinkVantage TrackPoint UltraConnect UltraNav Intel and Intel SpeedStep are trademarks or registered trademarks of Intel Corporation or its subsidiaries in the United States and other countries. -
Page 137: Appendix E. Restriction Of Hazardous Substances Directive (Rohs)
Appendix E. Restriction of Hazardous Substances Directive (RoHS) China RoHS Turkish RoHS The Lenovo product meets the requirements of the Republic of Turkey Directive on the Restriction of the Use of Certain Hazardous Substances in Electrical and Electronic Equipment (EEE). Ukraine RoHS © Copyright Lenovo 2012... -
Page 138: India Rohs
India RoHS RoHS compliant as per E-Waste (Management & Handling) Rules, 2011. User Guide...
Need help?
Do you have a question about the ThinkPad Helix S230U and is the answer not in the manual?
Questions and answers