Table of Contents
Advertisement
Advertisement
Table of Contents
Troubleshooting

Related Manuals for Gateway XHD3000


Summary of Contents for Gateway XHD3000
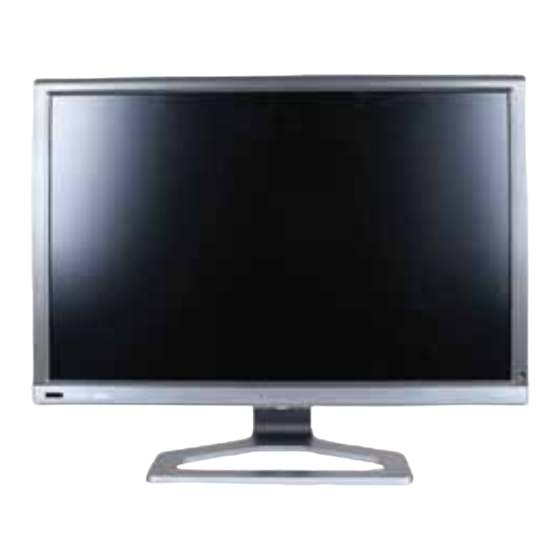
- Page 1 XHD3000 30-inch Widescreen LCD Monitor USERGUIDE ®...
-
Page 3: Table Of Contents
Contents Chapter 1: Checking Out Your Monitor ..1 Package contents ........2 Monitor features . - Page 4 Chapter 4: Troubleshooting ....43 Troubleshooting guidelines ......44 Troubleshooting symptoms .
- Page 5 Recycling ......... . 81 www.gateway.com...
- Page 6 Contents...
-
Page 7: Chapter 1: Checking Out Your Monitor
Checking Out Your Monitor • Package contents • Monitor features • Remote control features CHAPTER1... -
Page 8: Package Contents
CHAPTER 1: Checking Out Your Monitor Package contents Your monitor’s box should contain the following items: Monitor (base attached) Speaker bar (optional on some models)) Audio patch cable DVI video cable IR blaster cable AC power adapter Universal remote control EzTune software CD USB hub cable VGA video cable... -
Page 9: Monitor Features
Monitor features Front IR remote sensor www.gateway.com Menu touch button* Power touch button*/Power LED * For instructions on using the touch buttons, see “Using the EzTouch menu” on page... -
Page 10: Back
CHAPTER 1: Checking Out Your Monitor Back Ports and jacks (underneath) Cable lock slot... -
Page 11: Monitor Connections
Connect to the optional speaker bar. S/PDIF TOSLINK Connect to the S/PDIF TOSLINK (digital optical) audio in output jacks on a device to play the audio on that device. www.gateway.com DVI mode audio Composite video Component video IR blaster S-Video... - Page 12 CHAPTER 1: Checking Out Your Monitor Connector Speaker bar audio Connect to the optional speaker bar. VGA mode audio Connect to the headphone/speakers jack on your computer for the VGA display mode’s audio source. IR blaster Connect to the IR blaster sensor. S-Video Connect to the S-Video out jack on an S-Video video source, such as a DVD player.
-
Page 13: Remote Control Features
Remote control features Select cable/satellite remote mode Select DVD remote mode Back menu Programming guide/DVD menu Channel recall Volume Input (video source select) www.gateway.com Power Open Windows Media Center Select LCD remote mode Playback controls Display on-screen information Menu controls Clear/exit/ cancel... - Page 14 CHAPTER 1: Checking Out Your Monitor Important Your remote control works for your monitor, but you must program it to work for your other devices (such as cable or satellite set-top boxes and DVD players). For more information, see on page Button Select cable/satellite remote mode...
- Page 15 10’ mode (larger sized menu that is controlled from the remote control). If you press a button on the front panel after pressing the Menu button on the remote, you will experience another delay while the on-screen menu changes from 10’ mode to 2’ mode. www.gateway.com...
- Page 16 CHAPTER 1: Checking Out Your Monitor...
-
Page 17: Chapter 2: Setting Up Your Monitor
CHAPTER2 Setting Up Your Monitor • Connecting the monitor • Setting up the optional speaker bar • Positioning the monitor... -
Page 18: Connecting The Monitor
CHAPTER 2: Setting Up Your Monitor Connecting the monitor Connecting video inputs Important To use the monitor’s full (highest) resolution (2560 × 1600), you must use the included dual-link DVI cable to connect the monitor to a dual-link capable video card on your computer. A single-link DVI cable or video card limits resolution to 1920 ×... - Page 19 Connect the other end of the video cable to the matching video port on the back of your monitor. Connect other video sources (such as a DVD player, video camera, or video receiver) to the appropriate video jacks on the back of the monitor.
-
Page 20: Connecting Audio Inputs And Outputs
CHAPTER 2: Setting Up Your Monitor should set your video source device’s output to 480i. Your monitor has superior deinterlacing and video processing features that are best utilized on 480i video. When displaying high-definition video (720p, 1080i, and 1080p), you should set your video source device’s output to 1080i for best performance. - Page 21 Connect the stereo patch cable to your computer’s headphone jack (green) and your monitor’s DVI audio or VGA audio jack. This is the most basic audio connection for your computer. Stereo patch cable DVI audio jack VGA audio jack...
- Page 22 CHAPTER 2: Setting Up Your Monitor Connect other audio sources (such as a DVD player or audio receiver) to the appropriate audio jacks on the back of the monitor. • For basic audio quality, connect your audio source to the L/R (two-channel stereo) audio in jacks for the device.
-
Page 23: Connecting Power
Power adapter locking sleeve Power connector www.gateway.com Caution Make sure that the pins in the power cord line up with the holes Caution Plug the power adapter into the monitor before you plug the... - Page 24 CHAPTER 2: Setting Up Your Monitor Plug the AC power cord into the AC power adapter, then plug the AC power cord into a power outlet. We recommend using a surge protector to protect your monitor from voltage spikes. sure to place the adapter in a well-ventilated area. To make sure that the monitor’s power is correctly connected, check the power touch button on the front button panel.
-
Page 25: Setting Up The Optional Speaker Bar
Setting up the optional speaker bar An optional speaker bar, which has excellent sound, is available for mounting underneath your monitor. You can order a speaker bar from www.gateway.com. To install the speaker bar: Turn off the monitor. is turned on, the speaker bar will not initialize and will not work correctly. -
Page 26: Connecting The Usb Hub
CHAPTER 2: Setting Up Your Monitor Plug the speaker bar’s power and audio plugs into the appropriate connectors underneath the monitor. For information on using the speaker bar, see speaker bar” on page Connecting the USB hub Your monitor has a built-in, powered, USB 2.0 6-port hub. When connected to your computer’s USB port, the hub provides six USB ports for connecting as many as six USB-compatible devices. - Page 27 Connect the included USB cable to the USB-B port on the back of the monitor, then connect the other end of the cable to a USB-A (standard) port on your computer. Important Only the computer and monitor should be connected during the first installation and bootup.
-
Page 28: Connecting A Security Cable
CHAPTER 2: Setting Up Your Monitor Connecting a security cable You can secure your monitor and speaker bar to your desk (or to another heavy object) with a cable lock, such as a Kensington™ lock. To connect a cable lock, follow the cable lock’s instructions to connect it to the cable lock slot on the back of your monitor (cable lock not included). - Page 29 To install batteries into the remote control: Remove the battery compartment cover on the back of the remote control.
- Page 30 CHAPTER 2: Setting Up Your Monitor Insert the batteries while matching the + and - symbols on the diagram inside the battery compartment, then close the battery compartment cover. program it to work for your other devices (such as cable satellite set-top boxes and DVD players).
-
Page 31: Positioning The Monitor
Positioning the monitor You can adjust the monitor for left and right pan and up and down tilt angle. -
Page 32: Ergonomic Guidelines
CHAPTER 2: Setting Up Your Monitor Ergonomic guidelines The recommended screen positioning is based upon the following guidelines. These guidelines are based on available scientific literature and published standards. Screen height The recommended screen height for displays (except in special circumstances, such as for bifocal use) is that the top of the display should be set at or slightly below (about 1 inch or 25 mm) your eye level while you are sitting in a comfortable... -
Page 33: Chapter3 Using Your Monitor
CHAPTER3 Using Your Monitor • Starting the monitor • Using the EzTouch menu • Adjusting monitor settings • Changing Windows screen settings • Using the speaker bar • Power management • Maintaining... -
Page 34: Starting The Monitor
Starting the monitor Caution If you plan to connect your monitor’s USB hub to the computer’s USB port, first install the included EzTune software onto your computer. Turning on the monitor To start the monitor: Touch the power button on the front of monitor. The power LED on the power button changes from purple (off) to blue (on), then turns amber/orange (standby) if no video source is detected. -
Page 35: Using The Eztouch Menu
• The main menu lets you access all of the functions of the display and precisely adjust all levels of settings. www.gateway.com The first prompt you see is the language selection menu settings. Important If you turn on the monitor and no video inputs are connected, the... -
Page 36: Using The Shortcut Menu
Using the shortcut menu To use the shortcut menu: To use an EzTouch menu button, lightly touch it. Touch of the buttons light up and the shortcut menu opens. (The menu’s appearance and choices vary, depending on the currently active video input and whether the speaker bar is attached.) •... - Page 37 • Touch (PIP On) to turn on Picture-in-Picture, and press (PIP Settings) to adjust the PIP position, size, and other advanced PIP settings. PIP adjustments may also be made using the included EzTune software. You must have multiple video sources connected for these options to be available.
-
Page 38: Using The Main Menu
Using the main menu To use the main menu: Touch of the buttons light up and the shortcut menu opens. “pressed” by holding your finger just above their surface. To completely “release” a touch button, make sure that you lift your finger well away from the button. -
Page 39: Adjusting Monitor Settings
Many common settings for VGA, DVI, and HDMI (PC only) can also be adjusted and controlled using the EzTune software included with your monitor. After installing EzTune, see the program’s online help. www.gateway.com For more detailed explanations of the menu choices, see (Choose Option) buttons to (Adjust) buttons to adjust the setting (Back) to return to a previous menu. -
Page 40: Using Monitor Menus
Using monitor menus Use the monitor’s on-screen display (OSD) menus to change settings and select inputs. OSD Menu Description Main menu Auto—Automatically adjusts your monitor to its optimum settings. (VGA input only) Picture—Opens the Picture menu, where you can adjust brightness, contrast, and gamma. - Page 41 Choose from Cool, Neutral, and Warm Sharpness—Adjusts sharpness for video images. Film Mode Detection—Film Mode Detection detects frame rates of the source image and adapts the frame rate of the display for ultimate image quality. Bad Edit Detection and Correction corrects incorrectly synchronized video. www.gateway.com...
- Page 42 OSD Menu Description Video Adjust Video Scaling—Sets video aspect ratios and scaling between menu (cont) Wide, Zoom, and 1:1 modes. PC input: sets resolution aspect ratios and scaling between Wide, Zoom, and 1:1. Wide mode stretches a standard broadcast or full-frame image to fill the entire screen.
- Page 43 VGA input. Clock—Minimizes any vertical bars or stripes visible on the screen background. The horizontal screen size will also change. Gateway recommends that you do not adjust the Clock setting. Phase—Minimizes any horizontal distortion and clears or sharpens the displayed characters. Gateway recommends that you do not adjust the Phase setting.
-
Page 44: Changing Windows Screen Settings
OSD Menu Description Advanced Color—Customizes the color levels. menu Language—Changes the language of the OSD. LED Mode—Changes the brightness of the Menu, Standby, and Power LED to Day Mode or Nite Mode. When watching movies in a darkened room, you may want to change the LED mode to Nite Mode to avoid an over-bright, distracting power LED indicator. - Page 45 Screen resolution is the number of pixels (individual colored dots) your computer uses to display images on your monitor. The higher the resolution, the more information and screen components (such as icons and menu bars) can be displayed on the monitor.
-
Page 46: Using The Speaker Bar
To change the color depth and screen resolution in Windows XP: Click Start, then click Control Panel. The Control Panel opens. If your Control Panel is in Category View, click Appearance and Themes. Properties. Click Display. The Display Properties dialog box opens. Click the Settings tab. -
Page 47: Power Management
Active Off mode (sleep). In the Active Off mode the Power LED will still show orange. Use these conventions and the power can be reduced to the following levels: VESA State Standby www.gateway.com (Menu), (Main Menu), then touch (Adjust) buttons to select LED Indicator Power Consumption ≤168 W... -
Page 48: Maintaining
To “wake” the monitor when it is in Standby/Active Off mode, move the mouse or press any keyboard key. You can change the monitor’s power management settings using the Windows Control Panel. For more information, see your computer’s User Guide. Maintaining To keep the monitor in optimal working order: •... -
Page 49: Chapter4 Troubleshooting
CHAPTER4 Troubleshooting • Troubleshooting guidelines • Troubleshooting symptoms • HDCP FAQs • Video FAQs... -
Page 50: Troubleshooting Guidelines
Troubleshooting guidelines • If you have problems with the monitor, the information in this chapter may help you solve them without needing to call Customer Care. • Make sure that the monitor has warmed up for about 30 minutes before making any judgments about the picture quality. - Page 51 Notebook computers typically have an F between your notebook’s display and an externally attached display. On Gateway notebooks, this key combination is F top row of keys. See your notebook user guide for more information.
-
Page 52: Display Colors Are Wrong
Display colors are wrong • Touch automatically adjust the display image to the ideal settings. (VGA input only.) • Restart your computer with the monitor turned on. • Make sure that the video cable is connected securely to the back of the monitor and your computer. For more information about connecting the video cable, see “Connecting video inputs”... -
Page 53: Image Is Not Sized Or Centered Correctly
Some video cards that have two DVI ports support dual-link on one of the DVI ports. Turn off your computer, move the DVI cable to the alternate DVI port, then restart your computer. www.gateway.com (Menu), (Main Menu), then (Menu), (Main Menu), (Video Scaling). -
Page 54: Gaming Support
• This may be caused by older video drivers on your computer. See the Gateway support Web site at www.gateway.com computer. You can also go directly to your video card’s support Web site for the most up-to-date video drivers. The Web sites for the major video card manufacturers are: ®... -
Page 55: The Monitor Has Pixels That Are Always Dark Or Too Bright
If you feel these pixels are unacceptably numerous or dense on your display, contact Gateway Customer Care to identify whether a repair or replacement is justified based on the number of pixels affected. -
Page 56: Hdcp Faqs
You want to plug in your headphones, but there is a headphone jack on both sides of the speaker bar. • You can use either jack or both jacks at the same time. When headphones are connected, no sound comes out of the speaker bar’s speakers. - Page 57 How does HDCP work? • Implementation of HDCP requires a license obtainable from the Digital Content Protection, LLC, which then issues a set of unique secret device keys to all authorized devices. During authentication, the receiving device only accepts content after it acknowledges the keys. To...
-
Page 58: Video Faqs
Video FAQs When I display video from S-Video, composite, or component, why does the video look overly compressed? • See your video device user manual to adjust the video or TV format output to 16:9. Setting this option to 4:3 results in compressed video. -
Page 59: Using The Universal Remote Control
CHAPTER5 Using the Universal Remote Control • Programming the universal remote control • Using the IR Blaster • Remote control programming codes... -
Page 60: Chapter 5: Using The Universal Remote Control53
CHAPTER 5: Using the Universal Remote Control Programming the universal remote control You can program the remote control directly (by entering a five-digit code) or by browsing codes. To directly program the remote control with a code: Press and hold the mode button (CBL/SAT, DVD, LCD, or MEDIA CENTER) for the device you want to program for about four seconds. -
Page 61: Resetting The Remote Control
Your remote control’s batteries can last several months of standard use, but you will need to replace them from time to time with fresh batteries. www.gateway.com once to save the code. The LED blinks once to save the code. The LED blinks... -
Page 62: Using The Ir Blaster
CHAPTER 5: Using the Universal Remote Control To test your remote control’s batteries: • Press and release any button on the remote control. If the batteries need to be replaced, the LED flashes five times. programming mode. Using the IR Blaster You can use the provided IR Blaster cable to control a device such as a DVD player, cable or satellite box, or computer with a Windows Media Center IR receiver. -
Page 63: Remote Control Programming Codes
00451, 00180, 00092, 00802, 00875 Aventura 00171 Bell & Howell 00154 Bradford 00180 Broksonic 00236, 00463 Candle 00030 Carnivale 00030 www.gateway.com Gateway XHD3000 Sony General Instrument 20476 Memorex Midland Mitsubishi Monivision Motorola Multitech NetTV Nikko Norcent Onwa Optimus Code 01756... - Page 64 CHAPTER 5: Using the Universal Remote Control Carver 00054 Celebrity 00000 Celera 00765 Changhong 00765 Citizen 00060, 00030, 00092 Clarion 00180 Commercial 01447, 00047 Solutions Contec 00180 Craig 00180 Crosley 00054 Crown 00180 Curtis Mathes 00047, 00054, 00154, 00451, 00093, 00060, 00702, 00030, 00145, 00166, 01147, 01347...
- Page 65 00812, 00171 Fisher 00154 Fujitsu 00683, 00809, 00853, 01181 Funai 00180, 00171 Futuretech 00180 Gateway 01755, 01756 01447, 00047, 00051, 00451, 00178, 01347 Gibralter 00017, 00030 Go Video 00886 GoldStar 00178, 00030 Goodmans 00360 Grunpy 00180 Haier 01034 Hallmark 00178...
-
Page 66: Dvd Player Codes
CHAPTER 5: Using the Universal Remote Control Jensen 00761, 00815, 00817 00053, 00731, 01172, 01253 00180 Kenwood 00030 00765 00180, 00030 01265, 00178, 00442, 00700, 00856, 01178 Loewe 00136 00047, 00054, 00154, 00156, 00178 Magnavox 01454, 00054, 00030, 00706, 00802, 01254 Marantz 00054, 00030, 00855... - Page 67 10490, 10634 Disney 10675 DVD2000 10521 Emerson 10591, 10675, 10821, 11268 Enterprise 10591 10821, 11268 Funai 10675, 11268 Gateway 11158 10522, 10815, 10717 Go Video 10744, 10741, 10783, 10869, 11044, 11075, 11158 GoldStar 10741 Greenhill 10717 Harman/Kardon 10582, 10702 Hitachi...
-
Page 68: Vcr Codes
CHAPTER 5: Using the Universal Remote Control Kawasaki 10790 Kenwood 10490, 10534 10717, 10790, 11020 Koss 10651 10591, 10741, 10869 LiteOn 11058, 11158 Loewe 10511 VCR codes 11972 Admiral 10048, 10209 Adventura 10000 Aiwa 10037, 10000 Alienware 11972 American High 10035 Asha 10240... - Page 69 10037, 10184, 10000, 10121, 10043, 10209, 11278, 11479 Fisher 10047, 10104 Fuji 10035, 10033 Fujitsu 10045 Funai 10000 Garrard 10000 Gateway 11972 10060, 10035, 10240, 10807, 11035, 11060 General 10045 GoldStar 10037, 11237 Gradiente 10000 Harley Davidson 10000 Harman/Kardon 10081...
-
Page 70: Pvr Codes
CHAPTER 5: Using the Universal Remote Control Humax 10739 Hush 11972 iBUYPOWER 11972 10067, 11279 10037 Kenwood 10067 Kodak 10035, 10037 Linksys 11972 Lloyd's 10000 10037 Magnasonic 11278 Magnavox 10035, 10039, 10081, 10000, 11781 Magnin 10240 Marantz 10035, 10081 Marta 10037 Matsushita 10035, 10162... -
Page 71: Video Accessory Codes
Dell 11972 DirecTV 10739 Gateway 11972 Hewlett Packard 11972 Howard Computers 11972 11972 Hughes Network 10739 Systems Humax 10739 Hush 11972 iBUYPOWER 11972 11279 Linksys 11972 Media Center PC 11972 Microsoft 11972 Mind 11972 Video accessory codes 31272 Accurian 31653... -
Page 72: Audio Amplifier Codes
CHAPTER 5: Using the Universal Remote Control 31415 Linksys 31272, 31365 Macro Image 31383 Technology Media Center PC 31272 Microsoft 31272 Mind 31272 Motorola 31363 MyHD 31383 Audio amplifier codes Bose 40674 Durabrand 41561 Elan 40647 40078 Harman/Kardon 40892 40331 Left Coast 40892 Lenoxx... -
Page 73: Audio Accessory Codes
Bose 41229, 41933 Capetronic 40531 Carver 41189 Coby 41389 Daewoo 41250 Denon 41360, 41142 Fisher 41801 Gateway 41517 Harman/Kardon 40110, 40891, 41304, 41306 Hitachi 41801 Integra 40135, 41298, 41320 40110, 41306 41374, 41495 Kenwood 41313, 41570, 41569 41390, 41428 Koss... -
Page 74: Cable Set-Top Box Codes
CHAPTER 5: Using the Universal Remote Control Cable set-top box codes 20003, 20008 Americast 20899 Bell South 20899 Digeo 21187 Director 20476 General Instrument 20476, 20810, 20276, 20003 GoldStar 20144 Jerrold 20476, 20810, 20276, 20003 Memorex 20000 Motorola 21376, 20476, 20810, 20276, 21187 Pace 21877, 20237, 20008... -
Page 75: Media Center Controller Codes
20775, 21775 Hughes Network 21142, 20749, 21749, Systems 21442 20775, 21531, 21775 21414 Magnavox 20722 Media Center controller codes 31272 Alienware 31272 CyberPower 31272 Gateway 31272 Hewlett Packard 31272 Howard Computers 31272 31272 Hush 31272 iBUYPOWER 31272 Keyspan 31344 Linksys 31272... - Page 76 CHAPTER 5: Using the Universal Remote Control...
-
Page 77: Appendixa Specifications
APPENDIXA • Monitor specifications • Speaker bar specifications • Remote control specifications Specifications... -
Page 78: Monitor Specifications
Monitor specifications Specifications are subject to change without notice or obligation. Many products for Gateway and its subsidiaries are custom engineered by our suppliers to Gateway specifications and may vary from similarly marketed products. Panel size 30 inches (diagonal) Panel type... - Page 79 (564.8 × 432.3~562.7 × 390.3 mm) Temperature Operating: 32~122°F (0~50°C) @ 50% humidity Storage: -13~140°F (-25~60°C) Humidity Operating: 20~90% (non-condensing) Storage: 5~90% (non-condensing) Altitude Operating: 15,000 feet (4,572 m) maximum Storage: 40,000 feet (12,192 m) maximum Security Kensington lock slot www.gateway.com...
-
Page 80: Video Modes
IR extender Adhesive side: Straight to target: >5 feet (1.52 m). Angle: 30° up/down, 30° left/right from center at 5 feet (1.52 m) Shock and vibration Shock (non-operating): 50G Vibration (non-operating): 1.5G Video modes Your monitor supports several video modes. If you do not use the best mode for the monitor, the display image may look slightly “fuzzy.”... - Page 81 15.734 480p 59.94 31.469 720p 45.0 1080i 33.75 1080p 67.5 576i 15.625 576p 31.25 720p 37.5 1080i 28.125 1080p 56.25 www.gateway.com Pixel Aspect frequency Ratio (MHz) 154.0 234.0 209.25 268.5 27.0 1.33 27.0 1.33 74.25 1.77 74.25 1.77 148.5 1.77 27.0...
-
Page 82: Speaker Bar Specifications
Speaker bar specifications Specifications are subject to change without notice or obligation. Many products for Gateway and its subsidiaries are custom engineered by our suppliers to Gateway specifications and may vary from similarly marketed products. Amplifier power output Signal-to-noise ratio... -
Page 83: Remote Control Specifications
Remote control specifications Specifications are subject to change without notice or obligation. Many products for Gateway and its subsidiaries are custom engineered by our suppliers to Gateway specifications and may vary from similarly marketed products. Range (straight to target) Operating angle... - Page 84 APPENDIX A: Specifications...
-
Page 85: Appendix B: Safety, Regulatory, And Legal Information
APPENDIXB Safety, Regulatory, and Legal Information • Important safety information • Environmental information • Regulatory compliance statements • Notices... -
Page 86: Important Safety Information
Do not expose the monitor to rain or use near water. If the monitor does get exposed to moisture, unplug it and allow it to dry for 24 hours. Call Gateway Customer Care for advice on whether the monitor is safe to turn back on. -
Page 87: Environmental Information
• In some cases, your “end of life” product may be “traded in” for credit towards the purchase of new Gateway equipment. Call Gateway to see if this program is available in your area. •... -
Page 88: Regulatory Compliance Statements
FCC declaration of conformity Model: TFT30W90** (XHD3000) Caution Changes or modifications not expressly approved by Gateway could void the FCC compliance and negate your authority to operate the product. Proposition 65 Warning This product contains chemicals, including lead, known to the State of California to cause cancer, birth defects or reproductive harm. -
Page 89: Trademark Acknowledgments
Gateway is not responsible for inaccurate information which may appear in this manual. For the latest product updates, consult the Gateway Web site at www.gateway.com. In no event will Gateway be liable for direct, indirect, special, exemplary, incidental, or consequential damages resulting from any defect or omission in this manual, even if advised of the possibility of such damages. - Page 90 APPENDIX B: Safety, Regulatory, and Legal Information...
- Page 92 MAN XHD3000 USR GDE R0 8/07...
Need help?
Do you have a question about the XHD3000 and is the answer not in the manual?
Questions and answers