LG DLE3733S Owner's Manual
Electric and gas dryer
Hide thumbs
Also See for DLE3733S:
- Owner's manual (72 pages) ,
- User's manual and installation instructions (68 pages) ,
- Service manual (43 pages)
Table of Contents
Advertisement
Available languages
Available languages
1-800-243-0000
24 HOURS
A DAY, 7 DAYS A WEEK
FOR LG CUSTOMER
SERVICE
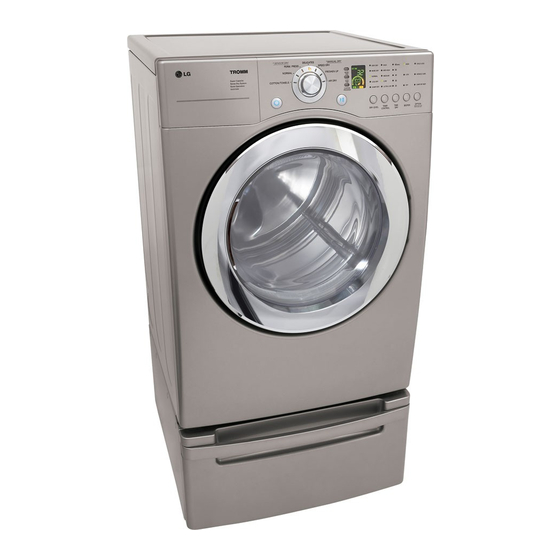
Electric andGasDryer
DLE3733W / DLG3744W
DLE3733S / DLG3744S
LG
as it provides instructions
iiiiiiiiiiiiiiiiiiiiiiiiiiiiiiiiiiiiiiiiiiiiiiiiiiiiiiiiiiiiiiiiiiiiiiii!_!!F
fifififififififififififififififififi_i_il
_
iiiiiiiiiiiiiiiiiiiiiiiiiiiiiiiiiiiiij_
iiiiiiiiiiiiiiiiiiiiiiiiiiiiiiiiiiii_,
iiiiiiiiiiiiiiiiiiiiiiiiiiiiiiiiiiiiiiiii_,
iiiiiiiiiiiiiiiiiiiiiiiiiiiiiiiiiiiiiiiiiiiiiii_
.....
reference.
at http://us.lge.com
iiiiiiiiiiiiiiiiiiiiiiiiiiiiiiiiiiiiiiiiiiiii_
.........
iiiiiiiiiiiiiiiiiiiiiiiiiiiiiiiiiiiiiiiiiiiiiiiiiiiiiiiiiiiiiiiiiiiiiiiiii_
...........
P/No.: 3828EL3004J
Advertisement
Table of Contents

Related Manuals for LG DLE3733S


Summary of Contents for LG DLE3733S
- Page 1 1-800-243-0000 24 HOURS A DAY, 7 DAYS A WEEK FOR LG CUSTOMER SERVICE Electric andGasDryer DLE3733W / DLG3744W DLE3733S / DLG3744S as it provides instructions iiiiiiiiiiiiiiiiiiiiiiiiiiiiiiiiiiiiiiiiiiiiiiiiiiiiiiiiiiiiiiiiiiiiiiii!_!!F reference. fifififififififififififififififififi_i_il iiiiiiiiiiiiiiiiiiiiiiiiiiiiiiiiiiiiij_ iiiiiiiiiiiiiiiiiiiiiiiiiiiiiiiiiiii_, at http://us.lge.com iiiiiiiiiiiiiiiiiiiiiiiiiiiiiiiiiiiiiiiii_, iiiiiiiiiiiiiiiiiiiiiiiiiiiiiiiiiiiiiiiiiiiiiii_ ..P/No.: 3828EL3004J iiiiiiiiiiiiiiiiiiiiiiiiiiiiiiiiiiiiiiiiiiiii_ ..iiiiiiiiiiiiiiiiiiiiiiiiiiiiiiiiiiiiiiiiiiiiiiiiiiiiiiiiiiiiiiiiiiiiiiiiii_...
- Page 2 DRYERS .............................. PART 6. ELECTRICAL REQUIREMENTS FOR GAS DRYERS ................................. PART 7. GAS REQUIREMENTS AND INSTRUCTIONS ..................................PART 8. EXHAUST REQUIREMENTS AND MAINTENANCE ................................PART 9. OPERATING YOUR DRYER ........................................ PART 10. TROUBLESHOOTING GUIDE ......................................LG DRYER LIMITED WARRANTY ........................................
- Page 3 m Type : Electric and Gas Dryer m Rating : Please refer to the rating label regarding detailed information. m Size : 27 x 29.9 x 38.7(inch) m Capacity : IEC 7.3 cu.ft. (22.5 Ib) m Weight : 126 Ibs (57.2 kg) ÷...
- Page 4 Use the space below to record the model number and serial number of your new LG dryer. Model Number. Serial Number. Date of Purchase _I_ Staple your receipt here for convenience when contacting...
-
Page 5: Basic Safety Precautions
READALL INSTRUCTIONS BEFORE USE WARNING For yoursafety, t he information inthis manual m ustbefollowedto minimize the riskof fire or explosion, electric shock,orto preventpropertydamage, p ersonalinjury, o r lossof life. Your Safety and the safety of others are very important, We have provided many important safety messages in this manual and on your appliance. -
Page 6: Grounding Instructions
READALL INSTRUCTIONS BEFORE USE WARNING For your safety, the information in this manual must be followed to minimize the risk of fire or explosion, electric shock, orto prevent property damage, personal injury, or loss of life. • Do not store or use gasoline or other •... -
Page 7: What To Do If You Smell Gas
READALL INSTRUCTIONS BEFORE USE fire or explosion, electric shock, orto prevent property damage, personal injury, or loss of life. WHATTO DOIF YOUSMELLGAS 1. Do not try to light a match or cigarette, 4. Immediately call your gas supplier from a turn on any gas or electrical appliance. -
Page 8: Safetyinstruction Forinstallation
READALLINSTRUCTIONS BEFORE USE X_ WARNING For your safety, the information in this manual must be followed to minimize the risk of fire or explosion, electric shock, or to prevent property damage, personal injury, or loss life. SAFETYINSTRUCTION FORINSTALLATION appliance, follow basic precautions,including the f0110wing: •... - Page 9 READALLINSTRUCTIONS BEFORE USE WARNING Foryour safety, the information in this manual must be followed to minimize the risk of life. SAFETYINSTRUCTION FORINSTALLATION (cont,) Exhaust/Ducting: • Ductwork is not provided with the dryer, • Gas dryers MUST be exhausted to the outside.
- Page 10 READALL INSTRUCTIONS BEFORE USE A WARNING F0r y0ur safety, the information in this manual must be followed to minimize the risk of fire or explosion,electric shock, or to prevent pr0perty damage, personal injury, 0r 10ss 0f life. SAFETYINSTRUCTION FORCONNECTING ELECTRICITY WARNING To reduce the risk of fire, electric shock or injury to persons when using the appliance, follow basic precautions, includingthe following :...
- Page 11 The following instructions will help guide you through the initial steps of setting up your dryer for use. Please note that every section of this manual provides important information regarding the preparation use of your dryer, and it is important that you review this entire manual before proceeding with any installation...
- Page 12 Once in position, adjust the leveling legs of the dryer until it is level from left to right and front to back. The leveling legs must remain firmly on the floor and the dryer should not rock. The maximum slope of the dryer from left to right or front to back should not exceed 2.5 cm (1 inch).
- Page 13 • ALTERNATE EXHAUST DIRECTIONS ]. Remove screw and exhaust duct. (Use exhaust kit part #3911 EZ9131X.) WARNING! • Use a heavy metal vent. • Do not use plastic or thin foil duct. • Clean old ducts before installing this dryer. •...
- Page 14 (Ga: dryer only). In addition to the following, Following are several warnings and instructions concerning makiug the electrical connection for electric please refer to manual section on Gas Requirements and Instructions. dryers. More detailed iutbrmatiou concerning the electrical connection is provided in the manual section entitled Electrical Requirements for Electric Dryer.
- Page 15 Prior to the first use of this appliance, use all- Effective dryer operation requires appropriate dryer purpose cleaning products or a solution of detergent airflow. The adequacy of the airflow can be and watei; with damp cloth to remove from the measured by evaluating the static pressure.
- Page 16 Electric dryers may be vented to the outside using the back, left, right, or bottom panel. Gas dryers may be vented to the outside using the back, left, or bottom panel. Gas dryers may not be vented to the outside using the right side panel because of the burner housing.
- Page 17 To ensure safe and secure installation, please observe the instructions below. Secure stacking kit side bracket to the WARNING! washer with a screw on the back of bracket. Repeat Steps 2, 3, 4 for the other side. • The weight of the dryer and the height of installation makes the stacking procedure...
- Page 18 Attach the double-faced tape of the bracket to the Remove pedestal, installation hardware, and dryer as shown so the bent parts of the brackets instructions from the shipping carton. align with the edge and can be attached to the pedestal with screws. Position dryer on top of the pedestal.
- Page 19 The following are additional instructions regarding electrical connections and requirements for electric dryers. Warning: The wiring and grounding must conform to the latest edition of the National Electrical Code, ANSI/NFPA 70 and all applicable local regulations. Please contact a qualified electrician to check your home's wiring and fuses to ensure that your home has adequate electrical...
- Page 20 Review the following options to determine the appropriate electrical connection for your home: Warning : Grounding through the neutral conductor is prohibited for (1) new branch-circuit installations, mobile homes, (3) recreational vehicles, and (4) areas Use the instructions in this section if your home has where local codes prohibit grounding through the a 4-wire receptacle (NEMA...
- Page 21 Warning : Grounding through the neutral conductor is prohibited for (1) new branch-circuit installations, • If your local codes or ordinances do not allow the (2) mobile homes, (3) recreational vehicles, and (4) use of a 3-wire connection, or you are installing areas where local codes prohibit grounding through the your dryer in a mobile home, you must use a neutral conductor.
- Page 22 • If your local codes or ordinances do not allow the If your local codes or ordinances permit the connection of a frame-grounding conductor to the connection of a frame-grounding conductor to the neutral wire, use the instructions under this neutral wire, use these instructions.
- Page 23 120 Volt, 60 Hertz, with 3-Prong Grounding Plug Following are additional instructions regarding electrical connections and requirements for gas dryers. Warning: The wiring and grounding must conform to the latest edition of the National Electrical Code, ANSI/NFPA 70, or the Canadian Electrical Code, CSA C22.1, and all applicable local regulations.
- Page 24 Following are important instructions and information concerning the requirements for the gas supply and service for gas dryers. Warning: The gas supply and service for a gas dryer must comply with all local codes and ordinances. In the absence of any local codes or ordinances in your area, the gas supply and service for your gas dryer must comply with the latest edition of the National Fuel Gas Code, ANSI Z223.
- Page 25 Following are important instructions and information concerning the exhaust requirements for your dryer. Warning: DO NOT exhaust dryer air into an enclosed and unventilated area, such as an attic, wall, ceiling, crawl space, chimney, gas vent, or concealed space of a building. To reduce the risk of fire, DO NOT exhaust the dryer with plastic or thin foil Ducting.
- Page 26 Exhaust and Dryer Maintenance Cleaning the Lint Screen 1. Clean the lint filter either before drying each load WARNING! or after drying each load. Always make sure the lint filter is clean before starting a new load, • Disconnect the dryer's electric power because...
-
Page 27: Power Button
Following are instructions for starting and using your new dryer. Please refer to specific sections of this manual more detailed information. Important Warning: To reduce the risk of tire, electric shock, or injury to person, read this entire manual, mcludm_ the IMPORTANT SAFETY INSTRUCTIONS,... - Page 28 Selection 2. Manual Dry Cycles • Turn the knob to select the desired cycle based on laundry types and conditions. Use Manual Cycles to select a specific amount of drying time and a drying temperature. When a 1. Sensor Dry Cycles Manual Cycle is selected, the ESTIMATED...
- Page 29 Time e Button Buttons • Press MORE TIME or LESS O CHILD LOCK TIME until the desired drying MORE time is set. TiME 0 WRINKLE CARE DAMP DRYBEEF LESS TiME Time change button is available only with Manual Dry, Time Dry and Rack Dry programs. OPTION PR_S_HeLDS_C Te _r _41LD LC_K...
- Page 30 4. Rack Dry Rack Dry is designed for use with items which are The BEEPER controls the O HiGH not designed for tumble drying such as sweaters, volume of the beep that is made silk or lingerie. when you press any of the O LOW Sneakers also will dry well with this option.
-
Page 31: Starting Your Dryer
Startingyourdryer When Using Air Dry 1. Before use This chart shows examples of items that can be dried using AIR DRY. • Clean lint screen before or after each cycle. • Place laundry into dryer and shut door. See Loading. •... - Page 32 4. To use a manual dry cycle 5. Pausing or restarting • To pause the dryer at any time: • Select a Manual Dry Cycle. Open the door or press START/PAUSE. • Press MORE TIME or LESS TIME until the desired drying time is displayed.
- Page 33 Troubleshooting Tips Save time and money! Review the charts on the following pages first and you may not need to call for service. 1. Problem:My Dryer Won't Start • !s the dryer plugged m? C0nh!im that the dryer!s plug is securely and completely pushed into the laun&'y I r00m'sp0wer0ut!et, •...
- Page 34 5. Problem:There Is LintOn My Clothes • Is your lint filter lull'? Please refer to the manual section on cleaning the lint filter, and please confirm that the lint filter is clean. It is important that the lint filter is clean before each new load of laundry.
- Page 35 9. Problem: It TakesToo Long For My ClothesTo Dry • Did you properly ior t You!I loads Of separate heaYy weight items from light _eight items when C!_eatingloads. launch'y? • Are you drying hu'ge loads of heavy Heavy fabrics take longer to dry because they tend to retain more moisture. To help fabrics? reduce and maintain more consistent drying times for large and heavy fabrics, separate these items into smaller loads of a consistent size.
- Page 36 Your LG Dryer will be will repaired or replaced, at LG's option, if it proves to be defective in material or workmanship under normal use, during the warranty period ("Warranty Period") set forth below, effective from the date ("Date of Purchase") of original consumer purchase of the product. This limited warranty is good only to the original purchaser of the product and effective only when used in the United States, including Alaska, Hawaii, and U.S.
- Page 37 1-800-243-0000 para el Servicio LG (Atenci6n al CJiente) 24 horas al dia, 7 dias a la semana Secadora d eEl_ctrica y Gas DLE3733W / DLG3744W DLE3733S / DLG3744S Secadora LG. Por favor lea su una instalaci6n segura, el modelo y nOmero de serie y referendas.
- Page 38 PARTE 7. REQUERIMEENTOS E INSTRUCCIONES SOBRE EL GAS ............................... PARTE 8. REQUERIMIENTOS Y MANTENIMIENTO SOBRE EL ESCAPE ............................PARTE 9. USANDO SU SECADORA ........................................PARTE 10. GU{A PARA LA SOLUCK)N DE PROBLEMAS ................................GARANT|A LIMITADA DE LA SECADORA LG ....................................
- Page 39 m Nombre : Secadora Electrica y de Gas m Suministro de Ene@a : Favor de consultar la etiqueta de medici6n referente a la informaci6n detallada m Tama5o : 27 x 29.9 x 38.7(inch) m Capacidad de la Secadora : IEC 7.3 cu.ft. (22.5 Ib) m Peso : 126 Ibs (57.2 kg) ÷...
- Page 40 Necesitarfi el nfimero de modeloo y de serie completo al solicitar la garantfa de servicio. Es necesaria la prueba de la compra (ticket o recibo). Utilice el siguiente espacio para anotar el ndmero de modelo y de serie de su nueva secadora LG. Modelo Ndmero...
- Page 41 LEATODASLAS INSTRUCCIONES ANTESDE UTILIZAR ADVERTENCIA Por su seguridad, la informaci6n deestemanual d ebe seguirse parareducir a l minimo el riesgo de incendio o explosibn, descargas e l6ctricas, o paraevitarda_osa lapropiedad,lesiones personales Su seguridad y ia de otros es muy importante, Hemos incluido muchos mensajes de seguridad importantes...
-
Page 42: Antes De Utilizar
LEATODAS[.AS IHSTRUCCJONES ANTESDE UTILiZAR ADVERTENCJA Porsuseguridad, la informaci6n d eestemanuaJ debeseguirse parareducir a ] m!nimo el riesgo de incendio oexplosibn, descargas e l6ctricas; o paraevitarda_osa lapropiedad, lesiones personales * No guarde ni use gasolina ni otros vapores * La instalaci6n y el servicio se deben ser infiamables ni liquidos en las cercanias... - Page 43 LEATODASLASINSTRUCCIONES ANTESDE UTILIZAR XIL ADVERTENCIA Porsuseguridad, lainformaci6n deestemanual d ebe seguirse parareducir a l minimo el riesgo de incendio oexplosi6n, descargas e l6ctricas, oparaevitarda_osa lapropiedad, lesiones personales QU¢: A HACERSI HUELEGAS utilizar el aparato, siga las precauciones b_sicas, incluidas las siguientes: 1.
- Page 44 LEATODASLAS INSTRUCCIONES ANTESDEUTILIZAR ADVERTENC|A P0rsuseguridad, lainf0rmaci6n deeste manual debe seguirse para reducir alminim0 e lriesg0 d e incendi0 0 expl0si6n, descargas el6ctricas, 0 paraevitar d a_0s a lapr0piedad, lesi0nes pers0nales 0p6rdida d evidahumana. INSTRUCCION DE SEGURIDAD PARALA INSTALACION aparato, sigalas precaucionesbbsicas, incluidaslassiguientes: •...
- Page 45 LEATODASLASINSTRUCCIONES ANTESDE UTILIZAR X]_ ADVERTENCIA Por suseguridad, lainformaci6n de estemanual d ebe seguirse parareducir a l minimoelriesgo de incendio oexplosi6n, descargas e l6ctricas, oparaevitarda_osa lapropiedad, lesiones personales INSTRUCCION DE SEGURIDAD PARALA INSTALACION(CONT.) Escape/Conducto: • El conducto no se entrega con la secadora. Usted es el responsable de instalar el •...
- Page 46 LEATODASLAS INSTRUCCIONES ANTESDEUTILIZAR ADVERTENC|A P0rsu seguridad, la inf0rmaci6n d e estemanual d ebeseguirse parareduciral minim0 e l riesg0 de incendi0 0 expl0si6n, descargas el6ctricas, 0 paraevitarda_0sa lapr0piedad,lesi0nes pers0nales INSTRUCCION DE SEGURIDAD PARALACONEXIONDE ELECTRICIDAD X_ ADVERTENCIA Para reducir el riesgo de incendio, descarga el_ctrica o da_os a usuarios del •...
- Page 47 Las siguientes instrucciones le servirfin de gufa a travds de los pasos iniciales para la preparaci6n de su secadora para el uso. Por favor note que cada secci6n de este manual proporciona informaci6n importante sobre la preparaci6n y uso de su secadora, y es muy importante que lea este manual completamente antes de...
- Page 48 Una vez en posicidn ajuste las patas niveladoras de la secadora hasta que estd nivelada de izquierda a derecha y del frente hacia atrfis. Las patas niveladoras deben permanecer firmes en el piso y la secadora no debe mecerse. La mfixima inclinaci6n de la secadora de izquierda a derecha odel frente hacia atrfis no debe ser mayor de 2.5 cm (1 pulgada).
- Page 49 m DIRECCIONES ALTERNAS PARAEL ESCAPE 1. Quite el tornillo y el ducto de escape. (Utilice el kit de salida, n° de pieza 3911 EZ9131X). ADVERTENCiA! - Utilice material para ventilaci6n de metal pesado. • No utilice conductos de pl__stico o aluminio delgado. •...
- Page 50 A contmuacmn encontmm aOvertencms e mstrucclones (Secadora a Gas solamente). Ademgs de 1o siguiente, pot concernientes a la confecci6n de la conexi6n eldctrica favor refidrase a la seccidn del manual sobre para secadoras eldctricas. Inforrnaci6n detallada adicional Requerimientos e Instrucciones del Gas. concerniente a la conexi6n eldctrica es suministmda en la secci6n del manual Requerimientos Eldctricos para la Secadora Eldctrica yes importante que usted lea esta...
- Page 51 La efectiva operaci6n de la secadora requiere de un flujo de aire adecuado. El flujo de aire adecuado Antes de usar por primera ves esta secadora, utilice puede ser medido evaluando la presi6n est,fitica. La un producto limpiador para todo prop6sito, o una presi6n est,fitica en el ducto de escape puede ser soluci6n...
- Page 52 3) Las secadoras eldctricas pueden ser ventiladas hacia el exterior usando el panel trasero, izquierdo, derecho o interior. 4) Las secadoras a gas pueden ser ventiladas hacia el exterior usando el panel trasero, izquierdo o interior. Las secadoras a gas no pueden set ventiladas al exterior usando el panel del lado Las siguientes instrucciones se aplican a derecho debido a la cubierta del quemador.
- Page 53 Para asegurar una instalaciSn segura, por favor Asegure el kit en el soporte lateral a la observe las instrucciones siguientes. lavadora con un tornillo en la parte trasera del soporte. Repita los pasos 2,3,4 para el ADVERTENCIA! otro lado. • El peso de la secadora y la altura de la instalacibn hacen que montar el kit sea peligroso para una sola persona.
- Page 54 Quite el pedestal, instalaci6n del disco duro e Atar la cinta de doble-cara del anaquel al secador instrucciones del cart6n del envio. como se muestra para que la inclinaci6n de las partes de los anaqueles se alinien con el horde y Coloque la secadora encima del pedestal.
- Page 55 Las siguientes son instrucciones adicionales sobre las conexiones y requerimientos eldctricos para las secadoras eldctricas. Adverteneia: El cableado y la conexi6n a tierra deben estar de acuerdo con la edicidn mils reciente cddigo Eldctrico Nacional, ANSI/NFPA 70 y todas las regulaciones locales aplicables.
- Page 56 Revise las siguientes opciones para determinar la conexibn el6ctrica adecuada para su casa: Advertenda: Contacto por conductor neutro esta prohibido por( 1) nuevas instalciones de branch- circuito (2) las casas de mobiles (3) vehiculo recreacional y (4) areas donde los codigos Utilice las instrucciones en esta secci6n si su casa locales prohibe contactar por el conductor neutro.
- Page 57 Advertenda: Contacto por conductor neutro esta prohibido por(1) nuevas instalciones de branch- circuito (2) las casas • Si los c6digos y ordenanzas locales no permiten el de mobiles (3) vehiculo recreacional y (4) tueas don& los uso de una conexi6n de 3 alambres, o estfi codigos locales prohibe contactar por el conductor neutm.
- Page 58 • Si los c6digos y ordenanzas locales no permiten Si los cddigos y ordenanzas locales permiten conexi6n de un conductor estructura-tierra a un conexi6n de un conductor estructura-tierra cable neutral, utilice las instrucciones bajo esta alambre neutral, utilice estas instrucciones. Si los secci6n.
- Page 59 120 Voltios, 60 Hertz, con Enchufe de 3-Clavijas con Conexion a Tierra Las siguientes son instrucciones adicionales sobre las conexiones y requerimientos eldctricos para las secadoras a gas. Advertencia: El cableado y la conexidn a tierra deben estar de acuerdo con la edici6n mils reciente del cddigo Eldctrico Nacional,...
- Page 60 Las siguientes son instrucciones e informacidn importante concernientes a los requerimientos para el suministro servicio del gas para las secadoras a gas. Adverteneia: El suministro y servicio del gas para las secadoras a gas debe cumplir con los c6digos y ordenanzas locales.
- Page 61 Las siguientes son instrucciones e informacidn importante concernientes a los requerimientos del escape para su secadora. Advertenda: NO dirija el escape de la secadora hacia un firea cerrada y no ventilada, como un fitico, pared, techo, s6tano, chimenea, salidas de gas, o espacio oculto de un edificio. Para reducir el riesgo de incendio, NO utilice ductos de plfistico o lfimina delgada para el escape de la secadora.
- Page 62 Mantenimiento del Escape y la Secadora Limpieza de la Malla de Pelusa 1. Limpie el filtro de pelusa antes o despu& de haber ADVERTENCIA! secado cada carga. Siempre asegdrese que el filtro de pelusa est_ limpio antes de empezar una nueva •...
- Page 63 Las siguientes son las instrucciones para encender y utilizar su nueva secadora. Por favor refidrase alas secciones especificas de este manual para infonnaci6n m4s detallada. Advertencia hnportante: Para reducir el riesgo de incendio, choque eldctrico, o lesiones personales lea este manual colnpletamente, incluyendo las Instrucciones de Seguridad hnportantes, antes de operar esta secadora.
-
Page 64: Programa Personalizado
Selecci6ndel ciclo 2. Ciclos Manuales • Marcando con la perilla, seleccione el ciclo deseado bas_.ndoseen los tipos de colada y las condiciones existentes. Use los Ciclos Manuales para seleccionar una cantidad 1. Ciclo de Sensor Dry[sensor de secado] especifica de tiempo de secado y una temperatura de secado. Cuando un Ciclo Manual es seleccionado, la pantalla del Seleccione el ciclo de secado que concuerde con el tipo de carga estimated time remaining(Tiempo Restante Estimado) - Page 65 BotonesOPCION Bot6nde cambiode tiempo • Pulse MORE TIME o LESS 0 CHILD LOCK TIME hasta ajustar el tiempo de MORE secado deseado. TiME 0 WRINKLE CARE DAMPDRYBEEP LESS TiME El bot6n de cambio del tiempo est_ disponibie s61ocon secado manual, secado per tiempo y OPTION secado per nivel, pRBSSt_LD _ SEC...
- Page 66 4. Secado con Parrilla Alarma El perchero de secado viene incluido en su secadora. La beeper[Alarma] controla Retire y deseche el material envolvente antes de usarlo. @ HiGH volumen de la serial que se emite Use el Rack Du[Secado con Parrilla] para artfculos que cuando se presiona algdn botdn en usted no quiera secar dando vueltas, asf colno sudteres.
- Page 67 Arranque de seu secadora Cuando Use Air Dry[Aire Seco] Utilice el Modificador de Air Seco para artfculos que |. Antes de usar requieran secado sin calor, as/cored hule, pl4stico y telas • Limpie la pantalla de hilos antes y despuds de cada ciclo. sensibles al calor.
- Page 68 5. Pausar o reiniciar. Para pausar la secadora en 4. Para usar un ciclo de manual por sensor • Seleccione un ciclo de secado manual. cualquier momento • Pulse MORE TIME o LESS TIME hasta que el Abra la puerta o pulse START/PAUSE una vez.
- Page 69 Consejos p aralasolucidn de problemas Ahorre tiempo ydinero! P rimero revise lastablasenlassiguientes p figinasyquizas nonecesite Ilamar a servicio. 1.Problema: Mi Secadora no Arranca • Est_i la Secadora conectada? Confirme que e! enchufe de !a secadora est6 completamente insertado en el tomacorriente .
- Page 70 4. Problema : Hay Pelusa en la Ropa , Est_ el f!ltro de pelusa lleno? Pot fayor ref!6rase a la secci6n de! manua! sobre la !impieza de! filtro de pe!usa, y €onfirme que fi!tr0 de pelusa est_ !impio. Es importante que e! fi!tro de pe!usa est6 !impi0 Htes de una nue_a carga.
- Page 71 8. Problema: Las Prendas Toman Mucho Tiempo en Secarse , C!asific6 sus cargas de ropa Separe !0S a_fcu!0s pesad0s de !0S !iyian0s Cuand0 C!asifique !as _argas, adecuadamente? • Esti secando cargas grandes de ropa La ropa pesada tarda mils tiempo en secarse porque tienden a retener mis humedad. Para pesada? ayudar a reducir y mantener tiempos de secado mls consistentes para telas grandes y pesadas, separe estos artfculos en cargas mis pequefias de un tamafio consistente.
- Page 72 Su Secadora LG sera reparada o reemplazada, a opci6n de LG, si demuestra estar defectuosa en material o mano de obra bajo uso normal, durante el periodo de garantia ("Periodo de garantia) que se menciona a continuaci6n, efectiva desde la fecha (Fecha de Compra) original de compra del producto.
Need help?
Do you have a question about the DLE3733S and is the answer not in the manual?
Questions and answers