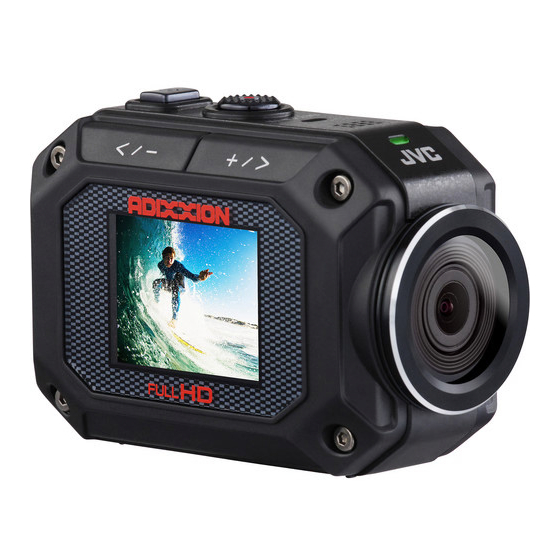
JVC GC-XA2 User Manual
Hide thumbs
Also See for GC-XA2:
- User manual (49 pages) ,
- Specifications (12 pages) ,
- Detailed user manual (58 pages)

Related Manuals for JVC GC-XA2


Summary of Contents for JVC GC-XA2
- Page 1 ACTION CAMERA GC-XA2 Detailed User Guide Dear Customers Thank you for purchasing this JVC product. Before use, be sure to read “Read this before using the camera” (p.2–5) to use the product correctly. LYT2658-003A...
-
Page 2: Read This Before Using The Camera
Read this before using the camera Safety Instructions • Before using the product in water, be sure to read p.3 and to use the product correctly. • Malfunction due to misuse by the customer is not covered by warranty. • Do not use this product in water deeper than 5 m (16.4 ft) or for longer than 30 minutes. • Do not drop, puncture or disassemble the camera. • Use the camera with care. Rough handling may damage the internal components. • Do not expose the camera to high temperature. • Please be aware that the camera body may become warm when operating it for an extended period. • Test for proper operation before using the camera. • Only use accessories supplied by the manufacturer, such as adapter and battery. • In order to prevent external short circuiting of the battery, please use a vinyl bag, etc. • Remove the battery if the camera is not going to be used for long periods. • When temperature of the camera reaches 67°C (152°F), an alarm icon (thermometer icon) will appear. Once it reaches 70°C (158°F), the camera will turn off automatically for safety. Using at Low Temperatures On ski slopes, at high elevations, and in other cold areas where the temperature drops below freezing 0°C (32°F), keep the camera warm inside clothing or other insulating material. • Prolonged contact with exposed metallic portions can trigger frostbite and other damage to the skin. - Page 3 2 m (6.5 ft). Notes • Do not immerse the camera in hot springs or other water with temperatures of 40°C (104°F) or above. • Do not expose the camera to high pressures or shocks associated with swift currents, waterfalls, diving into water, etc. • Dropping or otherwise exposing the camera to shocks voids the waterproof warranty. Contact your JVC Service representative. • This camera does not float. Use a strap or other measure to prevent losing it in the water. • Before opening or closing the cover, wipe off any moisture and move to a low-humidity environment. • Immediately wipe off any detergent, soap, hot spring water, bath additives, oil, sunscreen, or other chemicals that come into contact with the camera. • Make sure that the cover rim seal, the SD slot, and the jacks are intact and free of hair, lint, sand, dust, and other foreign matter.
- Page 4 Water, Dust, and Shock Resistance (continued) After Using ■ ■ After underwater use or exposure to dusty conditions, promptly rinse the camera with fresh water and thoroughly dry it. 1 Press and hold Power for 2 seconds to turn off the camera. Make sure that the slot cover is closed firmly. 2 Rinse with fresh water. Immerse the camera in a container with enough fresh water to cover completely it. Operate the buttons to force out any material caught in the gaps around them. Do not clean with soap, detergent, alcohol, or other chemicals.
- Page 5 • We recommend replacing the seal annually to maintain water resistance. Contact your JVC Service representative. (Charges apply.) • Always keep the battery cover closed before use. Cautions • Remember that this unit is intended for private consumer use only. Any commercial use without proper permission is prohibited. (Even if you record an event such as a show, performance or exhibition for personal enjoyment, it is strongly recommended that you obtain permission beforehand.) • HDMI is a trademark of HDMI Licensing, LLC. • YouTube™, the YouTube logo and Android™ are trademarks and/or registered trademarks of Google Inc. • Windows® is either a registered trademark or a trademark of Microsoft Corporation in the United States and/or other countries. • Intel, Intel Core, Pentium and Celeron are trademarks or registered trademarks of Intel Corporation or its subsidiaries in the United States and other countries. • Marks such as ™ and ® have been omitted in this manual. Read this before using the camera...
-
Page 6: Table Of Contents
Contents Read this before using the camera .................2 Getting to Know Your Camera .................7 Recording ........................13 Enjoying the Playback Mode ................20 Setting Your Camera ....................22 Connecting to a PC ....................30 Using Wi-Fi ........................31 Precautions on Using Wi-Fi ................... 50 Specifications .......................52 Troubleshooting ......................54 Contents... -
Page 7: Getting To Know Your Camera
Getting to Know Your Camera Overview ● This camera with a 7.99 Mega Pixel sensor can take H.264 format videos. The H.264 technology allows for video recording at an HD resolution of 1920x1080. High quality 7.99 mega-pixel images, and 16 mega-pixel images with super-resolution technology can also be taken. With a color LCD monitor, you can view and examine the video and photo easily. ● You can connect this camera to an HDTV via an HDMI cable, and easily playback the recorded high-definition videos on wide screen HDTVs. ● This camera is equipped with a Wi-Fi module. ● You can broadcast live streaming of the camera on the USTREAM website via Wi-Fi. ● You can upload files to YouTube via Wi-Fi. ● A 5x digital zoom, manual brightness adjustment and manual white balance adjustment are available. ● Time lapse recording, high-speed shooting, varied video effects, etc. make recording more fun. Notes • A wireless LAN function is required to use our PC application. Getting to Know Your Camera... -
Page 8: Checking The Accessories
Checking the Accessories Battery USB cable (BN-VH105) Wide exible mount (Pod part/Base part) Notes • Remove any dirt or moisture before attaching accessories. • Once attached, the exible mount cannot be removed. • The knob of the exible mount is attached to the base part when purchased. Remove the knob before assembling the exible mount. - Page 9 Assembling the Flexible Mount When you fix the camera to a helmet, etc., attach the flexible mount to the tripod mounting hole of the camera. 1 Remove the knob from the base part. Turn the knob in the direction indicated. 2 Insert the pod part into the knob. 3 Attach the pod part to the base part. Be careful not to pinch your finger.
-
Page 10: Component Names And Functions
Mini USB Port (inside) Tripod socket When attaching an optional product not manufactured by JVC, make sure that the product Strap hook conforms to 1/4 ISO 1222. Use a strap or something similar to prevent Attaching a product with a long the camera being dropped. -
Page 11: Charging The Battery
Charging the Battery 1 Load the battery. ~ Slide the port/slot cover latch in the direction indicated. Ÿ Slide and open the cover in the direction indicated while holding down the latch. ! Insert the battery in the correct direction (+/–) while pulling the blue lever to the left. -
Page 12: Inserting An Sd Card
Inserting an SD Card • Insert a separately purchased SD card into the SD slot firmly, until the card is locked. • To remove the SD card, push the card in once, and pull it out straight. • When using a new SD card, format the card in the menu screen. Operation is confirmed with the following manufacturers’ SD cards. Class 4 or higher SD/SDHC/SDXC cards (up to 128GB) When recording with 1080p60(1080p50), Class 6 or higher is required. - SanDisk - TOSHIBA Setting the Clock 1 Press and hold Power for 2 seconds to turn the power on. The clock setting screen appears the first time the camera is used. -
Page 13: Recording
Recording Video Recording 1 Press and hold Power for 2 seconds to turn the power on. 2 Check that the video mode icon ( ) is on the screen. Video mode icon If the photo mode icon ( ) is displayed on the screen, switch to the video mode as follows: ~ Press MENU. -
Page 14: Taking Photos
Taking Photos 1 Press and hold Power for 2 seconds to turn the power on. 2 Check that the photo mode icon ( ) is on the screen. Photo mode icon If the movie mode icon ( ) is displayed on the screen, switch to the photo mode as follows: ~ Press MENU. Ÿ Press < or > to select “Photo Mode Options”, and press SET. - Page 15 Timelapse recording (video/photo) In timelapse mode, the camera takes pictures at certain intervals. This function is useful when you want to record things changing slowly, such as flower buds opening. 1 Press MENU in recording mode. 2 Video mode: Press < or > to select “Video Mode Options”, and press SET. Photo mode: Press < or > to select “Photo Mode Options”, and press SET. 3 Video mode: Press <...
- Page 16 Making Thumbnails During the video recording, photos can be saved at 5-second intervals. The photo resolution is the same as the video resolution. 1 Press MENU in recording mode. 2 Press < or > to select “Video Mode Options”, and press SET. 3 Press < or > to select “Video & Photo”, and press SET. 4 Press Record to start recording. Press Record again to stop recording.
- Page 17 Recording with a Special Effect (video mode only) You can add a special effect to the movie. 1 Press MENU in recording mode. 2 Press < or > to select “Video Mode Options”, and press SET. 3 Press < or > to select “Video Effects”, and press SET. 4 Press Record to start recording.
- Page 18 Endless Recording (video mode only) The video les are automatically divided every 15 minutes and saved. If there is not enough space in the SD card, the oldest le is deleted and the recording continues while the battery lasts. Press MENU in recording mode. Press <...
- Page 19 Burst Shooting (photo mode only) The camera takes pictures continuously at short intervals. 1 Press MENU in recording mode. 2 Press < or > to select “Photo Mode Options”, and press SET. 3 Press < or > to select “Burst”, and press SET. 4 Press Record to start recording. Information • You can specify the time intervals in the menu screen.
-
Page 20: Enjoying The Playback Mode
Enjoying the Playback Mode Playback 1 Press Play to switch to the playback mode. Press Play to switch back to the recording mode. 2 Press < or > to select a file. 3 (In video mode) Press SET to start playback. Playback screen ■ ■ Playback counter File counter (video mode) Video icon/... -
Page 21: Deleting A File
Button operations during playback ■ ■ Video Photo Play/Pause − During playback: Fast rewind 1 - 3 < / – Previous file During pause: Previous file During playback: Fast forward 1 - 3 + / > Next file During pause: Next file Deleting a File 1 Press Play to switch to the playback mode. Press Play to switch back to the recording mode. 2 Press < or > to select the file you wish to delete. -
Page 22: Setting Your Camera
Setting Your Camera Configuring the Camera Settings 1 Press MENU in recording mode. 2 Press < or > to select the item you wish to change, and press SET. • Press MENU to exit the menu screen. • Press Play to switch back to the previous menu screen. Setting Your Camera... - Page 23 Setting items in “Video“ Video Switches to the normal video recording mode (“Video Recording”, P.13) Endless REC Switches to the endless recording mode (“Endless Recording (video mode only)”, P.18) Video Time Lapse Switches to the timelapse recording mode (“Timelapse recording (video/photo)”, P.15) Video Effects Adds a special effect to the video (“Recording with a Special Effect (video mode only)”, P.17) Video & Photo Makes thumbnails during the video recording (“Making Thumbnails”, P.16) High Speed Switches to the high speed recording mode (“High Speed Recording (video mode only)”, P.16) Setting items in “Photo“ Photo Switches to the normal photo capturing mode (“Taking Photos”, P.14) Burst Switches to the burst shooting mode (“Burst Shooting (photo mode only)”, P.19) Photo Time Lapse Switches to the timelapse recording mode (“Timelapse recording...
-
Page 24: White Balance
Setting items in “Setup“ Brightness ■ ■ The camera adjusts the brightness automatically. In addition, manual settings are available. Auto Adjusts the image to the standard brightness +6 - +1 Records brighter –6 - –1 Records darker White Balance ■ ■ The camera adjusts the white balance automatically. In addition, six manual settings are available. Auto Adjusts the white balance automatically Daylight Suitable for outdoor conditions Fluorescent1/ Suitable for fluorescent light conditions Fluorescent2 Tungsten Suitable for incandescent light conditions Blue (marine) Suitable for blue water conditions Green (marine) Suitable for green water conditions Video Resolution ■... - Page 25 Video Time Lapse ■ ■ You can specify the time interval of the timelapse recording. 0.2 Second Records 1 frame every 0.2 seconds 1 Second Records 1 frame every 1 second 5 Second Records 1 frame every 5 seconds 10 Second Records 1 frame every 10 seconds 30 Second Records 1 frame every 30 seconds 60 Second Records 1 frame every 60 seconds Photo Time Lapse ■ ■ You can specify the time interval of the timelapse photography. 2 Second Takes 1 photo every 2 seconds 5 Second Takes 1 photo every 5 seconds 10 Second Takes 1 photo every 10 seconds 30 Second Takes 1 photo every 30 seconds 60 Second Takes 1 photo every 60 seconds...
-
Page 26: Time Stamp
Time Stamp ■ You can choose whether you add a timestamp or not, and the format of the timestamp. (You cannot delete the time stamp after recording.) Deactivates the time stamp function YEAR/MONTH/DAY Records the timestamp in the format of year/month/day MONTH/DAY/YEAR Records the timestamp in the format of month/day/year DAY/MONTH/YEAR... -
Page 27: Operation Sound
Setting items in “More“ LCD Auto Off ■ ■ The display automatically turns off 5 seconds after the start of recording. The display turns on automatically at any operation or the end of recording. Deactivates this function Activates this function Volume ■ ■ You can adjust the volume during playback. Mute Emits no sound from the speaker. -
Page 28: Default Setting
Default Setting ■ ■ You can reset all settings to the factory default. Update ■ ■ You can update the internal software. For more details, please refer to the following website. (No information is posted until the updater is provided.) http://www3.jvckenwood.com/english/support/index.html Setting Your Camera... - Page 29 Setting items in “Wi-Fi Menu“ Deactivates the Wi-Fi function of the camera Activates the Wi-Fi function of the camera Use this setting when you monitor the camera view using Android or iOS devices. (“Monitoring the Camera View”, P.32) USTREAM Broadcasts the camera view on USTREAM using the Wi-Fi function. To use this function, you must register wireless LAN settings and a USTREAM account in advance using a PC, Android or iOS application. (“Broadcasting Using USTREAM”, P.39) YouTube Uploads camera footage view to YouTube using the Wi-Fi function. To use this function, you must register wireless LAN settings and a YouTube account in advance using a PC, Android or iOS application. (“Uploading to YouTube”, P.44) Setting Your Camera...
-
Page 30: Connecting To A Pc
Connecting to a PC Transferring Files to Your PC 1 Connect the supplied USB cable. 2 Press < or > to select “PC”, and press SET. 3 Windows PC: Double click “SD” below the “Computer“ in Windows Explorer. Mac OS: Double click “SD”... -
Page 31: Using Wi-Fi
Using Wi-Fi Available Wi-Fi Functions Monitoring the camera view ■ ■ You can check the camera view and operate the camera from an Android or iOS device. Broadcasting using USTREAM (*1) ■ ■ You can broadcast camera footage in real-time using USTREAM. Uploading to YouTube (*1) ■ ■ You can upload files to YouTube. *1 T o use these functions, you must register wireless LAN settings and a service account in ad- vance using a PC, Android or iOS application. Using Wi-Fi... - Page 32 Monitoring the Camera View 1 Download the application. To monitor the camera view, You must download “ADIXXION sync.“ (freeware) to your Android or iOS device. Download the application from Google Play (Play store) or the App Store. Required operating environment OS: Android OS 2.3 or later, iOS 6 or later 2 Set the Wi-Fi function of the camera to on. ~ Press MENU. Ÿ Press < or > to select “Wi-Fi Menu”, and press SET. ! Press <...
- Page 33 3 Set the Wi-Fi function of your device to on. Set the Wi-Fi function of your device to on before starting “ADIXXION sync.“. Android device: ~ Touch “Settings” on the application list. Ÿ Set the Wi-Fi function of your device to on. ! Press the home button to go back to the home screen. Notes • The display and procedure may differ depending on the device you use.
- Page 34 ~ Touch “Settings”. Ÿ Touch “Wi-Fi”. ! Touch “Wi-Fi” to turn the Wi-Fi on. ⁄ Touch the Camera ID (JVC-****) on the list. @ Enter the KEY. Press the home button to go back to the home screen.
- Page 35 4 Start “ADIXXION sync.”. ~ Touch “ADIXXION sync.” on the application list. Ÿ Touch the detected camera. • If the camera cannot be found, confirm that the Wi-Fi setting is set to on and touch “Refresh”. ! Enter the KEY. The camera view appears when the connection is complete. Using Wi-Fi...
- Page 36 Control the camera from the application. Monitor screen You can do things such as monitor the camera view or record footage. (Camera sound is not output.) Recording/shooting Switch between Zoom multiple cameras* Use this when multiple cameras are connected. To the monitor screen To the album screen To the setup screen (this screen)
- Page 37 Album screen You can check or delete images. Video index Photo index Delete No thumbnail (*) It is displayed in the following cases. If the thumbnails has been deleted. If video les has been split by a long time recording. If video les has been split by the "Endless recording".
- Page 38 Setup screen You can change the settings of the camera. Camera settings ID/Password Changes the camera ID and the password Date & Time Adjusts the clock. Touch to export the time set on the device to the camera Operation Sound Switches the beep sound at button operation on/off Format SD Card Formats the inserted SD card Default Reset all settings to the factory default Video Mode Options Switches the video recording mode Photo Mode Options Switches the photo recording mode...
- Page 39 Broadcasting Using USTREAM Operations 1 to 3 are only required the first time. Go to 4 (page 42) if these operations have already been carried out. 1 Connect the camera and the smartphone/ tablet via a wireless LAN router. See “Monitoring the Camera View” on page 2 Register an access point. ~ Start “ADIXXION sync.”, and select the detected camera.
- Page 40 ! Touch in “Access Point Setting”. ⁄ Select the access point you wish to use and enter the password. @ Touch to return. Using Wi-Fi...
- Page 41 3 Register the account you wish to use. ~ Enter your “USTREAM” Username and Password. Ÿ Touch “Save to Camera”. Information • Access http://www.ustream.tv/ to register an account. Using Wi-Fi...
- Page 42 4 Start broadcasting using the camera. ~ Press MENU in recording mode. Ÿ Press < or > to select “Wi-Fi Menu”, and press SET. ! Press < or > to select “USTREAM”, and press SET. Using Wi-Fi...
- Page 43 ⁄ Press < or > to select “Yes”, and press SET. Broadcasting via USTREAM starts. Press SET or Play/Record to stop broadcasting. Notes • Broadcasting footage via USTREAM and may not be allowed depending on the area, network, etc. Using Wi-Fi...
-
Page 44: Uploading To Youtube
Uploading to YouTube Operations 1 to 3 are only required the first time. Go to 4 (page 47) if these operations have already been carried out. 1 Connect the camera and the smartphone/ tablet via a wireless LAN router. See “Monitoring the Camera View” on page 2 Register an access point. ~ Start “ADIXXION sync.”, and select the detected camera. - Page 45 ! Touch in “Access Point Setting”. ⁄ Select the access point you wish to use and enter the password. @ Touch to return. Using Wi-Fi...
- Page 46 3 Register the account you wish to use. ~ Enter your “YouTube” Username and Password. Ÿ Touch “Save to Camera”. Information • Access http://www.youtube.com/ to register an account. Using Wi-Fi...
- Page 47 4 Start uploading using the camera. ~ Press MENU in recording mode. Ÿ Press < or > to select “Wi-Fi Menu”, and press SET. ! Press < or > to select “YouTube”, and press SET. Using Wi-Fi...
- Page 48 ⁄ Press < or > to select the file to upload, and press SET. Uploading to YouTube starts. Press Play/Record to stop uploading. Notes • Uploading files to YouTube may not be allowed depending on the area, network, etc. • The privacy option is set to “Public“ (anyone can watch the file). Using Wi-Fi...
- Page 49 By installing the application, you can perform the same operations as on the Android/iOS application on Windows or Mac OS PCs. Notes • Download the application at the following website. http://www3.jvckenwood.com/english/download/gc-xa2/index.html • The required environment to install “ADIXXION sync.” is as follows.
-
Page 50: Precautions On Using Wi-Fi
In this case, change the location accordingly. Radio wave interference by Bluetooth devices Bluetooth devices make use of the same frequency bandwidth (2.4 GHz) as that of Wi-Fi devices. Using this product near such devices may cause radio wave interference, and result in a drop in communication speed or connection failure. In this case, turn off the power of devices that are not in use. Wireless LAN security An advantage of wireless LAN is that instead of using a LAN cable, it transmits information using radio waves, thus enabling a LAN connection to be established within the area covered by the radio waves. However, as radio waves penetrate through objects (such as walls) within the range that they cover, security issues, such as interception of transmission or illegal access, may arise if security settings are not configured. Failure to do so may increase the risk of personal information such as user names, passwords, and the content of your e-mails being intercepted, or illegal access to the network. • Due to the design of wireless LAN, note that security may be breached by unusual or unforeseeable means. • JVC shall not be liable for any security issues, problems, damage or losses arising from the use of this feature. Precautions on Using Wi-Fi... - Page 51 Radio Waves Used by this Product This product makes use of radio waves in the ISM band (2.4 GHz). Although a radio station license is not required to use this product, please take note of the following. Do not use this product near the following places: • Industrial, scientific, or medical equipment, such as microwave ovens and pacemakers • Radio stations that require a license, such as the station for identifying moving bodies used in the product lines of factories...
-
Page 52: Specifications
Specifications Specifications Image sensor 1/3.2” 7.99 Mega pixel CMOS sensor Lens F2.4 f=2.46 mm (Fixed Focus) Zoom Digital zoom: up to 5x LCD monitor 1.5” 0.11 Mega pixel color LCD Storage media SD/SDHC/SDXC card slot support up to 128 GB Video resolution NTSC: 1920x1080/60 fps, 1920x1080/30 fps, 1280x960/30 fps, 1280x720/60 fps, 1280x720/30 fps, 848x480/30 fps PAL: 1920x1080/50 fps, 1920x1080/25 fps, 1280x960/25 fps, 1280x720/50 fps, 1280x720/25 fps, 848x480/25 fps Note: T he value changes depending on your “TV System“ setting. (“TV System”, P.27) Photo resolution 16 M : 4608 x 3456 (with super-resolution technology) 8 M : 3264 x 2448 File format Movie: MPEG-4 (.mp4) Photo: JPEG (.jpg) Wi-Fi Compatible with IEEE802.11b/g/n (2.4 GHz band only) Battery Lithium-ion rechargeable battery (3.7 V) Mass 110 g (0.25 lbs) (excluding the battery) Dimensions (mm) 74 x 53 x 35 (2 15/16’’ x 2 1/8’’ x 1 7/16’’) (W × H × D) - Page 53 Recordable Time/Number of Images Approximate video recording time ■ ■ SDHC/SDXC card Video resolution 4 GB 8 GB 16 GB 32 GB 48 GB 64 GB 128 GB 1920x1080/ 15 min. 35 min. 1 hr. 2 hr. 3 hr. 5 hr. 10 hr. 60p (50p) 10 min.
-
Page 54: Troubleshooting
2 The camera may not work properly due to the noise or static electricity, etc. In this case, remove the battery and reset the camera. 3 If the System does not work correctly after these procedures, consult your nearest JVC dealer. - Page 55 Problem Check There is a black or colored This is not a malfunction. spot in the LCD monitor The LCD screen is manufactured using extremely high-precision technology, so over 99.99% of the pixels are operational for e ective use. However, some tiny black and/or bright dots (white, red, blue or green) may appear on the LCD screen.
- Page 56 FCC: Federal Communication Commission Interference Statement This equipment has been tested and found to comply with the limits for a Class B digital device, pursuant to Part 15 of the FCC Rules. These limits are designed to provide reasonable protection against harmful interference in a residential installation. This equipment generates, uses and can radiate radio frequency energy and, if not installed and used in accordance with the instructions, may cause harmful interference to radio communications. However, there is no guarantee that interference will not occur in a particular installation. If this equipment does cause harmful interference to radio or television reception, which can be determined by turning the equipment off and on, the user is encouraged to try to correct the interference using one or more of the following measures: • Reorient or relocate the receiving antenna.
- Page 57 © 2013 JVC KENWOOD Corporation 0613HO-MW-VM...
Need help?
Do you have a question about the GC-XA2 and is the answer not in the manual?
Questions and answers