Table of Contents
Advertisement
Quick Links
Advertisement
Table of Contents

Related Manuals for Garmin GPSMAP 130


Summary of Contents for Garmin GPSMAP 130
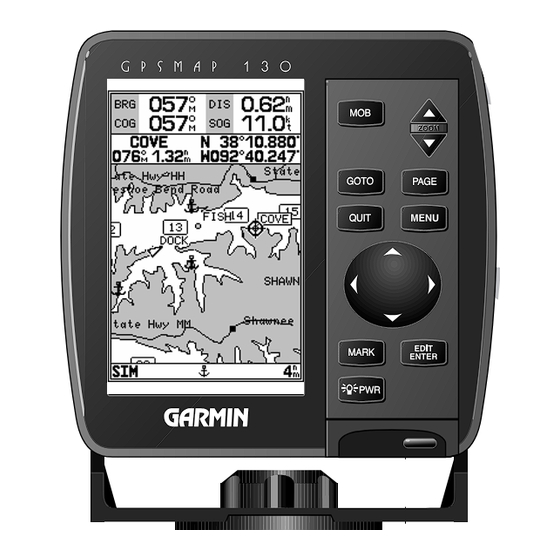
- Page 1 OWNER’S MANUAL AND REFERENCE GPSMAP ®...
-
Page 3: Foreword
All rights reserved. No part of this manual may be reproduced or transmitted in any form or by any means, electronic or manual, including photocopying and recording, for any purpose without the express written permission of GARMIN. Information in this document is subject to change without notice. GARMIN... - Page 4 GARMIN GPSMAP 130 is a precision electronic NAVigation AID (NAVAID), any NAVAID can be misused or misinterpreted and, therefore, become unsafe. Use the GPSMAP 130 at your own risk. To reduce the risk of unsafe operation, carefully review and understand all aspects of this Owner’s Manual—and thoroughly practice operation using the simulator mode prior to actual use.
- Page 5 Designed for detailed electronic charting and simple operation, the GARMIN GPSMAP 130 is a powerful navigation device that can help guide you in water- ways around the world: Precision Performance • High-contrast LCD screen • PhaseTrac12 receiver tracks and uses up to 12 satellites simultaneously for fast, accurate positioning •...
-
Page 6: Limited Warranty
GARMIN warrants this product to be free from defects in materials and work- manship for one year from the date of purchase. GARMIN International, Inc. will at its sole option, repair or replace any components which fail in normal use. Such repairs or replacement will be made at no charge to the customer for parts or labor. - Page 7 This man- ual is broken down into two sections for your convenience. Part One introduces you to the GPSMAP 130 and provides a getting started section so that you may become more familiar with the unit. This part will provide you with a basic working knowledge necessary to use the unit to it’...
-
Page 8: Packing List
Before installing and getting started with your unit, please check to see that your package includes the following items. If any parts are missing, please see your GARMIN dealer immediately. Standard Package: • GPSMAP 130 Unit • External Antenna and 30’ cable • Power/Data Cable • Mounting Bracket •... -
Page 9: Table Of Contents
APPENDICES Appendix A: GPSMAP 130 Installation ....67-69 Appendix B: Wiring & Specifications ....70-71 Appendix C: Messages . -
Page 10: Table Of Contents/Keypad Usage
The Getting Started Tour will introduce you to most of the keypad and provide a ‘hands-on’ lesson in using the GPSMAP 130. We strongly encourage you to take the Getting Started tour before using your unit for actual navigation. -
Page 11: Initializing The Receiver/Getting Started
Initializing the Receiver The first time you power up your new GPSMAP 130 is an important step in get- ting the best possible GPS performance. The receiver must be given an opportunity to collect satellite data and establish its present position. To ensure proper initializa- tion, the GPSMAP 130 is shipped from the factory in AutoLocate allow the receiver to ‘find itself’... - Page 12 Once the receiver has collected information from at least three satellites, the flashing satellite icon on the status bar will glow steadily, and the GPSMAP 130 is ready for use. key to zoom in to a...
- Page 13 2. To decrease the screen contrast, press the left arrow of the 3. Press the key to finish. The GPSMAP 130’ s three-level screen backlighting is controlled with P key, and may be adjusted at any time from any page. To turn on and adjust the backlighting: 1.
- Page 14 Each page of the GPSMAP 130’ s system also features an options page, which gives you access to other functions and features that relate to the specific page you are viewing.
- Page 15 The satellite status page is one of four main pages used in the GPSMAP 130’ s system. All four pages are linked together in a simple chain, which allows you to scroll through the pages in either direction using the J and Q keys. To con- tinue the tour, let’...
-
Page 16: Getting Started
Both of these techniques are described in the reference section of the manu- al and/or on your GPSMAP 130 quick reference guide. To continue our tour, let’ s move on to the map page. - Page 17 The GPSMAP 130’ s map page combines digital chartplotting with a user-selec- table display of navigation data and a built-in worldwide database to 64 nm. It will also be the page you use most to create and edit waypoints and routes. Before we take off on our practice route, let’...
-
Page 18: Using The Map Cursor
Now that you have a feel for how the cursor works, let’ s move on and see how the GPSMAP 130 works on the water. To help you practice using the map page and other features, we’ve stored a practice route in the receiver’ s permanent memory, so you can see exactly what you’ll experience when you’re navigating with your new... -
Page 19: Going To A Destination
This will also give us an idea of how the O key is used throughout the GPSMAP 130 system to provide context-sensitive options and functions. Let’ s give it a try by activating the practice route stored in memory for navigation: 1. - Page 20 GETTING STARTED Simulator Setup/Map Scales A. To enter a boat speed or define the simulated course, highlight the ‘Setup Simulator?’ option and press EDIT/ENTER. B. Enter a boat speed of 60 knots to begin the tour. This will allow you to complete the Getting Started tour in 10-15 minutes.
- Page 21 Once the cursor is over the TOUR3 waypoint, you’ll notice that the waypoint symbol and name will become highlighted, and the data field at the top of the page will display the waypoint name, the range and bearing from your present position, and the coordinates for the waypoint.
- Page 22 (see page 29). Now that we’re navigating to an actual destination, let’ s move on to the next page of the GPSMAP 130 system, the navigation page: 1. Press the key.
-
Page 23: Using The Navigation Page
Whenever the GPSMAP 130 is in simulator mode, you can adjust your speed and course from the navigation page using the R keypad. As you head toward each waypoint in the tour route, try adjusting your boat speed and course to get a feel for how the highway works. - Page 24 GETTING STARTED Active Route/Main Menu Page A. To stop navigating the active route, select the “Deactivate Route?’ option and press EDIT/ENTER. B. Use the left arrow key to clear the SOG field and press EDIT/ENTER to confirm. Now that you’ve seen the four main pages, let’ s review the active route page, which appears in the main page sequence whenever you are navigating a route: 1.
-
Page 25: Clearing The Track Log
As you’ve seen, the GPSMAP 130’ s main pages provide vital status, position, navigation and map information. The last page we’ll cover in the tour is the main menu page, which provides access to the GPSMAP 130’ s waypoint, route and planning functions, as well as various operational and navigation setup features. -
Page 26: Power Off
To turn the GPSMAP 130 off: 1. Press and hold the key for about 3 seconds, until the screen is blank. Thank you for choosing the GARMIN GPSMAP 130 navigation system. We hope that it will be a useful tool for you wherever you travel. -
Page 27: Status Page
Dilution of Precision Status Bar The GPSMAP 130 status page provides a visual reference of various receiver functions, including current satellite coverage, receiver operating mode and cur- rent receiver accuracy. The status information will give you an idea of what the receiver is doing at any given moment. -
Page 28: Section 1: Gpsmap Status Page
SECTION STATUS PAGE Receiver Status A. The status bar at the bottom of the page displays important status, alarm and map scale informa- tion. It also provides on-screen user and message prompts. B. The status bar will display an anchor symbol or ‘PRX’... - Page 29 Status Page Options The GPSMAP 130’ s status page features a context-sensitive options page that provides access to functions and features relating to the status page. To display the status page options: 1. Press To select a menu option: 1. Highlight the desired option and press The following options are available: •...
-
Page 30: Section 2: Position
Day Status Bar The GPSMAP 130 position page shows you where you are, what direction you are heading and how fast you are going. The top of the page features a graphic compass tape to indicate the direction you’re heading (while you’re moving), and four user selectable data fields: course over ground (COG), speed over ground (SOG), distance travelled (TRP) and altitude (ALT). - Page 31 Position Page Options The GPSMAP 130’ s position page features a context-sensitive options page that provides access to functions and features relating to the position page. To display the position page options: 1. Press To select a menu option: 1. Highlight the desired option and press The following options are available: •...
-
Page 32: Section 3: Map Page
Boat Icon Status The GPSMAP 130’ s map page provides a comprehensive display of electronic cartography, plotting and navigational data. The map display shows your boat on a digital chart, complete with geographic names, navaids, depth contours and a host of other chart features. It also plots your track and displays any routes and waypoints you create. - Page 33 • If the boat icon attempts to go off the display, the zoom level may need to be adjusted to keep cartography on screen. Whenever the R keypad is pressed, the GPSMAP 130 will enter cursor mode. In cursor mode: •...
-
Page 34: Using The Cursor
SECTION MAP PAGE Using the Cursor A. To create a new waypoint at the cursor, move the cursor to the desired position and press EDIT/ENTER. B. The create new waypoint page will appear, where you may change the waypoint name, symbol and comment before saving the waypoint. - Page 35 1. Press the up key to zoom out and the down The GPSMAP 130’ s system has a built-in worldwide database to 64 n.m.(see Appendix D for a built-in coverage map), with more detailed coverage available through the use of G-chart...
-
Page 36: Map Page Options
Map Page Options The GPSMAP 130 map page is designed to be a flexible tool that can be cus- tom-tailored to your exact navigation needs. The map options page provides access to many of the features and functions that will help you configure the map page to your own preferences. -
Page 37: Map Configuration
• Configure the Map?— allows you to determine what chart features are displayed on a particular map scale to prevent excessive clutter. The map configuration page features an on/off grid with a list of chart features down the left side. The zoom scales are displayed across the top of the grid with the chart scale currently in use also indicated. - Page 38 MAP PAGE SECTION Map Configuration & Map Colors A. To calibrate the map, highlight the ‘Calibrate the Map?’ option and press EDIT/ENTER. B. A satellite icon will remain on the map to indi- cate the GPS position, while the boat marker will reflect the calibration changes.
-
Page 39: Section 3: Map
• Setup Page Display?— allows you to specify the number of fields displayed in the data window section of the map page. A graphic compass tape or CDI scale may also be displayed. The following options are available: • 2 Fields •... -
Page 40: Section 4: Navigation
SECTION NAVIGATION PAGE Overview The navigation page can be configured to show the active waypoint, all route waypoints and/or nearby waypoints on the graphic highway. GPSMAP 130 Navigation Page Graphic Compass Graphic Highway Pointer to Waypoint Whenever a GOTO, MOB, TracBack or route has been activated, the GPSMAP 130 will provide digital and graphic steering guidance to the destination with the navigation page. -
Page 41: Section 4: Navigation Page
1. Press the up or down arrow of the key to select the desired setting. Navigation Page Options The GPSMAP 130’ s navigation options page allows you to define the nav data fields and select what waypoints are displayed on screen. To display the navigation page options: 1. - Page 42 SECTION NAVIGATION PAGE Nav Page Options A. Ten data options are available for each data field on the navigation page. The digital crosstrack error option is especially useful to display the exact distance you are off course in feet/miles or meters.
-
Page 43: Section 5: Main Menu Page
The GPSMAP 130’ s main menu page provides access to various waypoint, sys- tem, navigation and interface management and setup menus. The main menu page is available from any page in the GPSMAP 130’ s system, and is accessed through the O key. -
Page 44: Section 6: Waypoints
Mark Key The GARMIN GPSMAP 130’ s M key lets you quickly capture your present position— or cursor or navaid position— in order to create a new waypoint. You must have a valid position fix to mark your present position. - Page 45 The mark key may also be used on the map page to mark the cursor position or an on-screen navaid. To mark a navaid, select the desired navaid with the cursor. The GPSMAP 130 will use the navaid text shown on the cartography as the default comment.
-
Page 46: Creating Waypoints Graphically
WAYPOINTS SECTION Creating Waypoints Graphically & By Text A. Once a position has been selected graphically, the create new waypoint page will appear. Here you can change the waypoint name, symbol or com- ment before saving the waypoint. B. To create a waypoint by text entry, start by entering the new waypoint’s name. -
Page 47: Reference Waypoints
A new waypoint may also be created without knowing position coordinates by entering its range and bearing from an existing waypoint or your present position. The GPSMAP 130 will then calculate the position coordinates for you, using the reference selected. - Page 48 WAYPOINTS SECTION Reviewing & Editing Waypoints A. The waypoint definition page will appear when- ever a waypoint is selected from the map or a waypoint list. B. A 20-character custom waypoint comment may be assigned to every waypoint. The default com- ment is the date and time of creation.
-
Page 49: Waypoint Definition
Waypoint Definition Page Options The waypoint definition page also features an options page that allows you to edit the selected waypoint on the map display, rename the selected waypoint or delete the waypoint from memory. To display the waypoint definition page options: 1. - Page 50 Waypoint Submenus The GPSMAP 130’ s main menu page features four waypoint submenus that let you manage a large number of waypoints quickly and efficiently. The submenus also provide a continuously updated nearest waypoints list and a proximity way- point alarm function that can be used to define an alarm circle around submerged hazards, shallow waters, etc.
-
Page 51: Proximity Waypoints
Proximity Waypoints The proximity waypoints list lets you define an alarm circle around a stored waypoint position, and can be used to help you avoid reefs, rocks or restricted waters. Up to nine waypoints may be listed, with a maximum alarm radius of 99.99 nautical or statute miles or kilometers. -
Page 52: Section 6: Waypoints
WAYPOINTS SECTION Create Waypoint/ Waypoint List A. The waypoints list displays all waypoints stored in memory in a two-column format. Temporary waypoints created by the TracBack feature are assigned a ‘TXXX’ name and a footprint symbol. B. The waypoints list options page lets you delete individual waypoints or the entire waypoint list. -
Page 53: Selecting A Goto Graphically
If you are selecting a navaid or a new position as the GOTO destination, the GPSMAP 130 will automatically create or move the waypoint named ‘MAP’ at the navaid or map position. - Page 54 SECTION GOTO/MOB GOTO Options A. The GOTO options page lets you start a TracBack route, select a destination from the nearest list, select a route to activate, or cancel the current GOTO destination. B. The nearest waypoints list limits the list to pro- vide quick access to nearby anchorages, facilities, etc.
-
Page 55: Tracback Navigation
2. Select the ‘Cancel GOTO’ option and press TracBack Navigation The third method of navigating to a destination is by using the GPSMAP 130’ s TracBack feature. The TracBack function allows you to retrace your path using the track log automatically stored in the receiver’ s memory, which will eliminate the need to store waypoints along the way. - Page 56 2. Highlight the ‘Start TracBack?’ option and press Once a TracBack has been activated, the GPSMAP 130 will take the track log currently stored in memory and divide it into segments called ‘legs’. Up to 30 temporary waypoints (e.g. T001) will be created to mark the most significant fea- tures of the track log in order to duplicate your exact path as closely as possible.
-
Page 57: Section 8: Routes
(numbered 1-20), with up to 30 waypoints each. Routes can be created and modi- fied right from the map page, allowing you to see each route graphically on-screen as you create, review, modify or navigate the route. All of the GPSMAP 130’ s route functions are accessed through the main menu. - Page 58 ROUTES SECTION Reviewing & Editing Routes Graphically A. To move a route waypoint, select the ‘Move?’ option and press EDIT/ENTER. B. Move the arrow cursor to the new waypoint posi- tion and press EDIT/ENTER to confirm. Once a route has been created graphically (and the Q key has been pressed to finish), the map display will automatically enter the route review mode.
- Page 59 The GPSMAP 130’ s route edit mode also allows you to insert a new route way- point in any route leg using the map cursor. To insert a new waypoint between two existing route waypoints: 1. Use the cursor to select the leg you want to insert the new waypoint in (the route line will change to a dotted line when the leg is selected) and press 2.
- Page 60 ROUTES SECTION Editing Routes Route Editing Options A. To remove a route waypoint, highlight the way- point on the map, press EDIT/ENTER, and select the remove option from the pop-up window. B. The route edit options page lets you activate, invert or deactivate the route you are editing.
- Page 61 Route List Page The GPSMAP 130’ s route list page displays all the routes currently stored in memory in numerical order, with the route number and comment displayed. Route 00 is always reserved for the TracBack route, while routes 1-20 serve as storage routes (route 20 is stored as the GPSMAP tour route, which may be deleted at any time).
- Page 62 SECTION ROUTES Route List Options A. To delete all waypoints from a selected route, highlight the ‘Clear Route?’ option and press EDIT/ENTER. B. Once a route is cleared, all waypoints are removed from the route. They are still stored in memory, however.
- Page 63 Active Route Page Whenever you have activated a route in the GPSMAP 130 system, the active route page will appear in the main page sequence. The active route page shows each waypoint of the active route, with the waypoint name, desired track, cumula- tive distance and ETE or ETA for each waypoint from your present position.
-
Page 64: Section 8: Routes
ROUTES SECTION Active Route Page Options The ‘Change Data Fields?’ option lets you specify what information is displayed for each route way- point. Four data options are available: distance, desired track, and ETA or ETE to each route way- point. Active Route Page Options The following options are available from the active route page: •... -
Page 65: Section 9: Setup Menus
Track Log Submenu The GPSMAP’ s main menu page’s track submenu lets you specify whether or not to record a track plot (an electronic recording of your path) and define how it is recorded. It also provides an indicator of the track memory used and selects func- tions to clear the track memory and start a TracBack route. -
Page 66: Trip And Fuel Planning
Trip and Fuel Planning The GPSMAP 130’ s trip and fuel planning submenu lets you plan and review distance, fuel, and ETE/ETA information between any two waypoints; your pre- sent position and a stored waypoint; or any part of a stored route. Sunrise and sunset information is also provided. - Page 67 The route planning mode lets you calculate the same planning information for any route stored in memory, in leg or cumulative leg or route totals. To use the route planning mode: 1. Highlight the ‘Trip & Fuel Planning’ option from the main menu and press 2.
-
Page 68: Setup Submenus
• Operational Mode lets you select between normal operation and simulator mode. The GPSMAP 130’s system only pretends to track satellites in simulator mode, and should not be used for actual navigation. Waypoints and routes created in simulator mode are saved in memory and are available for use in normal mode. - Page 69 • Display Contrast provides a slide bar to adjust the LCD screen contrast in order to compensate for changes in temperature or lighting conditions. • Backlight Timeout provides an automatic shutoff for the GPSMAP 130’s screen backlighting. Six settings are available: No Timeout (the backlight will stay on until it is turned off), 15 seconds (default setting);...
- Page 70 SECTION SETUP MENUS Navigation Setup A. The GPSMAP 130 will also display position coor- dinates in eight grid formats. B. To enter a user magnetic variation, select the ‘User Mag Var’ option and enter a direction and value in the variation field.
-
Page 71: Setup Menus
If no datum informa- tion is indicated on the charts you are using, contact the chart manufacturer. allow the GPSMAP 130 to automatically monitor and adjust the response time for track and speed calculations. - Page 72 SECTION SETUP MENUS Timers & Alarms A. The timer field can be set to count down from a specified interval or provide a running count of elapsed time. B. The ‘On’ setting of the arrival alarm will cause the alarm to sound only for the final destination waypoint of a route at the distance specified.
- Page 73 Data Transfer is a proprietary interface that allows you to exchange data such as way- points, routes and track logs between GPSMAP units or a GARMIN PC kit. No In/NMEA Out provides navigation information to a compatible NMEA device such as an autopilot or radar.
-
Page 74: Section 9: Setup Menus
SECTION SETUP MENUS NMEA & DGPS Setup A. Select the desired format from the NMEA field. The baud rate will automatically be set to the appropriate speed. B. After entering a DGPS frequency, set the bit rate to the speed indicated on the USCG station chart. DGPS coverage, frequencies and bit rates are available from the Coast Guard’s automated FAX service (703-313-6932). - Page 75 3. Use your thumb to firmly push the cartridge into place (until the cartridge will not go any further into the unit). If your GPSMAP 130 is on, a confirmation tone will sound when the cartridge has been properly installed and accepted.
- Page 76 When you leave the area covered by the main map of a cartridge, the GPSMAP 130 will default back to using the built-in 64 nm database if it is avail- able at the current scale.
-
Page 77: Installation
Installing the GPSMAP 130 The GPSMAP 130 must be properly installed according to the following instruc- tions to get the best possible performance. The GPS antenna should be installed first, followed by the display unit. To complete the installation, you’ll need the appropriate fasteners for your installation, and a 1”... - Page 78 GPSMAP 130 may also be used with a Johnny Ray JR-400 swivel mount. 3. Fasten the bracket to the surface using the appropriate fastener. 4. Insert the GPSMAP 130 into the mounting bracket. The bracket is designed for a tight fit to provide additional support when swiveling the unit.
- Page 79 To flush mount the GPSMAP 130: 1. Cut a 4.15” W x 4.67” H (105.4 x 118.6mm) hole in panel. 2. Place GPSMAP 130 into hole from the front until its flange rests against the mounting surface. 3. From the back side of the panel, loosely attach the bracket so that the slot in the ratchet area points away from the mounting panel.
-
Page 80: Wiring Specifications
GPSMAP unit. Connecting the Power/Data Cable The power/data cable connects the GPSMAP 130 to a 10-40 volt DC system and provides interface capabilities for connecting external devices, including an external alarm. The color code in the diagram below indicates the appropriate harness connections. -
Page 81: Wiring & Specifications
10-40v DC Usage: 3 watts max. Specifications subject to change without notice. * With optional GARMIN GBR 21 Beacon Receiver Input. ** Subject to accuracy degradation to 100m 2DRMS under the U.S. DOD-imposed Selective Availability Program. SECTION APPENDIX Wiring &... -
Page 82: Messages
Memory Battery Power is Low—The internal battery that stores waypoints, routes and track plots needs to be replaced. Take your unit to an authorized GARMIN service center for installa- tion of a new battery. Need Altitude—Your GPSMAP system needs the altitude to maintain a position fix due to poor satellite coverage. -
Page 83: Messages
RTCM Input has Failed—DGPS data being received has been lost. You are no longer receiving the beacon signal. Searching the Sky—The GPSMAP 130 is searching the sky for almanac data. APPENDIX Stored Data was Lost—All waypoints, routes and almanac data has been lost due to internal battery failure. -
Page 84: Map Datums
SECTION APPENDIX Map Datums The GPSMAP’s built-in worldwide database includes chart coverage down to 64 nm (120 km) for the areas outlined above. Note that the GPSMAP database is only valid to 68º15’ of latitude. The maximum cursor latitude is 85º05’, and the maxi- mum waypoint latitude is 89º24.543 north or south. -
Page 85: Map Datums
Corrego Alegr Corrego Alegre- Brazil Kerguelen Islnd Djakarta Djakarta (Batavia)- Sumatra Kertau 1948 Island (Indonesia) L. C. 5 Astro Dos 1968 Dos 1968- Gizo Island Liberia 1964 (New Georgia Islands) Luzon Mindanao Easter Isld 67 Easter Island 1967 Luzon Philippine European 1950 European 1950- Austria, Belgium,... -
Page 86: Map Datums
SECTION APPENDIX Map Datums NAD27 Greenland North American 1927- Reunion Greenland (Hayes Rome 1940 Peninsula) RT 90 NAD27 Mexico N. American 1927- Mexico Santo (Dos) NAD27 San Salvadr North American 1927- San Sao Braz Salvador Island NAD83 North American 1983- Sapper Hill ‘43 Alaska, Canada, Central America, CONUS, Mexico... - Page 87 Almanac Data—The satellite constellation information (including location and health of SECTION satellites) that is transmitted to your receiver from every GPS satellite. Almanac data must APPENDIX be acquired before GPS navigation can begin. Glossary Bearing (BRG)—The compass direction from your position to a destination. Course Over Ground (COG)—Direction of movement relative to a ground position.
- Page 88 Universal Time Coordinated (UTC)— The time of day at the prime meridian (0º longi- tude) in Greenwich, England. SECTION APPENDIX Universal Transverse Mercator- (UTM)— A grid coordinate system that projects global Glossary sections onto a flat surface to measure position in specific zones. Velocity Made Good (VMG)—The speed you are travelling in the direction of the desti- nation.
- Page 89 The chart below gives an approximate UTC time offset for the various longitudinal zones. Check with local charts for more detailed information. If you are in daylight savings time, add one hour to the offset. Longitudinal Zone W180.0º to W172.5º W172.5º...
-
Page 90: Index
SECTION APPENDIX Index Date/Time Formats Alarm Setup Datums Anchor Drag Alarm Definitions Antenna Installation Desired Track (DTK) Arrival Alarm Depth Contours AutoLocate 1-2,18 Depth Units Dilution of Precision (DOP) DGPS Setup Backlight Level DGPS Status Beacon Receiver Setup 63-64 Bearing Bearing/Distance Calculation Entering Initial Position Boat Icon... - Page 91 Keypad Tone Operation Setup Keypad Usage viii Overzoom Mode Local Time Offset Packing List Page Sequence Physical Specifications Magnetic Variation Point-to-Point Planning Main Menu Position Page Man Overboard Function Position Format Map Calibration Velocity Filters Map Configuration 27-28 Power Off Map Datum List 74-76 Power On...
- Page 92 SECTION APPENDIX Index Satellite Acquisition 2,17-18 Satellite Sky View Waypoints Signal Strength Bars 2,17 Simulator Mode Simulator Tour 4-16 Status Bar Status Page 17-19 Steering Guidance 13,30-32 Sunrise/Sunset Calculation Table of Contents Time Offsets 58-59,79 Timer/Alarm Setup Tone Selection TracBack Function 44-46 Track Log Track Memory...
- Page 94 ® © 1996 GARMIN International 1200 E. 151st Street, Olathe, KS 66062 USA GARMIN (Europe) LTD Unit 5, The Quadrangle, Abbey Park Industrial Estate, Romsey SO51 9AQ UK Part Number 190-00106-00 Rev. B...
Need help?
Do you have a question about the GPSMAP 130 and is the answer not in the manual?
Questions and answers