Advertisement
Table of Contents
- 1 Installation Manual
- 2 Table of Contents
- 3 Safety Considerations
- 4 Before Installation
- 5 Selecting Installation Site
- 6 Preparations before Installation and Installation
- 7 Refrigerant Piping Work
- 8 Drain Piping Work
- 9 Installing the Duct
- 10 Electric Wiring Work
- 11 Wiring Example
- 12 Field Setting and Test Run
- Download this manual
SYSTEM Inverter Air Conditioners
MODELS
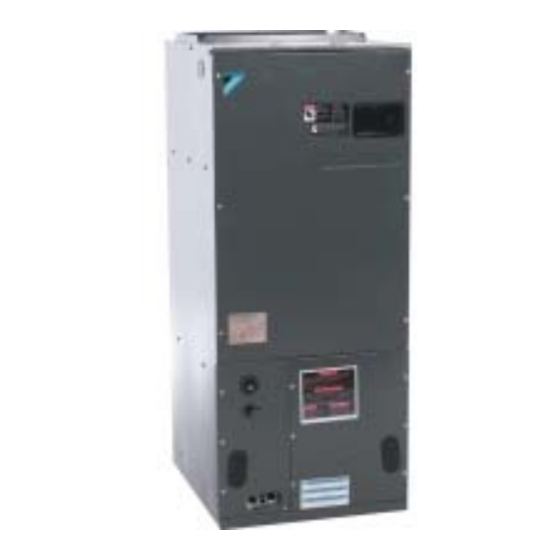
Air Handling Unit
FXTQ12PAVJU
FXTQ18PAVJU
FXTQ24PAVJU
FXTQ30PAVJU
FXTQ36PAVJU
FXTQ42PAVJU
FXTQ48PAVJU
FXTQ54PAVJU
Read these instructions carefully before installation.
Keep this manual in a handy place for future reference.
This manual should be left with the equipment owner.
Lire soigneusement ces instructions avant l'installation.
Conserver ce manuel à portée de main pour référence ultérieure.
Ce manuel doit être donné au propriétaire de l'équipement.
Lea cuidadosamente estas instrucciones antes de instalar.
Guarde este manual en un lugar a mano para leer en caso de tener alguna duda.
Este manual debe permanecer con el propietario del equipo.
INSTALLATION MANUAL
English
Français
Español
Advertisement
Table of Contents

Related Manuals for Daikin FXTQ12PAVJU


Summary of Contents for Daikin FXTQ12PAVJU
-
Page 1: Installation Manual
INSTALLATION MANUAL SYSTEM Inverter Air Conditioners MODELS Air Handling Unit FXTQ12PAVJU FXTQ18PAVJU English FXTQ24PAVJU FXTQ30PAVJU FXTQ36PAVJU Français FXTQ42PAVJU FXTQ48PAVJU FXTQ54PAVJU Español Read these instructions carefully before installation. Keep this manual in a handy place for future reference. This manual should be left with the equipment owner. -
Page 2: Table Of Contents
VRV SYSTEM Inverter Air Conditioners Installation manual CONTENTS • If refrigerant gas leaks during installation, ventilate the area immediately. Refrigerant gas may produce toxic 1. SAFETY CONSIDERATIONS ........... 1 gas if it comes in contact with fi re. Exposure to this gas 2. - Page 3 Plastic parts may deteriorate and fall off or result in than those specifi ed by Daikin are used, fi re or explo- water leakage. sion may occur.
-
Page 4: Before Installation
BEFORE INSTALLATION FOR THE FOLLOWING ITEMS, TAKE SPECIAL CARE DURING CONSTRUCTION AND CHECK AFTER INSTALLATION IS FINISHED. WARNING a. Items to be checked after completion of work • Entrust installation to the place of purchase or a qualifi ed serviceman. Improper installation could lead to leaks and, in If not properly done, what is Items to be checked Check... -
Page 5: Preparations Before Installation And Installation
• Where piping between indoor and outdoor units is WARNING possible within the allowable limit. (Refer to the installa- • When installing the unit horizontally, be sure to tilt the unit in tion manual for the outdoor unit.) the direction shown in Fig. 1-2. If the unit is tilted in any other •... - Page 6 Table 1 Check if the unit is horizontally level. Model CAUTION 12 · 18 type 15/16 15/16 • Make sure the unit is installed level using a level tube: four 24 · 30 · 36 · sides. (One thing to watch out for in particular is if the unit is 42 ·...
-
Page 7: Refrigerant Piping Work
REFRIGERANT PIPING WORK • Cut off the pipe end with a tube cutter. (Both liquid line and gas line) 〈Observe the requirements listed below for refrigerant piping sizes.〉 Cut with a tube cutter Liquid 12 · 18 type 1/4 in. 1/2 in. -
Page 8: Drain Piping Work
Install drain piping as described Fig. 6. CAUTION In case of vertical installation • Be sure to insulate any fi eld piping all the way to the piping connection inside the unit. Any exposed piping may cause condensation or burns if touched. •... -
Page 9: Installing The Duct
• To keep the piping from becoming clogged with dirt, • If the metal duct passes through a metal lath, wire lath, or avoid bends where possible and install so that traps can metal plate of a wooden structure, isolate the duct from the be cleaned. -
Page 10: Wiring Example
NOTES If the wiring gets too hot due to loose power-supply wir- ing, use the following precautions: If the wiring is in a place where people it can be easily • For wiring, use the designated power supply wiring and touched by people, install a ground-fault circuit interrupter connect fi... - Page 11 in Fig. 10. How to use insulation tube. • Then secure them in place with the included clamp • Use the insulation tube to cover the wiring. material (1) as shown in Fig. 10 to protect them from • Joint the insulation tube with the tape and cut off the tube external force from outside the unit.
- Page 12 • Outside the air conditioners, separate the low voltage wiring No. 3 system When including BS unit (remote controller and transmission wiring) and high voltage Power supply wiring (ground wire and power supply wiring) by at least 5 in. single phase Outdoor unit BS unit 60Hz 208/230V...
-
Page 13: Field Setting And Test Run
Wiring Method (See ‘‘8. ELECTRIC WIRING WORK’’) FIELD SETTING AND TEST RUN 〈Field settings may have to be performed using the re- Remove the electric component box cover. mote controller, depending on the type of installation.〉 Add remote controller 2 (SUB) to the terminal block for remote controller (P ¹... - Page 14 10-2 REMOTE CONTROL SETTING Insert the air fi lter as far as it can go. • Forced off and ON/OFF operation should be selected by selecting the SECOND CODE NO. as shown in Table 4. Table 4 FIRST SECOND External ON/OFF input Mode No.
- Page 15 Turn off power supply to all indoor and outdoor units. Install the circuit breaker mounting bracket removed in step (3) into the blower deck. Remove the front panel (upper) and the electric heater * The HKR-03 and HKR-06 have no circuit breaker mount- slot cover.
- Page 16 Pass the power supply wiring and the ground wire (11) Confi rm that there are no mistakes with the wiring, through the conduit (conduit should be fi eld sup- and install the front panel (upper). plied). The hole for running wires through should be sealed completely to prevent air from entering.
- Page 17 (12) -2 Electric heater operating mode setting WARNING 〈When electric heater is used in “Heat Pump lockout • If the unit is installed with an electric heater, install the mode”〉 optional product at a location where it is not exposed directly •...
- Page 18 〈When using a wireless remote controller〉 • A wireless remote controller address needs to be set when using a wireless remote controller. See the installation manual included with the wireless remote controller for details on how to make the settings. Perform a test run according to the outdoor unit’s installa- tion manual.
- Page 19 3P250363-2B EM09A034A (1011) FS...
Need help?
Do you have a question about the FXTQ12PAVJU and is the answer not in the manual?
Questions and answers