Table of Contents
Advertisement
Quick Links
- 1 Parts Diagram
- 2 Coffeemaker Features and Benefits
- 3 Clean Your Coffeemaker before Using the First Time
- 4 Setting the Clock and Delay Brew Time
- 5 Brewing Coffee Now
- 6 Brewing Coffee Later (Delay Brew)
- 7 Cleaning and Maintaining Your Coffeemaker
- 8 Troubleshooting Your Oster Coffeemaker
- Download this manual
Advertisement
Table of Contents

Related Manuals for Oster 7982-33


Summary of Contents for Oster 7982-33
- Page 1 OFFEEMAKERS Models 7982-33, 7983-33 User 7984-33, 7985-33 and 7988-33 Manual QUESTIONS? COMMENTS? IN CANADA: 1 800 667-8623 www.oster.com P.N. 114421...
-
Page 2: Important Safeguards
Return this appliance only to the nearest Authorized Service Center for examination, repair or adjustment. 7. The use of accessory attachments other than OSTER /MR. COFFEE brand ®... -
Page 3: Table Of Contents
Brewing Coffee Later (Delay Brew) ..... 14 Cleaning and Maintaining Your Coffeemaker ... . . 15 Troubleshooting Your Oster ®... -
Page 4: Introduction
Introduction Welcome and congratulations on the purchase of your new Oster coffeemak- ® er. Your new coffeemaker will wake up with you in the morning and provide you breaks and treats during your hectic daily activities. How you enjoy your Oster ®... -
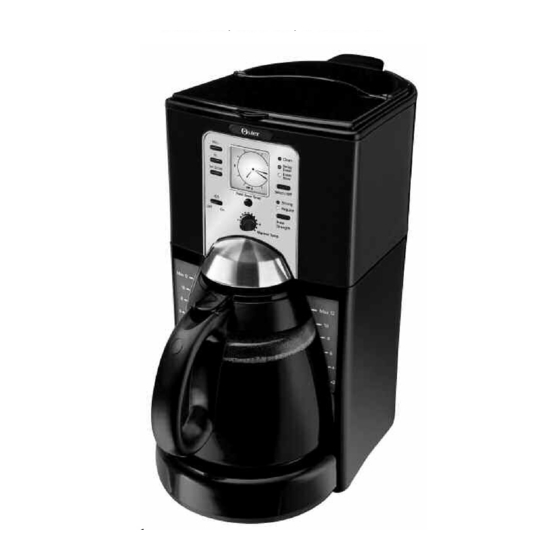
Page 5: Parts Diagram
parts Parts Diagram 1. Filter Basket Lid 2. Shower Head Cover 3. Water Reservoir 4. Pause ‘n Serve 5. Dual Water Windows 6. Warmer Plate 7. Decanter 8. Removable Filter Basket 9. Water Reservoir Pour Through Lid 10. Shower Head... - Page 6 Control Panel, Switch Models (7982-33 and 7983-33) a. Brew Now Button (On/Off) b. On Indicator c. Brew Strength Button d. Brew Strength Indicators (Regular/Strong) Control Panel, Programmable Models (7984-33, 7985-33 and 7988-33) e. Clock Display / j. Select Button FRESH BREW ™...
-
Page 7: Coffeemaker Features And Benefits
Coffeemaker Features Your new Oster coffeemaker has the following features: ® • 12-cup Brewing Capacity Brew Basket with Removable Filter Insert – The filter basket insert lifts • out of the brew basket for fast and easy cleaning and filling. -
Page 8: Clean Your Coffeemaker Before Using The First Time
10 seconds after a power outage. Clean Your Coffeemaker Before Using the First Time Make sure your first cup of coffee is as good as can be by cleaning your Oster coffeemaker before its first use. Just follow these simple ®... -
Page 9: Setting The Clock And Delay Brew Time
setting up Setting Up Setting the Clock and Delay Brew Time On programmable models (7984-33, 7985-33, 7988-33 only) To Set the Clock: 1. Plug the power cord into a standard electrical outlet. The clock will flash on the control panel to indicate that the time has not been set yet. -
Page 10: Preparing For Use
setting up Preparing for Use Selecting and Measuring Ground Coffee For best results, use a level tablespoon for ground coffee measurement. Make sure you use medium grind coffee for a perfect brew. Suggested Coffee Measurement Chart To Brew Ground Coffee 12 Cups 9 tbsp. - Page 11 5. Fill the decanter with cold, fresh water to the desired capacity (1 cup equals 5 ounces) (Figure 6). For easy and accurate filling, the water mark- ings on the glass decanter and on the dual water windows show the amount of water needed to make the corresponding desired number of cups.
-
Page 12: Brewing Coffee Now
Brewing Coffee Now 1. After completing the steps in the “Adding Water and Coffee” section and with the glass decanter and the filter basket securely in place, turn the coffeemaker on. For Switch models, press “On” button and the on light will come on. For Programmable models: press the SELECT button once to turn the coffeemaker on. - Page 13 5. Make sure the decanter is empty before starting to brew coffee. 6. Be sure to turn your coffeemaker off when no longer using it. The FRESH BREW timer Feature (on 7984-33, 7985-33, ™ 7988-33 only) The FRESH BREW timer feature counts up ™...
-
Page 14: Brewing Coffee Later (Delay Brew)
Brewing Coffee Later (DELAY BREW on 7984-33, 7985-33, 7988-33 only) 1. You must first set the time for when you would like the coffeemaker to begin brewing your coffee as described in “Setting the Clock and the Delay Brew Timer” section. 2. -
Page 15: Cleaning And Maintaining Your Coffeemaker
Minerals (calcium/limestone) found in water will leave deposits in your coffeemaker and will affect it. It’s recommended that you regularly remove these deposits by using white household vinegar. For Switch Models (7982-33/7983-33): 1. Pour four cups (32 fluid ounces) of undiluted white household vinegar into the water reservoir. - Page 16 maintenance 11. Begin brewing and allow the full brew cycle to complete. 12. Repeat steps 8 through 11 one more time. Your coffeemaker is now clean and ready to brew the next pot of deli- cious, hot coffee! For Programmable models (7984-3, 7985-33, 7988-33): Follow steps 1-3 above.
- Page 17 maintenance Cleaning the decanter Hard water can leave a whitish stain on the decanter, and coffee may then turn this stain brown. To remove decanter stains: 1. Fill the decanter with a solution of equal parts water and vinegar and let the solution stand in the decanter for approximately 20 minutes.
-
Page 18: Troubleshooting Your Oster Coffeemaker
Troubleshooting your Oster Coffeemaker ® Your Oster ® Coffeemaker has been carefully designed to give you many ears of trouble-free service. In the unlikely event that your new cof- feemaker does not operate satisfactorily, please review the following potential problems and try the steps recommended BEFORE you call an Authorized Sunbeam Service Center. - Page 19 • The filter collapsed • Remove filter and replace Do you still have questions? You can call us toll-free at our Consumer Service Department at 1-800-667-8623 or you can visit us at www.oster.com...
-
Page 20: Service And Maintenance
service Service and Maintenance Replacement Parts • Decanters – You can usually purchase a replacement decanter from the store where you purchased your coffeemaker. If you are unable to find a replacement, please call 1-800-667-8623 in Canada or 1-800-672- 6333 in the U.S. Repairs If your coffeemaker requires service, do not return it to the store where you purchased it. -
Page 21: Notes
notes Notes... -
Page 22: Warranty Information
® © 2004 Sunbeam Products, Inc. Boca Raton FL 33431. All rights reserved. SUNBEAM ® and OSTER are registered trademarks and FRESH BREW™ is a trademark of Sunbeam Products, Inc. Imported and distributed by Sunbeam Corporation (Canada) Limited. Rev 16/4/04...
Need help?
Do you have a question about the 7982-33 and is the answer not in the manual?
Questions and answers