Chapters
Table of Contents

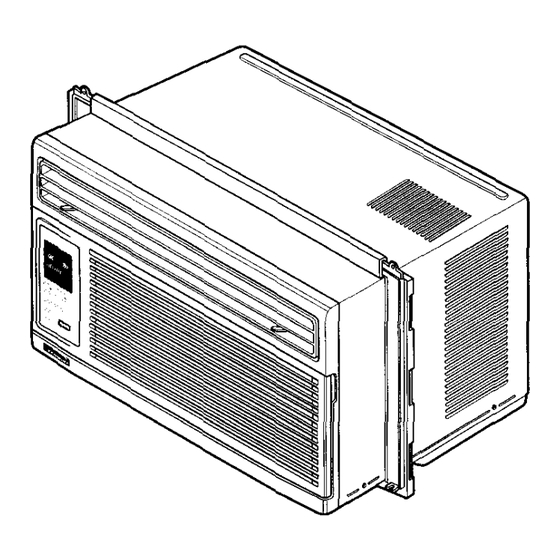
Related Manuals for Kenmore 580.720059200


Summary of Contents for Kenmore 580.720059200
- Page 1 Owner's Manual Manual del Propietario ® ROOM AIR CONDITIONER ACONDICIONADOR DE AIRE DE VENTANA Model, Modelo 580.72059:;_ Sears, Roebuck and Co., Hoffman Estates, IL 60179 U.S.A. www.sears.com...
-
Page 2: Table Of Contents
Features ........... TABLE OF CONTENTS ......2 Using the Air Conditioner ......9 WARRANTY ..........2 Display ........... SAFETY .............3 Remote Control ........11 Important Safety Instructions ...... How to insert BatteriesInto RemoteControl.-.-12 ELECTRICAL REQUIREMENTS ..4 Air Direction Adjustment ......12 INSTALLATION ........5 MAINTENANCE ........ -
Page 3: Safety
IMPORTANT SAFETY INSTRUCTIONS The safety instructions below will tell you how to use your room air conditioner to avoid harm to yourself or damage to your ROOM AIR CONDITIONER. _FOR YOUR SAFETY Do not store or usegasoline or other flammable vapors Avoid fire hazard or electric shock. -
Page 4: Electrical Requirements
OBSERVE ALL LOCAL CODES AND A, WARNING ORDINANCES. DO NOT, UNDER ANY CIRCUMSTANCES, REMOVETHEPOWERSUPPLYCORD GROUNDPRONG. ELECTRICAL GROUND IS REQUIRED ON THIS APPLIANCE. A 115-volt 60 Hz, AC only, 15A fused and Electrical Shock Hazard properly grounded electrical supply is required, Plug into a grounded 3 prong outlet. -
Page 5: Installation
INSTALLATION REQUIREMENTS INSTALLATION HARDWARE Your air conditioner will install into standard double hung windows with actual clear opening widths of 22 to 36 inches (558mm to 914mm) (FIG. 1). Lower sash must open sufficiently to allow a clear vertical opening of 14 inches (356rnm). Side louvers and the rear of the air conditioner must have clear air space to allow enough airflow through the condenser for heat removal. -
Page 6: Installation
INSTALLATION ATTACH L BRACKET Pick a location whichwillallowyou toblow the cold air into • Install the L brackets on the outer sill with the short the area you want. Windows used for installation must be side of the bracket against the back of the inner strong enoughto suppod the weight of the air conditioner. -
Page 7: Removal From Window
r"_ INSTALL THE AIR CONDITIONER IN THE WtNDOW • Carefullyliftthe air conditionerand slideit intothe open window.Make surethe bottomguideof the air conditionerdropsintothe notchesofthe L brackets. • When the air conditionerdropsintothe L brackets,the air conditioner w ill be centeredin windowopeningas shown in FIG. 7. 10H) Support Bracket (ITEMFIG. -
Page 8: Operation
HOW AND WHY ompressor Your room air conditioner provides the following The modem high efficiency functions to make hot weather living more compressor may have a high comfortable: pitched hum or pulsating • Cools and circulates room air. noise that cycles on and off. •... -
Page 9: Features
FEATURES USING THE AIR CONDITIONER reduce the risk of fire, electric shock, or injury to persons, read the important SAFETY instructions section before operating this appliance. To begin operating the air conditioner after installation, follow these steps: 1. Plug in the air conditioner. (To prevent electrical hazards, do not use an extension cord or an adapter plug.) 2. -
Page 10: Display
DISPLAY "_' REMOTE CONTROL SIGNAL RECEIVER TEMPERATURE SEI-rlNG • This button can automatically control the temperature of the room. The temperature can be set within a range of 60°F to 86°F by increments of I°F. -- MODE - Every time you pushthis button, it willshiftamong COOL, ENERGY SAVER and FAN. -
Page 11: Remote Control
REMOTE CONTROL Note: The Remote Controller will not operateproperlyif strong lightshineson the sensorwindowof theAir Conditioner or if there are obstaclesbetweenthe RemoteControland the AirConditioner. Everytimeyou pushbutton,you willhear a beep from the AirConditioner. POWER • To turnthe air conditioner ON, pushthe button.To turnthe air conditioner O FF, pushthe buttonagain. -
Page 12: How To Insert Batteriesinto Remotecontrol.-.-12
AIR DIRECTION ADJUSTMENT HOW TO INSERT BATTERIES INTO REMOTE CONTROL Using the Control Tabs, the air flow can be directed to the left, right, up, down and straight ahead, or 1. Remove the cover from the back of the any combination of these directions. remote controller. -
Page 13: Maintenance
AIR FILTER CLEANING HOW TO REMOVE THE FRONT GRILLE The Air Filter will become dirty as it removes dust from the inside air. It should be washed at least • Pull the inlet grille forward. every 2 weeks. If the Air Filter remains full of dust, •... -
Page 14: Troubleshooting
BEFORE CALLING FOR SERVICE Check the following listto be sure a service call is really necessary. A quick reference to this manual may help you avoid an unneeded service call. THE AIR CONDITIONER WILL NOT OPERATE Check if... Then... Wallplugdisconnected. Pushplugfirmlyintowalloutlet. -
Page 15: Espanol
Caracteristicas ........21 INDICE DE MATERIAS ......15 Uso del equipo de aire acondicionado ..-22 GARANTiA ..........Despliegue ..........Control remoto ........24 SEGURIDAD ..........Como a Baterias de Adicion en el Control Remoto ........25 Importantes instrucciones de seguridad..16 Ajuste para la direccion del aire .... -
Page 16: Seguridad
IMPORTANTES INSTRUCCIONES DE SEGURIDAD Las eiguientes instruccionee de eeguridad le indicardn c6mo usar su equipo de aire acondicionado de habitaci6n para evitar da_os para usted mismo y para su EQUIPO DE AIRE ACONDICIONADO, PeR SU SEGURIDAD Evite lospeligros de incendiosy No almacene ni use gasolina u otros vapores y Ifquidos descargaselL_tricas.No use un cable de extensi6nni un inflamables cerca de este o cualquier otto... -
Page 17: Requerimientos Electricos
RESPETE TODOS LOS C(_DIGOS Y ADVERTENCIA REGLAMENTOS. BAJO NINGUNA CIRCUNSTANCIA CORTE, QUITE O EVITE EL USO DE LA CONEXION A TIERRA DE ESTA CLAVIJA. ESTE APARATO NECESITA SER CONECTADO A TIERRA. Se requiere una alimentaci6n ei_ctrica CA, adecuadamente conectada a tierra con un Peligrode chequeel6ctdco fusible de 15 A, de 60 Hz y de 115 V. -
Page 18: Instalacl6N
INSTALACION PIEZAS DE MONTAJE REQUERIMI.ENTOS PARA INSTALACION Sueqoipode aireacondicionsdo se instalar_i en ventanas estandar d e doblepanelconanehosdeaberturalibre de 558mm a 914mm(22a 36 pulgadas). ( Figura1) El marcoinferiordebeabrirseIo suficiente parapermitiruna abertura verticallibrede 356mm(14pulgadas).Lasrejillas desviadoras lateralesy laparteposteriordel equipode aire acondicionado d ebentonerun espaciolibre de aireparapermitir suficiente flujode aireatravesdeleondensador p araasi eliminar el calor.La parteposteriorde la unidaddebequedaralaire Iibre, no dentrode un edificioo garaje. -
Page 19: Instalaci6N
INSTALACION L_ SOPORTE DE FIJACI(_N L • Instale los soportes L en la solera exteroa con el Escoja un lugar que le permitaIlevar el aire frio al _,rea lado carlo del soporte contra la parte trasera de la que desea. LaBventanas que ae usen para la instalaciOn solera interoa. -
Page 20: La Eliminaci6N De La Ventana
INSTALE EL ACONDICIONADOR DE AIRE EN LA VENTANA • Levantecuidadosamenteel acondicionadorde aire y deslicelo en la ventana abierta.AsegL]resede que lagufa inferior del acondicionadorde aire encaje en del soporle L • AI encajar en del soporte L, el acoodicionador de aire estara centrado en la abertura de la ventana, como se muestra en la Figura 7. -
Page 21: Operaci
COMO Y PaR QU¢: Compresor Su equipo de aire acondicionado de habitaciOn El modemo compresorde gran brinda las siguientes funciones para hacer que la eficiencia puede producir un ruido vida en climas c_lidos sea mas confortable: agudo de murmullo o un ruido de •... -
Page 22: Caracteristicas
USO DELEQUIPO DE AIRE CARACTERiSTICAS ACON DICIONADO _Para reducir el riesgo de incendio, descargas electrica o lesiones personales, lea las IMPORTANTES rNSTRUCCIONES SEGURIDAD antes de operar este aparato. Para eomenzar a utilizar el equipo de aire aeondieionado, siga estos pasos: 1. -
Page 23: Despliegue
DESPLIEGUE RECEPTOR DE SENAL AJUSTE DE LA TEMPERATURA • Estebot6npuedecontrolar l atemperatura delcuarto autom&ticamente. Latemperatura se puede ajustar de grade en grado,desde60°F hasta86°Faumentando de a 1°F. -- MODO - Cado vez que presioneeste bot6n,cambiar_, entre COOL(FRESCO),ENERGYSAVER(ECON(_MICO) y FAN(VENTILADOR). - AHORRADORDE ENERGIA: •... -
Page 24: Control Remoto
CONTROL REMOTO Nota: El dispositivo de control remoto no funcionar_ adecuadamente si la ventana sensora del acondicionador de aire es expuesta a luz fuerte, o si hay obst_culos entre el dispositivo de control remoto y el acondicionador de aim. Cuando opere el aire acondicionado con el control remoto, deber_ oir un pito. ENECNDIDO/APAGADO •... -
Page 25: Como A Baterias De Adicion En El Control Remoto
AJUSTE PARA LA DIRECCION COMO A BATERIAS DE ADICION DEL AIRE EN EL CONTROL REMOTO La aletas de control, permiten que la circutaci6n de 1. Quite la cubierta de la espalda del director aire pueda ser dirigida hacia la izquierda, derecha, remoto. -
Page 26: Mantenimiento
C(_MO SACAR LA REJILLA LIMPIEZA DEL FILTRO DEL AIRE FRONTAL El filtro del aire se ira ensuciando a medida que va • Tire de la rejilla de entrada hacia delante atrapando el polvo proveniente, del aire interim'. Es agarrando ambas lengOetas y tire del filtro del aire preciso laver el filtro del aire al menos cada dos hasta sacarlo. -
Page 27: Correcci6N De Fallas
ANTES DE LLAMAR PARA SERVIClO Cheque la siguiente lista para asegurarse si en realidad es necesado Ilamar para servicio. Una referencia rapida a este manual puede evitar una Ilamada para servicio innecesaria. EL EQUIPO DE AIRE ACONDIClONADO NO FUNClONA. Elenchufe nosetaconectado e nlatomade corriente de pared. Conecte elenchute flrmemente s e latornadecorrlente depared. - Page 28 Get it fixed, at your h0me or ou ! Your Home For repair- in your home-of all major brand appliances, lawn and garden equipment, or heating and cooling systems, no matter who made it, no matter who sold it! For the replacement parts, accessories owner's manuals that you need to do-it-yourself.
Need help?
Do you have a question about the 580.720059200 and is the answer not in the manual?
Questions and answers