Table of Contents
Advertisement
Operator's
Manual
CRRFr MRN
24" SNOW THROWER
Model No. 247.881731
CAUTION"
Before
using this
product,
read this manual
and
follow
all safety
rules and operating
instructions.
,, SAFETY
o ASSEMBLY
OPERATION
MAINTENANCE
PARTS LIST
o ESPANOL
Sears Brands
Management
Corporation,
Hoffman
Estates,
IL 60179, U.S.A.
Visit our website:
www.craftsman.com
FormI/o 769-081740
(June21,2013)
Advertisement
Table of Contents

Related Manuals for Craftsman 247.881731


Summary of Contents for Craftsman 247.881731
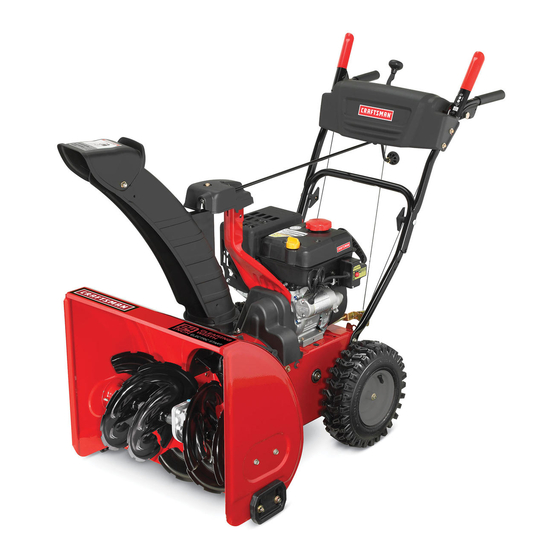
- Page 1 Operator's Manual CRRFr MRN 24" SNOW THROWER Model No. 247.881731 ,, SAFETY o ASSEMBLY OPERATION MAINTENANCE CAUTION" Before using this PARTS LIST product, read this manual o ESPANOL follow all safety rules and operating instructions. Sears Brands Management Corporation, Hoffman Estates, IL 60179, U.S.A.
- Page 2 Sears a uthorized service provider. With proofofpurchase, youwill receive a new chute freeofcharge. Y ou areresponsible for thelaborcostofinstallation andanycostincurred to verifythedefect. Forwarrantycoverage d etails to obtainrepair or replacement, visitthewebsite:www.craftsman.com This warrantycovers ONLY d efects in material a ndworkmanship. Warranty coverage d oesNOT include: •...
- Page 3 Thissymbolpointsout importantsafety instructionswhich, if not Thismachinewasbuilt to beoperatedaccordingto the safeoperation followed, could endangerthe personalsafetyand/or property of practicesin this manual.Aswith anytype of powerequipment, yourself and others.Readandfollow all instructions in this manual carelessness o r error on the part of the operatorcanresultin seriousinjury. beforeattempting to operatethis machine.Failureto complywith these Thismachineiscapableof amputating fingers, hands,toesandfeet and instructions m ay resultin personalinjury.Whenyou seethis symbol, HEED...
- Page 4 To r educe fire hazards, keep machine free o fgrass, leaves, or other debris Use onlyattachments andaccessories approved bythe manufacturer ( e.g. build-up. Clean up oil o r fuel spillage and r emove any f uel soaked debris. wheelweights,tire chains,cabs etc.). Never store the machine or fuel container...
- Page 5 Check fuelline,tank,cap,andfittings frequentlyfor cracks or leaks. R eplace if necessary. Donot crankenginewith sparkplug removed. According to the Consumer Products S afetyCommission ( CPSC) andthe U.S. E nvironmental Protection Agency (EPA), thisproducthasan Average Useful Life of seven (7)years, o r 60 hoursofoperation. A tthe endof the Average Useful Life havethe machine inspected annuallybyan authorized service dealerto ensure that all mechanical andsafetysystems areworkingproperly andnotwornexcessively.
- Page 6 SAFETY SYMBOLS Thispage depicts and describes safety symbols that may appear on this product. Read, understand, and follow all instructions on the machine before attempting to assemble and operate. READ THE OPERATOR'S MANUAL(S) Read, understand, and follow all instructions in the manual(s) before attempting to assemble operate WARNING--...
- Page 7 This page left intentionally blank.
-
Page 8: Assembly
NOTE: References to rightor left sideofthe snowthroweraredetermined from behindthe unit in theoperatingposition(standing directlybehindthe snow thrower,facingthe handlepanel). Removing FromCarton Cutthe corners of the cartonandlaythe sides flat on theground.Remove anddiscard all packinginserts. Movethe snowthrowerout of the carton. Makecertainthe cartonhasbeencompletely emptiedbefore discarding it. Assembly Place theshift leverinthe Forward-6position. - Page 9 Place chuteontochutebaseandsecure chutecontrolhead to chutesupport bracket w ith clevispinandcotter pinremoved earlier. S eeFigure 4. Finishsecuring chutecontrolheadto chutesupportbracket w ith wingnut andhexscrewremoved earlier. S eeFigure 5. Insertthe chutedirectional c ontrolinto thesupportbracket o nthe rearof the dashpanel.SeeFigure 6. Remove t he hairpinclipfrom the rearofthe chutecontrolhead. Insertchutedirectional c ontrolinto rearofthe chutecontrolhead.Secure the chutedirectional c ontrolto the chutecontrolhead with the hairpinclip removed earlier.
- Page 10 Set-Up ChuteClean-Out Tool Achuteclean-out t ool isfastened to the top ofthe augerhousing with amounting clip.SeeFigure 8.Thetool isdesigned to cleara chuteassembly o f iceandsnow. Thisitem isfastened witha cabletieat the factory.Cutthe cabletie before operatingthesnowthrower. ChuteClean-Out Tool Neveruseyour handsto clearaclogged chuteassembly,Shutoff engine and remainbehind handles until all movingpartshavestoppedbefore usingthe clean-outtool to clearthe chuteassembly.
- Page 11 The distance snow isthrown can beadjusted bychanging theangle oftheupper chute. To doso: Stopthe enginebyremoving the ignitionkeyandloosen the plasticwing knobfoundonthe left sideofthe chuteassembly. Pivotthe chuteupwardor downwardbefore retighteningthe wingknob. SeeFigure 10. Auger Control Priorto operatingyoursnowthrower, carefully readand follow all instructions b elow. Performall adjustmentsto verifyyoursnowthrower is operating safelyand properly.
-
Page 12: Snow Blower Overview
Your s nowthrowerhassixforward(F)speeds. P ositionone(1)is the slowest a nd plateon the carburetor a ndaidsinstartingthe engine. positionsix(6)isthe fastest. Reverse Yoursnowthrowerhastwo reverse(R)speeds. One(1)lstheslowerand two(2)ls thefaster. MeetsANSi S afetySta.dards Craftsman S nowThrowers c onformto thesafetystandard of the American National S tandards I nstitute(ANSI). - Page 13 Throttlecontrol DriveControl/Auger Control Lock DRIVE CONTROL Thethrottlecontrolislocatedonthe rearofthe engine.It regulates the speed ofthe engineandwill shutoffthe enginewhen moved into the STOP p osition. Depressing t he primerforces fueldirectlyintothe engine's carburetor t o aid incold-weather s tarting. RecoilStarter Handle Thishandleisusedto manuallystartthe engine. Thedrivecontrolislocatedonthe right handle.
-
Page 14: Clean-Out Tool
Clean-OutTool Donot overfill the fueltank.Afterrefueling,makesurethe tankcapisclosed properly andsecurely. Becareful n ot to spillfuelwhen refueling.Spilled fuel orfuel vapormay ignite.If anyfuel isspilled,makesurethe areaisdry before startingthe Neveruseyour handsto clearaclogged chuteassembly.Shutoff engine engine. and remainbehindhandles until all movingparts havestopped before usingthe clean-out t ool to clearthe chuteassembly. Avoidrepeatedor prolonged contactwith skinor breathingofvapor. -
Page 15: Stopping Engine
ToEngageDrive Movethrottle control t o FAST ( rabbit)_Jl_ _ position. 3 Move choke to the C HOKE I,'I pos t on co,d eng nestart),fengine s With the throttlecontrolinthe Fast ( rabbit)_ _1 position,moveshift lever into oneof the sixforward(F)positions or two reverse (R)positions. S elect a warm,place chokein RUN position. -
Page 16: Changing Engine Oil
MAINTENANCE SCHEDULE Followthe maintenance s chedule givenbelow.Thischartdescribes s ervice guidelines only.Use the Service Logcolumn to keeptrackofcompleted maintenance t asks.Tolocatethe nearest S ears Service C enter o r to schedule service, Beforeperforming any type of maintenance/service, d isengageall controls andstop the engine.Wait until all moving partshavecometo a complete simplycontactSears at 1-800-4-MY-HOME ®. -
Page 17: Checking Spark Plug
Refillwith the recommended o il andcheck the oil level.SeeRecommended OilUsage chart.Theengine's oil capacityis20ounces. (%-40 °-20 o 0o 20o 40o Oil Drain (oc) -30° -20° -10 ° 0° Plug DO NOT use nondetergentoil or 2-strokeengine oil. it couldshorten the engine'sservicelife. Reinstall the oil filler cap/dipstick securely. Figure15 Thoroughlywashyour hands with soapandwater assoonaspossibleafter SparkPlug... -
Page 18: Lubrication
Lubrication "I GearShaft Thegear(hex)shaftshouldbelubricated at leastonceaseason or after every25 hoursof operation. Topreventspillage, r emove all fuel fromtank byrunningengineuntil it stops. Carefully pivotthe snowthrowerupandforwardsothat it restsonthe auger housing. Remove t he lowerframecoverfrom the underside of the snowthrowerby removing the self-tapping screws whichsecure it. Applya lightcoatingof engineoil (or3-in-1oil) to the hexshaft.SeeFigure NOTE: Whenlubricating the hexshaft,becareful n ot to get anyoil onthe aluminum driveplateor rubberfrictionwheel.Doing sowill hinderthe snowthrower'sdrive... - Page 19 Adjustments Shift Cable If the full rangeof speeds (forwardandreverse) c annotbeachieved, referto the figureto the right andadjusttheshift cableasfollows: Place the shift leverinthe fastestforwardspeed position(F6). Loosen the hex nut onthe shift cableindexbracket. S eeFigure 21. Pivotthe bracket d ownwardtotake upslackinthe cable. Retighten the hexnut.
- Page 20 Auger Control Referto theAssembly sectionforinstructions on adjustingtheaugercontrol c able. Skid Shoes Referto theAssembly sectionforinstructions on adjustingtheskidshoes. 8eR Replacement Auger Belt Toremove andreplace yoursnowthrower'saugerbelt, proceed asfollows: Topreventspillage, r emove all fuel fromtank byrunningengineuntil it stops. Remove t he plasticbelt coveronthe front of the enginebyremoving thetwo self-tapping screws.
- Page 21 Loosen andremove the shoulder screw whichactsasabelt keeper. R efer t o Figure 27. Remove t he belt fromaroundthe augerpulley,andslipthe belt betweenthe supportbracket a ndtheaugerpulley.SeeFigure 28. NOTE: Engaging t he augercontrol w ill easeremoval a ndreinstallation of the belt. Reassemble augerbeltbyfollowing instructions inreverse order. NOTE: DoNOT forgetto reinstallthe shoulder s crewandreconnect t hespring to the frameafterinstallingareplacement augerbelt.
- Page 22 Carefully remove the hexnut andwasher whichsecures t he hexshaftto the snowthrowerframeandtightlytap the shaft'sendto dislodge the ban bearing fromthe rightsideofthe frame.SeeFigure 30. NOTE: Becareful n ot to damage the threads onthe shaft. Carefully positionthe hexshaftdownwardandto the [eft before carefuNy slidingthe frictionwheelassembly off the shaft.See Figure 31. NOTE: If you'rereplacing the frictionwheelassembly asawhole,discard the wornpartandslidethe newpartontothe hexshall FoNow the stepsabove in reverse orderto reassemble c omponents.
- Page 23 If the snowthrowerwill not beusedfor 30daysor longer, o r if it is theendof thesnowseason whenthe lastpossibility of snowisgone,the equipmentneeds to bestored properly.Follow storageinstructions belowto ensuretop performance f rom thesnowthrowerformanymoreyears. PreparingEngine PreparingSnowThrower Engines s toredover30daysneedto bedrained of fuel to prevent d eterioration and Whenstoringthe snowthrowerin anunventilated or metalstorage shed, gumfromforminginfuel system or on essential c arburetor p arts.If thegasoline in careshouldbetakento rustproof t he equipment.
- Page 24 Disconnect the sparkplug wireandgroundit againstthe engine to prevent unintended starting. Beforeperforming anytypeof maintenance/service, disengage all controls andstop the engine.Wait until aHmovingparts havecometo a completestop.Alwayswear safetyglasses duringoperation or while performing any adjustmentsor repairs. This section addresses minor service i ssues. Tolocate the nearest Sears Service Center o rto schedule service, simply contact Sears at 1-800-4-MY=HOMP. Engine fails to start Choke control not in CHOKE position.
- Page 25 Unit fails to discharge snow 1. Chute assembly clogged. 1. Stop engine immediately and disconnect spark plug wire. Clean chute assembly and inside of auger housing with clean-out tool or a stick. 2. Foreign object lodged in auger. 2. Stop engine immediately and disconnect spark plug wire.
- Page 26 Craftsman Snow ThrowerModel 247.881731 o,/" _\\/ \\\\ _"/...
- Page 27 Craftsman SnowThrowerModel 247.881731 684-04265-4044 731-2635 Snow Removal Tool Mount Housing Assembly, Auger 24" 684-04107-0637 684-04057A-0637 Spiral Assembly, Impeller Assembly, 12" Dia. 684-04108-0637 710-0347 Hex Screw, 3/8-16, 1.75, Gr5 Spiral Assembly, 731-04870 710-0451 Spacer, 1.25 OD x .75 ID x 1.00 Bolt, Carriage, 5/16-18, .750 Grl...
- Page 28 CraftsmanSnowThrowerModel 247.881731...
- Page 29 Craftsman Snow ThrowerModel 247.881731 790-00341-0637 Bracket, Rod 631 -04133A Handle Assembly, Clutch Lock, LH 631-04134B 790-00313-0637 Shift Lever Handle Assembly, Clutch Lock, RH 684- 04111 B 710-04370 Screw, 1/4-20 x 3.00 Handle Ass'y, Engage, LH 710-0627 Screw, 5/16-24 x .750...
- Page 30 CraftsmanSnowThrowerModel247.881731...
-
Page 31: Parts List
Craftsman SnowThrowerModel 247.881731 738-04493 656-04055 Axle, .75 x 22" Disc Assembly, Friction Wheel 684-04153C 936-0329 Washer, Lock, 1/4 Friction Wheel Assembly, 5.50D 684-04154B-0637 710-0809 Hex Screw, 1/4-20, 1.25, Gr5 Support Bracket, Friction Wheel 710-0191 684- 04156A Hex Screw, 3/8-24, 1.25, Gr8... - Page 32 Craftsman EngineModel270-SUA ForSnowModel 247.881731 951-11282 Muffler Assembly 710-05001 Muffler Stud 951-14190 Muffler Stud Kit 951-11289 Muffler Gasket 712-04214 Nut- M8 710-04915 Bolt - M6 X 12 Zin 951-10642B Muffler Shroud...
- Page 33 Craftsman EngineModel270-SUAForSnowModel 247.881731 °0 951-10634 Shroud-Engine 712-04213 951-11284 Choke Knob 951-10757 Throttle Knob 951-10637 Switch-Ignition 731-05632 Ignition Key Switch 951-10640 Push Rod-Choke 951-10635 Air Filter Heating 710-04943 Bolt-M6 1X28M Spec...
- Page 34 Craftsman EngineModel270-SUA ForSnowModel 247.881731 131- Gasket Kit-Complete 132-Gasket Kit-External 133- CompleteEngine...
- Page 35 Craftsman EngineModel270-SUAForSnowModel 247.881731 951-12111 Piston Ring Set 951-11632 Piston Pin Snap Ring 951-12007 Piston 951-11633 Piston Pin 710-04915 Bolt- M6 X 12 Zin 951-11113 Shield - Air 951-11573 Connecting Rod Assembly 951-14053 Governor Shaft 736-04461 Washer 951-11902 Governor Seal 714-04078...
- Page 36 Craftsman EngineModel270-SUA ForSnowModel 247.881731 46 _46 U" -"45 131- GasketKit-Complete 132-GasketKit-External 133- CompleteEngine...
- Page 37 Craftsman EngineModel270-SUAForSnowModel 247.881731 ID - 710-04968 Flange Bolt M6 951-11054A Valve Cover 731-07059 Hose-Breather 726-04101 Clamp-Breather Hose 951-11565 Valve Cover Gasket 951-12000 Intake Valve Spring Retainer 951-11892 Rocker Arm Assembly 751-11124 Nut - Pivot Lockin 751-11123 Nut - Valve Adjust...
- Page 38 Craftsman EngineModel270-SUA ForSnowModel 247.881731 134- CarburetorKit- Deni 135- CarburetorKit- Huayi...
- Page 39 Craftsman EngineModel270-SUAForSnowModel 247.881731 II _ 710-04939 Stud-Carb 710-04910 Stud- M6X 105 951-11567 Gasket-Carb Insulator 951-11896 Carburetor Insulat 951-11569A Carburetor Gasket 951-10639A Primer 951-11824 Primer Bulb 951-14026A Carburetor Assembly - Huayi 951-14027A Carburetor Assembly - Deni 951-11897 Carburetor Gasket 951-11112 Bracket-...
- Page 40 Craftsman EngineModel270-SUA ForSnowModel 247.881731 951-10646 Ignition Coil 951-11110 Shield - Air Flow 710-04940 Bolt 710-04919 Bolt - Flange M6 951-12416 Flywheel 951-10934 Cooling 951-10911 Starter Cup 712-04209 Nut- M14 710-04915 Bolt- M6X 12 Zin 951-10663A Fan Cover Complete 736-04455 Flat Washer-Recoil...
- Page 41 Craftsman EngineModel270-SUAForSnowModel 247.881731 ,114 951-11914 951-10758 Throttle Control Assembly Engine/Dipstick Cover 710-04905 Bolt 710-05103 Bolt-M6 X 12 951-I 1108 Shield - Governor 710-04915 Bolt- M6 X 12 Zin 951-I 1935 951-11913 Governor Spring Oil Fill Tube Assembly 951-10664 951-11381 Spring-Throttle...
- Page 42 Craftsman EngineModel270-SUA ForSnowModel 247.881731 1_127 710-04914 Bolt- Flange M6 951-11680 Flexible Clamp 951-11114 Bracket- Switch Housing Mount 712-05015 710-04965 Screw M4 X 55 710-04935 Screw - M4 X 60 710-05182 Bolt-M6 X 32 715-04088 Pin - Dowel 951-I0645A Electric Starter...
- Page 43 Craftsman SnowThrowerModel247.881731 777S32636 777X43688 100/.I, IIO-NV=IIO "lVflNVlAI S ,EIOIVEI3dO QV:IEI " g "S:IOV:IEII1S "13MEI9NO 9NIIVEI3dO N3HM NOIlflVO VUIX3]Sfl "SU3QN¥1S_8 IV 39UVHO$10 IO]UIOH]A3N 'S]IUflFNI $133r80 NMOHHIOlOAV 01 "_ "3NIHOV_ 9NIOIAU3S UO9NIOOO13Nfl 3UO_3B O3ddOIS3MH SIUVd9NIAOW 11VlllNfl S]IONVH ONIH38 NIV_3UONV '3NIgN3 dOIS'$83A31 HOLfllO 39VgN3SIO " _ "31flHO 399VHOSIO 901ONflO11001 lflO'NV310 3sn "_...
- Page 44 FEDERAL and/or CALIFORNIA EMISSION CONTROL W ARRANTY STATEMENT YOUR WARRANTY RIGHTS ANDOBLIGATIONS MTD Consumer Group Inc, the United States Environmental Protection Agency (EPA), and for those products certified for sale in the state of California, the California Air Resources Board (CARB) are pleased to explain the emission (evaporative and/or exhaust) control...
- Page 45 10. Add-on o rmodified parts t hatare not e xempted bythe AirResources Board m ay not b eused. The use ofany non-exempted add-on o r modified parts b ytheultimate purchaser willbegrounds fordisallowing awarranty claims. MTD Consumer Group I nc willnotbeliable t o warrant failures ofwarranted parts c aused bytheuse ofanon-exempted add-on o rmodified part.
- Page 46 Congratulations onmakingasmartpurchase. YournewCraftsman ®productisdesigned andmanufactured f or yearsof dependable operation. B utlikeall products, i t mayrequire repairfromtime to time.That'swhenhaving a Repair P rotection Agreement c ansave youmoneyandaggravation. Here'swhat the Repair ProtectionAgreement _ includes: 10,000 [] Expertservice byour professional repairspecialists [] Unlimitedservice and nocharge for partsandlaboronallcovered repairs [] Productreplacementupto $1500 if yourcovered productcan'tbefixed [] Discount o f 25%from regular priceof service andrelatedinstalled p artsnot covered bythe agreement;...
- Page 47 Your Home For troubleshooting, product manuals and expert advice: managernylife www.managemylife.com For repair - in your home - of all major brand appliances, lawn and garden equipment, or heating and cooling systems, no matter who made it, no matter who sold it! For the replacement parts, accessories owner's manuals that you need to do-it-yourself.
Need help?
Do you have a question about the 247.881731 and is the answer not in the manual?
Questions and answers