Table of Contents
Advertisement
Quick Links
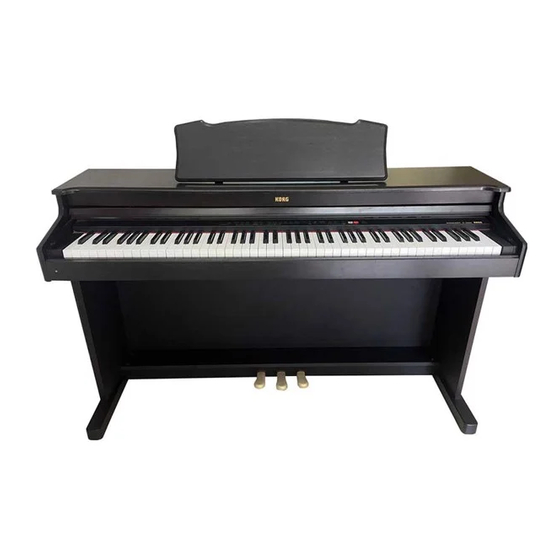
Thank you for purchasing the Korg Digital
Piano Concert C-4500. To ensure long,
trouble-free operation, please read this manual
carefully.
Contents
About Recorder data ----------------------3
Conventions in this manual ------------- 3
Main features------------------------------- 4
Switch functions -----------------------------6
Preparations for playing ------------------7
Listening to the demo songs ------------ 9
Playing the C-4500 ---------------------- 11
1. Selecting a sound ------------------- 11
2. Adding effects to the sound ------- 11
3. Using the pedals --------------------- 12
4. Playing with the metronome------- 13
5. Adjusting the keyboard touch ---- 14
6. Changing keys (Transpose) -------- 14
7. Adjusting the pitch ------------------ 15
8. Selecting a temperament ---------- 15
Owner's Manual
your performance ------------------------ 17
1. Recording your performance ----- 17
performance ------------------------- 18
3. Erasing recorded data ------------- 18
Connecting other devices --------------- 19
or audio system ---------------------- 19
2. Connecting MIDI equipment ------ 19
3. Connecting a computer ------------ 22
Troubleshooting --------------------------- 23
Specifications ------------------------------ 24
Assembling the ST-4500 ---------------- 25
E
2
Advertisement
Table of Contents

Subscribe to Our Youtube Channel
Related Manuals for Korg Concert C-4500


Summary of Contents for Korg Concert C-4500
-
Page 1: Table Of Contents
Conventions in this manual ------------- 3 2. Playing back your recorded Main features------------------------------- 4 performance ------------------------- 18 Parts of the C-4500 and their function ----- 4 3. Erasing recorded data ------------- 18 Switch functions -----------------------------6 Connecting other devices --------------- 19 Preparations for playing ------------------7 1. -
Page 2: Important Safety Instructions
INSTRUCTIONS PERTAINING TO The lightning flash with arrowhead symbol, within an equilateral triangle, is intended to alert the user to the A RISK OF FIRE, ELECTRIC presence of uninsulated “dangerous voltage” within the product’s enclosure that may be of sufficient magni- SHOCK, OR INJURY TO PERSONS tude to constitute a risk of electric shock to persons. -
Page 3: About Recorder Data
If the [TOUCH] switch indicator blinks when the power is turned on, the battery must be replaced. Please contact a nearby Korg dealer or a Korg service center. When you press the [TOUCH] switch, it will stop blinking. -
Page 4: Main Features
Pedal effects ( p.12) The C-4500 has the same three pedals as on an acoustic piano: damper, sostenuto, and soft. The damper pedal of the C-4500 also simulates the resonances that occur in the strings of an acoustic piano. The damper pedal... - Page 5 8 [Sound selector] switches C PHONES jack (located on the bottom panel) These switczhes are used to select sounds. You can also A set of stereo headphones can be connected to this play using two sounds simultaneously (Layer func- jack. ( p.7) tions).
-
Page 6: Switch Functions
Switch functions By pressing two switches simultaneously, you can access the following functions. [Sound selector] switches Program Control PC I/F frequency ( p.22) Local on/off Data dump change change ( p.20) 31.25kBPS ( p.21) 38.4kBPS on/off on/off 6 beats Metronome click ( p.13) 2 beats 3 beats 4 beats... -
Page 7: Preparations For Playing
4. Adjust the volume. Preparations for playing Use the [MASTER VOLUME] slider to control the volume that is output from the built-in speakers, Before you begin playing the headphone jack, and the rear panel [OUTPUT] jacks. 1. Plug in the power cable. Plug the power cable into an outlet. -
Page 9: Listening To The Demo Songs
Listening to the demo songs The C-4500 contains 18 demo songs. Press to select a song Listen to the demo songs to experience the C-4500's rich sounds and expressive potential. 2. Press the [DEMO] switch once again. 1. PIANO1 F.Chopin / Fantasy-Impromptu Op.66 All [Sound selector] switch indicators will blink in 2. -
Page 11: Playing The C-4500
2. Adding effects to the sound Playing the C-4500 Adjusting the brightness 1. Selecting a sound The brightness can be adjusted independently for each Press a [Sound selector] switch to select the sound. This setting is remembered for each sound until desired sound. -
Page 12: Using The Pedals
Adding spaciousness 3. Using the pedals You can apply modulation to the sound currently This instrument has three pedals: damper, sostenuto, selected by the [Sound selector] switches, to create a and soft. They can be used to make your performance sense of spaciousness and richness. -
Page 13: Playing With The Metronome
Adjusting the volume 4. Playing with the metronome 1. Press the [METRONOME] switch to start the If you wish to play at an accurate tempo, it is conve- metronome. nient to use the metronome. This metronome also sets the time signature and tempo used when you record a performance ( p.17). -
Page 14: Adjusting The Keyboard Touch
5. Adjusting the keyboard touch 6. Changing keys (Transpose) You can adjust the way in which the dynamics respond By changing the key (transposing), you can play a to your playing strength. This is called the Touch song using easier fingering that uses fewer black keys, Control function. -
Page 15: Adjusting The Pitch
The pitch can be adjusted in 0.5 Hz steps over a range to reproduce the original sound of such compositions, of 427.5–452.5 Hz (Hertz). the C-4500 provides Kirnberger and Werckmeister classical temperaments, in addition to the equal Raising the pitch... -
Page 17: Recording / Playing Back Your Performance
When the [START/STOP] switch is pressed, recording will begin after a two-measure count. The C-4500 contains a built-in recorder that lets you During recording, the [START/STOP] switch record and playback your performance as easily as indicator will blink in time with the time signature, using a tape recorder. -
Page 18: Playing Back Your Recorded Performance
[PART 1] or [PART 2] You can press the switch for a part that you do not switches will blink, and the C-4500 will be ready wish to hear, making its indicator blink green so to erase recorded data. -
Page 19: Connecting Other Devices
This section will explain how MIDI can be used in OUTPUT jacks (L/MONO, R) ways relating to the C-4500. If you would like to learn These jacks can be connected to the input jacks of an more about MIDI, please refer to one of the many... -
Page 20: Midi Channel
When you have finished making MIDI connections, Program change messages can be transmitted from the set the C-4500 and the connected MIDI device to the C-4500 to a connected MIDI device to select sounds, same MIDI channel. There are sixteen MIDI channels: or transmitted from a connected MIDI device to select 1–16. -
Page 21: Control Changes
Saving the musical data to the data filer Operations of the C-4500’s damper pedal etc. can be 1. Use a MIDI cable to connect the C-4500’s MIDI transmitted to control a connected external MIDI OUT to the MIDI IN of the data filer. -
Page 22: Connecting A Computer
Connecting an Apple Macintosh series PC (TO HOST) connector computer This connector allows the C-4500 to be controlled from a computer, or Make connections using the AG-002B connection kit the C-4500 to send MIDI messages to a computer. Use a PC I/F cable of a type appropriate for your computer to connect (connection cable, “Korg MIDI Driver”... -
Page 23: Troubleshooting
The pitch or tone of piano sounds is wrong Troubleshooting in certain key ranges • The piano sounds of the C-4500 are designed to simulate the sounds of a real piano as accurately as Power does not turn on possible. For this reason, it may sound as though •... -
Page 24: Specifications
Specifications Keyboard 88 note (A0–C8) Sounds 6 sounds: Piano 1, Piano 2, Electric piano, Harpsichord, Organ, Strings Tone generator system HI synthesis system Polyphony 64 notes Effects Reverb (3 levels), chorus (3 levels), brilliance (3 levels) Recorder 2 parts (maximum capacity 14,000 notes) Tempo, Metronome, Record, Start/stop, Pause Keyboard modes Single, Layer... -
Page 25: Assembling The St-4500
2. Attach the side panel (left) 1 and side panel Assembling the ST-4500 (right) 2 to the pedal box 3, and use four long screws 5 to fasten them. Caution Use two or more people to assemble the stand. When placing the piano on the stand, be careful not to pinch your hand. -
Page 26: Check After Assembly
Disassembly the pedal cable. If you need to packup the C-4500, reverse the order by which the piano was attached to the stand and the stand was assembled. After disassembly, save the screws and other parts so that no parts are lost. -
Page 27: Midi Implementation Chart
*3: Half-pedal output value (0, 38, 74, 127) Mode 1: OMNI ON, POLY Mode 2: OMNI ON, MONO : Yes X: No Mode 3: OMNI OFF, POLY Mode 4: OMNI OFF, MONO Consult your lacal Korg distributor for more imformation on MIDI Implemantation. - Page 28 These products are warranted by the KORG distributor only in each country. Any KORG product not sold with a warranty card or carrying a serial number disqualifies the product sold from the manufacturer’s/distributor’s warranty and liability. This requirement is for your own protection and safety.
Need help?
Do you have a question about the Concert C-4500 and is the answer not in the manual?
Questions and answers