Mesa/Boogie Dual Rectifier Road King Amp Owner's Manual
Hide thumbs
Also See for Dual Rectifier Road King Amp:
- Owner's manual (54 pages) ,
- Operating instructions manual (24 pages) ,
- Owner operating instructions (11 pages)
Table of Contents
Advertisement
Advertisement
Table of Contents

Related Manuals for Mesa/Boogie Dual Rectifier Road King Amp


Summary of Contents for Mesa/Boogie Dual Rectifier Road King Amp
- Page 1 OOGIE Owner's Manual...
- Page 2 Greetings from the Home of Tone Congratulations on your choice of the ROADKING as your Guitar amplifier and welcome to the MESA/Boogie family! As a discriminating player you probably know that you have purchased the most comprehensive instrument for amplifying Guitar that is available.
-
Page 3: Table Of Contents
Table of Contents Precautions Overview Getting Started Helpful Hints FRONT PANEL: MODES: Ch 1 & 2 Clean Ch 1 & 2 Fat Ch 1 Tweed Ch 2 Brit Ch 3 & 4 Raw Ch 3 & 4 Vintage Ch 3 & 4 Modern CONTROLS: GAIN TREBLE... - Page 4 PRECAUTIONS & WARNINGS Your MESA/Boogie Amplifier is a professional instrument. Please treat it with respect and operate it properly. USE COMMON SENSE AND ALWAYS OBSERVE THESE PRECAUTIONS: WARNING: EU: permission from the Supply Authority is needed before connection. WARNING: Vacuum tube amplifiers generate heat. To insure proper ventilation always make certain there is at least four inches (100mm) of space behind the rear of the amplifier cabinet.
-
Page 5: Overview
OVERVIEW: Congratulations on choosing the Mesa Dual Rectifier Road King as your amplifier and welcome to the Mesa/Boogie Family! By choosing this all-tube hand-built instrument you have taken a step into the future of guitar amplification, for as you can see at a glance, the Road King is more than just an amp. - Page 6 OVERVIEW: (Continued) 4 provide different levels of the same lower gain solo sound. Conversely, a Rock player might configure 1 & 2 for semi-clean and pushed rhythm sounds respectively and dedicate 3 & 4 to high gain crunch rhythm and lead sounds using different settings of the same modes.
-
Page 7: Getting Started
Getting Started: 2.) Install the 5U4 Rectifier tubes (if they are not already in place) by bending back the spring steel tube clamps just enough so that the base of the tube will have to barely push the clamps out of the way as they go in. Be sure to line up the guide with the slot in the socket, don’t force it…when it is lined up it will fit in the socket easily. - Page 8 Helpful Hints: (Continued) 8.) You will notice a substantial volume increase when switching from either the RAW or VINTAGE modes to the MODERN mode in Channels 3 & 4.When switching modes Always check your MASTER controls to avoid sudden volume increases. It is a good practice when setting up your channels, to get in the habit of zeroing out the Channel MASTER control each time you switch modes.
- Page 9 CHANNEL MODES: CHANNELS 1 & 2: CLEAN This is the lowest gain circuit of the Road Kings’ twelve modes and is optimized for producing balanced pristine clean sounds. This mode is duplicated in CHANNEL 2 as it is extremely useful for many different applications. For the best understanding of how to achieve a great sound in this mode, please refer back to the GAIN control section of this manual.
- Page 10 CHANNEL MODES: (Continued) CHANNEL 2: BRIT This mode appears in CHANNEL 2 only and, as the name implies, was inspired by the great sounding amps of the 50s’ & 60s’ that were built in Great Britain. These classic amplifiers were basically “upside down Leo circuits” but none the less had a signature sound all their own, due largely to the fact that they were powered by the pentode available to them at the time…the Euro style EL 34.
-
Page 11: Gain
CHANNEL MODES: (Continued) CHANNEL 3 & 4: MODERN Aggressive. This is the word that best describes the menacing power of the Road Kings’ most rebellious of all modes and appears in its original form in CHANNELS 3 & 4. A take no prisoners, crushing assault of top end cut and lightning fast response creates a sound of unparalleled aggression that has set a new standard for hard core sounds. -
Page 12: Treble
CONTROLS: (Continued) NOTE: Due to the Road Kings’ extreme gain potential, the highest regions of the GAIN control may possibly push the pre-amp tubes past what they can handle, producing microphonic squealing. While we screen and test the tubes your amplifier was shipped with and the tubes in your amp passed our rigourous test, we can’t predict how the tubes will respond over time exposed to extreme gain settings. -
Page 13: Mid
CONTROLS: (Continued) MID: (Continued) therefore less apparent resistance to the pick. As the MIDDLE control is increased, ( 11:30 - 1:30 ) the sound is rounded-out and filled-in with a focused mid attack appearing rather quickly. As you would guess, the feel starts to change - becoming more resistant. -
Page 14: Master
CONTROLS: (Continued) Higher settings unleash the mighty roar of your Road King and this can be great for sparkling clean sounds in Channels 1 & 2 and more aggressive crunch rhythm sounds in the high gain modes. Be sure to taunt the beast that lurks in CHANNEL 3 MODERN as the PRESENCE is truly amazing in this most agro mode. -
Page 15: Output Control
CONTROLS: (Continued) OUPUT CONTROL: (Continued) 1.) Connect your preamp signal to the EFFECTS RETURN jack of LOOP 2. 2.) Select LOOP ACTIVE on the Rear Panel 3.) Use the OUTPUT control as your power amp level control. 4.) Adjust the PRESENCE control of the Channel you are using to taste. 5.) Select a Channel and a power setting in that Channel. - Page 16 CONTROLS: (Continued) A.C. MAINS: (power on) This switch delivers the A.C. power to your new Road King. Make sure the unit is grounded (all three terminals of the A.C. power cord must be connected whenever possible to avoid injury to the user as well as to the unit) and that the proper voltage is present. Follow the cold start procedure described in the ON/ STANDBY section above when powering up your new Road King.
-
Page 17: Rear Panel
REAR PANEL CONTROLS & FEATURES Road King REAR VIEW : COMBO SPEAKERS OOGIE 2x6L6 2x6L6 2x6L6 2x6L6 NORMAL NORMAL NORMAL NORMAL WARNING To reduce risk of fire or WARNING To reduce risk of fire or electric HANDBUILT CH 2 CH 3 8 OHM 4 OHM 4 OHM... -
Page 18: Reverb
REAR PANEL CONTROLS & FEATURES (Continued) SPEAKER OUTPUTS: (Continued) NOTE: Do not use the SPKR A + B selection when two 8 Ohm cabinets are each connected to the two 4 Ohm OUTPUTS of each Speaker Output Bank. A 2 Ohm load puts an excessive strain on the power tubes causing them to wear unusually fast. - Page 19 REAR PANEL CONTROLS & FEATURES (Continued) PROGRESSIVE LINKAGE: (Continued) are laid out in a logical left to right array with the lowest wattage settings to the left and the most powerful RMS ratings to the right. On the Front Panel you will find the valuable PROGRESSIVE LINKAGE LED status indica- tors, which keep you informed of your current power status at all times…even from across the stage.
- Page 20 REAR PANEL CONTROLS & FEATURES (Continued) SELECTING POWER TUBES: (Continued) 2xEL34: is similar in output to the 2 x 6L6 duo but oddly enough can at times seem more powerful to the ear and has a very different character. The emphasis here is on top end and a more urgent stripped attitude. While this setup works for both low and high gain sounds, the additional top end accentuation combined with a drier low end makes clean sounds a bit more challenging to dial.
- Page 21 REAR PANEL CONTROLS & FEATURES (Continued) PENTODE: (Continued) progressively louder as you add output tubes. Because of this, the PENTODE position would be best for demonstrating the Progressive Linkage feature. PENTODE is the choice for loud clean playing in Channels 1 & 2 where maximum headroom is needed along with a bright clear attack.
- Page 22 REAR PANEL CONTROLS & FEATURES (Continued) 2xEL34: (Continued) Because the Seimens tubes are no longer available in quantity, we have shipped your amplifier with the best sounding EL34 currently available. This EL34 is made in Russia and has very similar characteristics to that of the Seimens and actually has slightly more output.
- Page 23 REAR PANEL CONTROLS & FEATURES (Continued) EL 34 EL 34 6L6 GC 6L6 GC 6L6 GC 6L6 GC HEAD VERSION STR 430 STR 430 STR 430 STR 430 2 x EL 34 and 4 x 6L6 (partial rear chassis view) LOOP 2 LOOP 1 REV ERB...
- Page 24 REAR PANEL CONTROLS & FEATURES (Continued) 6L6 GC 6L6 GC EL 34 EL 34 6L6 GC 6L6 GC STR 430 STR 430 STR 430 STR 430 HEAD VERSION 4 x 6L6 (partial rear chassis view) LOOP 2 LOOP 1 REV ERB SOLO EXT TRIGGERS RETURN 2...
-
Page 25: Rectifier Select With Tube-Tracking
REAR PANEL CONTROLS & FEATURES (Continued) EL 34 EL 34 6L6 GC 6L6 GC 6L6 GC 6L6 GC HEAD VERSION STR 430 STR 430 STR 430 STR 430 2 x EL 34 and 4 x 6L6 (partial rear chassis view) LOOP 2 LOOP 1 REV ERB... -
Page 26: Rectifier Select With Tube-Tracking
REAR PANEL CONTROLS & FEATURES (Continued) RECTIFIER SELECT with TUBE-TRACKING: (Continued) of rectification to put out its full power potential. And beyond that, each channel would have to be able to have these two interrelated circuits pre-assigned specifically and independently! This led to the concept of RECTIFIER TUBE-TRACKING. - Page 27 REAR PANEL CONTROLS & FEATURES (Continued) LOOP 2 MIX: This rotary control determines the dry/wet ratio of the Parallel Effects Loop in each of the 4 Channels. Remember that the SERIES (LOOP 1) Loop dry/wet ratio must be controlled at the processor that is inserted into its SEND & RETURN jacks. LOOP 1 has a predetermined level of RETURN signal strength at the Return stage of the amplifier, which is critical to overall NORMAL 2x6L6...
- Page 28 REAR PANEL CONTROLS & FEATURES (Continued) EFFECT LOOPS: (Continued) Please try to keep in mind that this is a high performance amplifier and should be used in conjunction with outboard gear of equal quality. If you must use lesser processing, you will have to tolerate any degradation in sound quality and remember that turning up the gain of such a processor much at all will only cause feedback problems.
- Page 29 REAR PANEL CONTROLS & FEATURES (Continued) PATCHING EFFECTS: (Continued) 2.) Connect the processors’ OUTPUT (MONO) to the RETURN jack. 3.) Set the processors’ internal dry/wet mix to the desired level. NOTE: Remember that LOOP 1 RETURN feeds the LOOP 2 SEND, so if there are any sequence related processing issues, put the first thing here in LOOP 1.
-
Page 30: External Switching
REAR PANEL CONTROLS & FEATURES (Continued) PATCHING EFFECTS: (Continued) will increase the power section input sensitivity by an order of ten. Be warned, this will make the OUTPUT level control extremely sensitive and the amplifier will be LOUD! NOTE: See the section on OUTPUT in the CONTROLS section earlier in this manual for more information on using the Road King as power amp only. -
Page 31: Fuse
REAR PANEL CONTROLS & FEATURES (Continued) FUSE: This is the A.C.’s (Alternating Current) main fuse and provides protection from outside A .C. fluctuations as well as power tube failure damage. Should the FUSE blow, replace it with the same rating in a Slo-Blo type package. The domestic U.S. version requires a 4 amp Slo-Blo fuse. -
Page 32: Factory Sample Settings
FACTORY SAMPLE SETTINGS: CHANNEL 1 SETTING #1 Versa Clean 2x6L6 NORMAL CLEAN 2xEL34 4x CH 1 EL34 2xEL+ DIODE TWEED 4x6L6 GAIN TREBLE BASS PRESENCE MASTER CLEAN PROGRESSIVE LOOP 2 LINKAGE TUBE-TRACKING SPKR BRIT RECTO LOOP 1 LOOP 2 CH 1 CHANNEL 1 SETTING #2 Spank 2x6L6 NORMAL... - Page 33 FACTORY SAMPLE SETTINGS: CHANNEL 2 SETTING #1 Skinny Skank 2x6L6 NORMAL CLEAN 2xEL34 4x CH 2 EL34 2xEL+ DIODE TWEED 4x6L6 GAIN TREBLE BASS PRESENCE MASTER CLEAN PROGRESSIVE LOOP 2 LINKAGE TUBE-TRACKING RECTO SPKR LOOP 1 LOOP 2 CH 2 BRIT CHANNEL 2 SETTING #2 Rhythm Mix 2x6L6...
- Page 34 FACTORY SAMPLE SETTINGS: CHANNEL 3 SETTING #1 Purring Blues 2x6L6 NORMAL 2xEL34 4x VINTAGE EL34 2xEL+ DIODE MODERN 4x6L6 GAIN TREBLE BASS PRESENCE MASTER PROGRESSIVE LOOP 2 LINKAGE VINTAGE TUBE-TRACKING CH 3 RECTO SPKR LOOP 1 LOOP 2 MODERN CHANNEL 3 SETTING #2 Smooth Grind 2x6L6 NORMAL 2xEL34 4x...
-
Page 35: Factory Sample Settings
FACTORY SAMPLE SETTINGS: CHANNEL 4 SETTING #1 Atlantic Blues 2x6L6 NORMAL 2xEL34 4x VINTAGE EL34 2xEL+ DIODE MODERN 4x6L6 GAIN TREBLE BASS PRESENCE MASTER PROGRESSIVE LOOP 2 LINKAGE VINTAGE TUBE-TRACKING CH 4 SPKR RECTO LOOP 1 LOOP 2 MODERN CHANNEL 4 SETTING #2 Stripped Grind 2x6L6 NORMAL 2xEL34 4x... - Page 36 TUBE NOISE & MICROPHONICS: You may occasionally experience some form of tube noise or microphonics. Certainly no cause for alarm, this quirky behavior comes with the territory and the Tone. Much like changing a light bulb, you don’t need a technician to cure these types of minor user serviceable annoyances and in fact, you’ll be amazed at how easy it is to cure tube problems...by simply swapping out a pre-amp or power tube! First may we suggest that you set the amplifier up on something so that you can get to the tubes comfortably without having to bend...
- Page 37 DIAGNOSING PREAMP TUBE PROBLEMS: Because your amplifier is an all tube design, it is quite possible that you will at some point experience minor pre-amp tube noise. Rest assured - this is no cause for alarm and you can take care of the problem yourself in a matter of minutes by simply swapping tubes.
- Page 38 BIAS ADJUSTMENT: (part of a continuous series) BEAM- An Article written by Randall Smith that CONFINING ELECTRODE we thought you might find interesting. CATHODE GRID ..SCREEN ..
- Page 39 BIAS ADJUSTMENT: (Continued) grids. Voltage and current are NOT the same. Current is the AMOUNT of electricity, the “quan- tity” — and is measured in amperes. Voltage is the degree of electric charge — like the “pressure” to use the old water analogy. Let me illustrate how different voltage and current are: When you scrape your feet across a carpetted floor in dry, wintery conditions, your body can become charged with 50,000 to 100,000 volts of static electricity.
- Page 40 How much money and trouble that has saved MESA/Boogie players you couldn’t estimate. Our rigorously tested and hand selected tubes are available at your nearest MESA/Boogie Pro Center or from us directly. Nobody offers better price, quality or warranty than we do ... so why swerve? Next time we’ll talk about our part in developing the great Sylvania STR 415 type 6 6 and how we’re on the verge of seeing something...
- Page 41 MESA/Boogie amplifiers can handle 4 and 8 ohms effectively. Never run below 4 ohms in a tube amplifier unless you are absolutely certain that the system can handle it properly; this can cause damage to the Output transformer. A few amplifiers can handle 2 ohms effectively without damaging them ( for example the MESA’S Bass 400+ ).
-
Page 42: Speaker A Speaker B
SPEAKER IMPEDANCE MATCHING & HOOK-UP GUIDE: (Continued) PARALLEL: When wiring in parallel, the resistance of the speakers decreases. Two 8 ohm speakers wired in ( hooked-up ) Parallel results in a 4 ohm load. It’s easy to calculate the effect of a resistive load when all the speakers are all the same resistance. It is really not suggested to wire different resistive load values in Parallel ( 8 and 4, 16 and 8 etc. - Page 43 WIRING SCHEMES...Amplifier to Speaker Cabinets Partial back view of amplifier Partial back view of amplifier 8 OHM 4 OHM 4 OHM 8 OHM 4 OHM 4 OHM 8 Ohm Cabinet Partial back view of some Mesa amp 8 OHM 4 OHM 4 OHM 4 Ohm Cabinet 8 Ohm Cabinet...
- Page 44 WIRING SCHEMES...Amplifier to Speaker Cabinets Partial back view of amplifier Partial back view of amplifier 4 OHM 4 OHM 8 OHM 8 OHM 4 OHM 4 OHM 8 Ohm Cabinet 16 Ohm Cabinet 8 Ohm Cabinet 8 Ohm Cabinet SAFE MISMATCH CORRECT MATCH Partial back view of amplifier Partial back view of amplifier...
- Page 45 WIRING SCHEMES...Amplifier to Speaker Cabinets Partial back view of amplifier 16 Ohm 4 OHM 4 OHM 8 OHM SERIES BOX 8 Ohm 8 Ohm 8 Ohm Cabinet 8 Ohm Cabinet 8 Ohm Cabinet SAFE MISMATCH Partial back view of amp Partial back view of amplifier CORRECT MATCH 8 OHM...
- Page 46 WIRING SCHEMES...Amplifier to Speaker Cabinets Partial back view of amplifier 16 Ohm 4 OHM 4 OHM 8 OHM SERIES BOX 8 Ohm 8 Ohm 8 Ohm Cabinet 8 Ohm Cabinet 16 Ohm Cabinet SAFE MISMATCH Partial back view of amplifier 8 OHM 4 OHM 4 OHM...
- Page 47 ON TRIODES, PENTODES & IRISHMEN: With apologies to Friends and Relatives from the Emerald Isle - who will make their appearance soon enough - the humor which follows is dedicated to the memories of Spec McAuliff and Fae (Rafael) McNally, two of the True Greats. As their numerical references suggest, the terms Diode, Triode and Pentode indicate the number of elements within the vacuum tube i.e.
- Page 48 ON TRIODES, PENTODES & IRISHMENT: (Continued) Thus a diode tube - one with a cathode and an anode - is mostly used to rectify alternating current into direct current by passing it without restriction, but in one direction only. This also explains why closing time is stricly enforced at Irish pubs: During normal operation, the traffic flow is similarily unimpeded and uni-directional toward the bar and this process rectifies the work-day negativity.
- Page 49 PENTODES: (Continued) stopping them. The influence of the plate takes over and - being solid metal and of the highest positive attraction - it is at this final destination that the electrons congregate. Thus the proper cocktail waitress - visible through the louvers - is scantily clad so as to be all the more effective at reinforcing the attractive influence of her bar and by being located in between the door and the bar, she serves as bait to lure customers past the door’s negative influence.
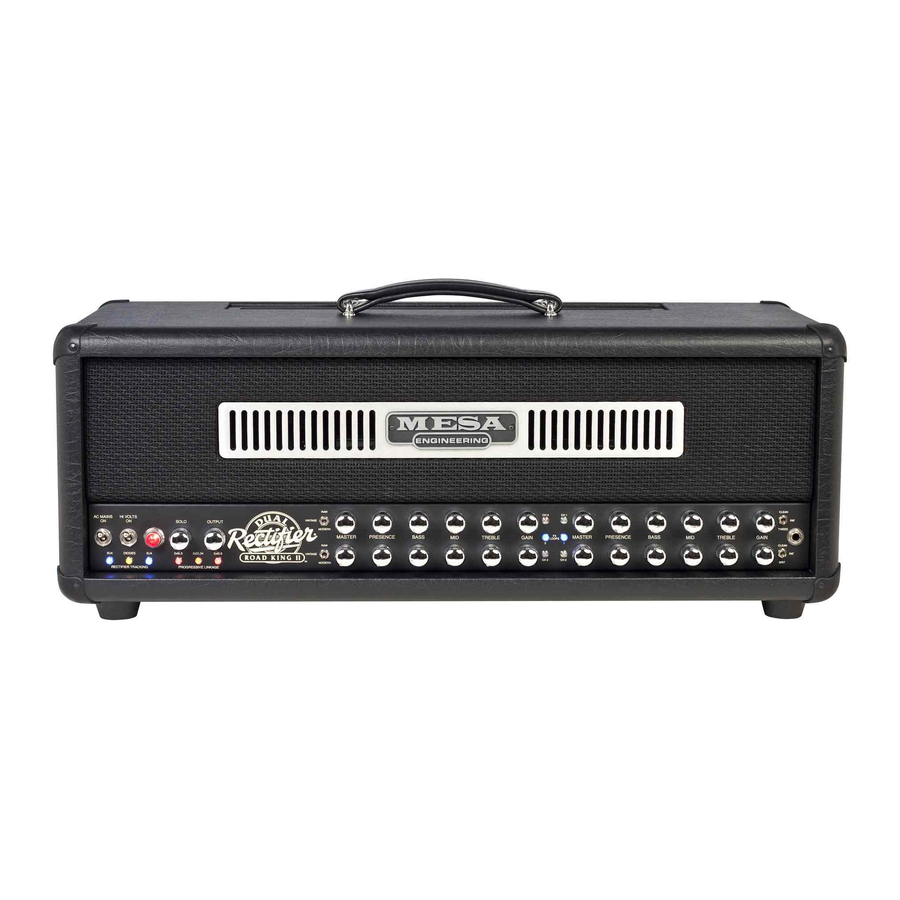
- Page 50 ROADKING FRONT PANEL: NOTE 2 GAIN POTS pt# 593794 ALL KNOBS ON FRONT PANEL CHROME / KNURLED pt# 408110 2 TREBLE POTS pt# 593148 593748 POT pt# 2 MID POTS pt# 592378 SWITCH POT pt# 593748 2 BASS POTS pt# 593148 607303 SWITCH pt# 607303...
- Page 51 OOGIE The Spirit of Art in Technology Thank you for trusting MESA/Boogie to be your amplifier company and we wish you many years of toneful enjoyment from this handbuilt all tube instrument.
- Page 52 The Spirit of Art in Technology (707) 778-6565 FAX NO. (707) 765-1503 1317 Ross Street Petaluma, CA 94954...
Need help?
Do you have a question about the Dual Rectifier Road King Amp and is the answer not in the manual?
Questions and answers