Table of Contents
Advertisement
Advertisement
Table of Contents

Related Manuals for Mesa/Boogie Stiletto


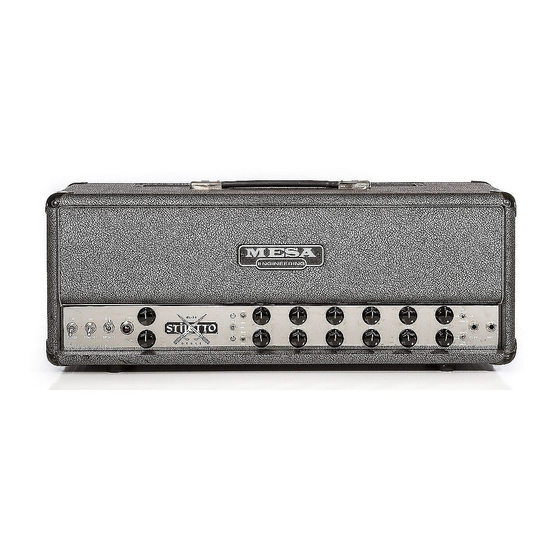
Summary of Contents for Mesa/Boogie Stiletto
- Page 1 OOGIE Owner's Manual...
- Page 2 Hello from the Tone Farm ...You, smart player and all around intuitive human, have put your trust in us to be your amplifier company. This is something we do not take lightly. By purchasing and choosing this unit to be a part of your musical voice, you have become part of the Mesa family...WELCOME! Our goal is to never let you down.
-
Page 3: Table Of Contents
Table of contents Precautions Overview & Instant Gratification Helpful Hints Instant Gratification THE MODES: Channel 1: Fat Clean / Tite Clean / Crunch Channel 2: Crunch / Tite Clean / Fluid Drive FRONT PANEL CONTROLS & SWITCHES: Gain, Treble / Mid / Bass Presence / Master Power Select: 100 watt / 50 watt Channel Select... - Page 4 PRECAUTIONS & WARNINGS Your MESA/Boogie Amplifier is a professional instrument. Please treat it with respect and operate it properly. USE COMMON SENSE AND ALWAYS OBSERVE THESE PRECAUTIONS: WARNING: EU: permission from the Supply Authority is needed before connection. WARNING: Vacuum tube amplifiers generate heat. To insure proper ventilation always make certain there is at least four inches (100mm) of space behind the rear of the amplifier cabinet.
-
Page 5: Overview & Instant Gratification
While the Stiletto is the first amplifier in the MESA Family that features exclusively the EL34 type power tube, it is no less endowed with the patented features and refinements than its MESA siblings utilizing 6L6 type pentodes for power production.Years of scrutiny and testing of the available ‘34‘s was incorporated into the long process of R&D to ensure reliable performance while we were extract-... - Page 6 All this preamp tone and flexibility is only half the story and magic though it is, the power section of the Stiletto plays an equal role in making what we call a high performance amplifier.
- Page 7 Now that we have a good idea of the features of your new Stiletto, let’s plug in and check out a quick demo setting to familiarize you with the basic operation of the modes.You will find an expanded group of possibilities in the rear of this manual under SAMPLE SETTINGS for your enjoyment at a later time.
-
Page 8: Helpful Hints
The MODES: Channel 1 As mentioned in the Overview, each of the Stiletto’s two channels contain three modes of opera- tion. These are laid out, in terms of their gain structure, such that as the mini toggle is switched down, the gain increases. The one exception is in Channel 1, when in TITE CLEAN (middle position) gain in the bottom end is reduced. - Page 9 However you wish to dedicate your Channels, you will likely find CRUNCH to be one of the most important and essential modes in your Stiletto. Now that we have reviewed the modes in Channel 1 and understand the voicings, let’s move down to Channel 2 and get to know the modes in your Stiletto dedicated to higher gain soloing. PAGE 5...
-
Page 10: Channel 2: Crunch / Tite Clean / Fluid Drive
Stilettos’ TITE GAIN is the ultimate blade in the world of modern hyper-gain rock. FLUID-DRIVE™ oozes with smoldering, layered harmonics and represents the highest gain mode in your new Stiletto. Its namesake pays tribute to the type of playing that it shines for, and like TITE GAIN, it will have you breaking all tempo barriers in no time with its consistent string resistance and easy-to-play-feel across the entire range of the instrument. -
Page 11: Gain, Treble / Mid / Bass
(Continued) While you have most likely taken your new Stiletto for an inspiring spin around the world of high performance EL34 tone, we encour- age you to read through the Control section to learn how these interactive controls can shape your dream tone. Many hours were spent making sure they are powerful, musical and that they will deliver all the shaping power you’ll ever need to craft a signature... - Page 12 The MID Control is responsible for the blend of midrange frequencies in the mix and though its effect is not as dramatic as that of the TREBLE Control, it plays an integral part in achieving any sound in your Stiletto. It is capable of changing the feel dramatically as it blends in a group of frequencies that tend to soften or stiffen the way a sound feels to play.
-
Page 13: Presence / Master
Ohm SPEAKER OUTPUT. This selection creates a “more proper” impedance match and imparts a slightly brighter, snappier voice. This is not critical to performance as the Stiletto is not overly sensitive to impedance, but you may prefer this EQ characteristic. -
Page 14: Channel Select
This 3 position switch - located in the centerline of the chassis between the two channels - is responsible for selecting the desired channel when the Stiletto Footswitch is not being used. This comes in handy in the studio where you may wish to use the head in the control room with the cabinet isolated and select the channels for overdub parts, or any time the footswitch is not needed for performance. -
Page 15: Solo Control
POWER: This switch delivers the A.C. power to the Stiletto. Make sure the unit is grounded (all three terminals of the A.C. power cord must be connected whenever possible to avoid injury to the user as well as to the unit) and that the proper voltage is present. -
Page 16: Slave
In this scenario, the Stiletto would be a “dry” master head (tone generator) and this sound would then be fed via the SLAVE output - to a rack of processing, then that signal would likely be split into stereo and fed to one or more stereo amplifiers for amplifica- tion of the separate “wet”... -
Page 17: Channel Solo: External Switch Ports
Channel MASTER Controls become your final output level controls. This HARD BYPASS feature allows you to use your Stiletto in all its’ raw glory in the studio where processing will be added later on a separate channel and you need every ounce of pure, unfiltered, Tone for a magical performance. -
Page 18: Fx Loop:
You will find the FX LOOP a welcome feature for all rack type processing and when good quality cables are used and kept to a length of 3 feet or less, you will notice very little if any degradation in the sound of your Stiletto. -
Page 19: Ac Receptacle
Should the Fuse blow, replace it with the same rating in a Slo-Blo type package. The domestic U.S. version requires a 4 amp ( Stiletto Trident ) Slo-Blo fuse. A power tube short or failure is often the cause of a blown fuse...Follow the cold start procedure mentioned in the ON/STANDBY switch section and watch the power tubes as you flip the STANDBY to the ON position. -
Page 20: Factory Sample Setting
FACTORY SAMPLE SETTINGS Ch 2 Ch 1 SAMPLE #1. Skinny Clean / Grinding Tight Crunch Clean Diodes Diodes 100 W CLEAN SOLO BOLD TITE CLEAN CH 1 50 W CRUNCH FTSW MASTER PRESENCE BASS TREBLE GAIN CRUNCH FT.SW INPUT 100 W CH 2 TITE GAIN... -
Page 21: Factory Sample Setting
FACTORY SAMPLE SETTINGS Ch 1 Ch 2 SAMPLE #6 Spankin Clean / Howling Lead Tube Rectifier Diodes 100 W CLEAN SOLO BOLD TITE CLEAN CH 1 50 W CRUNCH FTSW MASTER PRESENCE BASS TREBLE GAIN CRUNCH FT.SW INPUT 100 W CH 2 TITE GAIN... -
Page 22: Personal Settings Page
PERSONAL SETTINGS PAGE 100 W CLEAN SOLO BOLD TITE CLEAN CH 1 50 W CRUNCH FTSW GAIN TREBLE BASS MASTER PRESENCE CRUNCH FT.SW INPUT 100 W CH 2 TITE GAIN OUTPUT POWER STANDBY SPONGY FLUID 50 W DRIVE 100 W CLEAN SOLO BOLD... -
Page 23: Tube Noise & Microphonics
The power tubes should be all but quiet when they are tapped. If crackling or hissing changes with the tapping, you have probably found the problem.To confirm a noisy power tube, merely put the Stiletto on Standby, remove it from its socket and turn it back on. It will cause no damage to run the Stiletto briefly with one power tube missing.You may notice a slight background hum, however, as... -
Page 24: Diagnosing Pre Amp Tube Failure
DIAGNOSING PRE-AMP TUBE PROBLEMS: Because your amplifier is an all tube design, it is quite possible that you will at some point experience minor pre-amp tube noise. Rest assured - this is no cause for alarm and you can take care of the problem yourself in a matter of minutes by simply swapping tubes. -
Page 25: Speaker Impedance Matching & Hook-Up Guide
MESA/Boogie amplifiers can handle 4 and 8 ohms effectively. Never run below 4 ohms in a tube amplifier unless you are absolutely certain that the system can handle it properly; this can cause damage to the Output transformer. A few amplifiers can handle 2 ohms effectively without damaging them (for example the MESA’s Bass 400+). -
Page 26: Speaker A Speaker B
SPEAKER IMPEDANCE MATCHING & HOOK-UP GUIDE: (Continued) PARALLEL: When wiring in parallel, the resistance of the speakers decreases.Two 8 ohm speakers wired in (hooked-up) Parallel results in a 4 ohm load. It’s easy to calculate the effect of a resistive load when all the speakers are all the same resistance. It is really not suggested to wire different resistive load values in Parallel (8 and 4, 16 and 8 etc.) The formula for figuring the total impedance in Parallel is the multiplication of the two loads divided by the sum of the two loads - i.e. - Page 27 WIRING SCHEMES...Amplifier to Speaker Cabinets Partial back view of amplifier Partial back view of amplifier 8 OHM 4 OHM 4 OHM 8 OHM 4 OHM 4 OHM 8 Ohm Cabinet Partial back view of some Mesa amp 8 OHM 4 OHM 4 OHM 4 Ohm Cabinet 8 Ohm Cabinet...
- Page 28 WIRING SCHEMES...Amplifier to Speaker Cabinets Partial back view of amplifier Partial back view of amplifier 4 OHM 4 OHM 8 OHM 8 OHM 4 OHM 4 OHM 8 Ohm Cabinet 16 Ohm Cabinet 8 Ohm Cabinet 8 Ohm Cabinet SAFE MISMATCH CORRECT MATCH Partial back view of amplifier Partial back view of amplifier...
- Page 29 WIRING SCHEMES...Amplifier to Speaker Cabinets Partial back view of amplifier 16 Ohm 4 OHM 4 OHM 8 OHM SERIES BOX 8 Ohm 8 Ohm 8 Ohm Cabinet 8 Ohm Cabinet 8 Ohm Cabinet SAFE MISMATCH Partial back view of amp Partial back view of amplifier CORRECT MATCH 8 OHM...
- Page 30 WIRING SCHEMES...Amplifier to Speaker Cabinets Partial back view of amplifier 16 Ohm 4 OHM 4 OHM 8 OHM SERIES BOX 8 Ohm 8 Ohm 8 Ohm Cabinet 8 Ohm Cabinet 16 Ohm Cabinet SAFE MISMATCH Partial back view of amplifier 8 OHM 4 OHM 4 OHM...
-
Page 31: Bias Adjustment: A Feature Article By Randall Smith
BIAS ADJUSTMENT: (Part of a continuous series) BEAM- CONFINING An article written by Randall Smith that ELECTRODE CATHODE we thought you might find interesting. GRID ..SCREEN GRID .. - Page 32 BIAS ADJUSTMENT (Continued) Voltage and current are NOT the same. Current is the AMOUNT of electricity, the “quantity” — and is measured in amperes. Voltage is the degree of electric charge — like the “pressure” to use the old water analogy. Let me illustrate how different voltage and current are: When you scrape your feet across a carpetted floor in dry, wintery conditions, your body can become charged with 50,000 to 100,000 volts of static electricity and when you reach for the door knob, a spark jumps and you feel it! The voltage is super high but the current...
- Page 33 How much money and trouble that has saved MESA/Boogie players you couldn’t estimate. Our rigorously tested and hand selected tubes are available at your nearest MESA/Boogie Pro Center or from us directly. Nobody offers better price, quality or warranty than we do ... so why swerve? Next time we’ll talk about our part in developing the great Sylvania STR 415 type 6 6 and how we’re on the verge of seeing something...
-
Page 34: Triodes, Pentodes & Irishmen: A Feature Article By Randall Smith
ON TRIODES, PENTODES & IRISHMEN: A look into the inner workings of the Vacumm Tube With apologies to Friends and Relatives from the Emerald Isle - who will make their appearance soon enough - the humor which follows is dedicated to the memories of Spec McAuliff and Fae (Rafael) McNally, two of the True Greats. As their numerical references suggest, the terms Diode, Triode and Pentode indicate the number of elements within the vacuum tube i.e. - Page 35 ON TRIODES, PENTODES & IRISHMEN: ( Continued ) Thus a diode tube - one with a cathode and an anode - is mostly used to rectify alternating current into direct current by passing it without restriction, but in one direction only.This also explains why closing time is stricly enforced at Irish pubs: During normal opera- tion, the traffic flow is similarily unimpeded and uni-directional toward the bar and this process rectifies the work-day negativity.
- Page 36 ON TRIODES, PENTODES & IRISHMEN: ( Continued ) PENTODES: (Continued) Thus the proper cocktail waitress - visible through the louvers - is scantily clad so as to be all the more effective at reinforcing the attractive influence of her bar and by being located in between the door and the bar, she serves as bait to lure customers past the door’s negative influence.
-
Page 37: Tube Task Charts
PAGE 33... - Page 38 PAGE 34...
-
Page 39: Part Sheet
PAGE 35... - Page 41 OOGIE The Spirit of Art in Technology Thank you for trusting MESA/Boogie to be your amplifier company and we wish you many years of toneful enjoyment from this handbuilt all tube instrument.
- Page 42 The Spirit of Art in Technology (707) 778-6565 FAX NO. (707) 765-1503 1317 Ross Street Petaluma, CA 94954...
Need help?
Do you have a question about the Stiletto and is the answer not in the manual?
Questions and answers