Oki B2200 User Manual
Hide thumbs
Also See for B2200:
- Maintenance manual (100 pages) ,
- User manual (40 pages) ,
- Safety & warranty (36 pages)
Table of Contents
Advertisement
Quick Links
Advertisement
Table of Contents

Related Manuals for Oki B2200


Summary of Contents for Oki B2200
- Page 1 B2200/B2400 User’s Guide B2200/B2400/B2400n...
-
Page 2: Ontents Preface
Every effort has been made to ensure that the information in this document is complete, accurate, and up-to-date. Oki assumes no responsibility for the results of errors beyond its control. Oki also cannot guarantee that changes in software and equipment made by other manufacturers and referred to in this guide will not affect the applicability of the information in it. -
Page 3: Emergency First Aid
Oki Data Corporation, 4-11-22 Shibaura, Minato-ku, Tokyo 108-8551, Japan MPORTER TO THE AUTHORISED REPRESENTATIVE Oki Europe Limited (trading as OKI Printing Solutions) Central House Balfour Road Hounslow TW3 1HY United Kingdom For all sales, support and general enquiries contact your local distributor. -
Page 4: Table Of Contents
Index........33 Oki contact details ......34... -
Page 5: Notes, Cautions And Warnings
Oki Printing Solutions toner cartridges. These can be identified by the Oki Printing Solutions trademark. Any other toner cartridge may not operate at all, even if it is described as "compatible", and if it does work, your product's performance and print quality may be degraded. -
Page 6: Introduction > 6
NTRODUCTION B2200/B2400 desktop printers offer a crisp, high quality, fast printing solution in a lightweight and compact unit that can be conveniently located right at the point of need. This User’s Guide gives day-to-day operating guidance and simple maintenance procedures, and is applicable to all models in the range: >... -
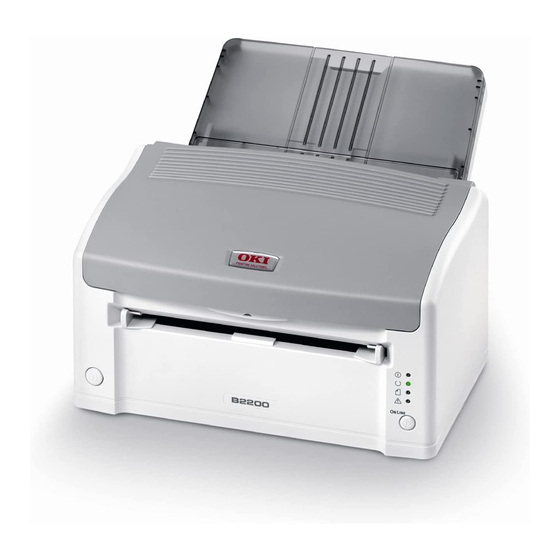
Page 7: Parts Identification
ARTS IDENTIFICATION Paper support. Paper tray (below cover) and output tray (above cover). Top cover. Power on/off button. Manual feed guides. Top cover release button. On-Line button—switches printer on line or off line. To clear a current print job from printer memory, press and hold this button for about 5 seconds. -
Page 8: Print Media
RINT MEDIA Print media that can be used with your printer includes standard copier bond paper, certain types of envelope and certain types of transparency. APER The best type of paper to choose is standard 80-90g/m² bond paper designed for use in plain paper copiers and laser type printers. - Page 9 The paper tray can hold up to about 150 sheets of standard bond paper. The manual feeder takes just one sheet at a time. Take just enough paper from its wrapping, fan the stack to ensure all sheets are separated from each other, then tap the stack flush again before loading.
- Page 10 Slide the paper stack fully into the tray as far as it will go, print side downwards, top edge into the printer, and ensure the guides just touch each side of the stack. Close the tray cover. OADING PAPER IN THE MANUAL FEEDER In your computer’s Print dialogue, click the printer [Properties] button to display the Printing Preferences dialogue.
-
Page 11: Transparencies And Labels
Load the sheet to be printed, top edge first, print side up, into the feeder and push it gently until you feel slight resistance. The printer will advance the paper a short distance and retain it and the Load Paper light will stop flashing. -
Page 12: Envelopes
NVELOPES Envelopes can be directly printed in this printer as long as you choose suitable types. Avoid self sealing envelopes and those with windows or metal clasps. Preferably choose envelopes with rectangular flaps rather than triangular flaps. OADING ENVELOPES IN THE MANUAL FEEDER When creating your address document, format it to the size of the envelope, remembering to set it to landscape (wide) format for most envelopes. -
Page 13: Print Quality Adjustments
Load the envelope, short edge first, print side up, flap folded under and to the left, into the feeder and push it gently until you feel slight resistance. The printer will advance the envelope a short distance and retain it. The sheet will be drawn into the printer and the printed page will eject normally into the output tray. -
Page 14: Clearing Paper Jams
LEARING PAPER JAMS Occasionally it may be necessary to clear a sheet of paper that has become jammed inside the printer. When this happens the printer will stop immediately and the Error light will flash. After the jam has been cleared and the top cover closed, the printer will automatically reprint the lost page WARNING! If the printer has been printing for a while the fuser... - Page 15 If the paper was fed from the tray, pull the sheet as illustrated below. If the paper was feed from the manual feeder, pull the sheet as follows. Carefully reinstall the print cartridge, pressing down firmly at both ends to ensure it is properly seated, and close the top cover.
-
Page 16: Setting Printing Preferences
ETTING PRINTING PREFERENCES The Status Monitor for Windows provides access to many options and enables the printer default settings to be changed to meet your every day needs. The Windows printer driver also contains settings for many of these items. Where items in the printer driver are the same as those in the Status Monitor menus, and you print documents from Windows, the settings in the Windows printer driver will override the printer’s default settings. -
Page 17: Setup Tab
ETUP TAB Paper size should be the same as the page size of your document (unless you wish to scale the printout to fit another size), and should also be the same as the size of paper you will feed into the printer. You can choose the source of the paper to feed, which may be the standard paper tray or manual feeder. -
Page 18: Job Options Tab
PTIONS TAB Set the output resolution of the printed page to meet your needs. If selected, toner saving uses less toner at the expense of print quality. Page orientation can be set to either portrait (tall) or landscape (wide). In landscape the page image is rotated 90 degrees to the left (e.g. -
Page 19: Image Tab
MAGE TAB Dithering produces an intermediate greyscale by adjusting the combination of dots used in printing. Selecting a setting determines the degree of detail with which a graphics image will be printed. Mesh determines that a screen of dots is used for dithering while Line Art determines that an array of lines is used for dithering. -
Page 20: Printer Menus
RINTER MENUS All the standard settings for the printer are stored within the printer’s internal memory. They are accessed via a menu system via the Configration button in the Status Monitor application. CATGORY ITEM FUNCTIONS INFO. MENU MENU MAP Prints menu list. PCL FONT Prints font list for PCL emulation (B2400 models only). - Page 21 CATGORY ITEM FUNCTIONS USER MENU TRAY SIZE Paper size for main tray. TRAY Paper type for main tray. MEDIATYPE TRAY MEDIA- Paper weight for main tray. WEIGHT MANUAL Paper size for manual feeder. PAPERSIZE MANUAL Paper type for manual feeder. MEDIATYPE MANUAL Paper weight for manual feeder.
- Page 22 CATGORY ITEM FUNCTIONS SYSTEM LANGUAGE Specifies language used for report printing. CONFIG. B2400 models only. MENU (Contd.) PCL MENU FONT Specifies location of PCL default font. (B2400 SOURCE models only) FONT NO. Specifies the PCL font number. FRONT CPI Width of PCL default font in characters per inc when this is a fixed spaced font.
- Page 23 CATGORY ITEM FUNCTIONS PPR MENU PITCH Specifies character pitch. (B2400 models only) CONDENSE Specifies 12CPI pitch for condense mode. CHARACTER Determines character set for printing. SYMBOL Determines symbol set for printing. LETTER 0 Specifies the style that replaces character (9B) or (9D) with (f) and (0). ZERO Specifies use of slashed or non-slashed zero CHARACTER...
- Page 24 CATGORY ITEM FUNCTIONS FX MENU PITCH Specifies character pitch. (B2400 models only) CHARACTER Specifies required character set. SYMBOL Specifies required symbol set. LETTER 0 See similar for LETTER 0 in PPR menu on page ZERO See similar for ZERO CHARACTER in PPR CHARACTER menu on page...
- Page 25 CATGORY ITEM FUNCTIONS NETWORK IP ADDRESS Sets fixed IP address or uses DHCP. MENU (B2400n only) IP ADDRESS Sets fixed IP address. SUBNET Sets subnet mask. MASK GATEWAY Sets default router address. Leave at ADDRESS 0.0.0.0. if no router. Enables or disables internal web pages for remote configuration.
- Page 26 CATGORY ITEM FUNCTIONS MAINT. MENU EEPROM Resets all programmable settings to factory defaults. DRUM COUNT Resets drum count when new image drum RESET installed. (See “Resetting the drum counter” on page 28.) SETTING Very fine adjustment of print density to correct streaks, light specks (reduce setting) or faded print (increase setting).
- Page 27 CATGORY ITEM FUNCTIONS ADMIN MENU Enables or disables items in this menu. (System CATEGORY administrator s only have INFO. Enables or disables these menus. access to this PRINT menu) MEDIA SYSTEM CONFIG. PARALLEL NETWORK MEMORY ADJUST MAINT. USAGE SIDM MN ID Sets the Pn to specify manual feed for the Cut Sheet Feeder control command (ESC EM Pn) in FX and PPR emulations.
-
Page 28: Resetting The Drum Counter
ESETTING THE DRUM COUNTER After replacing the image drum, reset the drum counter to keep a correct count of the number of pages printed on the image drum. Start the Status Monitor for the printer. Select the Printer Setup tab, click on the Configuration button and then open the Maintenance Menu. -
Page 29: Led Indicators
INDICATORS On the front panel of your printer are four LED indicators. The upper-most LED is the Power ON/OFF indicator, and is illuminated constantly whenever power is applied and switched on. The other three lights have five conditions of illumination depending on the printer’s current status: OFF—Not illuminated. - Page 30 If your printer develops a hardware fault all three status LEDs will flash fast (flicker approximately four times a second). In this case you should contact your service representative or your Oki dealer for advice and support. LED indicators > 30...
-
Page 31: Specifications
PECIFICATIONS The following is a summary specification for all models covered in this guide. Specifications are subject to change without notice. ITEM B2200 B2400 B2400n Model number N22108B N22109B Power 220~240VAC ±10% requirement 50/60Hz ± 2Hz Power Power save mode: >10W... - Page 32 ITEM B2200 B2400 B2400n Internal RAM 16MB Toner capacity 2,000 pages (approx.) depending on usage Image drum life Continuous: 15,000 pages (approx., without 3 pages/job: 10,000 pages power save) 1 page/job: 6,500 pages Acoustic noise Operating: 52dB Idle: Background level Data interface USB 2.0...
-
Page 33: Index
NDEX manual feeder ......7 Print Cancelling a print job ...... 7 resolution ........31 speed ........31 Error fault indication......30 Status lights ........7 indications ......29 Toner http//www.okiprintingsolutions.com..2 capacity........32 Transparencies recommended type ....11 Image drum capacity ........32 Resetting counter..... -
Page 34: Oki Contact Details
Kowloon, Hong Kong Tel:+353 1 4049590 Fax:+353 1 4049591 Tel:(852) 2736 0130 http://www.oki.ie Fax:(852) 2376 3725 OKI Systems – Northern Ireland The IPL Group 40 Sydenham Park 63-85 Victoria Street Belfast, BT4 1PW Beaconsfield NSW 2015, Australia Tel:+44 (0)28 90 20 1110 Tel:(61) 2 9690 8200 http://www.oki.ie... - Page 35 Oki Europe Limited Central House Balfour Road Hounslow TW3 1HY United Kingdom Tel: +44 (0) 208 219 2190 Fax: +44 (0) 208 219 2199 www.okiprintingsolutions.com 07084501 iss.2...
Need help?
Do you have a question about the B2200 and is the answer not in the manual?
Questions and answers