InFocus T102 Reference Manual
Hide thumbs Also See for T102:
Table of Contents

Advertisement

Advertisement

Table of Contents
loading

Summary of Contents for InFocus T102

  • Page 2: Table Of Contents

    Table of contents Introduction....3 Personalizing the projector menu display.......... 36 Projector features......3 Shutting down the projector ..36 Shipping contents ......4 Menu operation......37 Projector exterior view ....5 Maintenance ....44 Controls and functions ....6 Positioning your Care of the projector ....
  • Page 3: Introduction

    Introduction Projector features The projector integrates high-performance optical engine projection and a user- friendly design to deliver high reliability and ease of use. The projector offers the following features. • Wall color correction allowing projection on surfaces of several predefined colors •...
  • Page 4: Shipping Contents

    Shipping contents Carefully unpack and verify that you have all of the items shown below. If any of these items are missing, please contact your place of purchase. Standard accessories The supplied accessories will be suitable for your region, and may differ from those illustrated.
  • Page 5: 
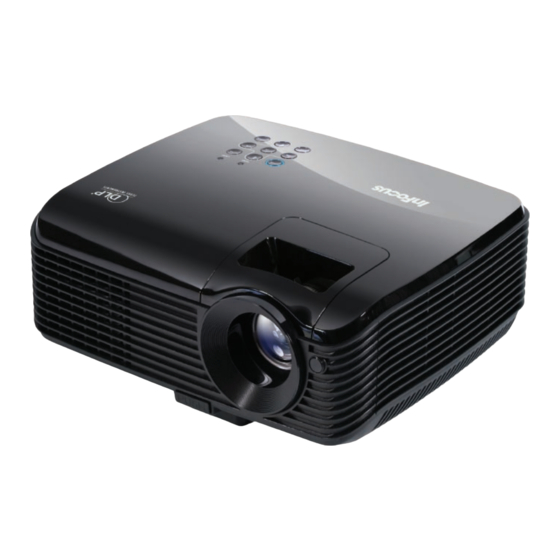
Projector Exterior View

    Projector exterior view External control panel Front/upper side (See "Projector and remote control" on page 6 for details.) Vent (heated air exhaust) Quick-release button Lens cover Focus ring and Zoom ring Front IR remote sensor Projection lens AC power cord inlet RS-232 control port Rear/lower side 10.
  • Page 6: Controls And Functions

    Controls and functions Projector and remote control Focus ring POWER Adjusts the focus of the projected Toggles the projector between image. See "Fine-tuning the image size standby mode and on. See "Starting and clarity" on page 26 for details. up the projector" on page 20 Zoom ring "Shutting down the projector"...
  • Page 7 MENU/EXIT 13. SOURCE Turns on the On-Screen Display Displays the source selection bar. (OSD) menu. Goes back to previous "Switching input signal" on page OSD menu, exits and saves menu for details. Freeze settings. See "Using the menus" on page 21 for details.
  • Page 8: Remote Control Effective Range

    Remote control effective range Infra-Red (IR) remote control sensor is located on the front of the projector. The remote control must be held at an angle within 30 degrees perpendicular to the projector's IR remote control sensor to function correctly. The distance between the remote control and the sensor should not exceed 8 meters (~ 26 feet).
  • Page 9: Positioning Your Projector

    Front Ceiling Select this location with the projector suspended upside-down from the ceiling in front of the screen. Purchase the InFocus ceiling mount, SP-CEIL- UNIV, from your dealer to mount your projector on the ceiling. Set Front Ceiling in the SYSTEM SETUP: Basic >...
  • Page 10: Obtaining A Preferred Projected Image Size

    InFocus has provided a table of 4:3-aspect-ratio screen sizes to assist you in determining the ideal location for your projector. There are two dimensions to...
  • Page 11: How To Determine The Recommended Screen Size For A Given Distance

    How to determine the position of the projector for a given screen size Select your screen size. Refer to the table and find the closest match to your screen size in the left columns labelled "4:3 screen diagonal". Using this value, look across this row to the right to find the corresponding average distance from screen value in the column labelled "Average".
  • Page 12 12000 12571 There is 3% tolerance among these numbers due to optical component variations. InFocus recommends that if you intend to permanently install the projector, you should physically test the projection size and distance using the actual projector before you permanently install it, so as to make allowance for this projector's optical characteristics.
  • Page 13: Connection

    Ensure the cables are firmly inserted. In the connections shown below, some cables may not be included with the projector (see "Shipping contents" on page 4). Additional cables can be purchased from InFocus.com in select areas, your dealer and/or from a commercial electronics store. Connection...
  • Page 14: Connecting A Computer Or Monitor

    Connecting a computer or monitor Connecting a computer The projector provides a VGA input socket that allows you to connect it to both IBM® compatibles and Macintosh® computers. A Mac adapter is needed if you are connecting legacy version Macintosh computers. To connect the projector to a notebook or desktop computer: Take the supplied VGA cable and connect one end to the D-Sub output socket of the computer.
  • Page 15: Connecting A Monitor

    Connecting a monitor If you want to view your presentation close-up on a monitor as well as on the screen, you can connect the MONITOR OUT signal output socket on the projector to an external monitor with a VGA cable following the instructions below: To connect the projector to a monitor: Connect the projector to a computer as described in "Connecting a computer"...
  • Page 16: Connecting Video Source Devices

    Connecting video source devices You can connect your projector to various video source devices that provide any one of the following output sockets: • Component video • S-Video • Video (composite) You only need to connect the projector to a single video source device; however each provides a different level of video quality.
  • Page 17: Connecting A Component Video Source Device

    Connecting a Component video source device Examine your video source device to determine if it has a set of unused Component video output sockets available: • If so, you can continue with this procedure. • If not, you will need to reassess which method you can use to connect to the device.
  • Page 18: Connecting An S-Video Source Device

    Connecting an S-Video source device Examine your video source device to determine if it has an unused S-Video output socket available: • If so, you can continue with this procedure. • If not, you will need to reassess which method you can use to connect to the device.
  • Page 19: Connecting A Composite Video Source Device

    Connecting a composite video source device Examine your video source device to determine if it has a set of unused composite video output sockets available: • If so, you can continue with this procedure. • If not, you will need to reassess which method you can use to connect to the device.
  • Page 20: Operation

    Operation Starting up the projector Plug the power cord into the projector and into a wall socket. Turn on the wall socket switch, if applicable. Check that the POWER indicator light on the projector lights orange after power has been applied. Remove the lens cap.
  • Page 21: Using The Menus

    Blank Timer Disable 3D Sync Panel Key Lock 3D Sync Invert Disable Timer Controller Disable Splash Screen InFocus Analog RGB MENU Exit Analog RGB MENU Exit Press MENU/EXIT twice* on to highlight the SYSTEM SETUP: Basic menu. the projector or remote control to leave and save the settings.
  • Page 22: Utilizing The Password Function

    Utilizing the password function For security purposes and to help prevent unauthorized use, the projector includes an option for setting up password security. The password can be set through the On-Screen Display (OSD) menu. For details of the OSD menu operation, please refer to "Using the menus"...
  • Page 23: Entering The Password Recall Procedure

    Press and hold AUTO on the projector or RECALL PASSWORD remote control for 3 seconds. The projector Please write down the recall code, will display a coded number on the screen. and contact InFocus Customer Center. Write down the number and turn off your projector. Recall code:...
  • Page 24: Switching Input Signal

    your retry. You can press MENU/EXIT to cancel the change or try another password. Though the password function is disabled, you need to keep the old password on hand should you ever need to re-activate the password function by entering the old password. Switching input signal The projector can be connected to multiple devices at the same time.
  • Page 25: Adjusting The Projected Image

    Adjusting the projected image Adjusting the projection angle The projector is equipped with 1 quick-release adjuster foot and 1 rear adjuster foot. These adjusters change the image height and projection angle. To adjust the projector: Press the quick-release button and lift the front of the projector.
  • Page 26: Correcting Keystone

    Fine-tuning the image size and clarity Adjust the projected image to the size that you need using the zoom ring. Then sharpen the image by rotating the focus ring. Correcting keystone Keystoning refers to the situation where the projected image is noticeably wider at either the top or bottom.
  • Page 27: Magnifying And Searching For Details

    Magnifying and searching for details If you need to look at specific details on the projected picture, magnify the picture. Use the direction arrow keys for navigating the picture. • Using the remote control Press Digital Zoom +/- to display the Zoom bar.
  • Page 28 Press to select an aspect ratio to suit the format of the video signal and your display requirements. About the aspect ratio In the pictures below, the black portions are inactive areas and the white portions are active areas. OSD menus can be displayed on those unused black areas. Auto: Scales an image proportionally to fit the projector's native resolution in its horizontal width.
  • Page 29: Optimizing The Image

    Optimizing the image Selecting a picture mode The projector is preset with several predefined picture modes so that you can choose one to suit your operating environment and input signal picture type. To select an operation mode that suits your need, you can follow one of the following a e r A e m a N l e d o M...
  • Page 30: Using Wall Color

    Using Wall Color In the situation where you are projecting onto a colored surface such as a painted wall which may not be white, the Wall Color feature can help correct the projected picture’s color to prevent possible color difference between the source and projected pictures.
  • Page 31: Adjusting Color

    Adjusting Color Highlight Color in the PICTURE menu and adjust the values by pressing the projector or remote control. Lower setting produces less saturated colors. If the setting is too high, colors on the image will be overpowering, which makes the image unrealistic. Adjusting Tint Highlight Tint in the PICTURE menu and adjust the values by pressing the projector or remote control.
  • Page 32 3D Color Management In most installation situations, color management will not be necessary, such as in classroom, meeting room, or lounge room situations where lights remain on, or where building external windows allow daylight into the room. Only in permanent installations with controlled lighting levels such as boardrooms, lecture theaters, or home theaters, should color management be considered.
  • Page 33: Setting The Presentation Timer

    Saturation is the amount of that color in a video picture. Lower settings produce less saturated colors; a setting of “0” removes that color from the image entirely. If the saturation is too high, that color will be overpowering and unrealistic. Setting the presentation timer The presentation timer can indicate the presentation time on the screen to help you achieve better time management when giving presentations.
  • Page 34: Hiding The Image

    To cancel the timer, perform the following steps. Enter the SYSTEM SETUP: Basic > Presentation Timer menu and highlight Off. Press MODE/ENTER. A confirmation message displays. Highlight Yes and press MODE/ENTER to confirm. You will see the message “Timer is Off” displaying on the screen. Hiding the image In order to draw the audience's full attention to the presenter, you can use BLANK on the...
  • Page 35: Freezing The Image

    Freezing the image Press on the remote control to freeze the image. The word 'FREEZE' will display in the upper left corner of the screen. To release the function, press any key on the projector or remote control. Even if an image is frozen on the screen, the pictures are running on the video or other device.
  • Page 36: Personalizing The Projector Menu Display

    Adjusting the sound level To adjust the sound level: Repeat steps 1-2 above. to highlight Volume and press Press to select a desired sound level. Personalizing the projector menu display The On-Screen Display (OSD) menus can be set according to your preferences. The following settings do not affect the projection settings, operation, or performance.
  • Page 37: Menu Operation

    Menu operation Menu system Please note that the on-screen display (OSD) menus vary according to the signal type selected. The menu items are available when the projector detects at least one valid signal. If there is no equipment connected to the projector or no signal detected, limited menu items are accessible.
  • Page 38 Disable/5 min/10 min/15 min/20 Blank Timer min/25 min/30 min Panel Key Lock On/Off Disable/30 min/1 hr/2 hr/3 hr/4 Timer Controller hr/8 hr/12 hr Splash Screen Black/Blue/InFocus Quick Cooling On/Off High Altitude Mode On/Off Mute On/Off Audio Settings Volume Menu display...
  • Page 39: Description Of Each Menu

    Description of each menu FUNCTION DESCRIPTION Corrects the projected picture’s color when the projection Wall Color surface is not white. See "Using Wall Color" on page 30 details. There are four options to set the image's aspect ratio Aspect Ratio depending on your input signal source.
  • Page 40 FUNCTION DESCRIPTION Pre-defined picture modes are provided so you can optimize Preset Mode your projector image set-up to suit your program type. See "Selecting a picture mode" on page 29 for details. Adjusts the brightness of the image. See "Adjusting Brightness" Brightness on page 30 for details.
  • Page 41 Sets the auto-shutdown timer. The timer can be set to a value Controller between 30 minutes and 12 hours. Allows you to select which logo screen will display during Splash projector start-up. Three options are available: InFocus logo, Screen Black screen, or Blue screen. Operation...
  • Page 42 FUNCTION DESCRIPTION Selecting On enables the function and the projector cooling time will be shortened to a few seconds. Quick Cooling If you attempt to restart the projector right after the quick cooling process, it may not be turned on successfully and will rerun its cooling fans.
  • Page 43 FUNCTION DESCRIPTION Selecting On enables the function. The projector can output a VGA signal when it is in standby mode and the D-SUB IN and D-SUB OUT sockets are correctly connected to devices. See VGA Out "Connecting a monitor" on page 15 for how to make the connection.
  • Page 44: Maintenance

    Your projector needs little maintenance. The only thing you need to do on a regular basis is to keep the lens clean. Never remove any parts of the projector except the lamp. If your projector needs service, contact InFocus Corporation (www.infocus.com/support) or your dealer for assistance. Cleaning the lens Clean the lens whenever you notice dirt or dust on the surface.
  • Page 45: Lamp Information

    Lamp information Getting to know the lamp hour When the projector is in operation, the duration (in hours) of lamp usage is automatically calculated by the built-in timer. The timer displays lamp hours used in Normal mode, plus equivalent Economic mode hours. Equivalent Economic mode hours are calculated as follows: 1 lamp hour (in Normal mode) = 1.33 lamp hours (in Economic mode) "Setting Lamp mode as Economic"...
  • Page 46: Timing Of Replacing The Lamp

    Timing of replacing the lamp When the Lamp indicator lights up red or a message appears suggesting it is time to replace the lamp, please install a new lamp or consult your dealer. An old lamp may cause a malfunction in the projector and in some instances the lamp may explode.
  • Page 47: Replacing The Lamp

    Be careful of sharp edges in the lamp compartment. Wash hands after lamp replacement. • Only InFocus certified lamps are tested with this projector. Use of other lamps may cause electrical shock and fire. Turn the power off and disconnect the projector from the wall socket.
  • Page 48 Pull out the lamp connector from a slot in the lamp compartment. Disconnect it from the projector as illustrated. Lift the handle so that it stands up. Use the handle to slowly pull the lamp out of the projector. CAUTION •...
  • Page 49: Resetting The Lamp Timer

    Tighten the screw that secures the lamp. CAUTION • Loose screw may cause a bad connection, which could result in malfunction. • Do not over tighten the screw. 10. Ensure the handle is fully laid flat and locked in place. 11.
  • Page 50: Indicators

    Indicators Light Status & Description Power Temp Lamp Power events The projector has just been connected to a power Orange Orange Orange outlet. Orange Stand-by mode Green Powering up Flashing Green Normal operation The projector needs 90 seconds to cool down as it was abnormally shut down without the normal Orange cooling down process.
  • Page 51: Troubleshooting

    Troubleshooting The projector does not turn on. Cause Remedy Plug the power cord into the AC inlet on the There is no power from the power projector, and plug the power cord into the cable. power outlet. If the power outlet has a switch, make sure that it is switched on.
  • Page 52: Specifications

    Specifications Projector specifications All specifications are subject to change without notice. General Product name Digital Projector Model name SVGA Optical Resolution 800 x 600 1024 x 768 Display system 1-CHIP DMD Lens F/Number F = 2.56 to 2.8, f = 21 to 23 mm (0.83” to 0.91”) Lamp SHP 220 W UHP 210 W...
  • Page 53: Dimensions

    Dimensions 264 mm x 96.1 mm x 225 mm (10.4” x 3.8” x 8.9”) (W x H x D) 264 mm (10.4”) 225 mm (8.9”) 96.1 mm (3.8”) 60 mm (2.4”) 66 mm (2.6”) Timing chart Supported timing for PC input Horizontal Frequency Vertical Frequency Pixel Frequency...
  • Page 54 60.000 60.000 1280 x 960_60 1280 x 960 75.000 75.000 1280 x 960_75 85.938 85.002 1280 x 960_85 1360 x 768 47.712 60.015 1360 x 768_60 1440 x 900 55.935 59.887 WXGA+_60 1400 x 1050 65.317 59.978 SXGA+_60 1600 x 1200 75.000 60.000 UXGA_60...
  • Page 55: Copyright Information

    Copyright information Copyright Copyright 2010 by InFocus Corporation. All rights reserved. No part of this publication may be reproduced, transmitted, transcribed, stored in a retrieval system or translated into any language or computer language, in any form or by any means, electronic, mechanical, magnetic, optical, chemical, manual or otherwise, without the prior written permission of InFocus Corporation.

This manual is also suitable for:

T104In100 series

Table of Contents