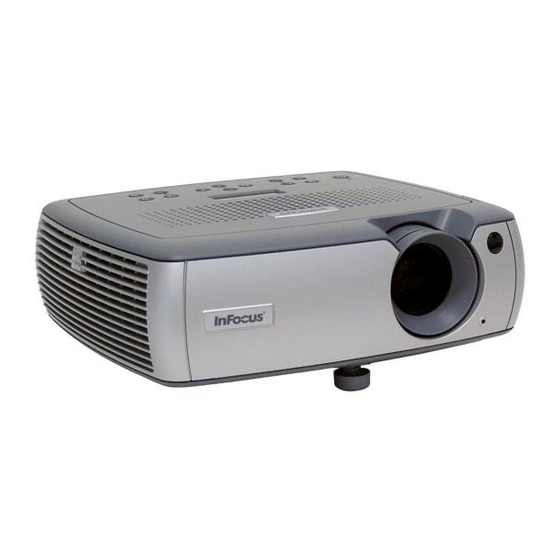
InFocus LP 640 User Manual
Infocus user's guide projector lp 540/lp 640
Hide thumbs
Also See for LP 640:
- Technical specifications (4 pages) ,
- User manual (43 pages) ,
- Cli manual (17 pages)
Table of Contents
Advertisement
Advertisement
Table of Contents
Troubleshooting

Related Manuals for InFocus LP 640


Summary of Contents for InFocus LP 640
- Page 1 540/ ® ® USER’S GUIDE...
- Page 2 Agency Approvals UL, CUL, TUV, GOST Other specific Country Approvals may apply, please see product certification label. This user’s guide applies to models LP540, LP640, GEN200, and GEN201. InFocus reserves the right to alter product offerings and specifications at any time.
-
Page 3: Table Of Contents
If you are experienced in setting up presentation systems, use the included Quick Set Up card. For complete details on connecting and operating the projector, refer to this User’s Guide. Electronic versions of this User’s Guide in multiple languages are available on the included CD and on our website. - Page 4 For complete details of the warranty, see the Warranty section at the end of this user's guide. Do not place objects or people in the 2 foot (.6m) area along the side of the projector. For ceiling mount applications, this area should be 5 feet (1.5m).
-
Page 5: Introduction
Introduction Your new digital projector provides computer and video inputs and has XGA 1024x768 resolution. The projector is easy to connect, easy to use, easy to maintain. An Interactive Display on the top of the projector gives you constant feedback on the status of the projector. -
Page 6: Connector Panel
You can use the projector’s M1 connector along with the InFocus LiteShow wireless adapter and software for cable-free digital projection. Contact an authorized InFocus dealer or visit the website listed on the back inside cover of this User’s Guide for more information. -
Page 7: Connecting A Computer
Connect the black end of the computer cable to the to the Computer 1 con- nector on the projector. Connect the blue end to the video port on your com- puter. If you are using a desktop computer, you first need to disconnect the monitor cable from the computer’s video port. - Page 8 Computer 2 con- nector on the projector. You can control the projector from an LCD control panel or computer by connecting an RS-232 cable to the projector’s Serial connector. Specific RS-232 commands can be found in the Service and Support section of our website.
-
Page 9: Displaying A Computer Image
Make sure your laptop’s external video port is active. Many laptops do not automatically turn on their external video port when a projector is connected. Usually a key combination like FN + F5 is used to turn the external display on and off. Refer to your computer’s documenta- tion to learn your computer’s key combination. -
Page 10: First-Time Projector Use With Windows 98
First-time projector use with Windows 98 The first time you connect a computer running Windows 98 to the projector, the computer recognizes the projector as “new hardware” and the Add New Hardware Wizard appears. Follow these instructions to use the Wiz- ard to load the correct driver (which was installed with your Windows operating system). - Page 11 Skip this page if you did not connect the USB portion of the M1 com- puter cable For Windows 98: • If you connected the USB cable, the Add New Hardware Wizard appears again. Drivers must be installed to use the USB functionality. •...
-
Page 12: Adjusting The Image
Adjusting the image Adjust the height of the projector, if necessary, by pressing the release but- ton to extend the elevator foot. Rotate the leveling foot (located at the bottom back right corner), if neces- sary. Position the projector the desired distance from the screen at a 90 degree angle to the screen. -
Page 13: Connecting A Video Device
Plug the remaining white connector into the left audio in connector on the projector, and plug the red connector into the right audio in connec- tor on the projector. -
Page 14: Displaying A Video Image
Displaying a video image Remove the lens cap. Press the Power button on the top of the projector or the remote. The LED flashes green and the fans start to run. When the lamp comes on, the startup screen is displayed and the LED is steady green. It can take a minute for the image to achieve full brightness. - Page 15 Keystone button to reduce the lower part. You can also adjust the horizontal keystone on the LP640 via the menus, or set the projector to automatically adjust the vertical keystone. See page 30. Adjust the volume on the keypad or remote.
-
Page 16: Shutting Down The Projector
When Power Save is enabled, Screen Save is disabled. See page 33. Turning off the projector To turn off the projector, press the Power button and verify that you want to turn the projector off by pressing the Power button again within 3 seconds. - Page 17 Source Troubleshooting Problem No startup screen Only startup screen appears Solution Plug power cable in, press Power button. Remove lens cap. Press the Computer button Activate laptop’s external port or restart laptop Result Correct image Computer image projected...
- Page 18 No computer image, just the words “Signal out of range” The video embedded in my PowerPoint presentation does not play on the screen Adjust computer refresh rate in Control Panel>Display>Settings>Advanced> Adapter (location varies by operating system) You may also need to set a different resolution on your computer, as shown in the following problem, “Image fuzzy or cropped”...
- Page 19 Image fuzzy or cropped Remote control not advancing PowerPoint slides Set your computer’s display resolution to the native resolution of the projector (Start>Settings>Control Panel>Display>Settings tab, select 1024x768) For a laptop, disable laptop monitor or turn-on dual- display mode Connect USB cable (page 7) then load USB drivers, if needed (page 10).
- Page 20 Projector troubleshooting Problem Image not square Image not sharp Image does not fit 16:9 screen Solution Adjust keystone on keypad or Picture menu Adjust the focus lens or Sharpness in the Picture>Advanced menu Change aspect ratio to 16:9 in Picture>Aspect ratio menu...
- Page 21 Image upside down Image reversed left to right Projected colors don’t match source COLOR Turn off Ceiling in Settings>System menu Turn off Rear in Settings>System menu Adjust color, tint, color temperature, brightness, contrast in the menus Correct image Correct image Correct image COLOR...
- Page 22 Lamp won’t turn on, LED blinking red (page 16) blinks Make sure vents aren’t blocked; allow projector to cool for one minute Lamp must be replaced (page 38) Unplug projector; wait one minute; plug in projector and turn it on: lamp lights Lamp turns on...
-
Page 23: Still Having Problems
This product is backed by a limited two-year warranty. An extended war- ranty plan may be purchased from your dealer. When sending the projector in for repair, we recommend shipping the unit in its original packing mate- rial, or having a professional packaging company pack the unit. -
Page 24: Using The Keypad Buttons
Most buttons are described in detail in other sections, but here is an over- view of their functions: power–turns the projector on (page 9) and off (page 14). menu–opens the on-screen menus (page 29). select–confirms choices made in the menus (page 29). -
Page 25: Using The Remote Control
See page 29 for more info on the menus. The remote also has a Power button to turn the projector on and off (see page 16 for shutdown info), Volume and Mute buttons to control the sound, and Video and Computer buttons to switch between sources. -
Page 26: Using The Audio
Using the audio To play sound from the projector, connect your source to the Audio In con- nector on the projector. To adjust the volume, use the buttons on the keypad or remote. To adjust the balance or turn off the projector’s chime, use the Audio menu (see page 33). -
Page 27: Optimizing Computer Images
See page 34. • Two menu options, Power Save and Screen Save, are provided to auto- matically shut down the projector after several minutes of inactivity or display a blank screen. This helps preserve lamp life. See page 33. -
Page 28: Optimizing Video Images
Adjust the Room Lighting. Select Dark if you are in a dark room, Light if in a bright room (page 31). Customizing the projector You can customize the projector for your specific setup and needs. See page 33 to page 37 for details on these features. •... -
Page 29: Using The Menus
• The About menu provides a read-only display of information about the projector and source. Certain menu items may be grayed out until a particular source is con- nected. For example, Sharpness is only available for video sources and will be hidden when a computer source is active. -
Page 30: Picture Menu
Picture menu To adjust the following six settings, highlight the setting, press Select, use Vertical Keystone the up and down arrows to adjust the values, then press select to confirm the changes. increasing keystone decreasing keystone Vertical Keystone: adjusts the image vertically and makes a squarer image. You can also adjust vertical keystone from the keypad. - Page 31 Presets these settings in the future by selecting the appropriate user presets. Room Lighting: This features optimizes the projector for your room’s light- ing conditions. Select Dark if you are in a dark room, Light if in a bright room. Choosing Light maximizes the light output from the projector.
-
Page 32: Advanced Settings
Color Space: This option applies to computer sources. It allows you to select a color space that has been specifically tuned for the video input. When Auto is selected, the projector automatically determines the standard. To choose a different setting, turn off Auto, then choose RGB for computer... -
Page 33: Settings Menu
When Autosource is checked, Startup Source deter- mines which source the projector defaults to at power-up. If no signal is present, the projector checks the sources in order until a source is found or until power down. - Page 34 LED on the keypad turns orange. When ready, the projector confirms the capture and the LED changes to green. The next time you start the projector, the custom logo you captured dis- plays. Blank Screen: determines what color is displayed when you press the Blank button on the remote.
- Page 35 Effect Key: allows you to assign a different function to the Effect button on the remote to quickly and easily use the effect. Only one effect can be enabled at a time. Highlight an effect and press Select to choose a different one.
- Page 36 Network: The LP640 has an RJ45 Ethernet connector that supports network connections and TCP/IP protocols. This will allow for the control and man- agement of the projector over a corporate network. The following fields are accessible when DHCP is not checked and available for manual entry of data.
-
Page 37: Maintenance
Abrasive cleaners, solvents or other harsh chemicals might scratch the lens. Lightly wipe the cleaning cloth over the lens in a circular motion. If you don’t intend to use the projector immediately, replace the lens cap. clean the lens with a soft dry cloth... -
Page 38: Replacing The Projection Lamp
Remove the two screws on the lamp module. WARNINGS: • To avoid burns, allow the projector to cool for at least 60 minutes before you replace the lamp. • Unplug the power cord before replacing the lamp. - Page 39 If the lamp timer has reached the maximum number of hours for the projec- tor lamp, the LED on the projector’s keypad will show a lamp error (see “LED behavior and meaning” on page 16). To reset the lamp timer, press the decrease volume button on the remote and then the increase volume button within 3 seconds.
-
Page 40: Cleaning The Dust Filter
Vacuum the non-removable metal grid filter adjacent to the lamp door. Using the security lock The projector has a security lock for use with a cable lock system. See “Accessories” on page 41 for ordering information. Refer to the information that came with the lock for instructions on how to use it. -
Page 41: Appendix
*country-dependent NOTE: Use only approved accessories. Optional Accessories Shipping Case (ATA approved) Projector Mount False Ceiling Plate for Projector Mount Extension Arm for Projector Mount 26” - 47” Organizer Carry Case DVI-D Cable 6 ft (1.8 m) M1 to Component Adaptor... -
Page 42: Red Led Behavior And Projector Errors
Red LED behavior and projector errors If the projector is not functioning properly and the red LED is blinking, con- sult Table 2 to determine a possible cause. There are two second pauses between the blinking cycles. Visit our website for more details on the red LED error codes. - Page 43 Computer 2 connector 8 computer connections optional 7 required 7 computer image optimize 27 troubleshooting 17 connector panel 6 contacting InFocus 23 Contrast 12, 15 custom logo startup screen 34 customer service contact information 23 Default gateway 36 DHCP 36 Display Messages 33...
- Page 44 Picture menu 30 PiP 35 power cable 7, 13 Power Save 33 PowerPoint, advancing slides 7 presentation features 27 projected image sizes 42 projector adjusting the height 12, 14 connector panel 6 customizing 28 optional accessories 41 positioning 12 shutdown 16...
- Page 45 39 RS-232 control 8 Screen Save 16 security lock 40 serial connection 8 Settings menu 33 shutting down the projector 16 solid green 16 solid red 16 Source troubleshooting 17 Sources 33 speakers, connecting 26 standard accessories 41...
Need help?
Do you have a question about the LP 640 and is the answer not in the manual?
Questions and answers
the screen only says "searching"
The InFocus LP 640 screen says "searching" because it is not receiving a signal from a connected source. This can happen if the source device is turned off, the input source is not selected correctly, or the cables are not properly connected.
This answer is automatically generated