Furuno BACK GP-80 Operator's Manual
Furuno gps receiver user manual
Hide thumbs
Also See for BACK GP-80:
- Operator's manual (119 pages) ,
- Installation manual (38 pages) ,
- Operator's manual (2 pages)
Table of Contents
Advertisement
Advertisement
Table of Contents
Troubleshooting

Related Manuals for Furuno BACK GP-80


Summary of Contents for Furuno BACK GP-80
- Page 1 Back...
- Page 2 9-52 Ashihara-cho, 9-52 Ashihara-cho, Nishinomiya, Japan Nishinomiya, Japan Telephone : Telephone : 0798-65-2111 0798-65-2111 0798-65-4200 0798-65-4200 Printed in Japan Printed in Japan All rights reserved. All rights reserved. PUB.No. OME-43740 PUB.No. OME-43740 ( ( TENI TENI ) ) GP-80 GP-80 Your Local Agent/Dealer Your Local Agent/Dealer FIRST EDITION :...
-
Page 3: Safety Instructions
"DANGER", "WARNING" and "CAUTION" notices appear throughout this manual. It is the responsibility of the operator and installer of the equipment to read, understand and follow these notices. If you have any questions regarding these safety instructions, please con- tact a FURUNO agent or dealer. DANGER WARNING... -
Page 4: Safety Information For The Operator
SAFETY INFORMATION FOR THE OPERATOR WARNING Do not open the cover of the equipment. This equipment uses high voltage electricity which can shock, burn or cause death. Only qualified person- nel should work inside the equipment. Do not dissasemble or modify the equipment. -
Page 5: Table Of Contents
TABLE OF CONTENTS FOREWORD ...v SYSTEM OVERVIEW ... 1 1. OPERATIONAL OVERVIEW 1.1 Control Description ... 1-1 1.2 Turning On and Off the Power ... 1-2 1.3 Adjusting Display Contrast and Brilliance ... 1-3 1.4 Selecting the Display Mode ... 1-3 1.5 Chart Icons ... -
Page 6: Declaration Of Conformity
9.3 Error Messages ... 9-2 9.4 Troubleshooting ... 9-4 9.5 Self Tests ... 9-5 10. INTRODUCTION TO GPS 10.1 What is GPS? ... 10-1 10.2 How the GPS Receiver Calculates Position... 10-1 10.3 Position-fixing Accuracy (HDOP) ... 10-2 APPENDIX Specifications... A-1 Digital Interface (IEC 61162-1) ... -
Page 7: Foreword
A Word to GP-80 Owners Congratulations on your choice of the FURUNO GP-80 GPS Navigator. We are con- fident you will see why the FURUNO name has become synonymous with quality and re- liability. For over 50 years FURUNO Electric Com-... - Page 8 This page is intentionally left blank.
-
Page 9: Menu Tree
SYSTEM OVERVIEW 1. Menu Tree Display selection menu DISPLAY Select Display (Plotter 1, Plotter 2, Highway, Navigation and Data displays) Main menu MENU 1. DISPLAY SETUP 2. TRACK/MARK SETUP 3. ERASE TRACK/MARK 4. ALARM SETTINGS 1/2 5. MANUAL CALCULATION 7. GPS MONITOR 8. - Page 10 Waypoint, route menu GOTO menu GOTO 1. Cursor 2. MOB/Event Position 3. Own Ship Position 4. Waypoint List WAYPOINT LIST 5. Route Planning ROUTE LIST 1. Cursor 2. MOB/Event Position 3. Waypoint List GOTO "Waypoint List" 4. Route List GOTO "Route List" 5.
-
Page 11: System Configuration
2. System Configuration GPA-017S ANTENNA UNIT Receives signal from GPS satellite beacon reference station. Ship’s Mains 10.2 to 31.2 VDC GPA-018S GPA-019S (for DGPS) (for DGPS) 1.2 m Whip antenna DISPLAY UNIT Receives ans processes GPS signals to fix position and display it in latitude/longitude or LOP. -
Page 12: Operation Flow Chart
3. Operation Flow Chart Select display mode • Plotter 1 (own ship's track and data) • Plotter 2 (own ship's track) • Highway (ship's track overlaid on navigation lane) • Navigation (graphic navigation data display for steering) • Data (alphanumeric navigation data) Set destination temporarily Register waypoints... -
Page 13: Operational Overview
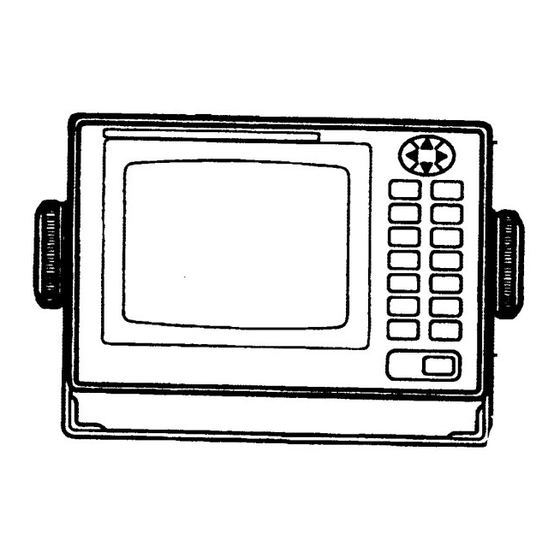
1. OPERATIONAL OVERVIEW 1.1 Control Description Opens/closes menu; quits current operation. Selects display mode. Registers waypoints and routes. Inscribes mark on the display. Expands display range. Centers ship's position/cursor position. Adjusts display contrast; changes latitude/longitude coordinate. MENU NU/CU DISPLAY EVENT GOTO PLOT MARK... -
Page 14: Turning On And Off The Power
(in latitude and longitude) ap- pears on the display. If position could not be found, "NO FIX" ap- pears at the GPS receiver condition window. When PDOP value exceeds 6 in the 3D mode or HDOP value exceeds 4 in the 2D mode, "DOP"... -
Page 15: Adjusting Display Contrast And Brilliance
Note 1: When PDOP value exceeds 6 in the 3D mode, the position fixing method is automatically changed to 2D. Note 2: The "DEMO" icon appears when the display is in the demonstration mode. To return to normal mode, turn off the power and turn it on while pressing and holding down the [NU/ CU ENT] key. -
Page 16: Track
Plotter 1 display Cursor position or lighthouse data, when cursor is on Course Own ship's track Own ship Alarm mark range 34° 23.456´ N 135° 45.678´ E [01] WGS84 2.00 nm Horizontal Course range Grid width Course Cursor Speed, or range from own ship to cursor Figure 1-5 Plotter 1 display... -
Page 17: Navigation Display
Navigation display 1) No autopilot connection Cross track Bearing from own error meter ship to destination waypoint Bearing Destination scale waypoint no. 63° 123° 0.1nm 23:45' 17H 45M Estimated Time of Time To Go Arrival (15th23:45) (3days17hrs45min) Cross track error indication Cross track error scale Figure 1-9 Navigation display,... -
Page 18: Data Display
Data display (Window assignment and size of characters are user-definable) Position in latitude and longitude or LOPs Fixing date and time* SEP 12, 1995 23:59'59" U 12 23.456' N POSITION 123 23.456' E WGS84 223.4 31.23 12.3 123.4 User-defined User-defined display data #1 display data #4 User-defined... -
Page 19: Track
2. TRACK 2.1 Enlarging/Shrinking the Display You may enlarge and shrink the display on the Plotter 1 and Plotter 2 displays, with the [ZOOM IN] and [ZOOM OUT] keys. The horizontal range is available among 0.25, 0.5, 1, 2, 4, 8, 16, 32, 64, 128 and 192 nautical miles for plotter 1 and 0.36, 0.71, 1.42, 2.84, 5.69, 11.38, 22.76, 45.51, 91.02, 182.04, 273.07 nautical miles for plotter 2 display. -
Page 20: Shifting The Display
Cursor turned off Ship's position (in latitude and longitude or LOPs), speed and course appear on the dis- play. Own ship Own ship position mark in latitude and longitude 34° 23.456´ N 135° 45.678´ E Figure 2-2 Data displayed when the cursor is turned off 2.4 Shifting the Display The display can be shifted on the Plotter 1... -
Page 21: Erasing Track
Hold icon (appears while recording of track is stopped) 34° 23.456´ N 135° 45.678´ E This portion of track does not appear on Own ship the display Recording of track started Ship’s track while recording is stopped Recording of track turned off Figure 2-3 Track not plotted or recorded when plotting is stopped... -
Page 22: Selecting Track Plotting Interval
Are you sure to erase ? ENT: Yes MENU: No Figure 2-6 Prompt for erasure of track, mark 5) Press the [NU/CU ENT] key. 2.9 Selecting Track Plotting Interval The plotting interval determines both how the track will be reconstructed on the display and track storage time. -
Page 23: Apportioning The Memory
2.10 Apportioning the Memory The memory holds 2,000 points of track and marks and may be apportioned as you like. The default memory setting stores 1,000 points each of track and marks. CAUTION All data are erased whenever the memory apportion setting is changed, even when the previous value is re-entered. -
Page 24: Selecting Bearing Reference
2.11 Selecting Bearing Reference Ship's course and bearing to waypoint may be displayed in true or magnetic bearing. Magnetic bearing is true bearing plus (or mi- nus) earth's magnetic deviation. Displaying true or magnetic bearing The default setting displays magnetic bear- ings. -
Page 25: Marks
3. MARKS 3.1 Entering/Erasing Marks Marks can be inscribed on the Plotter 1 and Plotter 2 displays. You may inscribe a mark anywhere, in one of 13 shapes. Further, can be connected with lines, to denote net loca- tion, etc. Note 1: When the mark memory becomes full no marks can be entered. -
Page 26: Selecting Mark Shape
Are you sure to erase ? ENT: Yes MENU: No Figure 3-4 4) Press the [NU/CU ENT] key. 5) Press the [MENU ESC] key. 3.2 Selecting Mark Shape 13 mark shapes are available. Select mark shape as follows: 1) Press [MENU ESC] and [2] to display the TRACK/MARK SETUP menu. -
Page 27: Entering Event Marks
3.4 Entering Event Marks Event marks can denote any important present position; for example, a good fishing spot. Event marks can be saved as ordinary marks and the unit automatically numbers them from 01 to 99. Note 1: When the mark memory becomes full no event marks can be entered. -
Page 28: Entering The Mob Mark
3.6 Entering the MOB Mark The MOB mark denotes man overboard po- sition. To mark man overboard position, press the [EVENT MOB] key. When the key is pressed, the position at the exact moment the key is pressed automatically becomes the des- tination. -
Page 29: Navigation Planning
4. NAVIGATION PLANNING 4.1 Registering Waypoints In navigation terminology a waypoint is a particular location on a voyage whether it be a starting, intermediate or destination waypoint. The GP-80 can store 999 waypoints, num- bered from 001–999. Waypoints can be reg- istered four ways: •... - Page 30 6) Press to select waypoint mark shape. The following display appears. : Cursor ENT: Enter MENU: Escape Figure 4-4 Screen for selecting waypoint mark shape 7) Press t or s to select mark shape. 8) Press the [NU/CU ENT] key. The display shown in Figure 4-5 appears.
- Page 31 Registering waypoints by MOB position/event position The MOB position or an event position can be registered as a waypoint. Event marks are numbered from 01 to 99; 01 is the latest event mark. Note: You cannot register a MOB position or event position when there are no MOB positions or event positions saved.
-
Page 32: Editing Waypoints
Edit = Waypoint : 001 _ _° _ _._ _ _' N _ _ _°_ _._ _ _' W Mark : Cmnt : : Cursor ENT: Enter MENU: Escape Figure 4-11 6) Enter latitude and longitude. To enter 34 12.345' N 135 23.456' E, for example, press;... -
Page 33: Deleting Waypoints
4.3 Deleting Waypoints Deleting waypoints by the cursor 1) Place the cursor on the waypoint to de- lete. 2) Press the [CLEAR] key. Deleting waypoints through the waypoint list 1) Press [WPT RTE] and [4]. 2) Press to select waypoint to de- lete. -
Page 34: Deleting Route Waypoints
ROUTE : 01 (In Use , REVERSE) skip Distance Trial Speed : Auto Man (012.0kt) 34° 12.345' N 130° 23.456' E MARINE POINT AUG 12' 95 12 : 35U 36° 12.345' N 135° 23.456' E A POINT AUG 13' 95 13 : 45U : RTE CLEAR: Delete ENT: Enter MENU: Escape... -
Page 35: Replacing Route Waypoints
4.6 Replacing Route Waypoints 1) Press [WPT RTE] and [5] to display the route list. 2) Press to select route. 3) Press s to display route editing screen. 4) On the route editing screen, place the cur- sor on waypoint number to replace. 5) Enter new waypoint number. - Page 36 This page is intentionally left blank.
-
Page 37: Starting For Destination
5. STARTING FOR DESTINATION 5.1 Setting Destination There are four ways by which you can set destination: • By cursor • By MOB position or event position • By waypoint, and • By route. Note 1: Destination cannot be set when there is no GPS position data. - Page 38 Flag mark Figure 5-4 Single destination set by cursor Setting multiple destinations 1) Press [GOTO] and [1]. 2) Place the cursor on the location desired for waypoint. 3) Press the [NU/CU ENT] key. 4) Repeat steps 2 and 3 to enter other points. Waypoints are connected with a line.
- Page 39 Setting destination by MOB position or event position Note: This operation cannot be performed when there is no MOB position or event position. The buzzer sounds and the message shown in Fig- ure 5-8 appears to alert you when there is no MOB position or event position.
-
Page 40: Setting Route As Destination
1 1 1 1 1 Setting destination by waypoint no. 3) Enter waypoint number, in three digits. You can clear entry by pressing the [CLEAR] key. 4) Press the [NU/CU ENT] key. Own ship position becomes starting point and a dashed line runs between it and the waypoint selected. -
Page 41: Skipping Route Waypoints
Skipping route waypoints You may skip route waypoints by displaying "DI" (DIsable) next to the route waypoint in the route list. Using Figure 5-14 as an ex- ample, your ship is currently heading toward waypoint 04 but is to switch course and head to waypoint 03. -
Page 42: Erasing Route Waypoints (Flags)
5.3 Erasing Route Waypoints (flags) 1) Place the cursor on the flag to erase. 2) Press the [CLEAR] key. The message shown in Figure 5-17 appears if the waypoint is currently selected as destina- tion, is part of a registered route, or is part of the route currently being navigated. -
Page 43: Finding Range And Bearing Between Two Points
5.4 Finding Range and Bearing Between Two Points Selecting Course Sailing Method The range and bearing to a destination are cal- culated by two ways: Great Circle or Rhumb Line. However, cross track error is calculated by rhumb line only. Great Circle: The great circle courseline is the shortest course between two points on the surface of the earth. - Page 44 3) Press to shift the cursor to the Trial Speed line. 4) Press t or s to select Auto or Man. Auto uses ship's average speed to calcu- late time-to-go. 5) If you selected Man, enter speed. 6) Press the [NU/CU ENT] key. The range, bearing and time-to-go between two points appear on the display.
-
Page 45: Setting Up Various Displays
6. SETTING UP VARIOUS DISPLAYS 6.1 Selecting Data to Display on the Data Display The user may select what data to display in four locations on the data display. SEP 12, 1995 23:59'59" U 12 23.456' N POSITION 123 23.456' E WGS72 223.4 31.23... -
Page 46: Selecting Position Format
6.2 Selecting Position Format Position can be displayed in latitude and lon- gitude, Loran C LOPs, or Decca LOPs, and the default format is latitude and longitude. Selecting position format (L/L or LOPs) 1) Press [MENU ESC] [9] and [8] to dis- play the LOP SETUP menu. - Page 47 Registering waypoints using LOPs 1) Press [WPT RTE] and [4]. 2) Press [ ] to display LOPs. WAYPOINT LIST (LOP, LC) 001 36365.2 59102.3 MARINE POINT AUG12' 95 12 : 35U 002 36512.3 59134.5 ___ A POINT AUG13' 003 _ _ _ _ _ , _ _ _ _ _ _ , _ ___ _ _ _ _ _ _ _ _ _ _ _ _ 004 _ _ _ _ _ , _...
-
Page 48: Demo Display
6.3 Demo Display The demo display provides simulated opera- tion of this unit. Own ship tracks, at the speed selected, a figure eight course, starting from position entered. All controls are operative; you may change course, enter marks, etc. 1) While pressing and holding down [NU/CU ENT], turn on the power. -
Page 49: Alarms
7. ALARMS There are seven alarm conditions which gen- erate both audible and visual alarms. When an alarm setting is violated, the buzzer sounds and the name of the offending alarm appears on the display. The alarm icon also appears on the Plotter 1, Plotter 2 and High- way displays. -
Page 50: Cross Track Error (Xte) Alarm
Anchor watch alarm The anchor watch alarm sounds to warn you that own ship is moving when it should be at rest. Alarm Own ship's setting position Destination waypoint Figure 7-4 How the anchor watch alarm works Before setting the anchor watch alarm, set present position as destination waypoint, re- ferring to chapter 5. -
Page 51: Ship's Speed Alarm
7.3 Ship’s Speed Alarm The ship’s speed alarm sounds when ship's speed is lower or higher (or within) the alarm range set. 1) Press [MENU ESC] and [4]. 2) Press to select Ship Speed. 3) Press t or s to select In (or Over). In: Alarm sounds when speed is within range set. -
Page 52: Water Temperature Alarm
7.5 Water Temperature Alarm The water temperature alarm sounds when the water temperature is higher or lower (or within) the preset temperature. This alarm re- quires temperature signal from external equip- ment. 1) Press [MENU ESC] and [4]. 2) Press to select Water Temp. -
Page 53: Menu Settings
The 2/3D mode switches between two and three dimension position fixing automatically depending on how many satellites (three or four) are in light of sight of the GPS receiver. Disable satellite Every GPS satellite is broadcasting abnormal satellite number(s) in the Almanac. Using this... - Page 54 Selecting fix mode 1) Press [MENU ESC] [9] and [6] to dis- play the GPS SETUP menu. GPS SETUP Fix mode 2/3D Disable satellite GPS Smoothing Posn 0 0 0 (000-999 sec) Posn 0 0 5 (000-999 sec) Speed Average 01 minute To Next Page : Select...
-
Page 55: Selecting Units Of Measurement
Entering position offset If you do not know the type of chart you are using, GPS position may be wrong. Note the difference in position when moored to a pier and enter it on the GPS SETUP menu, to get correct position. -
Page 56: Mark, Character Size And Brilliance
Unit of water temperature 1) Press [MENU ESC] [9] and [2]. 2) Press to select Unit of Temp. 3) Press t or s to select unit; Centigrade or Fahrenheit. 4) Press [NU/CU ENT] and [MENU ESC]. Unit of altitude Available only in 3D mode. 1) Press [MENU ESC] [9] and [2]. - Page 57 Waypoint mark size The size of the waypoint mark can be selected to large or small. Large waypoint mark No icon With icon Small waypoint mark Figure 8-5 Waypoint mark size 1) Press [MENU ESC] and [1]. 2) Press to select Waypoint Size. 3) Press t or s to select Large or Small.
-
Page 58: Settings For Connection Of Navigator
8.4 Settings for Connection of Navigator Besides its fundamental function of display- ing position, the GP-80 can also output vari- ous data to external equipment. Before outputting data to external equipment, first determine what data the external equipment requires. Output only necessary data to en- sure data will be output correctly. - Page 59 DATA 2 output setting 1) Press [MENU ESC] [9] and [4]. The DATA 2 OUTPUT SETUP menu appears. DATA 2 OUTPUT SETUP Data Fmt. V1.5 V2.0 Talker ID Output Data (00-90 sec)81% 1. AAM:00 APA:00 APB:04 2. BWR:00 BWW:00 GGA:00 GLL:01 3.
-
Page 60: Receiving Data From Personal Computer
8.5 Receiving Data from Personal Computer Loading Waypoints/Routes data Waypoints and Routes data can be down- loaded from a personal computer, through the DATA 4 connector. 1) Press [MENU ESC] [9] and [5]. 2) Press to select Level. 3) Press t or s to select level of personal computer;... - Page 61 2) To quit loading, press the [NU/CU ENT] key. The cursor shifts to Stop. 3) To start loading, select Start. 4) Press the [NU/CU ENT] key. Loading waypoint data from YEOMAN equipment 1) Do steps 1 through 9 in "Loading light- house data."...
-
Page 62: Dgps Settings
11) Press the [NU/CU ENT] key. The mes- sage shown in Figure 8-23 appears while data is being saved. Now saving Waypoint/Route data ! MENU:Stop Figure 8-23 12) Save data at the computer. 13) Press the [MENU ESC] key. When data is saved, the cursor shifts to Stop. -
Page 63: Displaying Gps Monitor Displays
3) Press the [MENU ESC] to escape. Number, bearing and elevation angle of all satellites in view of the GPS receiver appear. Satellites being NONE used in fixing position are circled with a solid line; satellites not being used in fixing position are circled with a dashed line. - Page 64 Aug 21 1995 23:59'59" U BEACON STATION NAME: _ _ _ _ _ _ _ _ _ _ _ _ _ _ _ _ _ _ _ _ _ _ _ _ _ ID: _ _ _ _ Health: _ Bit Rate: _ _ _ bps Freq: _ _ _ .
-
Page 65: Maintenance And Troubleshooting
9. MAINTENANCE & TROUBLESHOOTING 9.1 Clearing the Memory The GP-80 has two memories: GPS memory and plotter memory. Clearing the plotter memory The plotter memory holds plotted track and mark data. When you clear the plotter memory, all track and marks are cleared and all corresponding defaults settings are re- stored. -
Page 66: Preventative Maintenance
Figure 9-5 GPS error message This message may appear when there is an interfering object between the satellite and GPS receiver (for example, mast) or the an- tenna cable is disconnected. DOP error When PDOP value exceeds 6 in the 3D mode,... - Page 67 DGPS error When DGPS data contains errors or the DGPS beacon station is experiencing transmitting problems, the message shown in Figure 9-7 appears. DGPS Error Figure 9-7 DGPS error message Self test error message If the self test (conducted when turning on the power) finds equipment error, the mes- sage shown in Figure 9-8 appears.
-
Page 68: Troubleshooting
9.4 Troubleshooting The table which follows provides trouble- shooting procedures which you can follow to restore normal operation. If normal operation cannot be restored, ask your dealer for advice..• • • t i s x i f •... -
Page 69: Self Tests
9.5 Self Tests Memory and I/O circuits test 1) Press [MENU ESC] and [8] to display the SELF TESTS menu. SELF TESTS 1. Memory, I/O Port Test 2. Keyboard Test 2. Keyboard Test 3. Test Pattern 4. Automatic Testing GPS PROGRAM No. 4850237002 NAV PROGRAM No. - Page 70 Display test 1) Press [MENU ESC] [8] and [3] to dis- play the test pattern screens. 2) To change the test pattern, press the [NU/ CU ENT] key. Each time the key is pressed one of the patterns shown in Fig- ure 9-12 appears.
-
Page 71: Introduction To Gps
GPS receiver- equipped vehicles, vessels and aircraft. Figure 10-1 How the GPS receiver calculates position 10.2 How the GPS Receiver Calculates Position The GPS receiver’s position is continuously fixed by receiving 3 (or 4) satellites in line- of-sight of the GPS receiver. -
Page 72: Position-Fixing Accuracy (Hdop)
10.3 Position-fixing Accuracy (HDOP) In radar position-fixing, most accurate posi- tion fixes are obtained when the targets used are spaced nearly 90 from each other. Simi- larly, GPS position fixing accuracy is subject to satellite location. Generally, the further apart the satellites are from one another, the greater the position-fixing accuracy. -
Page 73: Specifications
All in view, 8-state Kalman filter Approx. 10m, 95% of the time, Horizontal dilution of position (HDOP) 4 Note: All GPS receiver are subject to degradation of position and velocity accuracies under the U.S. Department of Defence. Position may be degraded. -
Page 74: Data Input/Output
Data Input/Output Number of ports Data format Input data Output data Power Supply & Environmental Conditions Power supply and power consumption Useable environment Humidity Waterproofing specification Resistancy 4 I/O ports IEC 61162-1/NMEA 0183 Ver. 1.5/NMEA Ver. 2.0 NMEA 0183: DBT, DPT, MTW, TLL DPGS;... -
Page 75: Digital Interface (Iec 61162-1
Isolation: Optocoupler Input impedance: 470 ohms Max. voltage: 15V Threshold: 3 mA (in case of connection of FURUNO device talker) Data transmission Data is transmitted in serial asynchronous form in accordance with the standard referenced in 2.1 of IEC 61162-1. The first bit is a start bit and is followed by data bits. - Page 76 Schematic diagrams DATA1 port (output) Output drive capability: Max. 10mA DATA 1 port (input)
- Page 77 DATA 2 port (output) Output drive capability: Max. 10mA DATA 2 port (input)
- Page 78 DATA 3 port (output) Output drive capability: Max. 10mA DATA 4 port IN/OUT signal is selected by the menu among the output of IEC 61162-1, NMEA Ver. 1.5/2.0, PC input/output and DGPS signal. Sentence description AAM - Waypoint arrival alarm...
- Page 79 APB - Autopilot sentence data...
- Page 80 BOD - Bearing, origin to destination BWC - Bearing and distance to waypoint...
- Page 81 BWR - Bearing, waypoint to range BWW - Bearing, waypoint to waypoint...
- Page 82 DBT - Depth below transducer DPT - Depth DTM - Datum reference A-10...
- Page 83 GGA -Global positioning system fix data GLL - Geographic position, latitude and longitude A-11...
- Page 84 GNS - GNSS fixed data MTW- Water temperature A-12...
- Page 85 RMB - Recommended minimum navigation information A-13...
- Page 86 RMC- Recommended minimum specific GPS/TRANSIT data RTE - Routes A-14...
- Page 87 TLL - Target latitude and longitude VTG - Course over ground and ground speed A-15...
- Page 88 WCV - Waypoint closure velocity WNC - Distance, waypoint to waypoint WPL - Waypoint location A-16...
- Page 89 XTE - Cross-track error, measured ZDA - Time and date ZTG - UTC and time to destination waypoint A-17...
-
Page 90: Time Differences
Time Differences A-18... -
Page 91: Geodetic Chart List
Geodetic Chart LIst 001: WGS84 002: WGS72 003: TOKYO : Mean Value (Japan, Korea & Okinawa) 004: NORTH AMERICAN 1927 : Mean Value (CONUS) 005: EUROPEAN 1950 : Mean Value 006: AUSTRALIAN GEODETIC 1984 : Australia & Tasmania 007: ADINDAN : Mean Value (Ethiopia &... -
Page 92: Loran C Chains
Loran C Chains Chain Central Pacific Canadian East Coast Commando Lion (Korea) Canadian West Coast South Saudi Arabia Labrador Sea Eastern Russia Gulf of Alaska Norwegian Sea Southeast USA Mediterranean Sea Western Russia North Central USA North Saudi Arabia Great Lakes South Central USA West Coast USA Northeast USA... -
Page 93: Decca Chains
Decca Chains Chain Chain Chain code South Baltic Vestlandet Southwest British Northumbrian Holland North British Lofoten North Baltic North West Trondelag English North Bothnian Southern Spanish North Scottish Gulf of Finland Danish Irish Finnmark French South Bothnian Hebridean Frisian Islands Helgeland Skagerrak North Persian Gulf... -
Page 94: Glossary
Cold start When the GPS receiver is turned on for the very first time, it starts receiving the Almanac. This condition is called cold start. In this condition it takes about two minutes to find position. - Page 95 This variation may be entered automatically or manually. Navigation calculation The GPS receiver calculates the range, bearing and cross track error to next waypoint when you select a destination. The calculation of that data is called navigation calculation. The...
- Page 96 Total distance Total distance is the number of miles from starting point to end point in a route. Trip distance The distance run from starting position. Trip elapsed time The amount of time passed since departing a starting point. True bearing Bearing relative to North;...
- Page 97 Cold start When the GPS receiver is turned on for the very first time, it starts receiving the Almanac. This condition is called cold start. In this condition it takes about two minutes to find position.
- Page 98 This variation may be entered automatically or manually. Navigation calculation The GPS receiver calculates the range, bearing and cross track error to next waypoint when you select a destination. The calculation of that data is called navigation calculation. The...
- Page 99 True bearing Bearing relative to North; compass bearing corrected for magnetic deviation. The GPS receiver can display true or magnetic bearing. Velocity to destination The amount of speed in the direction (course) of the desired destination. Waypoint A waypoint is a particular location on a voyage whether it be a starting, intermediate or destination waypoint.
- Page 100 This page is intentionally left blank.
-
Page 101: Index
INDEX Anchor watch alarm 7-2 Apportioning the Memory 2-5 Arrival Alarm 7-1 Automatic testing 9-6 brilliance 1-3 Cancelling Destination 5-5 Centering Cursor Position 2-2 Clearing the Memory 9-1 Cross Track Error Alarm 7-2 contrast 1-3 Course-up 2-1 Connecting Marks 3-2 Course bar tone 8-4 Cursor size 8-5 [CURSOR ON/OFF] 2-1... - Page 102 Navigation display 1-5 North-up 2-1 Magnetic variation 2-6 Mark Shape 3-2 mark connection line 3-2 Memory and I/O circuits test 9-5 MOB Mark 3-4 Plotter 1 display 1-4 Plotter 2 display 1-4 [PLOT ON/OFF]key 2-2 Position offset 8-1 Position-fixing Accuracy 1-2 [POWER]key 1-2 receiver indication 1-2 Registering Waypoints 4-1...
Need help?
Do you have a question about the BACK GP-80 and is the answer not in the manual?
Questions and answers