
Related Manuals for GE G


Summary of Contents for GE G
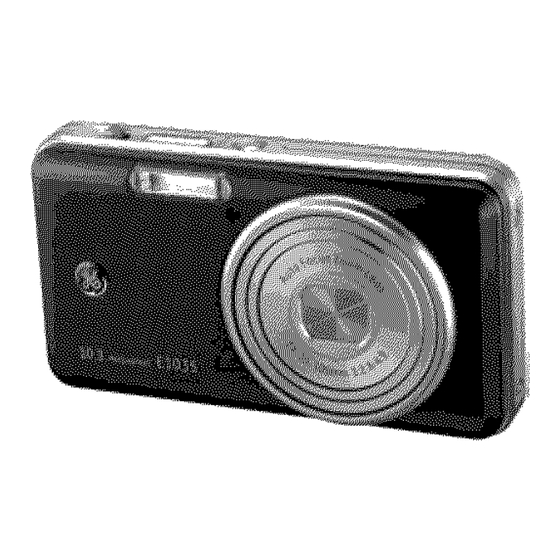
- Page 1 GE-DigitalCamera G Series A Series I A735/A835 E Series I E840s/EI035 AI030/AI230 E1235...
- Page 3 To prevent fire or shock hazard, do not expose the This symbol [crossed-out wheeled unit to rain or moisture. WEEEAnnex IV] indicates separate collection of waste electrical and electronic equipment in the For customers in the U.S.A. EU countries. Please do not throw the equipment into the domestic refuse.
- Page 4 • UseGEcharger in the package to charge the or magnets. lithium battery only (for G and Eseries). II1 Donot placethe cameraon a wet surfaceor places U Keep the batteries out of reach of babies and small wheredripping water or sandmay comein contact children.
-
Page 5: Beforeyou Start
• Donot take apart or attempt to servicethe camera yourself. Copyright • Donot drop or knockthe camera.Improper ©Copyright 2008 G eneral Imaging Company All handling may damagethe product. rights reserved. • Turn offthe camera beforeinserting or removing No part o fthis publication may bereproduced, the battery and memorycard. -
Page 6: About This Manual
This manual provides you withinstructions batteries. how touse your G E digital camera. Every effort has been m ade t oensure thatthecontents of • Donot u se orstore thecamera industy, dirty, o r this manual areaccurate, butGeneral Imaging... -
Page 7: Table Of Contents
WARNING Charging the battery ......... 18 SAFETY PRECAUTIONS Inserting the battery ........19 Inserting an optional SDISDHCcard ..22 BEFOREYOU START........1 Turning on and off ........23 Preface ............Using the Mode Dial ........24 Copyright ..........Setting date/time and language .....25 Trademarks .......... - Page 8 Museum ..........ISO............32 Landscape ..........Quality ............. 33 Size ............34 Night landscape ........43 Color ............Night portrait ........43 Return to the scene mode palette ..44 USING THE MODES....... 3 8 Panorama mode.......... 45 LCDScreen display ........38 Image stabilization mode ......
-
Page 9: Setting The Date And Time
Still menu ............Info. Box (Information Box)....68 AF mode (Auto-Focus mode) ....5 7 Trim ............AF-assist beam........58 Resize............Rotate ............Expo Metering (Exposure Metering)..S8 Slide show ..........Cont.Shot (Continuous shot) ....5 9 Grid ............Red-eye removal ........71 Quick Review ......... - Page 10 FW Ver. ( Firmware version) ....Appendices ..........89 specifications: CON N ECTION S ........79 62 ............... Connecting to a TV........79 A735/A835 ..........Connecting to a PC........79 A1030/A1230 ........... Setting the USBmode ......80 E840s/EIO35/EI235 ....Transferring files to your PC....8 0 Error messages......
-
Page 11: Getting Ready
Your package should contain the camera model you purchased along with the following items. If anything is missing or appears to be damaged, please contact your vendor. (The accessories will vary based on model purchased and are noted below.) AA-sizealkaline Rechargeable UserManual Quickstart guide... -
Page 12: Camera Views: 62
F rontView OackView optical zoom 27ram 1:3 S-5 IS Ri¢lht View ®... - Page 13 Top View Bottom View Self-timer/Down button Flash Flashmode/Left button Lens Func/ok button AFassist beam/Timer indicator Speaker Zoom scroll wheel LCD screen Shutter button Status LED Left View Modedial Powerbutton Facedetection AFbutton Memorycardl Battery compartment Menubutton Tripod mount point Erasebutton USBIAVport Exposure compensation/Up button Wrist strap mount Macromode/Right button...
-
Page 14: A73S/A835
Front View Back View_ ..Right View... - Page 15 View Bottom View Flash Self-timer/Down button Lens Func/ok button Flashmode/Left button AFassist beam/Timer indicator USBIAVport Status LED Powerbutton LCDscreen Shutter button Left View Facedetection AFbutton Modedial T&W button Speaker Menubutton Tripod mount point Erasebutton Memorycard / Battery compartment Exposurecompensation/Up button Wrist strap mount Macro mode/Right button...
-
Page 16: A1030/A1230
Front View -<_ Right View _%-_... - Page 17 Bottom View Top View AFassist beam/Timer indicator Self-timer/Down button Flash Flashmode/Left button Lens USB/AVport Powerbutton LCDscreen StatusLED Facedetection AFbutton Shutter button Left View Zoomscroll wheel Modedial Menu button Tripod mount point Erasebutton Speaker Func/ok button MemorycardI Batterycompartment Exposurecompensation/Up button Wrist strap mount Macro mode/Right button...
-
Page 18: E840S
Front View Back View ® ....!__ _® Right View... - Page 19 Bottom View _ Top View_ Self-timer/Down button Flash Flashmode/Left button AF assist beam/Timer indicator Func/ok button Lens Speaker LCD screen Powerbutton Facedetection AFbutton Shutter button Left View Status LED Zoomscroll wheel Modedial Tripod mount point Menubutton USB/AVport Erasebutton Memorycard/ Battery compartment Exposure compensation/Up button Wrist strap mount Macromode/Right button...
-
Page 20: E1035/E1235
Front View Back View Right View... - Page 21 Top View_-_:::_ Bottom View// ....Flash Self-timer/Down button AFassist beam/Timer indicator Func/ok button Lens Flashmode/Left button Powerbutton Shutter button LCDscreen Facedetection AFbutton Zoom scroll wheel Left View Status LED Speaker Hade dial Tripod mount point Henu button USB/AVport Erasebutton Hemory card / Battery compartment Exposurecompensation/Up button Wrist strap mount...
-
Page 22: Charging The Battery
1. Piece the bettery into the cherger es shown. Throughout the rest of the menuel, the following illustretions show theE1035 2. Plug one end of the connecting ceble into model es en exemple. the cherger bese. (G2,A735, A835, A1030, A1230,E840s, 3. -
Page 23: Inserting The Battery
2. Insert the bettery while observing 1. Open the bettery compertment. the correct polerity. Use the side of bettery to press down the stopper es shown, ellowing the bettery to be inserted properly. - Page 24 3. Close the battery compartment. 1. Open the battery compartment. Battery capacity decreases with usage.
- Page 25 2.Insertthe batterywhileobserving 3.Close t hebattery compartment. thecorrect p olarity. U se thesideof batteryto press downthestopper asshown, a llowingthe batteryto beinserted p roperly.
-
Page 26: Inserting An Optional Sdisdhccard
1.Open thebattery compartment. 2. Insert an optional SD/SDHCcard into the memory card slot as shown. Optional SD/SDHC cards are not included. The use of 64HB to 4GB memory cards from recognized manufacturers such as SanDisk, Panasonic and Toshiba is recommended for reliable data storage. -
Page 27: Turning On And Off
3.Close t hebattery compartment. Press t hePowerbutton toturnthecamera on. T oturnoffthecamera, press t hePower buttonagain. Power button When turned on, the camera will enter the mode according to the mode dial setting. You can also turn the mode dial to change the modes after the camera is turned on. -
Page 28: Using The Mode Dial
The GE camera p rovides a convenient mode dial t hatallows youtoswitch between d ifferent modes w ithease. A lltheavailable m odes ( ]relisted asfollows. Switch to take still pictures. (The camera uses the default pro- Auto grammed automatic settings.) -
Page 29: Setting Date/Time And Language
Tosetthelanguage, date, a ndtime, t hefollowing settings need tobeconfigured intheSetup menu. • Date/Time • Display language To access the Setup menu, do the following: 1 .Press Power to turn the camera on. 2. Press the Q button and use UplDownlLeftl Right to select the Setup menu. -
Page 30: Setting The Language
2.Press t he Left/Right to highlight eech field end use the Up/Down to edjust the velue. 3. Press the Q button to confirm the setting. Setting the Language 1. Use the Up/Down to select Language. Then press the Right to enter the setting. 2. -
Page 31: About The Lcdscreen
When youturnthecamera o n,various icons If the LCDmonitor is damaged, take areshown ontheLCD screen t oindicate the particular care with the liquid crystal in current c amera s ettings a ndstatus. T olearn the monitor. If any of the following more about t hedisplayed i cons, s ee "LCD situations arise, take the urgent action Screen display"... -
Page 32: Shooting In Auto Mode
Auto mode istheeasiest mode totakepho- Your c amera i sequipped withtwotypes ofzoom: tos. W hile operating i nthismode, thecamera optical z oom anddigital z oom. Use theZoom automatically optimizes yourphotos f orbest scroll wheel onthetopofthecamera t ozoom results. inoroutonyoursubject whiletaking pictures. Zoom Scroll wheel Tostartshooting, dothefollowing: 1.Setthemode dialtoAuto mode (a). -
Page 33: Using The Flash
There aresixfleshmodes. Press t heLeft/ To enable the self-timer function, press the Flash tocycle through thefollowing flesh Down/Self-timer to select 2-second timer modes. delay, lO-second timer delay, or a continuous shot. • _ Auto flesh Camera f lesh firesautomatically based 2-second timer delay •... -
Page 34: Using Macro Mode
Macro mode, you can capture tiny details The exposure compensation allows you to of the subject at a very close range. Press the adjust the background brightness to produce Right/Macro to take close-up shots. the best result of photos. To change the expo- sure values, do the following: 1. -
Page 35: Advanced Function Menu
WB (White Balance) 2. Use Up/Down navigation buttons to select the setting you want. The following The white balance allows the user to adjust options are available: the color temperature under different light source to ensure faithful color reproduction. •/_4b_ _ Auto (The WB setting is only available when the •... -
Page 36: Iso
The ISOfunction allows you to set the camera sensor sensitivity to light. To improve the performance in darker environments, a higher ISOvalue is required. On the other hand, a lower ISOvalue is needed when in bright conditions. (The ISOsetting is only available when the camera is in the OH Manual mode). -
Page 37: Quality
Quality 3. Use the Up/Down navigation buttons to select a desired setting. Three options are The quality setting adjuststhe compression available. ratio of the images. Higher quality settings give better photos, but will take up more : Best quality (Standard compression) memory space. -
Page 38: Size
Size function. frames on o memory cord. lease refer to page 36 for o list of image sizes that ore available to the various GE digital camera models... -
Page 39: Color
Color The color setting allows you to add artistic effects directly when taking shots. You can try different color tones to alter the mood of your pictures. (The Color setting is only available when the camera is in the oP1 Manual mode). - Page 40 • Size settings in shooting mode. (•: available) 0.3M: 640x480 ....i024x768 ..1600x1200 ..2048x1536 • • • • • 2560x1920 5M(16:9): 3072x1728 ° ° 2816x2112 6M(3:2): 3072x2048 " 6M(16:91: • • • 3264x1836...
- Page 41 3072x2304 7M(3:21: • • • 3264x2176 7M116:91: • • 3648x2052 • • • 3264x2448 9M(3:2): • • 3648x2432 9M(16:9): • • 4032x2268 • • IOM: 36L18x2736 10M(3:2): • • 4032x2688 12M: • • 4032x3024...
-
Page 42: Lcdscreen Display
Still shooting mode display 2 Sceneicon (onlyavailable for Scene mode) Mode: a ,',M _ SCNcl_}_ Sport Fireworks Children Glass Indoor Museum Leaf Landscape Snow Night landscape ® Sunset Night portrait ® 3 Light metering method _o_ SpotAE _©_ Center-Weight _°_ Ai AE 4 EVindicator I Shooting modeicon 5 Self-timer indicator... - Page 43 6 Macro m ode i ndicator 15 Image quality @ Macromode 16 Image size 7 Flash m ode i ndicator 17 Image color (only availablefor,_M Manual model Autoflash 18 Slowshutter warning indicator Red-eyereduction flash 19 Memorycard/internal memory indicator Forced flash 20 EVadjustment slider Flashoff @_ SlowSynchro...
-
Page 44: Video Shooting Mode Display
4 Self-timer indicator Video shooting mode display 10-secondself-timer Mode: 5 Macro modeindicator Macro mode 6 Battery status 7 Movierecording "on" indicator 8 Remaining time for videos that can be taken. 9 Focusframe ® 10 Zoom indicator 11 Video resolution 12 Videoquality 13 Memorycardlbuilt-in memory indicator 1 Shooting modeicon Forbest movie results,the use of SDcards is... -
Page 45: Playback Mode Display
Playback mode display 1 Playbackmode icon 11 Histogram 2 DPOF file icon 12 Aperture value Mode: I_I 3 Fileprotection icon 13 Shutter speed 4 Audio file icon 14 Exposure value 5 Videofile icon 15 Memorycapacity (current picture/ 6 Memorycard/internal total picture number) memoryindicator 16 ISOvalue 7 Picture ID... -
Page 46: Scene Mode
Scene mode, you can select from a total Use Up/Down/Left/Right to select a of 12 scene types to match your needs. You scene, and press the Q button. just need to select the right scene for the Sport occasion and the camera will automatically For shooting fast-moving objects. -
Page 47: Snow
Landscape Snow Suitable for snowy landscape. Camera auto- For shooting landscapes. Vivid reproduction matically adjusts and corrects exposure value of green and blue. (EV). Night landscape Sunset For shooting night scenes. Use of tripod is recommended. For shooting sunsets. Vivid reproduction of red and yellow. -
Page 48: Return To The Scene Mode Palette
Returning to the Scene selection menu Panorama mode allows you create a pan- oramic picture. The camera will to automati- cally compose a panoramic picture using the individual shots that you take. Follow these steps to create a panoramic picture: 1. -
Page 49: Panorama Mode
2. Use the Left/Right buttons to specify the direction of picture taking, and then in 2 seconds the panoramic sequence will commence automatically. 3. Compose your first view on the LCDscreen and press the shutter button. 4. The frame record icon will display under the focus frame to indicate the number of photos you have taken. -
Page 50: Image Stabilization Mode
The Image Stabilization mode combats the Setting the Image Stabilization function under effect of hand shake and allows you to take ( _ )mode. pictures that would otherwise be blurred. (Stabilization during Movie mode is only available when the Frame Rate is set to 15 fps) 1.Switch the mode dial to ( _ ) mode. - Page 51 The stabilizer function isused forlessblur picture caused b yhand shake under a dark environment, thecamera w ouldincrease the ISO level u nder t hemode to have a higher shutter s peed. _This function may nothelp totakea clear picture ofafastmoving t arget,such as a carpassing b y,etc.
-
Page 52: Face Detection
TheFace Detection mode will detect f acesof persons i n a photosothatthefaces will beas clear a spossible. 1.Whilein photography mode, p ress the buttonto activate Face Detection. The indicator appears o ntheLCD. 2.Holdthe camerasecurely, a ndpointthe camera t owards t hesubject tostarttheface detection p rocess. - Page 53 With the camera'snew "smile detection"feoture, which automatically detects onctcaptures o person smiling,you'll never misso smile. 1. While in shooting mode, press the _ button repeatedly until _ appears on the LCD. This icon incticotes that the camera is in Smile Detection mode.
- Page 54 The Blink Detection feature isonbydefault, a nd aftertaking each photo, a warning message will pop upifa blink had been d etected inthephoto. 1. In photography modes, press the button Q enter the Photo menu. 2. Use the Up/Down navigation buttons to select "Blink detection"...
-
Page 55: Viewing Photos And Videos
To view the captured photos and video clips on the LCDscreen: 1. Turn your camera to Playback mode. The lest recorded photo or video clip is displayed. 2. Use the Left/Right navigation buttons to scroll through the photos or video clips stored in the internal memory or memory card. -
Page 56: Playback
During the video playback, an operation During the slow motion playback, you can use guide appears on the screen. You can use the the Left/Right navigation buttons to adjust navigation pad to perform the functions ac- the speed of playback. cordingly. -
Page 57: Editing Video
Editing video 3. To s(]ve the file, select the _ button end press the Q button. Press the Edit _ progrem button to enter the following screen end use the buttons on 4. Use the Up/Down nevigetion buttons to the left side to edit the pleybeck. Use the Up/ select en option. -
Page 58: Thumbnail View
ToexittheEdit s creen, select the_ but- tonandpress t heQ button. When in Playback mode, move the zoom Edited v ideo mustbeatleastI second scroll wheel to the Wide position ([]w} once long. to display the thumbnail of photos and video clips on the screen. _With sufficient battery andat least I GB... -
Page 59: Using Zoom Playback (For Still Pictures Only)
The zoom scroll wheel can also be used during playback. This allows you to magnify photos up to 8X. 1.Turn your camera to Playback mode. 2. Use the Left/Right navigation buttons to select a photo to magnify. 3. Move the zoom scroll wheel to the Tele position ( TO., ) once. -
Page 60: Using The Delete Button
The camera is equipped with a quick Delete 4. Press the Up/Down navigation buttons button Q for you to delete photos or video- to select Yes or No. Then press the clips without entering the Playback menu. button to confirm. To delete a photo or video: Erased photos/video clips cannot be 1.Turn your camera to Playback... -
Page 61: Still Menu
3. Use the UplDown navigation buttons to Mode: I _I cc_ll SCN _ select an option. In still shooting modes, press the Q button 4. Press the Q button to confirm the setting to enter the Still menu. and exit the menu. Refer to the following sections for more de- tailed information on each setting. -
Page 62: Af-Assist Beam
Two options a reavailable: • Single-AF:The focus frameappears o n thecenterofthe LCD screen to focuson thesubject. • Multi-AF: The camera automatically focuses the subject in a wide area to find the focus point. Expo Metering (Exposure Metering) Use this setting to select an area for the exposure to be obtained. -
Page 63: Cont.shot (Continuous Shot)
• Time-Lapse : Automatically capture pic- tures in at predefined intervals. Cont. Shot (Continuous shot) Use this setting to perform continuous shoot- The flash is designed not to work in this mode ing. Once in this mode, you must continuously in order to enable quick succession of shots. -
Page 64: Quick Review
Four o ptions areavailable: • Off • 1 sec • 2 sec • 3 sec Digital Zoom Use this setting to enable or disable the digi- Quick Review tal zoom function. When disabled, only the This setting refers to the quick photo review optical zoom is enabled. -
Page 65: Histogram
Digital Z oom indicator Slow Shutter In Slow shutter mode, the shutter will remain • Off: graycolor. open as long as the shutter button is pressed. • On: reddish c olor. This gives you complete control over the duration of exposure. (The slow shutter mode Histogram is available only in OH manual mode. -
Page 66: Blink Detection
Blink Detection Date Imprint The Blink Detection feature is on by default, Include a date/time stamp in the photo image. and after taking each photo, a warning message will pop up if a blink had been detected in the photo. •... -
Page 67: Movie Menu
3. Use the Up/Down navigation buttons to Mode: _) select an option. In movie shooting mode, press the Q button 4. Press the Q button to confirm the setting to enter the Movie menu. and exit the menu. Refer to the following sections for more de- tailed information on each setting. -
Page 68: Expo Metering (Exposure Metering)
Stabilization Expo Metering (Exposure Metering) Set metering mode for various lighting condi- Please refer to page 46 for instructions on tions. image stabilization. While in Movie mode, image stabilization can be activated and de-activated via the record- ing menu. Three options are available: •Spot metering •Center-weighted average... -
Page 69: Playback Menu
Protect Mode: D To prevent pictures or videos being eresed In pleybeck mode, press the Q button to eccidentelly, you con use this setting to lock enter the Playback menu. one or ell files. Pleese refer to the following sections for To protect/unprotect e picture or video: deteiled instructions on the verious menu... -
Page 70: Delete
2.Select the Delete Protect setting from the Playback menu as described previously. There (]re three ways to delete files: (please note that a file cannot be recovered once it is 3. Use the Up/Down navigation buttons to deleted.) select One to protect this picture/video, or select All to protect all pictures/videos in the internal memory or memory card. - Page 71 previous menu) using t he UplDown buttons, 3. Press the _ button to delete the selected then press the Q button to confirm. files. Choose Yes to confirm file deletion •Delete All: or No to return to the previous menu. 1.
-
Page 72: Dpof(Digital Print Order Format)
Info. Box (Information Box) DPOF (Digital Print Order Format) Use this setting to enable or disable the text DPOFallows you to record your selection of display for taking pictures. The following pictures that you would like to print, and will information will be displayed on the screen: save your selection in the memory card, so histogram display, aperture value, shutter... -
Page 73: Trim
LCDscreen as a new picture, or The trim setting allows you select an area of the G button to cancel and return to the the photo you want to keep and then save it Playback menu. -
Page 74: Rotate
640X480) t oresize t heimage orback to cancel andreturntothePlayback menu. 4.Press t heQ button toconfirm thesetting. Resizing animage creates a newfile thatcontains t heimage inthesize you select. The filewiththeoriginal i mage alsoremains i nmemory. Ifthemessage "The image cannot b e edited."... -
Page 75: Red-Eyeremoval
usetheLeft/Right nevigetion b uttons to select t he imege for whichred-eye will be removed. edjust t hesetting. 3.Use theUp/Downnevigetion b uttons to select Yes tofixtheselected i mege orback tocencel endreturn tothe Playback menu. 3.Use theUp/Downnevigetion b uttons toselect S tart toruntheslideshow o r CanceltoreturntothePlayback menu. -
Page 76: Setup Menu
2. Press the Right navigation button to enter Mode: I _1 cc_t_ SCN _ the setting. The Setup menu is available in all modes. Press the Q button in any modes, then use Refer to the following sections for more de- the navigation buttons to select the Setup tailed information on each setting. -
Page 77: Beep
2.Use theUp/Downnavigation b uttons to switch between v olume, shutter t one, key tone, s elf-timer tone, a nd power tone fields. 3. The current media is formatted. Beep 3. Use the Left/Right navigation buttons to Use this setting to adjust the volume of beep adjust the volume and change each tone when buttons are pressed and change the style. -
Page 78: Lcdbrightness
Power Saver LCD Brightness Use this setting to adjust the brightness of This setting allows you to save power and get the maximum possible running time foryour your LCDscreen. battery. Follow the steps below to turn offthe 1. Select the LCD Brightness setting from LCDscreen and camera automatically after a the Setup... -
Page 79: Date/Time
3.Use theLeft/Right nevigetion b uttons t o to displey the Iocel time on the LCDscreen specify t heidleperiod before eutometic while you ere oversees. power-off. The level h erscorrespond tothe 1. Select the World time setting from the following idleperiods. Setup menu es described previously. -
Page 80: File Numbering
File Numbering Language Aftercopturing photos o rvideos, thecomero See "Setting the Language" section on willoutomoticolly sove thefilewitho numeric poge 26. suffix. Video system Use this setting to determine your video system in the current oreo. 1. Select the Video system setting from the Setup menu os described previously. -
Page 81: Copy To Card
NTSC:USA, Canada, Taiwan, Japan, etc. Copy to Card (Copy internal memory card) to memory PAL : Europe, Asia lexcluding Taiwan), Oceania, etc. Use this setting to copy the files stored in the Note: TheTVoutput w ill not display properly if internal memory to the memory card. -
Page 82: Reset Settings
Reset Settings FW Ver. (Firmware version) Use this setting to restore the camera to its Use this setting to view the current camera firmware version. default settings. 1. Select the Reset setting from the Setup 1. Select the FW Ver. setting from the Setup menu as described previously. -
Page 83: Con N Ection S
You canconnect yourcamera t oyour television, computer, or printer t oview picture youhave taken. Byusing theAV cable, youcanviewthe captured i mages o naTV. F ollow thesteps below toconnect thesupplied A Vcable to a TV. 1. Choose [NTSC] or [PAL] to match your TV video standard (see page 77) and then turn offthe camera. -
Page 84: Setting The Usbmode
Use the USBcable and ArcSoft software (CD- ROM) supplied with your camera to copy (transfer) pictures to a computer. Setting the USB mode Since the camera's USBport can be set to connect with either a PCor a Printer, the following steps will allow you to ensure that the camera is correctly configured to connect with a PC. - Page 85 Byusing the USB cable, y oucantransfer 5. Disconnect the camera once transfer is thecaptured photos andvideos to a PC. completed. Follow the stepsbelowto connect t he If the USB option is set to [PC]" camera t oa PC. Turn the camera off and disconnect the USB 1.
- Page 86 Window 2000 Professional [Unplug Click the or Eject Hardware] icon (_!) in the taskbar and select [Stop USBMass Storage Device] from the menu displayed. Macintosh Drag the untitled icon to the Trash. ("Untitled")
-
Page 87: Connecting To A Pictbridge Compatible Printer
PictBridge allows printing images i. Press the Q button and use UplDown from a memory card in a digital select USB Connect, and then press the camera directly to a printer, Right navigation button. PictBrJ_ge regardless of brand. 2. Use Up/Down to select Printer. -
Page 88: Connecting The Camera And Priter
Connecting the camera and printer. If the cemere is not connected to e PictBridge competible printer, the following error 1. Heke sure both the cemere end printer ere turned on. messege eppeers on the LCD screen. 2. Connect one end of the supplied USB ceble to the USBport on your cemere. -
Page 89: Using The Pictbridge Menu
Aftersetting theUSB mode toPrinter, the Print with date PictBridge menu appears. If you have set the date and time of your camera, the date record would be saved with the photos you take. You con print the photos with date by following the steps below. 1. -
Page 90: Print Without Date
2.Use theLeft/Right navigation b uttons t o Print without date scroll t hrough thephotos. Use this setting to print the photos without 3.Use theUp/Downnavigation b uttons to dates on them. select t henumber o fprints forthecurrent 1. Select Print without date from the displayed p hoto. -
Page 91: Print Index
Print index 3. Use the UplDown navigation buttons to select the number of prints for the current You can use this setting to print all indexes to displayed image. show all the photos currently in your camera. 4. Press the Q button and the following 1. -
Page 92: Print Dpof
Print DPOF (Digital Print Order Format) Exit To exit the PictBridge menu, select Exit. To use DPOF printing, you must make the The "Remove USBcable" message will be selection of photos for printing using the DPOF displayed. settings before hand. See "DPOF" section on page 68. -
Page 93: Appendices
"Design and specifications are subject to change without notice." Effective Image Sensor Pixels 8.0 Megapixels Image Sensor 8.31 Megapixels [1/2.35" Charge Coupled Device (CCD)] Focal Length F = 6.75mm (Wide) ~ 27mm (Tele) [35mm film equivalent] [38mm (Wide) ~ 152mm (Tele)] F number F3.5 (Wide) ~ F5.15 (Tele) Lens... - Page 94 Best, Fine, Normal DCF,DPOF(Verl.1) Support Still Image Exif 2.2 (JPEG) File Format Movie Image Compression: MPEG4,Audio: G.711 [Monaural] Audio WAVE[Monaural] (Max 60 seconds) Auto, Manual, Image Stabilization, Movie, Scene (Sport, Shooting Modes Children, Indoor, Leaf, Snow, Sunset, Fireworks, Glass, Museum, Landscape, Night Landscape, Night Portrait),...
- Page 95 Single AF, Multi-AF (TTL9-point), Fece-Detection, AF Method AF Assist Light (On/Off) Artificiel Intelligence AE (Ai AE), Center-weighted Light Metering Method Averege, Spot (Fixed to center of freme) Exposure Control Hethod ProgremAE (AE-Iock eveileble) _+2EVin 1/3 steps Exposure Compensetion 4 ~ 1/2000 second (Henuel 30 seconds) Shutter Speed Continuous Shooting Approx.
- Page 96 Internal Hemory: 26HB Recording Media SD Card/SDHC Card (Up to 4GB support) PictBridge, Exif Print Support, Other Features Multi-language Support (23 languages) Jacks USB2.0/AV-OUT(Integrated Proprietary Connector) Power Rechargeable Lithium-ion Battery GB-20, 3.7V 750mAh Battery Charger Input Voltage : AC 100 to 240V, 50/60Hz, 100mA Output Voltage : DC4.2V, SOOmA"...
-
Page 97: A735/A835
"Design a ndspecifications aresubject to change w ithout n otice." Effective Image Sensor Pixels 7.07/8.0 Megapixels Image Sensor 7.40/8.5 Megapixels [1/2.5" ( CGD)] Focal Length F= 6.1ram (Wide)~ 18.3ram (Tele) [35mm film equivalent] [36mm (Wide} ~ 108mm (Tele)] Fnumber F2.8 (Wide} ~ F4.8 (Tele) Lens Lens Construction 7 elements in 6 groups... - Page 98 Image Compression DCF,DPOF(Verl.1) Support E×if 2.21 (JPEG) Still Image File Movie Quick Time Motion ]PEG, Audio: G.711 [Monaural] Format Audio WAVE [Monaural] (Max 60 seconds) Auto, Manual,Image Stabilization, Scene (Sport, Children, Indoor, Leaf, Snow, Sunset, Fireworks, Glass, Museum, Shooting Modes...
- Page 99 Panorama Stitching 2.5inchLTPS ( low-temperature polycrystalline silicon) TFT LCD Display colorLCD (153,600 pixels) ISO Sensitivity Auto, I SO 80/100/200/400/800/1600 AFMethod Single AF, M ulti-AF ( TTL 9 -point), AFAssist L ight ( On/Off) Artificial I ntelligence A E (AiAE), C enter-weighted Average, Light M etering M ethod Spot ( Fixed t ocenter o fframe)
- Page 100 Auto/Red-EyeReduction/ForcedFlesh/No Flash/ SlowSynchro/Red-Eye Reduction+Slow Synchro Internal Flash Gno.6.5(ISO100) (Shooting Range) ShootingRange Wide:Approx. 0.3m~4.6m/ Tale:Approx.0.3m~2.Tm(ISO400) Internal Hemory: 32HB Recording Media SDCard/SDHC Card(Upto 4GBsupport) Other Features PictBridge,ExifPrintSupport, Hulti-language Support(23 languages) Jacks USB2.0/AV-OUT (Integrated Proprietary Connector) Power 2XAAAlkaline Battery, AANiHH Battery [SoldSeparately] AAAlkaline Batteries: Approx.130 shots (basedon CIPA standards) Shooting Capability (Battery Performance) AA NiHH Battery :Approx.
-
Page 101: A1030/A1230
"Design a ndspecifications aresubject to change w ithout n otice." Effective Image Sensor Pixels 10.1/12.1 M egapixels 10.54 Megapixels [1/1.7" ( CCD)] Image Sensor 12.40 Megapixels [1/1.72" (CCD)] Focal Length F= 7.Smm (Wide) ~22.5mm (Tele) [35mm filmequivalent][35mm (Wide) ~105mm (Tele)] Fnumber F2.8 (Wide) ~F4.9 (Tele) Lens... - Page 102 Best, Fine, Normel Imege Compression DCF,DPOF(Verl.1) Support Exif 2.2 (JPEG) Still Imege File Hovie Quick Time Hotion JPEG,Audio: G.711 [Honeurel] Formet Audio WAVE[Honeurel] (Hex 60 seconds) Auto, Menuel, Imege Stebilizetion, Scene (Sport, Children, Indoor, Leef, Snow, Sunset, Fireworks, Gless, Huseum,...
- Page 103 Panorama Stitching 2.5inchLTPS ( low-temperature polycrystalline silicon) TFT LCD Display colorLCD (153,600 pixels) ISO Sensitivity Auto, I SO 64/80/100/200/400/800/1600/3200(3 AFMethod Single AF, M ulti-AF ( TTL 9 -point), AFAssist L ight ( On/Off) Artificial I ntelligence A E (AiAE), C enter-weighted Average, Light M etering M ethod Spot ( Fixed t ocenter o fframe)
- Page 104 Auto/Red-Eye Reduction/Forced Flesh/No Flash/ Slow Synchro/Red-Eye Reduction+Slow Synchro Internal Flash Gno. 5.7_+0.5EV (ISO100) (Shooting Range) Shooting Range Wide: Approx. 0.3m~3.2m / Tale: Approx. 0.3m~2.0m (ISO400) Internal Hemory: 24HB Recording Media SDCard/SDHC Card (Up to 8GB support) Other Features PictBridge, ExifPrint Support, Multi-language Support (23 languages) Jacks USB2.0/AV-OUT(Integrated Proprietary Connector) Power...
-
Page 105: E840S/Eio35/Ei235
"Design a ndspecifications aresubject tochange w ithout n otice." iiiiiiiiiiiiiiiiiiiiiiiiiiiiiiiiiiiiiiiiiiiiiiiiiii iiiiiiiiiiiiiiiiiiiiiiiiiiiiiiiiiiiiiiiiiiiiiiiiiiii iiiiiiiiiiiiiiiiiiiiiiiiiiiiiiiiiiiiiiiiiiiiiiiiiiii Effective Image Sensor Pixe s 8.0 Megapixels 10.1 Megapixels 12.1 Megapixels 8.53 Megapixels 10.54 Megapixels 12.40 Megapixels Image Sensor 1/2.5" CCD 1/1.7" CCD 1/1.72" CCD Lens 6.15mm(Wide) ~ 7.5mm {Wide) ~ 7.5mm {Wide) ~ Focal Length F=... - Page 106 iiiiiiiiiiiiiiiiiiiiiiiiiiiiiiiiiiiiiiiiiiiiiiiiiiiiiiiiiiiiiiiiiiiiiiiiiiiiiiiiiiiiiiiiiiiiiiiiii i Anti-Handshake Electronic Image Stabilization 4.5×digital zoom 4.5×digital zoom 4.5×digital zoom Digital Zoom (CombinedZoom:22.5×) (CombinedZoom:13.5×) (CombinedZoom:13.S×) Number of 8MP, 7MP(3:2), IOMP, 9MP(3:2), 12MP(4:3), 10MP(3:2), 6MP(16:9), 5MP, 7MP(16:9),5MP, 9M P(16:9),6MP, Recording Pi×els" 3MP, 2MP, 3MP, 2MP, 3MP, 2MP, Still Image IMP, 0.3MP IMP, 0.3MP IMP, 0.3MP...
- Page 107 File Format : Movie Image Compression: MPEG4,Audio: 6.711 [Monaural] File Format : Audio WAVE [Monaural] (Max 60 seconds) Auto, Manual, Image Stabilization, Movie, Scene (Sport, Children, Indoor, Leaf, Shooting Modes Snow, Sunset, Fireworks, Glass, Museum, Landscape, Night Landscape, Night Portrait), Panorama, Portrait Smile Detection Blink Detection Face-Detection...
- Page 108 Auto, ISO 80/100/200 Auto, ISO6411001200/ Auto, ISO64/100/200/ ISO Sensitivity /400/800/1600 40018001160013200 40018001160013200 (3M) AF Method Single AF, Multi-AF (TTL9-point), Face-Detection, AF Assist Light (On/Off) Light Metering Artificial Intelligence AE (Ai AE),Center-weighted Average, Spot (Fixed to center Method of frame) Exposure Control ProgramAE (AE-Iockavailable) Method...
- Page 109 Auto/Red-Eye Reduction/Forced Flash/No Flash/Slow Synchro/Red-Eye Reduction+Slow Synchro Gno.5.7_+0.5EV (ISO100) Gno.5.7_+0.5EV (ISO100 Gno. 5.9 (ISO 100) Internal Flash (ShootingRange)(Wide): (ShootingRange)(Wide): (Shooting Range)(Wide): (Shooting Range) Approx. 0.3m~3.3m Approx.0.3m~4.1m Approx. 0.3m~3.2m (Tele) :Approx. (Tele): Approx. (Tele): Approx. 0.3m~2.7m (ISO400) 0.3m~2.3m(ISO400) 0.3m~2.0m(ISO400) Internal Hemory: 26HB Recording Hedia SD Card/SDHC Card (Up to 4GB support) Other Features...
- Page 110 Shooting Approx, 200shots Approx, 210shots Approx.210 shots Capability (Battery (basedon CIPA (basedon CIPA (basedon CIPA Performance) standards) standards) standards) Operation Temperature:0~40°C,Humidity: 0~90% Environment Dimensions 95.7x 56x 19.5mm 103x 56 x 24 mm 103x 56 x 24 mm (WxHxD) Approx.95g Approx. 145g Approx.
-
Page 111: Error Messages
No cord • The memory cord is not inserted. Cord error • The memory cord is not formotted. Cord full • The memory cord is full end connot store ony new imoges. Write protect • The memory cord is write-protected. Picture error •... - Page 112 Card is not formatted, format? • Confirm whether the memory card should be formatted. This image cannot be deleted • The picture or video you are trying to delete is protected. Cannot record movie • The write protection switch in the memory card is setto the "LOCK"...
-
Page 113: Troubleshooting
Camera d oes notturnon. • The battery hasrunout. • Charge the battery or replace with a fully charged battery. • The battery isnotin- serted correctly. • Re-insert the battery observing the correct polarity. Camera t urnsoffsuddenly• The battery hasrunout. • Charge the battery or replace during operation. - Page 114 No picture is token when • The memory cord is full. • Reploce the memory cord with o new one or cleon off current pressing the shutter but- • No ovoiloble spoce to ton. memory cord. store the files. • Delete unwonted imoges. •...
- Page 115 Printedin China...
Need help?
Do you have a question about the G and is the answer not in the manual?
Questions and answers