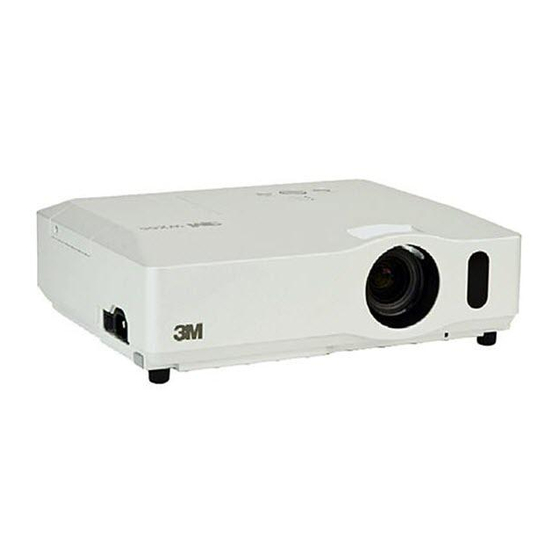
3M Digital Projector WX66 Operator's Manual
Hide thumbs
Also See for Digital Projector WX66:
- Product safety manual (17 pages) ,
- Specification sheet (2 pages) ,
- Setup manual (1 page)
Table of Contents
Advertisement
Quick Links
Download this manual
See also:
Setup Manual
Digital Projector WX66
Operator's Guide
Thank you for purchasing this projector.
WARNING
product. Be sure to read "Product Safety Guide" first. After reading them, store
them in a safe place for future reference.
About this manual
Various symbols are used in this manual. The meanings of these symbols are
described below.
WARNING
CAUTION
NOTE
• The information in this manual is subject to change without notice.
• The manufacturer assumes no responsibility for any errors that may appear in
this manual.
• The reproduction, transfer or copy of all or any part of this document is not
permitted without express written consent.
Trademark acknowledgment
• Mac is a registered trademark of Apple Inc.
• Windows is a registered trademark of Microsoft Corporation.
• VESA and DDC are trademarks of the Video Electronics Standard Association.
• PowerPC is a registered trademark of International Business Machines Corporation.
• DVI is a trademark of Digital Display Working Group.
• HDMI, the HDMI logo and High-Definition Multimedia Interface are trademarks
or registered trademarks of HDMI Licensing LLC.
All other trademarks are the properties of their respective owners.
© 3M 2008. All Rights Reserved.
►Before using this product, please read all manuals for this
This symbol indicates information that, if ignored, could possibly
result in personal injury or even death due to incorrect handling.
This symbol indicates information that, if ignored, could possibly
result in personal injury or physical damage due to incorrect
handling.
Please refer to the pages written following this symbol.
1
Advertisement
Table of Contents

Related Manuals for 3M Digital Projector WX66


Summary of Contents for 3M Digital Projector WX66
-
Page 1: About This Manual
• DVI is a trademark of Digital Display Working Group. • HDMI, the HDMI logo and High-Definition Multimedia Interface are trademarks or registered trademarks of HDMI Licensing LLC. All other trademarks are the properties of their respective owners. © 3M 2008. All Rights Reserved. -
Page 2: Table Of Contents
Technical (English only) ontrAst olor hArpness (Please see the end of this book, although only in English.) hisper irror eset ilter time o to Advanced Menu AnguAge © 3M 2008. All Rights Reserved. -
Page 3: Projector Features
Fix the strap to the strap hole of the projector. Thread the other end of the strap through the strap hole of the projector and make the loop there. Let the lens cover with the one end of strap though the loop. © 3M 2008. All Rights Reserved. -
Page 4: Part Names
Clean the air filter periodically. ►Do not use the security bar and slot to prevent the projector from falling down, since it is not designed for it. © 3M 2008. All Rights Reserved. -
Page 5: Control Panel
(10) (14) (11) (13) (12) CAUTION ►Use the shutdown switch only when the projector is not turned off by normal procedure, since pushing this switch stops operation of the projector without cooling it down. © 3M 2008. All Rights Reserved. -
Page 6: Remote Control
(22) ▲/▼/◄/► cursor buttons (13, 22, 23) (23) ENTER button (13, 22, 23) (24) ESC button (13, 22) (25) RESET button (13, 22, 23) (26) Battery cover (12) (26) Back of the remote control © 3M 2008. All Rights Reserved. -
Page 7: Setting Up
169 149 179 158 203 179 224 198 254 224 299 264 104 338 299 123 374 330 130 352 10.8 423 373 153 374 11.4 449 396 156 10.7 423 12.9 508 448 184 © 3M 2008. All Rights Reserved. - Page 8 Placing the projector in such places could cause fire, electric shock and/or malfunction of the projector. • Do not place the projector near humidifiers, smoking spaces or a kitchen. ►Position the projector to prevent light from directly hitting the projector's remote sensor. © 3M 2008. All Rights Reserved.
-
Page 9: Connecting Your Devices
For cables with a core only at one end, connect the end with the core to the projector. ►Make sure that devices are connected to the correct ports. An incorrect connection may result in malfunction or damage to the device and the projector. © 3M 2008. All Rights Reserved. - Page 10 • When the projector is connected with a device having DVI connector, use a DVI to HDMI cable to connect with the HDMI input and an audio cable to connect with one of the AUDIO input. © 3M 2008. All Rights Reserved.
-
Page 11: Connecting Power Supply
►Do not place anti-theft chain or wire near the exhaust vents. It may become too hot. NOTE • The security bar and slot is not comprehensive theft prevention measures. It is intended to be used as supplemental theft prevention measure. © 3M 2008. All Rights Reserved. -
Page 12: Remote Control
• The remote control may not work correctly if strong light (such as direct sun light) or light from an extremely close range (such as from an inverter fluorescent lamp) shines on the remote sensor of the projector. Adjust the position of projector avoiding those lights. © 3M 2008. All Rights Reserved. -
Page 13: Changing The Frequency Of Remote Control Signal
(the POWER indicator blinks green), and while adjusting the volume and display, correcting for keystone, zooming in on the screen, using the BLANK function, or displaying the menu screen. © 3M 2008. All Rights Reserved. -
Page 14: Power On/Off
STANDBY/ON button (41) • Use the shutdown switch only when the projector is not turned off by (62) normal procedure. © 3M 2008. All Rights Reserved. -
Page 15: Operating
● While TURN ON is selected for AUTO SEARCH item in OPTION menu (41), the projector will keep checking the ports in above order repeatedly till an input signal is detected. (continued on next page) © 3M 2008. All Rights Reserved. - Page 16 ● This function also can use for document camera. Select the input COMPUTER VIDEO DOC.CAMERA port that connected the document camera. BLANK ASPECT AUTO SEARCH PAGE UP VOLUME MAGNIFY FREEZE PAGE DOWN KEYSTONE MY BUTTON MUTE POSITION MENU ENTER RESET © 3M 2008. All Rights Reserved.
-
Page 17: Searching An Input Signal
4:3 16:9 16:10 14:9 REAL For no signal 16:10 (fixed) ● ASPECT button does not work when no proper signal is inputted. ● NORMAL mode keeps the original aspect ratio setting. © 3M 2008. All Rights Reserved. -
Page 18: Adjusting The Projector's Elevator
Adjusting the zoom and focus Zoom ring Focus ring Use the zoom ring to adjust the screen size. Use the focus ring to focus the picture. © 3M 2008. All Rights Reserved. -
Page 19: Using The Automatic Adjustment Feature
● If POSITION button is pressed when a menu is indicated on screen, the displayed picture does not move its position but the menu does. ● This function can not be performed on a HDMI signal. © 3M 2008. All Rights Reserved. -
Page 20: Correcting The Keystone Distortions
● In the MAGNIFY mode, the keystone distortion condition may vary, it will be restored when the projector exits from the MAGNIFY mode. NOTE • The zoom level can be finely adjusted. Closely watch the screen to find the level you want. © 3M 2008. All Rights Reserved. -
Page 21: Freezing The Screen
• The sound is not connected with the BLANK screen function. If RESET necessary, set the volume or mute first. To display the BLANK screen and mute the sound at one time, use AV MUTE function (43). © 3M 2008. All Rights Reserved. -
Page 22: Using The Menu Function
If you want to change it to the Advanced Menu, select the Go to Advanced Menu... Use the ▲/▼ cursor buttons to select an item to operate. Use the ◄/► cursor buttons to operate the item. EASY MENU (continued on next page) © 3M 2008. All Rights Reserved. - Page 23 ◄ cursor button or ESC button on the remote control. Press MENU button on the remote control again to close the menu and complete this operation. Even if you do not do anything, the dialog will automatically disappear after about 10 seconds. © 3M 2008. All Rights Reserved.
-
Page 24: Easy Menu
PICTURE MODE is “CUSTOM”. Please refer to GAMMA (26) and COLOR TEMP (27) items in PICTURE menu. • When this function is performed, a certain extra such as a line may appear. (continued on next page) © 3M 2008. All Rights Reserved. - Page 25 See LANGUAGE item in SCREEN menu (37). Select Go to Advanced Menu… on the menu, and press the ► Go to or ENTER button to use the menu of PICTURE, IMAGE, INPUT, Advanced Menu... SETUP, AUDIO, SCREEN, OPTION or C.C.. © 3M 2008. All Rights Reserved.
-
Page 26: Picture Menu
“1”. The darkest tone at the left end of the test pattern cannot be controlled with any of equalizing adjustment bar. • When this function is performed, lines or other distortion may appear. (continued on next page) © 3M 2008. All Rights Reserved. - Page 27 HDMI signal. Using the ▲/▼ buttons adjusts the tint. Greenish ó Reddish TINT • This item can be selected only for a video, s-video, component video and HDMI signal. (continued on next page) © 3M 2008. All Rights Reserved.
- Page 28 Performing a SAVE function saves the current adjustment data into the memory linked in the number included in the function’s name. • Remember that the current data being stored of a memory will be lost by saving a new data into the memory. © 3M 2008. All Rights Reserved.
-
Page 29: Image Menu
OVER SCAN (above) setting. It is not possible to adjust when OVER SCAN is set to 10. • This item cannot be selected for an HDMI signal. (continued on next page) © 3M 2008. All Rights Reserved. - Page 30 • The items adjusted by this function may vary when the FINE or DISABLE is selected for the AUTO ADJUST item of the SERVICE item in the OPTION menu (44). © 3M 2008. All Rights Reserved.
-
Page 31: Input Menu
Pr) and VIDEO ports will function as a SCART RGB port. A SCART cable is required for a SCART RGB input to the projector. For your reference, see the TECHNICAL part. (continued on next page) © 3M 2008. All Rights Reserved. - Page 32 (1) Use the ◄/► buttons to select the input port to be set. COMPUTER (IN)1 ó COMPUTER (IN)2 COMPUTER IN (2) Use the ▲/▼ buttons to select the computer input signal type. AUTO ó SYNC ON G OFF (continued on next page) (continued on next page) © 3M 2008. All Rights Reserved.
- Page 33 ◄ button. The screen will then return to the RESOLUTION menu displaying the previous resolution. • For some pictures, this function may not work well. © 3M 2008. All Rights Reserved.
-
Page 34: Setup Menu
• This function will be unavailable when the Transition Detector is on (50). Using the ▲/▼ buttons turns off/on the whisper mode. WHISPER NORMAL ó WHISPER • When WHISPER is selected, acoustic noise and screen brightness are reduced. (continued on next page) © 3M 2008. All Rights Reserved. -
Page 35: Omponent
Choosing the COMPUTER 2 allows the following choice. 2 (COMPUTER IN2) ó OFF Choosing other input or STANDBY allows the following choice. 1 (COMPUTER IN1) ó 2 (COMPUTER IN2) ó OFF • OFF disables the MONITOR OUT port. © 3M 2008. All Rights Reserved. -
Page 36: Audio Menu
C.C. menu and the signal from the input port supports the C.C. feature (54). The HDMI AUDIO is set to 1 as default. In case the HDMI audio does not work well, try 2. HDMI AUDIO 1 ó 2 © 3M 2008. All Rights Reserved. -
Page 37: Screen Menu
BLUE, WHITE, Plain screens in each color. BLACK • To avoid remaining as an afterimage, the MyScreen or ORIGINAL screen will change to the plain black screen after several minutes. (continued on next page) © 3M 2008. All Rights Reserved. - Page 38 To start registration, press the ENTER button. To restore the screen and return to the previous dialog, press the RESET or ESC button. Registration takes several minutes. (continued on next page) (continued on next page) © 3M 2008. All Rights Reserved.
- Page 39 • If the projector goes into the FREEZE mode while the TURN OFF is selected, the picture on screen is frozen without any messages, which is not a malfunction (21). (continued on next page) © 3M 2008. All Rights Reserved.
- Page 40 Using ▲/▼ buttons switches the mode for the template screen. The selected template pattern can be displayed when the MY BUTTON allocated to the TEMPLATE function is pressed (43). TEMPLATE DOT-LINE4 ó DOT-LINE3 ó DOT-LINE2 TEST PATTERN ó DOT-LINE1 © 3M 2008. All Rights Reserved.
-
Page 41: Option Menu
• After turning the lamp on by the AUTO ON function, if neither input nor operation is detected for about 30 minutes, the projector is turned off, even though the AUTO OFF function (42) is disabled. (continued on next page) © 3M 2008. All Rights Reserved. - Page 42 • Please reset the filter time only when you have cleaned or replaced the air filter, for a suitable indication about the air filter. • For the air filter cleaning, see the section “Cleaning and replacing the air filter” (57). (continued on next page) © 3M 2008. All Rights Reserved.
- Page 43 ENTER button to execute the item. SERVICE FAN SPEED ó AUTO ADJUST ó GHOST ó FILTER MESSAGE FACTORY RESET ó INFORMATION ó REMOTE FREQ ó KEY LOCK (continued on next page) © 3M 2008. All Rights Reserved.
- Page 44 • Please be careful with the operating environment of the projector and the condition of the air filter. (continued on next page) © 3M 2008. All Rights Reserved.
- Page 45 Note that the items LAMP TIME, FILTER TIME, LANGUAGE and SECURITY settings are not reset. RESET CANCEL (continued on next page) © 3M 2008. All Rights Reserved.
- Page 46 20 seconds, please make note of the PASSWORD during this time. Pressing the ENTER button will close the NOTE NEW PASSWORD box. • Please do not forget your PASSWORD. (continued on next page) © 3M 2008. All Rights Reserved.
-
Page 47: Password Function
PASSWORD. Move the cursor to the right side of the ENTER PASSWORD box (small) and press the ► button to display the PASSWORD AGAIN box, enter the same PASSWORD again. (continued on next page) © 3M 2008. All Rights Reserved. -
Page 48: Using The Pin Lock Function
3.1 Registering the PIN Code 3.1-1 Use the ▲/▼ buttons on the SECURITY menu to select PIN LOCK and press the ► button or the ENTER button to display the PIN LOCK on/off menu. (continued on next page) © 3M 2008. All Rights Reserved. - Page 49 If 5 minutes pass after the PIN BOX is displayed, the projector will turn off. 3.3-2 Contact your dealer with the 10-digit Inquiring Code. Your PASSWORD will be sent after your user registration information is confirmed. (continued on next page) © 3M 2008. All Rights Reserved.
-
Page 50: Using The Transition Detector Function
PASSWORD. Move the cursor to the right side of the ENTER PASSWORD box (small) and press the ► button to display the PASSWORD AGAIN box, enter the same PASSWORD again. (continued on next page) © 3M 2008. All Rights Reserved. - Page 51 PASSWORD box (large). The 10-digit Inquiring Code will be displayed inside the box. 4.4-3 Contact your dealer with the 10-digit Inquiring Code. Your PASSWORD will be sent after your user registration information is confirmed. (continued on next page) © 3M 2008. All Rights Reserved.
-
Page 52: Using The My Text Password Function
START UP screen and the INPUT- INFORMATION- dialog (45). • This function is available only when the MY TEXT PASSWORD function is set to the TURN OFF. (continued on next page) © 3M 2008. All Rights Reserved. - Page 53 (2) Select TURN OFF to display the ENTER PASSWORD BOX (large). The 10 digit inquiring code will be displayed inside the box. (3) Contact your dealer with the 10 digit inquiring code. Your PASSWORD will be sent after your user registration information is confirmed. © 3M 2008. All Rights Reserved.
-
Page 54: C.c. (Closed Caption) Menu
1: Channel 1, primary channel / language CHANNEL 2: Channel 2 3: Channel 3 4: Channel 4 The channel data may vary, depending on the content. Some channel might be used for secondary language or empty. © 3M 2008. All Rights Reserved. -
Page 55: Maintenance
►Do not touch any inner space of the projector, while the lamp is taken out. NOTE • Please reset the lamp time only when you have replaced the lamp, for a suitable indication about the lamp. © 3M 2008. All Rights Reserved. -
Page 56: Lamp Warning
When the pictures appear dark, or when the color tone is poor, please replace the lamp as soon as possible. Do not use old (used) lamps; this is a cause of breakage. © 3M 2008. All Rights Reserved. -
Page 57: Cleaning And Replacing The Air Filter
Put the filter frame back where it was. Filter (finer meshed) Put the filter unit back into the projector. Filter (larger meshed) Filter cover (continued on next page) © 3M 2008. All Rights Reserved. - Page 58 • The projector may display the message such as “CHECK THE AIR FLOW” or turn off the projector, to prevent the internal heat level rising. © 3M 2008. All Rights Reserved.
-
Page 59: Other Care
Incorrect care could cause not only an injury but adverse influence such as discoloration, peeling paint, etc. ►Do not use cleaners or chemicals other than those specified in this manual. ►Do not polish or wipe with hard objects. © 3M 2008. All Rights Reserved. -
Page 60: Troubleshooting
“Cleaning and replacing the air filter” section of this manual. After you have cleaned or changed the air filter, please be sure to reset the filter timer (57). © 3M 2008. All Rights Reserved. -
Page 61: Regarding The Indicator Lamps
Lighting etc., and then turn the power on again. If the same indication is displayed after the remedy, please contact your dealer or service company. (Continued on next page) © 3M 2008. All Rights Reserved. -
Page 62: Shutting The Projector Down
When it is hard to correct some wrong settings, the FACTORY RESET function of SERVICE item in OPTION menu (45) can reset all settings(except LANGUAGE, FILTER TIME, LAMP TIME, FILTER MESSAGE settings and etc.) to the factory default. © 3M 2008. All Rights Reserved. -
Page 63: To Be Mistaken For Machine Defects
The volume is adjusted to an extremely low level. Adjust the volume to a higher level using the menu function or the remote control. (Continued on next page) © 3M 2008. All Rights Reserved. - Page 64 HDMI input. harmonized. Turn off the both equipment, and turn on them again. The signal format on the HDMI is not supported. Check the video setting on your HDMI equipment. (Continued on next page) © 3M 2008. All Rights Reserved.
- Page 65 NOTE • Although bright spots or dark spots may appear on the screen, this is a unique characteristic of liquid crystal displays, and it does not constitute or imply a machine defect. © 3M 2008. All Rights Reserved.
-
Page 66: Specifications
HDMI .............HDMI connector x1 Audio input/output port AUDIO IN1 .............Stereo mini x1 AUDIO IN2 .............Stereo mini x1 AUDIO IN3 ............... RCA x2 AUDIO OUT ...........Stereo mini x1 Others USB ..............USB-B x1 CONTROL ............ D-sub 9 pin x1 © 3M 2008. All Rights Reserved. - Page 67 3M™ Digital Projector WX66 Specifications Specifications (continued) AUDIO AUDIO S-VIDEO CONTROL AUDIO HDMI MONITOR COMPUTER COMPUTER [unit: mm] © 3M 2008. All Rights Reserved.
- Page 68 3M™ Digital Projector WX66 Intended Use Before operating this machine, please read this entire manual thoroughly. The 3M Digital Projectors are designed, built, and tested for use indoors, using 3M lamps, 3M ceiling mount hardware, and nominal local voltages. The use of other replacement lamps, outdoor operation, or different voltages has not been tested and could damage the projector peripheral equipment and/or create a potentially unsafe operating condition.
Need help?
Do you have a question about the Digital Projector WX66 and is the answer not in the manual?
Questions and answers