Table of Contents
Advertisement
Advertisement
Table of Contents

Related Manuals for Fisher & Paykel AeroSmart dryer


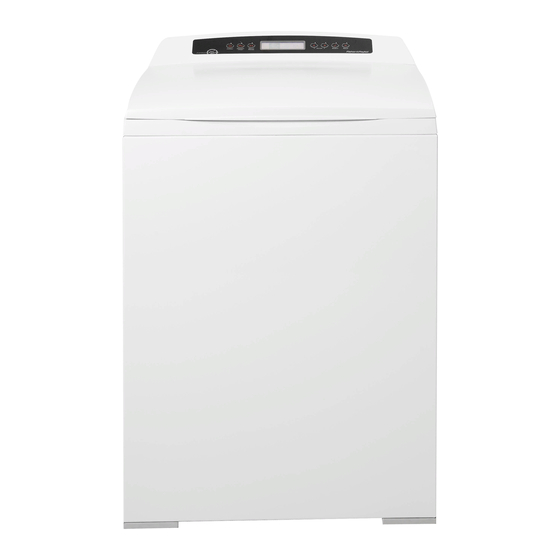
Summary of Contents for Fisher & Paykel AeroSmart dryer
- Page 2 must followed to minhnize .risk of fire --\VHAT TO DO IF YOU SMELL ° Do not try to light any appliance° ÷ Do not touch any electrical switch_ do not use. any phone _oin y our° ..building. baddmg ÷ Clear room>...
-
Page 3: Table Of Contents
Alarm Level / Screen Brightness / Key Lock Mode Reminders/ Hints / Language Setvice Contacts/Trouble Shooting / Rese_ Defaults / Repkq In,to Caring for your AeroSmart dryer Before you call for service If your AeroSmarl: dryer beeps for help Solving operating problems... - Page 4 Wekome to AeroSmart Thank you for buying a Fisher & Paykd AeroSmart clothes dryer. We are very proud of this dryer and trust it will serve you well for many years. At Fisher & Paykel we aim to provide innovative products that are simple to use, ergonomic kind to the environment.
- Page 5 mportant safety instructions Symbols SymboB will be used in this Guide to highlight when extra care is required. Abide by these at all times to ensure you and your family are not harmed while operating your dryer. It is important to always act with caution and use common sense when operating your dryer.
-
Page 6: Mportant Safety Instructions S
mportant safety instructions Electric Shock Hazard Follow the safety precautions outlined in this User Guide° Failure to do so can result in death or electric shock. Read all instructions c_refully before using this dryer. Usethis dryer only for its intended purpose asdescribed in this Userduide_ Taminimize the p_ssibi_ity_f dectric sh_ck, unplug this dryer from the p_wer supply _r d_sc_nnect the dryer at the household distribution panel (by removing the fuse or switching off the circuit breaker) before attempting any user maintenance or cleaning,... - Page 7 mportant safety instructions Fire Hazard Only dry fabrics that have been washed with water° Do not use heat to dry articles containing foam rubber or simHady textured rubber.olike materiaBo Dry on the Air Dry cydeo A clothes dryer produces combustiMe lint and must be exhausted outdoorsoTake care to prevent...
- Page 8 Important safety insWuctions Do not reach into the appliance if the drum is moving, Close supervision is necessary if this dryer is used by or near children, Do not allow children play inside, around or with this dryer or any other appliance, Never cNmb on, climb into, or stand on the dryer top, lid or drum, Undergarments that contain...
- Page 9 iiilI!i!, !, !!!!!' I' liiiliii, ill ¸ I II I II I ii i i l iill_ l i _i_ l i i_i_ i_ il_ lli,i _,i_ iiI_ l i ii:iiiiiiiiiiii ¸i¸I IIiii I l iill llilli ¸ I l iiiiii Installatiion instrultions Clothes...
- Page 10 nsta ation instructions To the installer The correct installation of the dryer is your responsibility. Be sure you read the following instructions carefully before you start to install the dryer. These instructions should be left with the home owner for future reference. It is your responsibility Observe all governing codes and ordinances.
- Page 11 iiiI!i!!i@@@@@@@@@@@@@@@@@@@@@@@@iI ii,!ii! iI iillli ¸Ili i i li!liiiii:iiliiii ..Installation instructions Location _equirements The area in which the dryer is located must be kept clear and free from combustible materials, gasoline and other flammable vapors and liquids. A dryer produces combustible lint so the area around the dryer must be cleaned regularly to keep it free of lint.
- Page 12 nsta ation instructions Dimensions Check that there is enough clearance for the lid to fully open, £g 27 *A_," (700 ram) 27" (685 ram) Fig,d AeroSmort dimensions Exhaust outlet location 13 _/J' (352 mm) "137_" (333 mm) Fig,7 Exhoust outlet dimensions...
- Page 13 iiilI!i!, !, !!!!!' I' liiiliii, ill ¸ I II I II I ii i i l iill_ i, iliiii_ ill i i ill IIIlil i l_ ill, i!, lilii_ii!i I, lii ! I I I i:liii!_ iiiiii_ il ill, i!_ Ii! i Installation instructions Mobile home installation...
- Page 14 nsta ation instructions Fire Hazard The dryer must be vented to the outdoors, Use rigid or thick wall flexiMe meta_ exhaust duct on_yo Do not use a p_astic exhaust duct° Do not use a meta_ foil exhaust duct, Failure to follow these instructions can result in death or fire,...
- Page 15 iiilI!i!,!, !!!!!,l,liiiliii,ill ¸IIII lllliiiliill, i,iliiii_illiiill IIIlil i l_ill,i_,lilii_ii!i l.lii ! l llilll,iiiiii, liilii Installation instructions Venti!lg -to reduce condensation, _nsulate an;, duct_ng which p asses through ur/heated areas. Slope the duct gentl;, downwards tothe hood, todrain condensation and reduce lint b uUd up. Avoid sag orloops inthe duct as they m ay c ollect and store water and accumulate lint.
-
Page 16: Nstahation Instructions
nsta ation instructions Choose a route that will provide the straightest and most direct path outdoors. Plan the installation to use the fewest number of elbows and turns. When using elbows (rigid duct) or making turns (thick wall flexible metal duct), allow as much room as possible. - Page 17 iiilI!i!, !, !!!!!' I' liiiliii, ill ¸ I II I II I ii i i l iill_ i, iliiii_ ill i i ill IIIlil i l_ ill, i!, lilii_ii!i I. lii ! I I I i;liii!_ iiiiii_ Installation instructions Maximum length of exhaust duct Maximum length of 4"...
- Page 18 nsta ation instructions Alternative installation for dose clearances Venting systems come in many varieties. Select the type best for your installation. A close-clearance installation is shown. swivel collar wall connection sections separate, f ttings can face same or c telescoping swivel collar sections Extra long...
- Page 19 ii i lI!iI !i !!!_ Iliii Iill,ill ili IIi Iiiii i I IIIII i i i liili l!! l i!lii i,ili ill i I liiii ii i i i i I I i lill lii i ,i llilii _iil !l,lii I i i li:liii_ iiilil iii il i il ili!ii ill ii Installation instructions...
- Page 20 nsta ation instructions Installation Partsand literature are packaged inside the dryer drum. Excess Weight Hazard Usetwo or more people to move and install the dryer, Failure to do so can result in back or other injury, Only remove the packaging at the customer's premises.
- Page 21 Installation instructions Fitting the f_or_t feet Note: Dryer isusuall;,, supplied with feet fitted a nd protruding the correct distance. Tilt the dryer back using a hand trolley and making sure the trolley and dryer are secure. Fit a rubber insert to each plastic foot as shown. lZ /n_rtm rubber lnsert Screw the feet into the foot retainers on the left hand and right hand sides as shown.
- Page 22 nsta ation instructions Grounding instructions for gas and electric dryers E_ectrical Shock Hazard Make sure appliance is wired or p_ugged into a grounded out_eto Do not use an adaptor, Do not use an extension cord, Failure to follow these instructions can result in death, fire, or e_ectrica_ shock.
- Page 23 iiilI!i!, !, !!!!!, I, liiiliii, ill ¸ I II I II I ii i i liill, i, iliiii_ ill i i ill IIIlil i l_ ill, i_, lilii_ii!i I, lii ! I I I i l II, iiil, i lli/i Installation insWuctions Electrical _equkements for electric models only...
- Page 24 nsta ation instructions Power supply cord requirements for UoSoA (for electric models only) Only a UL listed power-supply cord kit a suitable length for the installation and rated 120/240 V rain, 30 A and marked with use for clothes dryers shall be used. This shall have ring terminals to connect to the dryer.
- Page 25 iiilI!i!, !, !!!!!' I' liiilii;i, ill ¸ I II I II I ii i i l iill_ i, iliiii_ ill i i ill IIIlil i l_ ill, i!, lilii_ii!i I l ii [ I I I i;liii!_ iiil, i Installation instructions Electrical connections (electric models only) Please read Electrical...
- Page 26 nsta ation instructions Electrical connections (electric models only) For 4owire connections by power cords 4--wire power supply cord must have four 10 AWG copper wires and match a 4-wire receptacle of NMEA Type14--30R. The fourth wire (ground conductor) must be identified by a green cover and the neutral wire by a white cover.
- Page 27 Ii liii ¸III lil i ll,liiiiili, i ilill l i !iiilli! Installation instructions 3-wke connections Use approved 3--wire Power Supply Cord or a 3-wire Cable for Direct Wiring as described on page 2S. Remove the terminal block cover plate, Insert the power cord wi@ a UL listed strain relief through the hole provided in the cabinet near...
- Page 28 nsta ation instructions 3owire connections plus separate grounding connector For use where local codes do not permit grounding through the Neutram wire. Use approved 3--wire Power Supply Cord or a 3--wire Cable for Direct Wiring as described on page 23. A separate I OAWG copper grounding wire is required.
- Page 29 Connect ground wire (green) of the power supply cord to the ground conductor green screw. -Fighten screw. Connect the neutral wire (white) of the power supply cord to the center terminal screw of the terminal block. Tighten screw, Connect the red wire and Mack wire to the upper and lower terminal block screws marked with }}': t he letter L Tig htensc rews.
- Page 30 nsta ation instructions Gas requirements (gas models only) The installation must conform with Local (:odes, or in the absence of Local (::odes, to the National Fuel Gas (::ode ANSI Z223.1/NFPA 54 or the Canadian Natural Gas and Propane Installation (::ode, CSA B149.1. E×D[os[on Hazard hstaHatbns...
- Page 31 ii@, !, i@@@@@@@@@@@@@@@@@@@@@@@@ilI_ i!llllii, i! iil; _, i!_II_ iÀÀ I l il i ii:iiiiii _ili lii, i! ll:iiii, i!_ iil' ii i ,i!_ l i ..Installation instructions Connecting gas to your dryer (gas models only) Use compound or thread tape appropriate to the gas type that is to be used (Natural or LP Gas), on the male threads of all non-flared connections.
- Page 32 nsta ation instructions Connecting gas to your dryer (gas models only} A listed connector in compliance with ANSI Z2124/6SA6.10 must be used to connect the dryer to the gas supply. If flexible tubing is used, an elbow should be installed on the pipe at the back of the dryer for the flexible tube to be connected to.
- Page 33 iiilI!i!,!, !!!!!'ii l,ill,l_ilill_li_i_l,_,llii'iiii _iilI_ i,iliiii_illiiill IIIlil i l_ill,i!,lilii_ii!i l,lii ! l lli:liii!_iii I_stallation instructions Levelling the d_ye_ Fig37 Levd/ing the dryer Check the dryer is level, and make necessary adiustments to the front levelling feet. The rear levelling feet are self adiusting. Final installation check list Checkthat:...
-
Page 34: The Firsttimeyouturnyourdryeron
The first time that you turn your dryer on an initial set-up mode wi[[ be initiated. This is to ensure that your AeroSmart is customized for your individual needs. The set-up mode will prompt you to select the language that you would prefer your AeroSmart dryer to use. Please se/est !cur /aHluag8 Irefsrertc8 New Zea and Aus_raha... -
Page 35: Lint Bucket
Features Smart loading The new ergonomic design of this dryer means less bending. Simply move clothes from the washer to the dryer with minimal effort. Superior clothes care Superior clothes care is accomplished by an efficient high airflow fan and careful heat control. The AeroSmart dryer provides the right heat for temperature sensitive delicate articles while still efficiently... -
Page 36: Operating Instructions
Getting started quickly Operating instructions Sorting For the best drying results, sort your clothes into similar types that will take a similar time to dry (refer to Sorting page 37). Loading FigS8 Moximum Iooding le_cel Ensure that clothes are Roaded no higher than the top of the transparent section of the lint bucket (refer to Loading page 37). - Page 37 It will then start to tumble, automatically sensing the dryness of your load as the cycle progresses (unless Timed Dry is selected). To pause your AeroSmart dryer at any time, simply touch START/PAUSE.
- Page 38 AeroSma t controls Easy touch controB These smooth, easy clean buttons require only a gentle touch to activate.To scroll you need to remove your finger to break contact and touch it again. Once you become accustomed to the soft touch technology you will find it effortless to operate.
- Page 39 Using your dryer Check the care labels inside the garments to determine whether the garment manufacturer recommends tumble-drying. It is best that you sort your garments before placing them into the dryer. Sort into loads of similar types, and loads that take similar times to dry.
- Page 40 Using your dryer Lint bucket The AeroSmart dryer's lint removal system is unique. Unlike other dryers, the AeroSmart dryer automatically removes the lint for you, from the lint screen - all you have to do is tip the lint out! The lint filter is hidden behind the lint bucket.
-
Page 41: Drying Cycle Options
Choosing your drying <yale Viewing the drying cycles When you turn your AeroSmart dryer or}, the ma[r_ dryk_g cycles will be displayed. Scroll Seiect Back 7o view all 8 drying cycles, the Lifestyle cycles and menu options, use the arrow buttons to scroll to the right, Scro/i Back... - Page 42 Changing the drying cyde options Scroll to the option you wish to modify, by highlighting it and touching the SELECT bu_on. Scroll to the appropriate setting and press SELECT.This will highlight your choice to show you that it has been selected. 8P1' @ 4 _i/1£/ SHe_.TiF_...
-
Page 43: Changing The Drying Cycle Options
Changing the drying cycle options Cycle options To alter any of the Cycle Options explained below, please refer to page 40 for further instructions. Auto Sensing Auto sensing is automatically selected when your AeroSmart dryer is turned on. AeroSmart's internal computer automatically measures the moisture content of the... -
Page 44: Drying Cycle Progress
Changing the drying cyde options Temperature AeroSmart offers 4 drying temperatures. Each drying cycle is set with a temperature specific to the load type, to ensure the best possible fabric care for your clothes. [f you wish to use a different temperature simply select another drying cycle. - Page 45 Changing the drying cycle options Drying cycles explained ReguJar A high heat cycle for rapid drying of everyday cottons. This cycle is suitable for most garments labelled "Tumble Dry". Regular Drying Temp Medium+ Dryness Level Automatic Wrinkle Free Bed Sheets A high heat cycle, with WRINKLE FREEoption, for the optimum result for sheets.
- Page 46 Changing the drying cycle options DryJn9 cycles explained Bulky Six specialised drying cycles recommended for drying bulky items choose from: Bulky Comforter Pillows Feather or Synthetic options Feather or Synthetic options For all bulky items: It is important that you check the care label of any item carefully, to ensure it is suitable for tumble-drying, before placing it into the dryer.
- Page 47 Changing the drying cycle options Drying cycles explained Casual A medium heat cycle ideal for lightweight cottons and items labelled "tumble with a medium heatl Casual Drying Temp Medium Dryness Level Automatic Wrinkle Free Air Dry A cool cycle for drying items without heal Perfect for airing clean clothes or to freshen up garments...
- Page 48 Lifestyle cydes No experience necessary Your AeroSmart dryer offers you a range of special Lifestyle cycles, to make drying even easier. These cycles have been specifically designed by our laundry experts, with you in mind. We have incorporated 70 years of laundry knowledge into 18 easy to use, preprogrammed drying cycles.
- Page 49 Lifestyle cydes The Lifestyle cycles are presented in three distinct categories, to help you to access them quickly and easily. The following pages explain the unique cycles that are located within these categories, and how they might be of help. Special Care Special care offers 5 unique cycles to provide extra care for your garments.
- Page 50 Lifestyle cycles ££Q FamilY Some common household laundry situations may require extra knowledge. We have created six unique FAMI[J cycles to help you with those tricky situations. Comforter Bulky items like Comforters can be tricky to dry due to their thickness. The Comforter cycle has been designed to cope with bulky bedding.
- Page 51 Lifestyle cycles Pitiows Choose from either Feather or Synthetic, low heat options to care for you pillows during drying. Check throughout the cycle to ensure even drying. If pillows are not completely dried at the end of the 40 minute period, repeat the Pillows cycle. AHergy This cycle has been developed to compliment...
-
Page 52: Protection Equipment
Lifestyle cycles Sports Outdoor activities can create some unique hundry challenges. We have created four helpful cycles to quickly deal with these situations, with no thinking required. Sportswear Light This autosensing cycle uses a low heat to gently dry light synthetic sportswear garments. -
Page 53: Care Labeb
Care labels Below is a selection of care label symbols that garment manufacturers use to show how their garments should be dried, We've converted these symbols into the cycles and heat settings that we recommend you use in the AeroSmart dryer. -
Page 54: Lid Lock
Lid Lock SIlsil REIILIR CYCLE Your AeroSmart dryer locks its lid at the lamlless start of the drying cycle, providing added llYl IEIIlll safety for you and your family while it is operating. This lock ensures the lid cannot be opened while the drum is rotating. Fig,45 Lid locked A Iidlock symbol (padlock) appears in the corner of the screen when locked (it disappears when... -
Page 55: Settings Menu
Settings Menu After using your AeroSmart dryer you may wish to fine--tune some of the options to suit your individual needs. Any options changed in this menu are a permanent change, unless 'Reset Defaults' is selected (refer to page SS). To access the Settings Menu: Turn your AeroSmart... - Page 56 Settings Menu Reminders How many times have you taken your clothes out of the dryer and realised that you forgot to add the softener sheet when you started the cycle? Or forgotten to remove your ddicates half way through the cycle and now they are ruined? AeroSmart hasthree helpful automatic reminders to help you to remember those important tasks.
-
Page 57: Before You Call For Service
Settings Menu Service Contacts In the first instance please refer to "Before You Call for Service" on page 57 for help to try and solve any problem you may encounter. If your problem persists, this option will direct you to the appropriate contact details for help or service. - Page 58 6adng for your Aerosmart dryer Clean your dryer with a soft damp cloth and wipe dry. Do not use scouring cleaners as they can damage the paint and plastic surfaces. Removing the Lid You can remove the lid for cleaning. Open the lid fully, hold one side with one hand and tap the other side with an upwards motion.
- Page 59 Before for servke }'our AeroSmart dryer is capable of diagnosing its own troubles. If your dryer is displaying message on the display screen and is sounding a musical series of beeps every 5 seconds, it has a problem that you may be able to solve using the checklist below. (It's the same sound AeroSmart dryer makes when you plug it in).
- Page 60 So ving operating prob em, Is the electrical cord plugged in? If not plug the cord in. If there is a switch, is it switched Could your household power supply be at fault? (If your plug is suitable, try plugging another dectrical appliance into the same outlet).
- Page 61 So ving drying problems Is the lint bucket full? When lint reaches the top of the transparent section of the bucket it needs emptying. Have you separated lint-shedding garments (eg towels) from lint receiving garments Have you checked your pockets for tissues or other items that could have been left in them? Have you over-loaded your dryer? Over--loading can result in linting...
-
Page 62: Limited Warranty
Limited warranty When you purchase any new Fisher & Paykel whiteware product for personal or consumer use you automatically receive a one year limited warranty covering parts and labor for servicing within the 48 mainland United States, Hawaii, Washington DC and Canada. In Alaska the limited warranty is the same except that you must pay to ship the product to the service shop or the service technician's... - Page 63 Limited warranty This warranty does not cover: Service calls that are not related to any defect in the product. The cost of a service call will be charged if the problem is not found to be a defect of the product. For example: 1.
- Page 64 Limited warranty How to get service Please read your User Guide. If you then have any questions about operating the product, need the name of your local Fisher & Paykel Authorized Service Agent, or believe the product defective and wish service under this limited warranty, please contact your dealer or call us at: USA and Canada TOLL FREE l°888°9,FNRUSA...
Need help?
Do you have a question about the AeroSmart dryer and is the answer not in the manual?
Questions and answers