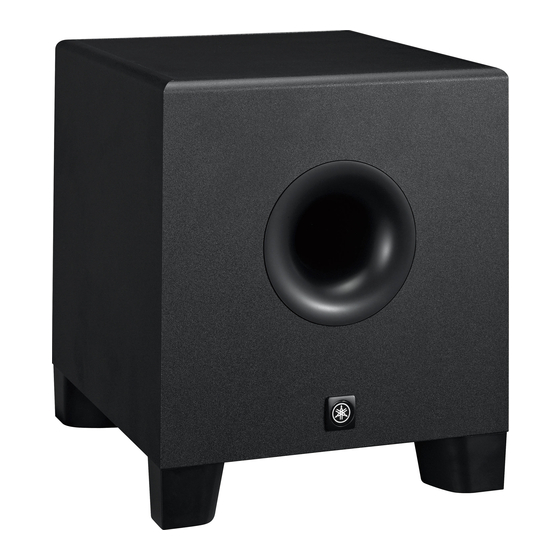
Yamaha HS8S Owner's Manual
Hs series powered subwoofer and powered studio monitor
Hide thumbs
Also See for HS8S:
- Owner's manual (20 pages) ,
- Manuale di istruzioni (20 pages) ,
- Owner's manual (20 pages)
Summary of Contents for Yamaha HS8S
- Page 1 Owner’s Manual Bedienungsanleitung Mode d'emploi Manual de instrucciones Manual do Proprietário Manuale di istruzioni Руководство пользователя POWERED SPEAKER SYSTEM...
-
Page 2: Important Safety Instructions
Explanation of Graphical Symbols The lightning flash with arrowhead symbol within an equilateral triangle is intended to C AU T I O N alert the user to the presence of uninsulated “dangerous voltage” within the product’s RISK OF ELECTRIC SHOCK DO NOT OPEN enclosure that may be of sufficient magnitude to constitute a risk of electric shock to persons. -
Page 3: Table Of Contents
Performance Graph ......119 musical instruments and other sources. Block Diagram........119 Included Items (please check) Thank you for choosing a Yamaha powered • Power cord monitor speaker or powered subwoofer. In order to take maximum advantage of the • Owner’s Manual (this book) speaker’s features and ensure maximum... -
Page 4: Precautions
• Only use the voltage specified as correct for the device. The off the power switch and disconnect the electric plug from the required voltage is printed on the name plate of the device. outlet. Then have the device inspected by Yamaha service • Use only the supplied power cord/plug. personnel. - Page 5 Doing so may result in malfunction. Yamaha cannot be held responsible for damage caused by • Before moving the device, remove all connected cables. improper use or modifications to the device, or data that is •...
-
Page 6: Notice
• These speakers should be used vertically, not laid on their side. Connectors • XLR-type connectors are wired as follows (IEC60268 standard): pin 1: ground, pin 2: hot (+), and pin 3: cold (-). HS8/HS7/HS5/HS8S Owner’s Manual... -
Page 7: Rear Panel
Rear Panel The HS8/HS7/HS5/HS8S switches and connectors are located on the rear panel, as described below. HS8/HS7/HS5 HIGH TRIM switch Adjusts the speaker’s high-frequency response. Setting the switch to the [0] position produces a flat frequency response. The [+2 dB] setting boosts the range above 2 kHz by 2 dB, while the [-2 dB] setting attenuates the range above 2 kHz by -2 dB. -
Page 8: Subwoofer Connections
] to turn the power ON, or to frequency can be adjusted via the LOW CUT control. the left [ ] to turn the power OFF. The Yamaha logo on the front panel will light when the power is ON. LOW CUT control... -
Page 9: Setup
Plug the power cord into the speaker first, and then insert the AC plug end into an appropriate AC wall outlet. When connecting a mixer (Yamaha MGP or MG series, etc.) to HS series speakers, connect the mixer’s MONITOR OUT or C-R OUT (Control Room) connectors Connecting to an Audio Interface directly to the speakers’... -
Page 10: Connecting To Synthesizer
Connecting to a Synthesizer or 60˚ Other Electronic Musical Instrument When connecting an electronic musical instrument such as a Yamaha MOTIF synthesizer to the HS series speakers, connect the instrument’s L/MONO and R outputs to the HS speaker inputs. HS8/HS7/HS5 HS8/HS7/HS5 ... -
Page 11: Adding Subwoofer
Four cables are required: two to connect the audio Point 4 interface or other source equipment to the HS8S subwoofer, and two more to connect the subwoofer to Position the tweeters at ear height. - Page 12 CONTROL and HIGH TRIM switches to 0 interface, etc.) to the HS8S For connection to a balanced phone jack input. Set the HS8S LEVEL control to 0, the HIGH HS8S CUT and LOW CUT controls to their 12- o’clock positions, and set the LOW CUT switch to OFF.
-
Page 13: Troubleshooting
The power switch might not be turned on. Turn the power switch ON. If the problem persists, contact your Yamaha dealer. No sound. One or more cables might not be Check that all cables are properly connected. -
Page 14: Xlr Connectors
Connections using RCA pin plug to phone plug conversion cables are unbalanced. Pin 2: hot (+) Pin 3: cold (-) Pin 1: ground Pin 1: ground Pin 3: cold (-) Pin 2: hot (+) HS8/HS7/HS5/HS8S Owner’s Manual... -
Page 15: Specifications
Yamaha. * Le specifiche e le descrizioni presenti in questo manuale sono fornite a fini puramente informativi. Yamaha Corp. si riserva il diritto di modificare prodotti o specifiche in qualsiasi momento senza preavviso. -
Page 16: Dimensions
Specifications Model HS8S General Specifications Type Bi-amp 2-way powered speaker Powered subwoofer 2 kHz – Crossover Frequency -3dB 47 Hz – 24 kHz 55 Hz – 24 kHz 74 Hz – 24 kHz 33 Hz – 124 Hz Overall Frequency... -
Page 17: Performance Graph
HS8S Unit: mm (inch) Unit: mm (inch) 170 (6-11/16") 222 (8-3/4") 300 (11-13/16") 389 (15-5/16") Performance Graph HS8S Block Diagram HS8/HS7/HS5 HIGH TRIM STEP FILTER LOWCUT P.AMP INPUT 1 LOW CUT ROOM CONTROL LEVEL INPUT 2 LOW BOOST STEP FILTER... - Page 19 Niederlassung und bei Yamaha Vertragshändlern in den jeweiligen Bestimmungsländern erhältlich. Pour plus de détails sur les produits, veuillez-vous adresser à Yamaha ou au distributeur le plus proche de vous figurant dans la liste suivante. Para detalles sobre productos, contacte su tienda Yamaha más cercana o el distribuidor autorizado que se lista debajo.
- Page 20 Yamaha Pro Audio global web site http://www.yamahaproaudio.com/ Yamaha Manual Library http://www.yamaha.co.jp/manual/ C.S.G., Pro Audio Division © 2013 Yamaha Corporation 303MWCR*.*-**A0 Printed in Indonesia ZF69500...


