Yamaha HS Series Owner's Manual
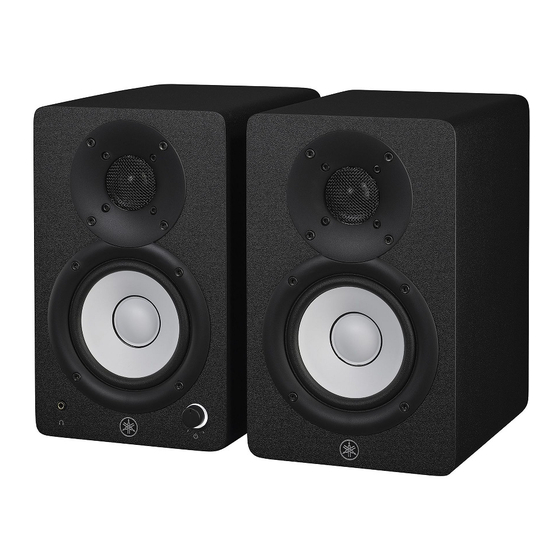
Powered studio monitor
Hide thumbs
Also See for HS Series:
- Manuale di istruzioni (20 pages) ,
- Owner's manual (20 pages) ,
- Owner's manual (20 pages)
Table of Contents
Advertisement
Advertisement
Table of Contents

Related Manuals for Yamaha HS Series


Summary of Contents for Yamaha HS Series
- Page 1 POWERED STUDIO MONITOR Owner’s Manual POWERED SPEAKER SYSTEM...
-
Page 2: Table Of Contents
Contents Introduction ..................3 About this manual ....................3 NOTICE ........................4 Included Items ......................5 Cables ........................5 Setting Up for Superior Sound ............7 Controls and Connectors ..............8 Rear .......................... 8 Front ........................10 Connections ..................11 Connecting the speakers with the included cable ..........11 Connecting to an Audio Interface ...............12 Connecting to a Mixer ...................13 Connecting to a Synthesizer or Other Electronic Musical Instrument ... -
Page 3: Introduction
Keep the manuals included with this product in a place where you can refer to them whenever needed. You can also download these manuals from the Yamaha website, so please make use of these resources as necessary. https://download.yamaha.com/... -
Page 4: Notice
NOTICE To avoid the possibility of malfunction/damage to the product or damage to other property, follow the notices below. Handling and maintenance ■ • Do not obstruct the hole (bass reflex port) on the back of the speaker unit. This reduces the quality of the sound. •... -
Page 5: Included Items
Paste it on the four corners of the bottom of the speaker. Please use when placing this product on a slippery table or platform. Cables You’ll need to acquire appropriate cables to connect the HS series monitor speakers to your audio interface or other source equipment. • Short, high-quality cables Use high-quality cables of the shortest practical length. - Page 6 • RCA plugs You can use the included stereo mini-to-RCA cable. This is an unbalanced connection. • Stereo mini plugs Use an audio cable with stereo mini plugs. These effectively cancel noise picked up from external sources. Balanced connections Balanced connections allow for longer cable runs that would probably otherwise result in more noise being picked up.
-
Page 7: Setting Up For Superior Sound
Setting Up for Superior Sound This product features two speakers: an active (with built-in amplifier) speaker L and a passive speaker R. To monitor the sound accurately, position the L speaker angled towards your left side and the R speaker angled towards your right side. Speaker L is marked on the rear panel as “LEFT”. -
Page 8: Controls And Connectors
Controls and Connectors Rear Air blowing out of the bass reflex ports is normal, and often occurs when the speaker is handling program material with heavy bass content. The shape of the plug differs depending on your locale. Speaker Input and Response Control ROOM CONTROL switch Adjusts the speaker’s low-frequency response. - Page 9 LINE 1 (L/R) chassis connectors These balanced input combo connectors are compatible with XLR connectors and phone plugs. Connect a line- level synthesizer, mixer or audio interface here. OUTPUT TO RIGHT SPEAKER Connect the included speaker cable here to transmit signals from the left speaker to the right speaker. / ] (standby/on) switch Turns the power of this product standby/on.
-
Page 10: Front
Front ]/volume knob This knob combines the features of a power and volume adjustment knob. Slightly turn the knob clockwise to turn the power on. Standby On (indicator lights up) Volume adjustment When the power is on, turn the knob clockwise to increase the volume, and turn the knob counterclockwise to decrease the volume. -
Page 11: Connections
Headphones socket Connect a pair of headphones here. No sound comes out of the speakers while headphones are connected. Connections WARNING • Before connecting the product to other devices, turn off the power for all devices. Also, before turning the power of all devices on or off, make sure that all volume levels are set to the minimum. Failing to do so may result in hearing loss, electric shock, or device damage. -
Page 12: Connecting To An Audio Interface
Connecting to an Audio Interface When connecting an audio interface to HS series speakers, connect the audio interface output connectors directly to the speakers’ input connectors. Normally you’ll connect to the LINE OUT 1 and 2 (1L and 2R outputs), although that might depend on the specific audio interface and DAW (Digital Audio Workstation) settings used. -
Page 13: Connecting To A Mixer
Connecting to a Mixer When connecting a mixer to HS series speakers, connect the mixer’s MONITOR OUT or C-R OUT (Control Room) con- nectors directly to the speakers’ input connectors. This makes it possible to control the monitor level independently from the mixer’s main bus level. -
Page 14: Connecting To A Synthesizer Or Other Electronic Musical Instrument
Connecting to a Synthesizer or Other Electronic Musical Instrument When connecting an electronic musical instrument to the HS series speakers, connect the instrument’s L/MONO and R outputs to the HS speaker inputs. Recommended cables ● For connection to an unbalanced phone chassis connector 1/4″... -
Page 15: Connecting To A Computer
Connecting to a computer Use the included stereo mini-to-RCA cable to connect the headphones output connector on your computer to the RCA connectors on this product. Use a commercially available stereo mini-plug cable to connect the headphones output connector on your computer to the ST MINI connector on this product. -
Page 16: Connecting To A Smartphone
Connecting to a smartphone Use the included stereo mini-to-RCA cable to connect the earphone connector on your smartphone to the RCA connect- ors on this product. Use a commercially available stereo mini-plug cable to connect the earphone connector on your smartphone to the ST MINI connector on this product. -
Page 17: Connecting Headphones
Connecting headphones Connect a pair of headphones features a stereo mini-plug cable. HS4, HS3 Owner’s Manual... -
Page 18: Turning On The Power And Making Sound
Turning on the power and making sound Once you’ve set up the speakers, make the settings by following the steps below. Before connecting this product, make sure that all the devices connected to this product are turned off. Standby Standby Turn the output level of the connected devices (such as audio interfaces) down to minimum. - Page 19 Adjust the volume. The [ ]/volume knob on the front panel is also used to adjust the volume. Turn this knob in either direction while the indicator is lit to adjust the volume. In this example, turn the knob to the 12-o’clock position. Output a signal from the connected device and gradually increase the level.
-
Page 20: Troubleshooting
The power switch might not be (first the rear switch and then the turned on. front knob). If the power still does not turn on, contact your Yamaha dealer. One or more cables might not be Connect the cables properly. connected properly. -
Page 21: Specifications
Specifications 0dBu is referenced to 0.775Vrms General Specifications System Type 2-way Powered speaker Frequency Response (−3 dB) 83 Hz - 20 kHz 85 Hz - 20 kHz Frequency Response (−10 dB) 60 Hz - 22 kHz 70 Hz - 22 kHz Crossover Frequency 2.3 kHz 3.2 kHz... -
Page 22: Dimensions
Dimensions HS4 Left HS4 Right 150 mm 213 mm 150 mm 203 mm HS3 Left HS3 Right 177 mm 132 mm 189 mm 132 mm HS4, HS3 Owner’s Manual... -
Page 23: Frequency Response
Frequency Response 1000 10000 Frequency (Hz) 1000 10000 Frequency (Hz) HS4, HS3 Owner’s Manual... -
Page 24: Block Diagram
Block Diagram HEADPHONE AMP HEADPHONE LINE 1 LOW CUT LOW CUT LEVEL ROOM CONTROL HIGH TRIM EQUALIZER POWER AMP LEFT CH RIGHT CH +2dB -2dB -4dB -2dB MUTE HIGH CUT LINE 2 LEFT CH RIGHT CABINET LOW CUT ROOM CONTROL HIGH TRIM EQUALIZER RIGHT CH... - Page 25 Yamaha Pro Audio global website https://www.yamahaproaudio.com/ Yamaha Downloads https://download.yamaha.com/ © 2023 Yamaha Corporation Published 11/2023 MW-A1...
Need help?
Do you have a question about the HS Series and is the answer not in the manual?
Questions and answers