Table of Contents
Advertisement
Advertisement
Table of Contents

Related Manuals for FujiFilm FinePix4900 ZOOM


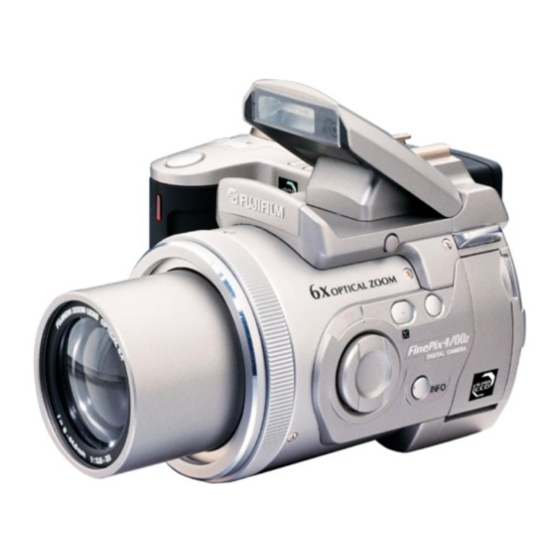
Summary of Contents for FujiFilm FinePix4900 ZOOM
- Page 1 This manual will show you how to use your FUJIFILM DIGITAL CAMERA FinePix4900 ZOOM correctly. Please follow the instructions carefully. Getting Ready Basic Photography Advanced Features Photography Advanced Features Playback Setting BB11855 - 200 ( 1 )
-
Page 2: Warning
Warning To prevent fire or shock hazard, do not expose the unit to rain or moisture. CAUTION : TO REDUCE THE RISK OF ELECTRIC SHOCK. DO NOT REMOVE COVER (OR BACK). NO USER-SERVICEABLE PARTS INSIDE. REFER SERVICING TO QUALIFIED SERVICE PERSONNEL. The graphical symbols are located on the bottom of the case. -
Page 3: Table Of Contents
Contents Warning ... 2 3 Advanced Features Photography Preface ... 6 ADVANCED PHOTOGRAPHY ... 39 Camera Features and Accessories ... 7 I Photography mode specifications ... 39 Nomenclature ... 8 Shutter Speed and Aperture Setting Displays ... 13 PHOTOGRAPHY MODE 1 Getting Ready ATTACHING THE LENS CAP AND SHOULDER STRAP ... -
Page 4: Preface
(provided as an optional accessory) mainly in the U.S.A., Canada and Japan. Conforms to the new standard for digital camera file system Phase Alternation by Line,a color television ✽ Design rule for Camera File system... -
Page 5: Nomenclature
Nomenclature ✽ Refer to the pages in parentheses for more details (Self-timer) button (P.60) (Continuous shooting) button (P.59) ( Macro : close-up photography ) button (P.53) (Flash) button (P.49) Mode dial (P.11) Command dial Indicator lamp (P.26) Mode switch (P.11) (Power) button (P.19) Shutter button... - Page 6 Nomenclature Flash control sensor Flash (P.49) Flash pop-up button (P.49) Lens Focusing mode selector INFO (information check ) button switch (P.56) Zoom button (P.24) Mode switch (Exposure compensation) button (P.55) (Custom white balance) button (P.65) DIGITAL (USB) socket (P.107) Video out socket (P.38) Mode dial DC IN 5V (power input)
-
Page 7: Shutter Speed And Aperture Setting Displays
Nomenclature Example of Monitor Text Display • Shooting Photography Mode Self-Timer photography Continuous shooting Zoom bar Auto bracketing Date Flash mode Macro photography Shutter speed display Manual focus AE lock Focus indicator Aperture setting display Example of Monitor Text Display • Playback Playback mode Date Shutter Speed and Aperture Setting Displays... -
Page 8: Getting Ready
ATTACHING THE LENS CAP AND SHOULDER STRAP Getting Ready ➀ ➁ ➀ Pull the lens cap cord through the strap mount. ➁ Fit and remove the lens cap by squeezing the Attach the shoulder strap by threading it through left and right sides of the cap. the strap mount. -
Page 9: Connecting The Ac Power Adapter
Operation of this camera is only guaranteed when it off to protect the SmartMedia. is used with FUJIFILM SmartMedia. The SmartMedia will not slide fully into the slot if it is Some 3.3V SmartMedia are labelled as “3V” cards. -
Page 10: Removing The Smartmedia
REMOVING THE SmartMedia ™ ➀ ➁ ➀ Grasp the SmartMedia with your fingertips and Check that the indicator lamp is green and pull it out. switch the camera off (➡next page). ➁ Open the slot cover. To protect the SmartMedia, always store it in the special anti-static case. -
Page 11: Setting The Date And Time
SETTING THE DATE AND TIME ➀ ➁ ➀ ➁ ➀ Use “ Set the Mode switch to “ ” Set the Mode ➁ dial to “ ”. The SET-UP screen appears on Press the “MENU/OK” button. the LCD monitor. See P.97 for more information on the items in the “... -
Page 12: Basic Photography
Basic TAKING PICTURES ( AUTO MODE ) Photography ➀ ➁ ➂ You can switch between using the viewfinder (EVF) and the monitor (LCD) to take pictures by ➀ ➁ pressing the EVF/LCD button. Set the Mode switch to “ ” and set the ➂... - Page 13 4-direction button “ ”. ✕ The FinePix4900 ZOOM uses a 6 zoom with a focal length equivalent to 35 mm – 210 mm on a If the subject is not in the AF frame, use AE/AF lock 35 mm camera.
-
Page 14: Number Of Available Frames
TAKING PICTURES ( AUTO MODE ) I Indicator Lamp Display Though the FinePix4900 ZOOM uses an Color Status Meaning accurate autofocus mechanism, it may have difficulty focusing or not be able to focus at all Ready to shoot. for the types of subject and situation listed AF/AE in progress or camera below. -
Page 15: Using Af/Ae Lock
AF (Autofocus) / AE (Autoexposure) Lock On the FinePix4900 ZOOM, pressing the shutter button down half way locks the focus and exposure settings (AF and AE lock). If you want to focus on a subject that is not centered in the frame or change the picture composition after the exposure is set, you can obtain good results by changing the composition after the AF and AE settings are locked. -
Page 16: Framing Guideline Function
FRAMING GUIDELINE FUNCTION Text displayed Framing Guideline displayed No text displayed When the Mode dial is set to a setting other than You can use the “ “ ”, the screen display changes each time the framing guidelines. The framing guidelines help “DISP”... -
Page 17: Viewing Your Images (Playback)
Images That Can be Viewed on the FinePix4900 ZOOM You can use this camera to view (excluding some uncompressed data) images recorded on an FinePix4900 ZOOM or images recorded onto a 3.3V SmartMedia using a FUJIFILM FinePix series, MX series and DX series digital camera. -
Page 18: Playback Zoom
PLAYBACK ZOOM After you have zoomed an image, Zoom bar move around the image by holding down the “SHIFT” button, and “ Pressing “ ” and “ ” button during playback zooms in and out on (enlarges and reduces) the still image respectively. -
Page 19: Erasing Single Frame
ERASING SINGLE FRAME ➀ ➁ ➀ Set the Mode switch to “ ”. Select “FRAME” in the “ ➁ Press the “MENU/OK” button to display the press the “MENU/OK” button. Menu screen on the monitor. See P.77 for more information on the Erasing all frames and Formating. -
Page 20: Using A Tv Monitor
USING A TV MONITOR VIDEO OUT socket Switch off the camera and the TV. Plug the Plug the other end of the cable into the video video cable (provided) into the “VIDEO OUT” input socket on the TV. Then switch the camera socket on the camera. -
Page 21: Auto/ : Scene Position
AUTO / : SCENE POSITION PHOTOGRAPHY MODE Turn the Mode dial to select the setting. Auto This is the simplest mode for taking pictures and can be used in a wide range of situations. : Scene Position This mode provides photography settings tailored to particular types of shot. -
Page 22: Photography Mode
: PROGRAMED / : SHUTTER - PRIORITY / : APERTURE - PRIORITY PHOTOGRAPHY MODE Turn the Mode dial to select a setting. : Pro g ramed Auto This is an automatic mode that selects the shutter speed and aperture for you but still allows you to Turning the Command dial gives you access to select the other camera settings. -
Page 23: Manual
: MANUAL PHOTOGRAPHY MODE Shutter Speed Setting Turn the Mode dial to select the settings. : Manual This mode allows you to set any shutter speed or aperture setting. Shutter speed setting (1 steps : 1/3 EV) ISO 125 3 sec. to 1/1000 sec. ISO 200 3 sec. -
Page 24: Movie
MOVIE PHOTOGRAPHY MODE Turn the Mode dial to select the settings. Movie When you select movie, the available recording In this mode, you can shoot up to 160 seconds time is displayed on the monitor. of movie without sound at a time (Motion JPEG When “... -
Page 25: Flash Photography
MOVIE PHOTOGRAPHY MODE A “recording time bar” is displayed on the monitor during shooting. If you press the shutter button down fully during shooting, shooting stops and the movie is recorded onto the SmartMedia. The “recording time bar” is displayed as a guide to the amount of remaining recording time. -
Page 26: A Auto Flash Mode
FLASH PHOTOGRAPHY A Auto Flash Mode Use this mode for ordinary photography. The Use this mode to ensure that the subject’s eyes flash fires automatically as required by the appear natural when photographing people in shooting conditions. low-light conditions. The flash fires a pre-flash just before the picture is taken and then fires again to take the actual picture. -
Page 27: Suppressed Flash
FLASH PHOTOGRAPHY Su pp ressed Flash Closing the flash suppresses flash operation. Use this mode when you are taking pictures in indoor lighting at distances too great for the flash Close the flash to switch to Suppressed Flash to have any effect, such as theater performances mode. -
Page 28: Ae - L : Using Ae Lock
AE - L : USING AE LOCK The exposure is locked while the “AE-L” button This mode can be selected in the “ • • • is held down. Focus and compose the shot ” photography modes. again and then take the picture. Use this function when you want to take pictures with the exposure fixed for a particular subject. -
Page 29: Setting The Manual Focus
SETTING THE MANUAL FOCUS ➀ Left ➁ ➀ Turn the focusing ring to focus the shot. ➁ A focusing indicator mark appears on the screen. Adjust the focus until “ Manual focus can be used in all photography I Focusing Indicator Marks modes except “... -
Page 30: Digital Zoom
DIGITAL ZOOM You can use the digital zoom function for all A “zoom bar” appears on the screen. If the ✕ Resolution (File Size) settings other than “2400 image on the screen is difficult to make out, 1800”. press the shutter button down halfway. To use the digital zoom Digital zoom focal lengths Use the optical zoom to zoom in fully (telephoto) -
Page 31: Self-Timer Photography
SELF - TIMER PHOTOGRAPHY Manual focus can be used in all photography Position the AF frame over the subject and modes except “ ”. press the shutter button. The camera focuses on Each time you press the “ ” button, the setting the subject in the frame and self-timer starts to ➡... -
Page 32: Photography Information
PHOTOGRAPHY INFORMATION Flash brightness adjustment White balance Photometry ISO sensitivity Bracketing If you cannot recall the current photography Sharpness settings, you can check them by holding down the “INFO” button. The photography information is not displayed in “ ”, “ ”... -
Page 33: Flash Brightness Adjustment
FLASH BRIGHTNESS ADJUSTMENT PHOTOGRAPHY MENU PHOTOGRAPHY MENU This mode can be selected in the “ ” This mode can be selected in the “ • • • photography modes. photography modes. Use this setting when you cannot obtain the Change the white balance setting when you correct brightness, such as when the flash does want to take a picture with the white balance not reach the subject (is too faint) or when you... -
Page 34: Setting The White Balance
SETTING THE WHITE BALANCE PHOTOGRAPHY MENU If “OVER” or “UNDER” is displayed, the white balance was not measured at the correct exposure. Reset the white balance. Using the light source for which you want to set After you take the picture, you should check the the white balance, hold a sheet of white paper “Color (White Balance)”... -
Page 35: Setting The Sensitivity
SETTING THE SENSITIVITY PHOTOGRAPHY MENU PHOTOGRAPHY MENU This mode can be selected in the “ ” This mode can be selected in the “ • • • photography modes. photography modes. Use this feature to photograph the same image Use this setting when you want to take bright with different exposure settings. -
Page 36: Using An External Flash
USING AN EXTERNAL FLASH PHOTOGRAPHY MENU This mode can be selected in the “ ” • • • photography modes. Set this setting to “ON” when you are using an external flash. ➀ Close the built-in flash. ➁ Mount the external flash on the camera’s hot Synchronization speed : Up to 1/1000 sec. -
Page 37: When The White Balance Is Incorrect
USING AN EXTERNAL FLASH PHOTOGRAPHY MENU When the White Balance is Incorrect Hold a sheet of white paper so that it fills the entire screen. Then press the “ the flash and set the white balance. Match the white balance to the external flash settings. -
Page 38: Playback Information
PLAYBACK INFORMATION File size Quality Shutter speed Aperture ISO sensitivity This function allows you to check the photography Flash ON/OFF information. Hold down the “INFO” button to check the information. This function cannot be used during multi-frame playback (➡P.35). MOVIE PLAYBACK Use “... -
Page 39: Playback Menu
Image data that can be played back The FinePix4900 ZOOM can play back video data recorded on an FinePix4900 ZOOM or image data recorded on a 3.3 volt SmartMedia using a FUJIFILM digital camera. However, the FinePix4900 ZOOM cannot play back audio data. -
Page 40: Playback (Automatic Playback)
ALL FRAMES / FORMATTING ERASING SINGLE PLAYBACK MENU • ➀ ➂ ➁ ➀ A confirmation screen appears. Press “ ” or “ ” to select “ ERASE”. ➁ If you are erasing all the frames, or formatting Use the “ ”... -
Page 41: Playback Menu
RESIZE PLAYBACK MENU When you resize an image, a new file is created containing a smaller amount of data. Only still images with a file size setting of ✕ ✕ ✕ “2400 1800”, “1600 1200” or “1280 960” can be resized. For other types of image, the "Resize"... -
Page 42: Setting And Removing Single Frame Protection
SETTING AND REMOVING SINGLE FRAME PROTECTION PLAYBACK MENU ➁ ➀ Press the “MENU/OK” button to display the Use “ ➁ menu on the monitor. Press “ RESET”. ➂ Press “MENU/OK”. Multi-frame playback is an easy way to select images to be protected (➡P.35). Protection : A setting that prevents images from being inadvertently erased (➡P.77). -
Page 43: Setting And Removing Protection For All Frames
SETTING AND REMOVING PROTECTION FOR ALL FRAMES PLAYBACK MENU ➁ ➀ Press the “MENU/OK” button to display the Use “ ➁ menu on the monitor. Press “ “UNPROTECT ALL”. ➂ Press “MENU/OK”. Formatting erases all images, including protected images (➡P.77). ➀... -
Page 44: How To Specify Print Options
The frames to be printed and the number of prints for each frame Imprinting of the date and time This section gives a detailed description of how to order your prints with the FinePix4900 ZOOM. ✽ Note that some printers do not support date and time imprinting or specification of the number of prints. -
Page 45: Dpof Set Frame
DPOF SET FRAME PLAYBACK MENU ➀ ➁ ➀ ➀ Use “ ” or “ ” to select “FRAME SET”. Use “ ➁ specified. Press the “MENU/OK” button. ➁ Use “ If you are not specifying cropping, proceed to step Always specify the date setting before proceeding to other settings. - Page 46 DPOF SET FRAME PLAYBACK MENU To specify prints for another frame, use the “ and “ specify the number of prints. Check the trimming settings on the monitor and then press the “MENU/OK” button to confirm the settings. Using “ automatically confirms the setting.
-
Page 47: Dpof Review/Reset
DPOF REVIEW / RESET PLAYBACK MENU ➀ ➁ ➀ Use “ ” or “ ” to select “REVIEW/RESET”. You can confirm the settings for only those ➁ frames with a specified number of prints by Press the “MENU/OK” button. pressing “ are displayed on the right of the screen. -
Page 48: Dpof Set All /Reset All
DPOF SET ALL / RESET ALL PLAYBACK MENU ➀ ➁ A confirmation screen appears. To proceed, press the “MENU/OK” button. ➀ Use “ ” or “ ” to select “SET ALL” or “RESET ALL”. ➁ Press sthe “MENU/OK” button to set the selected option. -
Page 49: Setting
CREATE INDEX PLAYBACK MENU ➀ ➁ ➀ The index preview screen appears. To record Use “ ” or “ ” to select “ INDEX”. ➁ the index, press the “MENU/OK” button. Press the “MENU/OK” button. If you do not want to record the index, press the “BACK”... -
Page 50: Setting The File Size And Quality (Compression Ratio)
: SET - UP MODE ➀ ➁ ➀ Press “ ➁ Use “ ➀ Set the Mode switch to “ ”. ➁ Set the Mode dial to “ ” to display the SET-UP screen. Always switch the camera off when you are replacing the batteries. -
Page 51: Preview Display Settings
PREVIEW DISPLAY SETTINGS Preview Zoom Use this setting to specify whether a preview screen (showing the photographed image) is displayed after you take a photograph. ON : The preview screen is displayed and you can choose whether to record the image. To record : “MENU/OK”... -
Page 52: Auto Power Save Setting
AUTO POWER SAVE SETTING Once you enable this function, the monitor is When the camera is in sleep mode, pressing the temporarily switched off to reduce power shutter button down halfway brings the camera consumption (Sleep mode) if the camera is not back to full operational mode. -
Page 53: Adjusting The Monitor Brightness
LCD viewfinder and the LCD monitor. System Expansion Options ➀ ➁ e By using the FinePix4900 ZOOM together with other optional FUJIFILM products, your system can Press “ ” or “ ” to adjust the brightness of the LCD monitor. -
Page 54: Using The Usb Interface Set
Using the USB Interface Set Use the cable provided to connect the camera to your PC and transfer image data from the camera to the PC. The software runs on Windows 98 (including the second edition), Windows 2000 Professional and Mac OS 8.5.1 to Mac OS 9.0. Note that your PC must be equipped with a USB port. -
Page 55: Overview Of The Wide Conversion Lens/Adapter Ring
Using the USB Interface Set Replacing SmartMedia On Windows 98 Check that the indicator lamp is green. On Windows 2000 Professional Check that the indicator lamp is green and then click on the Eject button in the taskbar. On a Macintosh Check that the indicator lamp is green and then drag the “Removable drive”... -
Page 56: Accessories Guide
Accessories Guide e The optional accessories (sold separately) can make taking pictures with the FinePix4900 ZOOM even easier. For information on how to attach and use the accessories, refer to the instructions provided with the accessory used. SmartMedia™ These are separately available SmartMedia cards. -
Page 57: Explanation Of Terms
AF/AE Lock : On the FinePix4900 ZOOM, pressing the shutter button down half way locks the focus and exposure settings (AF and AE lock). If you want to focus on a subject that is not centered in the frame or change the picture composition after the exposure is set, you can obtain good results by changing the composition after the AF and AE settings are locked. -
Page 58: Notes On The Power Supply
I Battery Features Notes on Using the Battery The battery gradually loses its charge even when not The FinePix4900 ZOOM camera uses a rechargeable used. Use a battery that has been charged recently lithium-ion battery. Note the points below when using (in the last day or two) to take pictures. -
Page 59: Ac Power Adapter
Store the battery in a cool, dry place. Storing the The use of an AC power adapter other than the AC- battery for long periods in a hot location can shorten 5V/AC-5VH could result in damage to your FinePix4900 the battery life. ZOOM Digital Camera. -
Page 60: Notes On The Smartmedia
I SmartMedia ✽ When the SmartMedia cover is opened or the SmartMedia removed and the camera is then The SmartMedia card supplied with your FinePix4900 ZOOM camera is a new image recording medium switched off during data recording, during data developed especially for use in digital cameras. -
Page 61: Warning Displays
• Camera malfunction or fault. • Switch the camera on again, taking care not to touch the lens. • Turn the camera off and on again a few times. If this does not resolve the problem, contact an authorized FUJIFILM service center. Remedy... -
Page 62: Troubleshooting
Troubleshooting e If you think the camera is faulty, check the following once more Problem Cause No power. • The battery is exhausted. • The AC power adapter plug has come out of the power outlet. Power cuts out during •... -
Page 63: Specifications
• The TV input is set to “TV”. Specifications S y stem Remedy • Remove the battery, re-insert them and Model : Digital camera FinePix4900 ZOOM try again. CCD Sensor • Set the Mode switch and Mode dial to the 1/1.7-inch Super CCD(with primary color filter), 2.4 correct setting. -
Page 64: Safety Notes
These are normal display characteristics and do not indicate a fault with the monitor. This phenomenon will not appear on the recorded image. problems. This is not a malfunction of FUJIFILM Digital Cameras. To ensure that you use your FinePix4900 ZOOM camera correctly, read these Safety Notes and your Owner’s Manual carefully beforehand. - Page 65 This can cause a fire or electric shock. Do not and cause a fire or electric shock. disassemble. Contact your FUJIFILM dealer. Do not use the camera in the bathroom or shower. Do not use the batteries except as This can cause a fire or electric shock.
-
Page 66: Ec Declaration Of Conformity
93/68/EEC ) and Low Voltage Directive ( 73/23/EEC ) . Fuji Photo Film ( Europe ) G.m.b.H. Heesenstrasse 31 40549 Dusseldorf, Germany DIGITAL CAMERA FUJIFILM FinePix4900 ZOOM Fuji Photo Film Co., Ltd. 26 - 30, Nishiazabu 2 - chome, Minato - ku, Tokyo 106-8620, Japan... - Page 67 26 - 30, Nishiazabu 2 - chome, Minato - ku, Tokyo 106 - 8620, Japan Printed on recycled paper. FGS - 002108 - FG Printed in Japan...
Need help?
Do you have a question about the FinePix4900 ZOOM and is the answer not in the manual?
Questions and answers