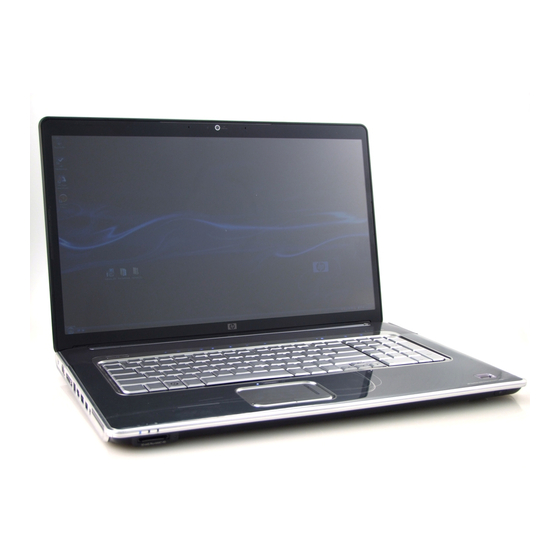
HP HDX X18-1000 - Premium Notebook PC User Manual
Multimedia
Hide thumbs
Also See for HDX X18-1000 - Premium Notebook PC:
- Maintenance and service manual (138 pages) ,
- User manual (24 pages) ,
- User manual (16 pages)
Table of Contents
Advertisement
Quick Links
Advertisement
Table of Contents

Related Manuals for HP HDX X18-1000 - Premium Notebook PC


Summary of Contents for HP HDX X18-1000 - Premium Notebook PC
- Page 1 Multimedia User Guide...
- Page 2 © Copyright 2008 Hewlett-Packard Product notice Development Company, L.P. This user guide describes features that are Microsoft and Windows are U.S. registered common to most models. Some features trademarks of Microsoft Corporation. may not be available on your computer. The information contained herein is subject to change without notice.
-
Page 3: Table Of Contents
Table of contents 1 Multimedia features Identifying your multimedia components ....................2 Using the media button ........................4 Adjusting the volume ..........................5 Using the media activity functions ......................6 Using the media activity buttons ..................7 Previous/rewind button ..................7 Play/pause button .................... - Page 4 6 Webcam Webcam tips ............................29 Adjusting webcam properties ......................30 7 Troubleshooting The optical disc tray does not open for removal of a CD, DVD, or BD ..........31 The computer does not detect the optical drive ................. 32 A disc does not play ...........................
-
Page 5: Multimedia Features
Multimedia features Your computer includes multimedia features that allow you to listen to music, watch movies, and view pictures. Your computer may include the following multimedia components: ● Optical drive for playing audio and video discs ● Integrated speakers for listening to music ●... -
Page 6: Identifying Your Multimedia Components
Identifying your multimedia components The following illustration and table describe the multimedia features of the computer. Component Description Internal digital dual array microphones (2) Record sound. Webcam light Turns on when video software accesses the webcam. Webcam Records audio and video and captures still photographs. Treble/bass button Press the button to alternate between the treble or bass functions. - Page 7 Component Description Audio-out (headphone) jacks (2) Produce sound when connected to optional powered stereo speakers, headphones, earbuds, a headset, or television audio. WARNING! To reduce the risk of personal injury, adjust the volume before putting on headphones, earbuds, or a headset. For additional safety information, refer to the Regulatory, Safety and Environmental Notices.
-
Page 8: Using The Media Button
Using the media button The function of the media button varies by model and installed software. With this button, you can watch movies, listen to music, and view pictures without starting up the computer and launching the operating system. Pressing the media button starts the MediaSmart program from any power state. NOTE: If the computer has been set up to require a logon password, you may be asked to log on to Windows®. -
Page 9: Adjusting The Volume
Adjusting the volume You can adjust the volume using the following controls: ● Computer volume buttons: ◦ To mute or restore volume, press the mute button (1). ◦ To decrease volume, slide your finger across the volume scroll zone from right to left, or press and hold the volume minus (-) sign (2). -
Page 10: Using The Media Activity Functions
Under System icons, select the Volume check box. Click OK. ● Program volume control: Volume can also be adjusted within some programs. Using the media activity functions The media activity buttons and the media activity hotkeys control the play of an audio CD or a DVD that is inserted into the optical drive. -
Page 11: Using The Media Activity Buttons
Using the media activity buttons The following illustration and tables describe the functions of the media activity buttons when a disc is inserted in the optical drive. ● Previous/rewind button (1) ● Play/pause button (2) ● Next/fast forward button (3) ●... -
Page 12: Next/Fast Forward Button
Next/fast forward button Disc status Button Function Playing Next/fast forward button Plays the next track or chapter. Playing + next/fast forward button Fast forwards the playback. Stop button Disc status Button Function Playing Stop button Stops the playback. Using the media activity hotkeys A media activity hotkey is a combination of the key (1) and a function key (2). -
Page 13: Multimedia Software
Multimedia software Your computer includes preinstalled multimedia software that allows you to play music, watch movies, and view pictures. The following sections provide details about MediaSmart and other preinstalled multimedia software. Using MediaSmart software MediaSmart turns your computer into a mobile entertainment center. With MediaSmart, you can enjoy music and DVD and BD movies. -
Page 14: Using Other Preinstalled Multimedia Software
Using other preinstalled multimedia software To locate other preinstalled multimedia software: Select Start > All Programs, and then open the multimedia program you want to use. For example, ▲ if you want to use Windows Media Player to play an audio CD, click Windows Media Player. NOTE: Some programs may be located in subfolders. -
Page 15: Audio
Audio Your computer enables you to use a variety of audio features: ● Play music using your computer speakers and/or connected external speakers ● Record sound using the internal microphone or connect an external microphone ● Download music from the Internet ●... -
Page 16: Connecting External Audio Devices
Connecting external audio devices WARNING! To reduce the risk of personal injury, adjust the volume before putting on headphones, earbuds, or a headset. For additional safety information, refer to the Regulatory, Safety and Environmental Notices. To connect external devices such as external speakers, headphones, or a microphone, refer to the information provided with the device. -
Page 17: Checking Your Audio Functions
Checking your audio functions To check the system sound on your computer, follow these steps: Select Start > Control Panel. Click Hardware and Sound. Click Sound. When the Sound window opens, click the Sounds tab. Under Program, select any sound event, such as a beep or alarm, and click the Test button. -
Page 18: Video
Video Your computer enables you to use a variety of video features: ● Watch movies ● Play games over the Internet ● Edit pictures and video and create presentations ● Connect external video devices ● Watch TV, including high-definition TV (select models only) Chapter 4 Video... -
Page 19: Connecting An External Monitor Or Projector
Connecting an external monitor or projector The external monitor port connects an external display device such as an external monitor or a projector to the computer. To connect a display device, connect the device cable to the external monitor port. ▲... -
Page 20: Connecting An Hdmi Device
Connecting an HDMI device NOTE: To transmit video signals through the HDMI port, you need an HDMI cable (purchased separately), available from most electronics retailers. The computer includes an HDMI (High Definition Multimedia Interface) port. The HDMI port connects the computer to an optional video or audio device, such as a high-definition television, or any compatible digital or audio component. -
Page 21: Setting Hdmi As The Default Audio Playback Device
– or – Select Start > Computer > System properties. In the left pane, click Device Manager. NOTE: Windows includes the User Account Control feature to improve the security of your computer. You may be prompted for your permission or password for tasks such as installing software, running utilities, or changing Windows settings. -
Page 22: Watching Tv (Select Models Only)
Watching TV (select models only) You can use the integrated TV tuner (select models only) or an optional external TV tuner to watch, record, and pause live TV on the computer. If your computer includes an integrated TV tuner, two remote controls are included in the box with the computer. - Page 23 Use the arrow keys to select the program you want to view, and then press the OK button. The recorded program begins to play in the preview window. To watch in full-screen format, press the right arrow to move the cursor to the preview window and then press the OK button.
-
Page 24: Optical Drive
Optical drive Your computer includes an optical drive that expands the functionality of the computer. Identify what kind of device is installed in your computer to see its capabilities. The optical drive allows you to read data discs, play music, and watch movies. If your computer includes a Blu-ray Disc, also known as BD, drive, then you can also watch high-definition video from disc. -
Page 25: Using Optical Discs (Cds, Dvds, And Bds)
Using optical discs (CDs, DVDs, and BDs) An optical drive, such as a DVD-ROM drive, supports optical discs (CDs, DVDs, and BDs). These discs store information, such as music, photos, and movies. DVDs and BDs have a higher storage capacity than CDs. -
Page 26: Playing A Cd, Dvd, Or Bd
Playing a CD, DVD, or BD Turn on the computer. Press the release button (1) on the drive bezel to release the disc tray. Pull out the tray (2). Hold the disc by the edges to avoid touching the flat surfaces and position the disc label-side up over the tray spindle. -
Page 27: Configuring Autoplay
Configuring AutoPlay Select Start > Control Panel > Play CDs or other media automatically. Confirm that the Use AutoPlay for all media and devices check box is selected. Click Choose a default, and then select one of the available options for each media type listed. Click Save. -
Page 28: Changing Dvd Region Settings
Changing DVD region settings Most DVDs that contain copyrighted files also contain region codes. The region codes help protect copyrights internationally. You can play a DVD containing a region code only if the region code on the DVD matches the region setting on your DVD drive. -
Page 29: Observing The Copyright Warning
Observing the copyright warning It is a criminal offense, under applicable copyright laws, to make unauthorized copies of copyright- protected material, including computer programs, films, broadcasts, and sound recordings. Do not use this computer for such purposes. CAUTION: To prevent loss of information or damage to a disc, observe the following guidelines: Before writing to a disc, connect the computer to a reliable external power source. -
Page 30: Creating Or "Burning" A Cd, Dvd, Or Bd
Creating or “burning” a CD, DVD, or BD CAUTION: Observe the copyright warning. It is a criminal offense, under applicable copyright laws, to make unauthorized copies of copyright-protected material, including computer programs, films, broadcasts, and sound recordings. Do not use this computer for such purposes. If your computer includes a CD-RW, DVD-RW, DVD±RW, or BD R/RE optical drive, you can use software such as Windows Media Player or CyberLink Power2Go to burn data and audio files, including MP3 and WAV music files. -
Page 31: Removing An Optical Disc (Cd, Dvd, Or Bd)
Removing an optical disc (CD, DVD, or BD) Press the release button (1) on the drive bezel to release the disc tray, and then gently pull out the tray (2) until it stops. Remove the disc (3) from the tray by gently pressing down on the spindle while lifting the outer edges of the disc. -
Page 32: Webcam
Webcam Your computer includes an integrated webcam, located at the top of the display. The webcam is an input device that allows you to capture and share video. Preinstalled CyberLink YouCam software provides new features that expand the webcam experience. To access the webcam and CyberLink YouCam software, select Start >... -
Page 33: Webcam Tips
Webcam tips For optimum performance, observe the following guidelines while using the webcam: ● Be sure that you have the latest version of an instant message program before starting a video conversation. ● The webcam may not work properly across some network firewalls. NOTE: If you are having trouble viewing or sending multimedia files to someone on another LAN or outside your network firewall, temporarily disable the firewall, perform the task you want to... -
Page 34: Adjusting Webcam Properties
Adjusting webcam properties You can adjust webcam properties using the Properties dialog box, which is accessible from various programs that use the integrated camera, usually from a configuration, settings, or properties menu: ● Brightness—Controls the amount of light that is incorporated into the image. A higher brightness setting creates a brighter image;... -
Page 35: Troubleshooting
Troubleshooting The following sections describe several common issues and resolutions. The optical disc tray does not open for removal of a CD, DVD, or BD Insert the end of a paper clip (1) into the release access in the front bezel of the drive. Press in gently on the paper clip until the tray is released, and then pull out the tray (2) until it stops. -
Page 36: The Computer Does Not Detect The Optical Drive
The computer does not detect the optical drive If the computer does not detect the optical drive, use Device Manager to troubleshoot the device and then update, uninstall, or disable the device driver: Remove any discs from the optical drive. Select Start >... -
Page 37: A Disc Does Not Play
A disc does not play ● Save your work and close all open programs before playing a CD, DVD, or BD. ● Log off the Internet before playing a CD, DVD, or BD. ● Be sure that you insert the disc properly. ●... -
Page 38: A Disc Does Not Play Automatically
A disc does not play automatically Click Start > Control Panel > Play CDs or other media automatically. Confirm that the Use AutoPlay for all media and devices check box is selected. Click Save. A CD, DVD, or BD should now start automatically when it is inserted into the optical drive. A DVD movie stops, skips, or plays erratically ●... -
Page 39: A Dvd Movie Is Not Visible On An External Display
A DVD movie is not visible on an external display If both the computer display and an external display are turned on, press fn+f4 one or more times to switch between the 2 displays. Configure the monitor settings to make the external display primary: Right-click on a blank area of the computer desktop, and select Personalize >... -
Page 40: A Device Driver Must Be Reinstalled
A device driver must be reinstalled To reinstall a device driver, follow these steps: Remove any discs from the optical drive. Click Start and type device manager in the Start Search box. As you type, search results are listed in the pane above the box. In the results pane, click Device Manager. - Page 41 To use HP Update: Select Start > All Programs > HP > HP Update. On the HP Welcome screen, click Settings, and then select a time when the utility should check for software updates on the Web. Click Next to immediately check for HP software updates. To use the HP Web site: Open your Internet browser, and go to http://www.hp.com/support.
-
Page 42: Index
Index digital dual array microphones, media activity hotkeys 8 audio devices, connecting identifying 2 media button 4 external 12 drives, optical drive 21 MediaSmart audio features 11 starting 4, 9 audio functions, checking 13 burning 26 using 9 audio-in (microphone) jack 3 changing region setting 24 MediaSmart software 9 audio-out (headphone) jacks 3... - Page 43 treble button 2 treble scroll zone 2 troubleshooting device driver 36 disc burning 35 disc play 33, 34 DVD movie play 34 external display 35 HP device drivers 36 Microsoft drivers 36 optical disc tray 31 optical drive detection 32 TV antenna/cable jack, identifying 2 TV, watching 18...
Need help?
Do you have a question about the HDX X18-1000 - Premium Notebook PC and is the answer not in the manual?
Questions and answers