Advertisement
Table of Contents
- 1 Table of Contents
- 2 Welcome & Congratulations
- 3 General Safety Instructions
- 4 Grill Assembly
- 5 Side Burner Assembly
- 6 Built-In Instructions
- 7 Gas Requirements
- 8 Leak Testing
- 9 Lighting the Grill
- 10 Using the Grill
- 11 Using the Rotisserie & Side Burners
- 12 Care and Maintenance
- 13 Troubleshooting Your Grill
- 14 Warranty
- Download this manual
Use & Care Manual
Use & Care Manual
3 3 0 0 " Stainless Steel
Outdoor Grill
with Electronic Ignition
Visit the Frigidaire Web Site at:
http://www.frigidaire.com
READ AND SAVE THESE INSTRUCTIONS
Assembly Instructions Included
Welcome/Product Registration
Grill Features and Components
Rotisserie/Side Burner Usage
1
2
3-4
5-8
9-11
12
13-15
16
17-18
19
Advertisement
Table of Contents

Related Manuals for Frigidaire Grill


Summary of Contents for Frigidaire Grill
-
Page 1: Table Of Contents
Use & Care Manual Use & Care Manual 3 3 0 0 " Stainless Steel Outdoor Grill with Electronic Ignition Visit the Frigidaire Web Site at: http://www.frigidaire.com READ AND SAVE THESE INSTRUCTIONS Assembly Instructions Included Welcome/Product Registration General Safety Instructions... -
Page 2: Welcome & Congratulations
Please record your model and serial numbers below for future reference. This information is found on the serial plate located on the back of the built-in grill or on the inside of the cart door (complete grill & cart model). -
Page 3: General Safety Instructions
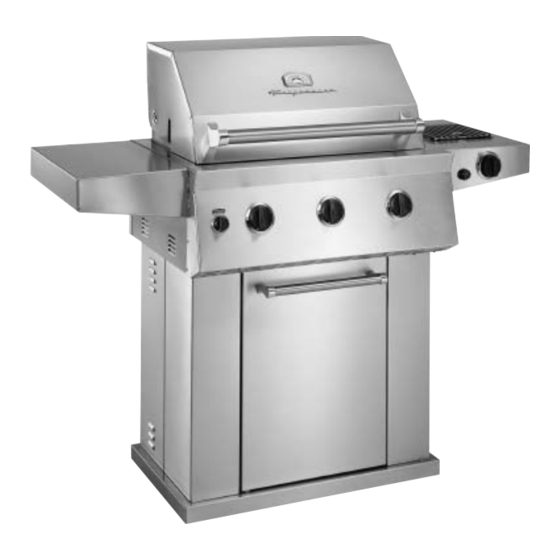
- Always keep your face and body as far away as from the grill as possible when lighting to reduce the risk of burn. - Extinguish all flames and do not smoke while engaging gas and igniting the grill. - Page 4 1. Roll top grill hood 2. Grilling/Cooking surface 3. Side Shelf 4. Control knob: back infrared burner 5. Control knobs: main burners 6. Convection vents 7. Hood Handle NOTE: Cart, side burner and side shelf are not included with the head only units.
-
Page 5: Grill Assembly
SIDE SHELF ATTACHMENT 1. Attach the shelf to the left side of grill by inserting the shelf hooks into the slots on the side of the grill and pushing down on the shelf assembly until level with grill. -
Page 6: Side Burner Assembly
SIDE BURNER PARTS ASSEMBLY 1. Attach the side shelf to the grill by inserting the shelf hooks into the slots on the side of the grill and pushing down on the shelf assembly until level with the grill. (See Fig. 8) 2. -
Page 7: Built-In Instructions
Review the drawings on the following pages to determine the exact dimensions and items needed for an outdoor cooking center. Keep in mind that the gas line hook-up is on the right hand side of the main built in-grill. The structure, grill and support items must be kept level throughout the installation to ensure proper operation. - Page 8 • If using a backsplash apron or rear wall, locate electrical service on the left hand side for rotisserie motor construction. • A minimum clearance of 12” from the back of the outdoor cooking center must be maintained between the grill and any combustible construction such as wood siding of residence, 3”...
-
Page 9: Gas Requirements
Check your local gas utility company or with local codes for instructions on installing gas supply lines. Be sure to check on type and size of run, and how deep to bury the line. If the gas supply line is too small, the grill will not operate correctly. - Page 10 Frigidaire). This assembly is designed to connect directly to a standard 20 lb. L.P. cylinder. L.P. Cylinders are not included with the grill. L.P. Cylinders can be purchased separately at an inde- pendent dealer.
-
Page 11: Leak Testing
GENERAL INFORMATION Although all gas connections on the grill are leak tested prior to shipment, a complete gas tightness check must be per- formed at the installation site due to possible shifting during shipment, installation or excessive pressure unknowingly being applied to the unit. Periodically check the whole system for leaks and immediately check the system if the smell of gas is detected. -
Page 12: Lighting The Grill
BEFORE LIGHTING Important! Before Lighting... Check the gas supply line for cuts, wear or abrasion. Always keep your face and body as far away from the grill as possible when lighting. GRILL BURNER LIGHTING Lighting the Grill with electronic igniter 1. -
Page 13: Using The Grill
NOTE: The grill will operate best if it is not facing directly into the wind. Clearance to combustible construction - A minimum of 12” from the sides and back must be maintained from the gas grill above and below the cooking surface to adjacent vertical combustible construction. -
Page 14: Using The Rotisserie & Side Burners
The rotisserie motor is equipped with metal gears and is capable of turning up to 20 lbs. of food. The motor is mounted on a bracket on the left side of the grill by sliding the motor over the bracket with the cord facing the back of the grill. - Page 15 NOTE: Do Not operate the main burners and infrared back burner at the same time. This can cause warping of the roll top grill hood. SIDE BURNER LIGHTING Push and turn the control knob to the “HIGH” position and immediately press and hold the electronic igniter button.
-
Page 16: Care And Maintenance
Important: Do not leave the grill outside during inclement weather unless it is covered (cover sold separately). Rain water can collect inside of the grill, the grill cart or the drip tray if left uncovered. If the drip tray is not cleaned after use and the grill is left uncovered, the drip tray will fill with water causing grease and water to spill into the grill cart. -
Page 17: Troubleshooting Your Grill
SPIDER AND INSECT WARNING Spider and insects can nest in the burners of this or any other grill and cause the gas to flow from the front of the burner. This is very dangerous condition which can cause a fire to occur behind the valve panel, thereby damaging the grill and making it unsafe to operate. - Page 18 SOLUTION • Is your gas supply fully turned on? • If this is an L.P. grill is there gas in your tank ? Check your gas level. • If this is an L.P. grill, shut off gas supply, disconnect gas line at tank, reconnect the line to the tank.
-
Page 19: Warranty
LIMITED LIFETIME WARRANTY Frigidaire Grills have a limited lifetime warranty on all stainless steel panels, limited 3 years on stainless burners, a limited 1 year warranty on all other parts and limited 1 year on labor. In the U.S.A., your appliance is warranted by Electrolux Home Products North America. We authorize no person to change or add to any of our obligations under this warranty.
Need help?
Do you have a question about the Grill and is the answer not in the manual?
Questions and answers