Advertisement
Quick Links
Advertisement

Related Manuals for Franke FF 5000 SERIES


Summary of Contents for Franke FF 5000 SERIES
- Page 1 FF 5000 SERIES Revolving mixer with separate handshower Installation guide...
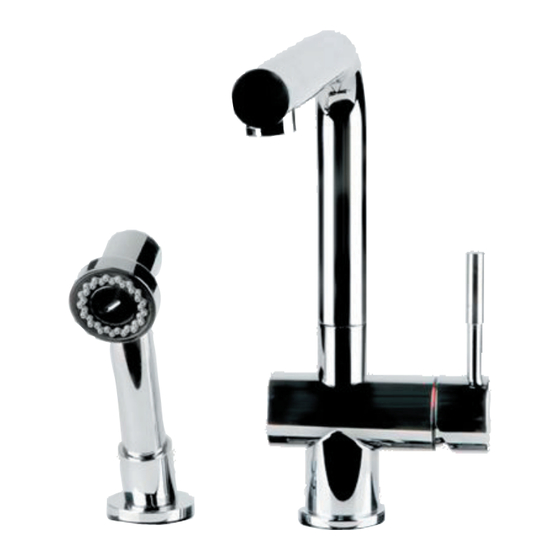
- Page 2 G 1402.XX G 28900.XX G R0185 G 1697 G 1403 G 1156 Cartridge G R0239.XX Ring cap G 13396.XX Handle G 1399.XX Aerator G 1402.XX Side spray G 28900.XX Hook for side spray G R0185 Fastening set (rubber washer, metal washer, nut) G 1697 Priority water flow system G 1403...
-
Page 3: Faucet Installation
Please remove all components from package and inspect prior to installation (see itemized table and picture). NOTE: Call us immediately if you see inconsistencies. (1-800-626-5771) Faucet Flexible hose of the side spray Hook for side spray Side spray Priority water flow system Fastening set (rubber washer, metal washer, nut) Fastening set (rubber washer, triangular flange, metal washer, nut, allen key 2,5mm) Counter weight... - Page 4 Install faucet to the sink or countertop Set the faucet into place on the sink as indicated in the figure. NOTE: the rubber O-ring should be sitting on top of the countertop and between the faucet body. DO NOT use putty or other sealant at this location.
- Page 5 Install faucet to the sink or countertop - follows Install the fastening components to the faucet’s threaded shank in the following sequence: round gasket (1), triangular flange (2), metal washer (3) and threaded nut (4) (the triangular flange can be omitted if the sink/countertop is too thick).
- Page 6 Assembly of side spray and connecting of the priority water flow system filter washer Proceed to the connection of the flexible hose of the side spray (A) and the priority water flow system (B - follow the phases indicated). Interposing the holding gaskets within the connections as indicated in the figure.
- Page 7 Connect the supply lines Arrow BLU COLD water Arrow RED HOT water Connect the hot and cold supply lines. Do not allow the supply tubes to twist or bend sharply. Leave the valves closed. - Move the faucet handle by rotating it onwards so that it opens in the full hot position and open the hot supply for 15 seconds.
-
Page 8: Replacing The Cartridge
Replacing the cartridge Allen key 2.5 mm 28 mm wrench Before starting, shut off the water supply to the faucet and move the faucet handle to the off position. Use a 2.5 mm Allen key to loosen the set screw (A) which is accessible from the back of the handle. Lift the handle (B) from the cartridge (F). - Page 9 Cleaning of the aerator It is recommended that you periodically clean the aerator of your fau- cet. To do so, unscrew the aerator holder from its own seat. Simply using a toothbrush, or something similar, rub the filter under the wa- ter, removing the impurities and any build up.
-
Page 10: General Maintenance
General maintenance Clean aerator periodically. Do not use harsh detergents, solvents, chemical agents, metallic sponges, etc. that could harm the surface. Clean only with a soft sponge and soapy water. Clean and then dry properly the faucet in case of very hard or calcare- ous water, whose deposits cold damage the surface. -
Page 11: Limited Lifetime Warranty
Limited lifetime warranty Franke Consumer Products, Inc., Kitchen Systems Division extends the following warranty to the origi- nal purchaser of its faucets effective January 1, 2003. All faucets installed in a private residence will carry a limited lifetime warranty on all mechanical parts to be free of manufacturing defects in material and workmanship under normal usage.
Need help?
Do you have a question about the FF 5000 SERIES and is the answer not in the manual?
Questions and answers