Viessmann VITODENS 100-W Installation And Service Instructions Manual
7.9 to 26.0 kw wall mounted gas fired condensing boiler natural gas and lpg version
Hide thumbs
Also See for VITODENS 100-W:
- Installation instructions manual (204 pages) ,
- Installation and service instructions manual (105 pages) ,
- Manual (84 pages)
Table of Contents
Advertisement
Quick Links
Advertisement
Chapters
Table of Contents

Related Manuals for Viessmann VITODENS 100-W


Summary of Contents for Viessmann VITODENS 100-W
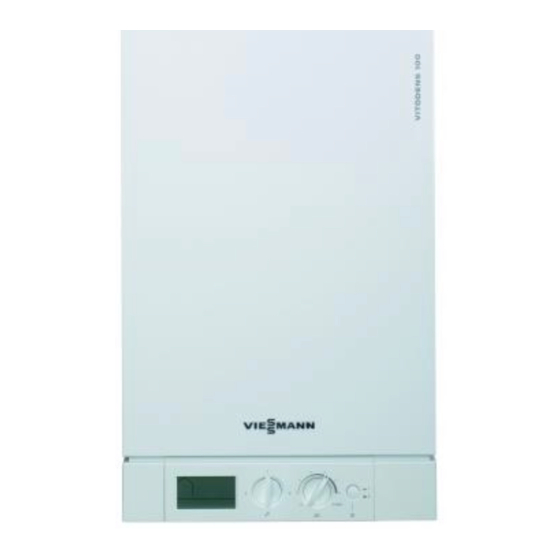
- Page 1 VIESMANN Installation and service instructions for contractors Vitodens 100-W Type WB1B, 7.9 to 26.0 kW Wall mounted gas fired condensing boiler Natural gas and LPG version Gas council no.: 41-819-21; 41-819-22; 41-819-23; 41-819-24 VITODENS 100-W Please keep safe. 5368 662 GB...
-
Page 2: Safety Instructions
Safety instructions Safety instructions Please follow these safety instructions closely to prevent accidents and mate- rial losses. Safety instructions explained ■ all current safety regulations as defined by DIN, EN, DVGW, TRGI, Danger TRF, VDE and all locally applicable This symbol warns against the standards, risk of injury. - Page 3 Please note and may invalidate our warranty. Electronic modules can be dam- For replacements, use only orig- aged by electro-static dis- inal spare parts from Viessmann charges. or those which are approved by Touch earthed objects, such as Viessmann. heating or water pipes, to dis-...
-
Page 4: Table Of Contents
Index Index Installation instructions Preparing for installation Product information....................Preparing for installation..................Installation sequence Installing the boiler and making all connections........... Opening the control unit casing................11 Electrical connections................... 12 Service instructions Commissioning, inspection, maintenance Steps - commissioning, inspection and maintenance.......... 15 Further details regarding the individual steps............ -
Page 5: Preparing For Installation
Preparing for installation Product information Vitodens 100-W, WB1B Set up for operation with natural gas. Preparing for installation Preparing the boiler installation Dimensions and connections A Heating flow C Condensate drain: Plastic pipe 7 B Heating return 22 mm... - Page 6 Preparing for installation Preparing for installation (cont.) D Gas connection, 1/2" male iron Fitting the wall retainer Ø 1 A Vitodens installation template B Opening for the balanced flue...
- Page 7 Preparing for installation Preparing for installation (cont.) 1. Position the installation template pro- 2. Prepare gas connection. vided on the wall. 3. Prepare the electrical connections. 2. Mark out the rawl plug holes. Observe valid IEEE standards. ■ A 1.5 m long power cable is fitted 3.
-
Page 8: Installation Sequence
Installation sequence Installing the boiler and making all connections Removing the front panel and mounting the boiler 1. Release screws at the bottom of the 3. Hook the boiler into the wall boiler; do not remove completely. retainer. 2. Remove front panel. -
Page 9: Gas Connection
Installation sequence Installing the boiler and making all connections (cont.) Installing connections on the water side A Heating flow B Heating return Gas connection 1. Connect gas shut-off valve to con- nection A. 2. Carry out a tightness test. Please note Excessive test pressure may damage the boiler and gas valve. -
Page 10: Condensate Connection
Installation sequence Installing the boiler and making all connections (cont.) Condensate connection Connect condensate drain A with a slope and pipe vent to the public sewer. Observe the local waste water regula- tions. Note Fill the siphon with water before com- missioning. -
Page 11: Opening The Control Unit Casing
Installation sequence Installing the boiler and making all connections (cont.) Balanced flue connection Connect the balanced flue. During installation and positioning of the flue system, observe building regula- tions part L, J and BS 5440 Part 1 and Flue system installation instruc- tions. -
Page 12: Electrical Connections
Installation sequence Opening the control unit casing (cont.) Electrical connections Information regarding the connection of accessories For connection of accesseries, observe the separate installation instructions provided with the accessories. - Page 13 Installation sequence Electrical connections (cont.) PUMP L N 1 L N 4 3 2 1 Note E Power supply (230 V, 50 Hz). Pump can be connected externally of the boiler through the external terminal box Danger Incorrect wire allocation can A Only for weather-compensated cause severe injuries and mode:...
- Page 14 Installation sequence Electrical connections (cont.) Outside temperature sensor (accessory) 1. Plug the lead supplied with the out- 2. Connect the outside temperature side temperature sensor into socket sensor to terminals 3 and 4. "X21". Routing leads and closing control unit casing Please note Leads will be damaged if they come into contact with hot parts.
-
Page 15: Commissioning, Inspection, Maintenance
Commissioning, inspection, maintenance Steps - commissioning, inspection and maintenance For further information regarding the individual steps, see the page indicated Commissioning steps Inspection steps Maintenance steps Page • • • 1. Filling the heating system..........16 • • • 2. Converting to operation with LPG........ 16 •... -
Page 16: Further Details Regarding The Individual Steps
Commissioning, inspection, maintenance Further details regarding the individual steps Filling the heating system Please note Unsuitable fill water increases the level of deposits and corrosion and may lead to boiler damage. ■ Thoroughly flush the heating system prior to filling it with water. ■... - Page 17 Commissioning, inspection, maintenance Further details regarding the individual steps (cont.) Checking and adjusting the ignition and ionisation electrodes A Ignition and ionisation electrode Check the electrode for wear and con- Check all clearances. If the gaps are not tamination as specified or the electrode is damaged, Clean the electrode with a small brush replace and align the electrode together (not with a wire brush) or emery paper.
-
Page 18: Checking The Co Or O Content
Commissioning, inspection, maintenance Further details regarding the individual steps (cont.) Checking the CO or O content Vitodens 100-W is factory-set for natural We recommend to measure O as the gas. During commissioning or mainte- value is unmistakable regarding lambda nance, the CO and CO have to be (air/gas). - Page 19 Commissioning, inspection, maintenance Further details regarding the individual steps (cont.) 4. Adjust the upper output: Turn rotary selector "tr" to the con- trol range on the right. The display shows 5 bars for upper output. 5. Measure the CO content for upper output.
-
Page 20: Burner Removal
Commissioning, inspection, maintenance Further details regarding the individual steps (cont.) Burner removal 1. Switch OFF the power. 6. Disconnect gas supply pipe D fit- ting. 2. Shut off the gas supply. 7. Undo four screws E and remove the 3. Disconnect electrical cables from fan burner. -
Page 21: Checking The Burner Gasket And The Burner Gauze Assembly
Commissioning, inspection, maintenance Further details regarding the individual steps (cont.) Checking the burner gasket and the burner gauze assembly Check burner gasket A for damage and replace if required. Replace the burner gauze assembly if it is damaged. 1. Remove electrode B. 5. -
Page 22: Checking And Adjusting Electrodes
Commissioning, inspection, maintenance Further details regarding the individual steps (cont.) Checking and adjusting electrodes 1. Check the electrode for wear and contamination. 2. Clean the electrode with a small brush (not with a wire brush) or emery paper. 3. Check the electrode gaps. If the gaps are not as specified or the electrode is damaged, replace and align the electrode together with a new gasket. -
Page 23: Checking The Condensate Drain And Cleaning The Siphon
Commissioning, inspection, maintenance Further details regarding the individual steps (cont.) 1. Use a vacuum cleaner to remove res- idues from heat exchanger A inside the combustion chamber. 2. If required, spray slightly acidic, chloride-free cleaning agents based on phosphoric acid onto heat exchanger A and let the solution soak in for approx. -
Page 24: Burner Installation
Commissioning, inspection, maintenance Further details regarding the individual steps (cont.) Burner installation 1. Fit the burner and torque screws A 6. Reopen gas supply and switch on power supply. diagonally with 4.0 Nm. 2. Insert new gasket and tighten the fit- 7. -
Page 25: Checking Gas Equipment For Tightness At Operating
Commissioning, inspection, maintenance Further details regarding the individual steps (cont.) Checking gas equipment for tightness at operating pressure Danger Escaping gas leads to a risk of explosion. Check gas equipment for tight- ness. Fitting the front panel Instructing the system user The system installer must hand the operating instructions to the system user and instruct him/her in the operation of the system. -
Page 26: Troubleshooting
Troubleshooting Function sequence and possible faults Display Measures Control unit issues Increase set value a heat demand and ensure heat is drawn off Fan starts After approx. 51 s Check fan, fan fault F9 connecting cables, power to the fan and fan control Ignition Fault F4... -
Page 27: Fault Messages On The Display
Troubleshooting Fault messages on the display Faults are indicated by a flashing fault code with fault symbol "U" on the dis- play. For fault code explanations see the fol- lowing table. ■ Flashing fault symbol "U": To reset press "U RESET" (see page 30) after the fault has been remedied ■... - Page 28 Troubleshooting Fault messages on the display (cont.) Fault code System characteris- Cause Measures on display tics Burner switched off Short circuit, flue Check sensor (see gas temperature page 34). sensor Burner switched off Flue gas tempera- Check sensor (see ture sensor lead page 34).
- Page 29 Troubleshooting Fault messages on the display (cont.) Fault code System characteris- Cause Measures on display tics Burner in a fault Fuel valve closes Check gas train. Check state too late both control paths. Press "Reset" (see page 30). Burner in a fault Fan speed too low Check fan, check fan con- state...
- Page 30 Troubleshooting Fault messages on the display (cont.) Press reset Note Only press RESET if fault symbol " U " is flashing. Turn rotary selector "rt" to "U RESET" in under 2 s, then back to the control range.
-
Page 31: Repairs
Troubleshooting Repairs Removing front panel and pivoting control unit downwards Outside temperature sensor Note The outside temperature sensor can only be connected if a) the boiler does heating only b) the boiler serves heating and hot water a separate switched live connec- tion from the DHW programmer has to be connected to the boiler (see separate instructions control box) - Page 32 Troubleshooting Repairs (cont.) 1. Open the control unit casing. See page 11. 2. Disconnect outside temperature sen- sor leads. 4 3 2 1 3. Check the sensor resistance and compare it with the curve. 4. Replace the sensor if the resistance varies significantly from the figure shown.
- Page 33 Troubleshooting Repairs (cont.) Checking the boiler water temperature sensor and return tem- perature sensor 1. Pull the leads from boiler water tem- perature sensor A or return temper- ature sensor B and check the resist- ance.
- Page 34 Troubleshooting Repairs (cont.) 2. Check the sensor resistance and compare it with the curve. 3. If the resistance varies significantly from the figure shown, drain boiler on the heating water side and replace the sensor. Danger The boiler water temperature sensor is immersed in the heating water (risk of scald- 10 30 50 70 90 110...
- Page 35 Troubleshooting Repairs (cont.) 2. Check the sensor resistance and compare it with the curve. 3. Replace the sensor if the resistance varies significantly from the figure shown. 10 30 50 70 90 110 Temperature in °C Checking the temperature limiter If the burner control unit cannot be reset after a fault shutdown, although the boiler water temperature is below approx.
- Page 36 Troubleshooting Repairs (cont.) Checking the fuse 1. Switch OFF the power. 3. Check fuse F4. 2. Open control unit casing (see page 11).
-
Page 37: Gas Type Conversion
Gas type conversion Converting from LPG to natural gas Removing gas restrictor 1. Remove the burner (see page 20). 4. Fit gas train B with a new gasket 2. Undo three screws A and remove Fixing screw torque A: 3 Nm. gas train B. - Page 38 Gas type conversion Converting from LPG to natural gas (cont.) 2. Simultaneously turn rotary selectors "à" and "tr" to their central posi- tion. "SERV" appears on the display. 3. Turn rotary selector "tr" anticlock- wise as far as it will go within 2 s. "A"...
-
Page 39: Control Unit
Control unit Functions and operating conditions in weather-compensated mode In weather-compensated mode, the boiler water temperature is regulated subject to the outside temperature. Heating curve of weather-compensated control unit -5 -10 -15 -20 Outside temperature in °C Rotary selector setting "tr" If the boiler temperature is less than 8C A = 1 the circulating pump is ON and at a boiler... -
Page 40: Designs
Designs Connection and wiring diagram Ignition/ionisation... - Page 41 Designs Connection and wiring diagram (cont.) Vitotrol 100, type UTA or on-site PCB inside the control unit room thermostat X ... Electrical interface Vitotrol 100, type RT or on-site § Boiler water temperature sensor room thermostat Cylinder demand terminal box Vitotrol 100, type UTD or on-site (accessory) room thermostat...
-
Page 42: Parts Lists
Parts lists Parts lists When ordering spare parts: 022 Burner door Quote the part and serial no. (see type 024 Venturi extension plate) and the item number of the 025 Control unit required part (as per this parts list). 026 Terminal box cover Obtain standard parts from your local 027 Thermocouple supplier. - Page 43 Parts lists Parts lists (cont.)
- Page 44 Parts lists Parts lists (cont.)
-
Page 45: Specification
Specification Specification Rated voltage: 230 V~ Temperature limiter Rated frequency: 50 Hz setting: 100 °C (fixed) Rated current: 2.0 A~ Line fuse (mains): max. 16 A Safety class: Protection: IP X4 to EN 60529 Permissible ambient temperature ■ During operation: 0 to +40 °C During storage ■... -
Page 46: Certificates
Certificates Declaration of conformity Declaration of conformity for the Vitodens 100-W We, Viessmann Werke GmbH & Co KG, D-35107 Allendorf, confirm as sole respon- sible body that the product Vitodens 100-W complies with the following standards: DIN 4702–6 EN 55 014... -
Page 47: Keyword Index
Keyword index Keyword index Boiler water temperature sensor..33 Heating curve........39 Burner gasket........21 Burner gauze assembly.....21 Burner installation......24 Ignition..........22 Burner removal........20 Ignition electrode......17, 22 Ionisation electrode......22 Cleaning the combustion chamber..22 Cleaning the heat exchanger.....22 Opening the control unit casing..11 Commissioning........16 Outside temperature sensor .....31 Condensate connection.....10 Condensate drain.......23 Connection diagram......40... - Page 48 Viessmann Werke GmbH&Co KG Viessmann Limited D-35107 Allendorf Hortonwood 30, Telford Telephone: +49 6452 70-0 Shropshire, TF1 7YP, GB Fax: +49 6452 70-2780 Telephone: +44 1952 675000 www.viessmann.com Fax: +44 1952 675040 E-mail: info-uk@viessmann.com...
Need help?
Do you have a question about the VITODENS 100-W and is the answer not in the manual?
Questions and answers