
Related Manuals for Vertu ASCENT X


Summary of Contents for Vertu ASCENT X
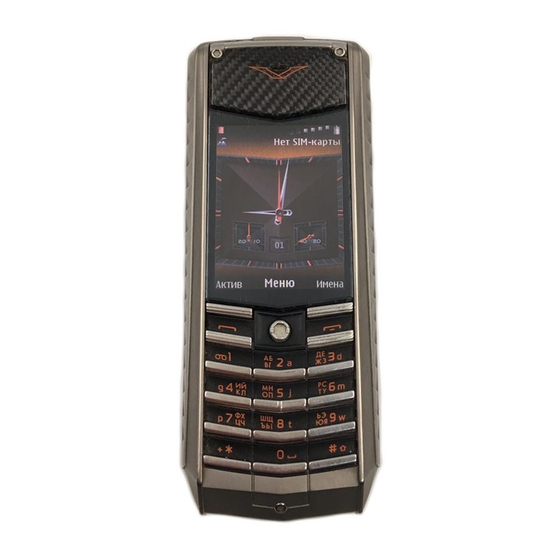
- Page 1 VERTU ASCENT X User Guide...
-
Page 2: Table Of Contents
Your Vertu phone - front 10 Mode indicators 40 Your Vertu phone - back 11 Changing input modes 40 Your Vertu phone - left, right & base 11 Changing writing language 41 Inserting the SIM card and battery 12 Key-character mapping 41... - Page 3 Contents Contacts 43 Settings 69 Saving a new contact 43 Date and time 69 Business cards 45 Profiles 70 Contacts memory 46 Themes 71 Other Contacts settings 47 Tones 71 Contact groups 48 Display 72 My numbers 49 Lights 73 Service numbers 49 My shortcuts 73 Copying and moving contacts 50...
- Page 4 General Public Licence for the software known as MSNTP 128 Vertu Concierge 106 EU recycling notice 129 Vertu Fortress 107 Vertu Concierge Terms and Conditions 130 Access to Vertu services while roaming 107 Passive Near Field Communication Device 132 Navigate 108 Index 133 GPS and A-GPS 108...
-
Page 5: Preface
Content owners may use different types of digital rights management (DRM) Under no circumstances shall Vertu be responsible for any loss of data or income or technologies to protect their intellectual property, including copyrights. This device any special, incidental, consequential or indirect damages howsoever caused. -
Page 6: Health And Safety
Health and safety WARNING: Read the following simple guidelines. Not following them may • Switch your Vertu phone off if you are entering a hospital or health care facility. be dangerous or illegal. Medical equipment may be affected by phone usage. -
Page 7: Battery Safety
589V) MEETS GUIDELINES FOR EXPOSURE TO RADIO WAVES. • Do not use your Vertu phone with a damaged battery. Your Vertu phone is a radio transmitter and receiver. It is designed to not exceed the limits for exposure to radio waves recommended by international guidelines. These •... -
Page 8: Fcc/Industry Canada Notice
Health and safety FCC/Industry Canada notice Your Vertu phone may cause TV or radio interference (for example, when using a phone in close proximity to receiving equipment). The FCC or Industry Canada can require you to stop using your phone if such interference cannot be eliminated. If you require assistance, contact Vertu Concierge. -
Page 9: Care And Maintenance
Care and maintenance Your Vertu products have been crafted from some of the finest materials and care • Only use a soft, clean cloth to clean your Vertu phone. Do not use chemicals, Care and maintenance should be taken to keep them in good condition. Damage caused to your Vertu phone detergents, abrasive substances, or any liquids. -
Page 10: Metal
Care and maintenance Metal Vertu metals are finished to a high standard and care needs to be taken to maintain their appearance. • Avoid contact between your Vertu phone and chemicals such as solvents, alkaline and acid solutions, cola-based drinks and salt water. If contact occurs, wipe with a clean, soft cloth as soon as possible. -
Page 11: Getting Started
Chronograph key Ascent guide Warranty book CD-ROM Call to action card - describes how to register your handset for Vertu Services Display screen The package contents may vary slightly in accordance with regional regulations. Left selection key Right selection key... -
Page 12: Your Vertu Phone - Back
Getting started Your Vertu phone - back Your Vertu phone - left, right & base Speakers Chronograph key Concierge key Camera flash Camera lens and torch Back cover locking screw... -
Page 13: Inserting The Sim Card And Battery
IMPORTANT: The SIM card and its contacts are easily damaged. Be careful when handling, inserting or removing the SIM card. Removing the back cover With the back of your Vertu phone facing Inserting the battery you, position the back cover release key (01) into the slot of the locking screw (02). -
Page 14: Using Your Vertu Phone
• If you miss a call or receive a message, the LED flashes with a double pulse. This When you switch on your Vertu phone for the first time, you will be guided through indication takes priority over those for other situations. -
Page 15: Home Screen
Home screen Select Unlock, then press the -key within two seconds. The Home screen displays a configurable clock, along with icons and indicators that show the current status of your Vertu phone. A confirmation message is displayed. Clock Automatic keyguard The clock displays the time and date in the Home screen. - Page 16 Getting started Home screen with Miniature clock: Home screen with Analogue clock and Accurate Time active while travelling: Home screen with Hidden clock: Home screen with Digital clock and Accurate Time while travelling: For information on changing the clock display, see Date and time format in Settings.
-
Page 17: Icons And Indicators
No signal. Battery charge Battery full. For information on activating Accurate Time, see Time management in Settings. Battery charge low. You need to recharge your Vertu phone soon. No charge. Battery charging. The bars change to white as the battery is charged. -
Page 18: Audible Indicators
Vertu Services. Audible indicators Calls Your Vertu phone can play tones to indicate the current signal strength and battery Dialling, incoming call, call in progress. charge level. These features can be accessed using voice commands. This feature is useful if you are using a headset and cannot view the status indicators on your Vertu phone. -
Page 19: Menus
This covers a wide range of features from changing the stand-by display background to setting up access points for network connectivity. We recommend that you protect your Vertu phone and SIM card from unauthorised use by protecting them with passwords using the Security option. - Page 20 Vertu Services making a phone call for which you may be charged. services available only to Vertu owners. For information on the menu structure of your Vertu phone, see the Menu tree See Vertu Services section for details. section. Opening menus From the Home screen, press the Joystick to open the main menu.
-
Page 21: Joystick Shortcuts
Press the End key to return to the Home screen from any menu. 2. If automatic sorting is on, select Options > Auto sorting off. You can also use voice commands to activate menu functions on your Vertu phone. 3. Select Options > Organise. -
Page 22: Cd-Rom
1. From the Home screen, press and hold the Right selection key until you hear a tone. Vertu aims to provide you with the very best service possible. To enable us to do this, TIP: If you have a headset connected, press and hold the headset button please register your Vertu phone. - Page 23 3. Click the Register Phone button. The Vertu registration web page will your Vertu phone. automatically open. • Store images - enables you to store images and videos from your Vertu phone on 4. Fill in the required information on the web page. your PC.
- Page 24 Getting started Connecting to a computer You can connect your Vertu phone to a computer using either your Vertu data cable (CA-101V) or Bluetooth. For information on connecting your Vertu phone to a computer using the data cable, see Data cable in Accessories.
-
Page 25: Security
When the PIN code security feature is active, you 5. Enter the new PIN2 code again for verification, then select OK. A confirmation need to enter the PIN code each time you switch on your Vertu phone. If you message is displayed. -
Page 26: Call Barring
When outgoing calls are barred, calls may still be possible to the emergency number(s) programmed into your Vertu phone. You need to enter the barring password to set up call barring. To obtain this password, contact your service provider. -
Page 27: Fixed Dialling
When fixed dialling is active, it may still be possible to call emergency numbers To modify the fixed dialling list: programmed in your Vertu phone, for example 112 and 911, or other official 1. From the Home screen, select Menu Settings >... -
Page 28: Closed User Group
Closed user group Security code The security code helps protect your Vertu phone from unauthorised use. You will NOTE: Closed user groups are only available if they are supported by your need to enter this security code before you can do the following: service provider. -
Page 29: Browser Security
This icon is displayed during a secure browsing session. Security keyguard To set your Vertu phone to request the security code when you unlock the keyguard: This icon is displayed during an unsecured browsing session. 1. From the Home screen, select Menu Settings >... -
Page 30: Digital Signatures
Settings > Security > Security module sett. > Digital signatures You can make digital signatures with your Vertu phone if your SIM card has a security module. Using a digital signature is similar to signing your name to a paper bill, contract, or other document. -
Page 31: Call Functions
Making an emergency call TIP: You can view only missed, received or dialled calls if required. For WARNING: Your Vertu phone, like any wireless phone, operates using details, see Call history. radio signals, wireless and land line networks as well as user-programmed functions. -
Page 32: Speed Dialling
Occasionally, a call may not connect because your network is experiencing heavy traffic, or the called party is busy. With the automatic redial feature activated, your Vertu phone redials the number up to 10 times, and notifies you when the network is available. -
Page 33: Receiving A Call
Call functions Making a call using speed dialling Receiving a call To make a call using speed dialling: Answering a call From the Home screen, simply press and hold the numeric key assigned to the To answer an incoming call: required phone number. -
Page 34: Ending A Call
To mute a call, select Options > Mute. The call muted icon is displayed. To unmute the call, select Unmute. Putting a call on handsfree When your Vertu phone is connected to a handsfree accessory, select Options > Headset/Handsfree. To switch the call back to the phone, select Options > Handset. -
Page 35: Multiparty Calls
Creating a conference call A conference call can be created when you have two calls on your Vertu phone - one that is active and one that is held. By creating a conference call, the separate calls are joined together. -
Page 36: Call Settings
• If busy - to divert calls when you are already in a call. • If not answered - to divert calls when you cannot answer them. • If out of reach - to divert calls when your Vertu phone is switched off or out of network coverage. -
Page 37: Call Waiting
Call functions Send my caller ID NOTE: Your service provider may not allow you to cancel all call diverts. Contact your service provider for further information. This feature enables call recipients to view your phone number on their phone when you call them. -
Page 38: Call History
Viewing call duration To view recent call information: From the Home screen, select Menu > Call history > All calls/Missed calls/ To view information about the duration of calls made and received by your Vertu Received calls/Dialled numbers as required. phone: 1. - Page 39 Security. The synchronisation log stores statistics about the data that has been transferred when synchronising your Vertu phone with a computer or server. To view the synchronisation log: From the Home screen, select Menu > Call history > Sync log.
-
Page 40: Text Input
Predictive text input mode Text input Your Vertu phone has three text input modes: Predictive text input mode enables you to enter text more quickly than by using traditional text input mode. Instead of having to press keys multiple times to enter •... -
Page 41: Numeric Input Mode
Text input Changing input modes Adding words to the predictive text database You can add words to the predictive text database when there is no match during text To change to traditional text input mode: entry (see previous section for details). You can also add new words via the menu Press and hold the -key, then select Prediction off during text entry:... -
Page 42: Changing Writing Language
Text input To enter a smiley while in predictive text input mode: Key-character mapping 1. Press and hold the -key. English 2. Select Next. Upper case Lower case 3. Select the required smiley. . , ' ? ! " 1 - ( ) @ / : _ . - Page 43 Text input Upper case Lower case Upper case Lower case . , ' ? ! " - ( ) @ / : _ ; + & % * = < > £ € . , ' ? ! " - ( ) @ / : _ ; + & % * = < > £ € P Q R S 7 $ p q r s 7 ß...
-
Page 44: Contacts
TIP: If someone whose phone number isn’t stored in Contacts calls you, 4. To add a tone that is stored in the Gallery on your Vertu phone, select Open you can create a contact for that person. To do this: Gallery, then select the required tone 1. - Page 45 2. Scroll to the required contact, then select Add. Finding contacts 3. Select the number type. To find a contact stored on your Vertu phone: 1. From the Home screen, select Names or Menu > Contacts > Names. TIP: To change the number type: 2.
-
Page 46: Business Cards
Contacts Business cards Deleting contacts The business card feature enables you to send and receive contact information as a multimedia message, a text message, or via Bluetooth. Sending a business card in a multimedia message To send a business card in a multimedia message: To delete a contact: 1. -
Page 47: Contacts Memory
Bluetooth devices and display them in a list. Contacts memory 4. Select the device to which you want to send the business card. Your Vertu phone Contacts can be stored on your Vertu phone and on the SIM card. -
Page 48: Other Contacts Settings
• Name list - to display your contacts as a list of names. • Phone - to view the memory status of your Vertu phone. The percentages of • Name and number - to display your contacts as a list of names with the default free and used contacts memory are displayed. -
Page 49: Contact Groups
Contacts 3. Select Options > Add to group. Contact groups 4. Select the required group. The contact details are displayed after a confirmation message. Changing the default group for a contact Each contact can be added to multiple groups. The first group that a contact is added The contact groups feature enables you to easily manage and use contacts by to is automatically set as the default group for that contact. -
Page 50: My Numbers
Contacts Deleting a group My numbers To delete a group: 1. From the Home screen, select Menu > Contacts. 2. Select Groups. 3. Scroll to the required group, then select Options > Delete group. The My numbers feature enables you to view your own numbers that are predefined 4. -
Page 51: Copying And Moving Contacts
Copying a single contact 2. Select the required contact. To copy a single contact between your Vertu phone and the SIM card: 3. Scroll to the required detail to copy with the contact name. This can be a phone 1. From the Home screen, select Names or Menu > Contacts > Names. - Page 52 Contacts Moving all contacts To move all contacts between your Vertu phone and the SIM card, either: 1. From the Home screen, select Menu > Contacts. 2. Select Move contacts. 3. Select From phone to SIM/From SIM to phone as required.
-
Page 53: Messages
These linked messages will be sent at the same time. The following message types are available when using your Vertu phone: When you send a text message, your Vertu phone uses a profile that defines how the • Text messages - also known as Short Message Service (SMS) messages. - Page 54 Messages 3. Scroll to the message area and enter your message. For information on entering 3. Select Back to return to the message creation screen. text, see the Text input section. For information on requesting delivery reports for all sent text messages, see Text message settings.
- Page 55 Text messages are automatically received when your Vertu phone is switched on. Your Vertu phone can extract information from a message. This information can then When your phone is off, messages are held by your service provider until the next be used for another task.
- Page 56 For information on viewing delivery reports, see Delivery reports. NOTE: Only the body text of the message is saved in the template. Other To view the details of text message services centres stored on your Vertu phone and information such as recipients and sending options is not saved.
- Page 57 Messages To set the validity of all sent text messages: You can set the reply path so that if a recipient of a text message that you have sent replies, the reply will be sent using the same text message service centre that you 1.
-
Page 58: Multimedia Messages
Messages 5. Enter text in the Text: area if required. Multimedia messages The Multimedia Messaging Service (MMS) enables you to exchange multimedia TIP: To save time by inserting predefined text: messages containing data such as text, pictures, sounds, animation and video clips. 1. - Page 59 Receiving and playing multimedia messages 4. Select Send. Your Vertu phone will alert you when a new multimedia message arrives. For information on calling the sender of a message, see Calling the sender of a When your phone is off, messages are held by your service provider until the next message.
-
Page 60: Multimedia Message Settings
For information on viewing delivery or read reports, see Delivery reports. and can then retrieve them manually if required. To allow read reports to be sent from your Vertu phone: If you select Off, then you will not receive multimedia messages or notifications of 1. -
Page 61: Audio Messages
Messages For information on replying to a message, see Replying to a multimedia message. Audio messages For information on forwarding a message, see Forwarding a multimedia message. An audio message is a type of multimedia message that contains only an audio clip. For information on calling the sender of a message, see Calling the sender of a Creating and sending an audio message message. -
Page 62: E-Mail Messages
1. From the Home screen, select Menu > Messages. 2. Select E-mail (if you have not yet set up an e-mail account on your Vertu phone) select Options > Add mailbox (if you are setting up an additional e-mail account). - Page 63 NOTE: These settings are dependent on the incoming server type. 2. Select E-mail (if you have not yet set up an e-mail account on your Vertu phone) select Options > Add mailbox (if you are setting up an additional e-mail •...
- Page 64 3. If you are not already connected to the mailbox, select Yes to connect. Your Creating and sending an e-mail message Vertu phone will connect to the e-mail account and synchronise messages. To create and send an e-mail message from the Home screen: 4.
- Page 65 Messages Saving the contents of an e-mail message E-mail message settings To save the contents of an e-mail message to the gallery: 1. From an open e-mail, select Options > Save object. 2. Select Options > Save. 3. Select the folder to save the object to. Using the e-mail message settings, you can select options for all e-mail messages.
-
Page 66: Delivery Reports
Listening to your voice messages Receiving and reading flash messages To listen to your voice messages: Your Vertu phone will alert you when a new flash message arrives. 1. From the Home screen, select Menu > Messages. To read the message, select Read. -
Page 67: Info Messages
4. Select Yes to confirm the deletion. A confirmation message is displayed. The IMs feature on your Vertu phone enables you to “chat” with other online users. To use this feature, you need to subscribe to an instant messaging service and log in via your phone. -
Page 68: General Message Settings
General message settings Font size Your Vertu phone supports different font sizes that can be applied to messages being created and message that have been received. The selected font size does not affect how a message that you send is displayed to the recipient(s). -
Page 69: Service Messages
Messages Service messages Service messages give service providers the ability to push notifications to your Vertu phone. Service messages can contain various information, such as changes in stock prices, flight schedule changes, or news headlines. Service messages may indicate downloadable content. You can then view this content by using the Inbox and the Web application. -
Page 70: Settings
2. Select Date & time settings. 3. Set the date and time, then select Save. Your Vertu phone has an Accurate Time feature. This feature uses your location to TIP: When setting the date, select Options > Select day to select the date keep the time on your phone accurate and updated, even when travelling. -
Page 71: Profiles
Silent profile. Setting a timed profile Your Vertu phone enables you to select one of seven profiles. Each of these profiles can be personalised to meet your specific requirements. You can set a profile to expire at a preset time. After the expiry time, the profile returns to the last non-timed profile. -
Page 72: Themes
Themes Tones A theme defines the image that is used as the background for all of your Vertu phone The Tones settings include the incoming call alert, ringing tone, ringing volume, light menus. Your Vertu phone comes with various themes containing different images. -
Page 73: Display
The wallpaper is the image used as the background for the Home screen. By default, the wallpaper on your Vertu phone is set by the theme. For information on themes, see Themes. You can set a wallpaper that is not defined by a theme. -
Page 74: Lights
2. Select Pulsing indicator. 3. Select On. Cell info display You can set your Vertu phone to indicate when you are connected to a Micro Cellular My shortcuts Network (MCN). MCN provides GSM services in densely populated areas with small cells. -
Page 75: Connectivity
• Your Vertu phone and the other device are within 10 metres of each other. turning your Vertu phone off and on. • Bluetooth on your Vertu phone is set to “On and hidden” or “On and Visible”. To change Bluetooth mode from “Off” to “On and Hidden”: •... -
Page 76: Bluetooth Connection Settings
3. Scroll to the required device, then select Options > Settings. 4. In the Auto-conn., no conf. field, select Yes. Changing the Bluetooth name You can change the name for your Vertu phone that is displayed to other Bluetooth Connecting a Bluetooth headset devices. - Page 77 • To connect your Vertu phone to a printer supporting PictBridge. cable, see Data cable in Accessories. For information on setting up a Bluetooth • To connect your Vertu phone to a computer for the phone to be used as a USB connection, see Bluetooth.
-
Page 78: Phone
3. Select On. This setting is applied to all stereo audio content and all stereo output Language settings channels. You can change the language of your Vertu phone to any of the languages that are available in the software. Voice recognition... -
Page 79: Flight Query
The flight query asks you if you would like to activate the Flight profile. You can set 2. Select Phone updates. this query to be displayed each time you switch on your Vertu phone. This is useful if 3. Select SW update provider. The software update provider is displayed. -
Page 80: Operator Selection
2. Select Operator selection. 3. Select Automatic or Manual as required. If you select Automatic, your Vertu phone will register to the default network. This network is defined by your SIM card. If you select Manual, you can select the network to connect to. -
Page 81: Accessories
Accessories Configuration This setting enables you to configure your Vertu phone with settings required for a NOTE: These settings are only available if your Vertu phone is, or has been, number of features to communicate with the network and thus function correctly. - Page 82 Viewing access point details 1. From the Home screen, select Menu Settings > Configuration. > To view details of the access points stored on your Vertu phone: 2. Select Personal config. sett. 1. From the Home screen, select Menu Settings > Configuration.
-
Page 83: Workshop Reset
4. Unselect any items that you do not want to synchronise by scrolling to the item To restore the settings on your Vertu phone to their original values, and delete all of and selecting Unmark. Select Done when you have finished. -
Page 84: Setup Wizard
Server sync internal memory card. In order to synchronise your Vertu phone with a remote server, you need to subscribe to a synchronisation service, such as Vertu Fortress. For information on Vertu TIP: You can also back up data from your Vertu phone using Vertu PC Suite Fortress, see Vertu Fortress in Vertu Services. -
Page 85: Additions
You can download new Java applications (including games) using Vertu PC Suite. For information on Vertu PC Suite, see Vertu PC Suite in Getting started. You can also download and install applications over-the-air. Collection... -
Page 86: Torch
Additions Torch Calculator Your Vertu phone is equipped with a torch that uses the camera flash LED. The calculator on your Vertu phone includes a standard calculator, a scientific To switch the torch on: calculator and a loan calculator. From the Home screen, press and hold the... -
Page 87: Media Player
Vertu phone, or by filtering the list of available music files. To select and play music by viewing the list of all music files: Your Vertu phone includes a media player that enables you to play digital audio and 1. From the Home screen, select Menu Additions >... - Page 88 For information on connecting to web sites, see the Web section. 3. Select Current song or All songs as required. A confirmation message is NOTE: To play an item on a network, your Vertu phone must connect to the displayed.
-
Page 89: Equaliser
Additions Equaliser Stopwatch The equaliser feature on your Vertu phones enables you to improve sound quality The stopwatch on your Vertu phone enables you to accurately measure times, split/ intermediate times, and lap times. when playing music by amplifying or attenuating some frequency bands. You can activate one of the preset equaliser settings or create your own set of settings and activate it. - Page 90 Additions Digital mode Viewing recorded times To view recorded times: 1. From the Home screen, press the Chronograph key or select Menu > Additions > Stopwatch. 2. Select Options. 3. Select the times you wish to view. These can be the last recorded time, split times, lap times, and saved times.
-
Page 91: Timer
1. From the Home screen, select Menu Additions > Timer. > The countdown timer on your Vertu phone works as a reminder that is activated when 2. Select Stop timer. A confirmation message is displayed. a preset time period has passed. -
Page 92: Voice Recorder
2. Select Options > Recordings list. 3. Scroll to the required recording, then select Open. The voice recorder on your Vertu phone enables you to record clips of speech and TIP: You can also access voice recordings from the gallery. -
Page 93: Notes
2. Scroll to the required note, then select Options > Delete. 3. Select Yes to confirm the deletion. A confirmation message is displayed. The notes feature on your Vertu phone enables you to save, edit and send simple To delete all notes: notes. -
Page 94: Calendar
2. Scroll to the date of the event, then select View. You can also display reminders on your Vertu phone, and create to-do lists. 3. Scroll to the required note, then select Options > Copy. - Page 95 Bluetooth devices and display them in a list. • As a calendar note. 5. Select the device to which you want to send the calendar note. Your Vertu phone • Via Bluetooth. connects to the device and sends the note. A confirmation message is displayed when the note has been sent.
-
Page 96: Calendar Views
Calendar Calendar views Calendar settings When you open the calendar, dates with associated calendar notes are shown in bold Date and time type. The current date is highlighted. To set the date and time: You can scroll through the calendar by using the Joystick to move the cursor. Select 1. -
Page 97: To-Do List
Calendar to add a tone that is stored in the Gallery on your Vertu phone, select Open To-do list Gallery, then select the required tone. The to-do list feature enables you to create notes for tasks you need to do. - Page 98 Calendar To delete multiple to-do notes at one time: 1. From the Home screen, select Menu Calendar or move the Joystick right. > 2. Select Options > Go to to-do list. 3. Select Options > Delete notes. 4. Select one of the following options: •...
-
Page 99: Alarm Clock
If you are using the Accurate time feature, you do not need to reset the alarm when Either select Snooze you reach your destination. Your Vertu phone automatically adjusts to the local time, and any preset alarms sound at the usual time. -
Page 100: Web
Internet site. Accessing Vertu Mobile You can access mobile internet services with the web browser on your Vertu phone. Vertu Mobile is Vertu’s presence on the mobile internet, tailored for handsets and carefully designed for accessing on the go. -
Page 101: Web Settings
Web settings Viewing a web page The following actions are available when viewing a web page: • To scroll a web page, move the Joystick. • To select a highlighted link, press the Joystick. Web page options To access the web settings: To adjust the zoom level, select Options >... -
Page 102: Clearing The Cache
The page sends the file, and it 1. From the web settings, select General > Backstep. opens hist. is stored on your Vertu phone. 2. Select one of the following options: To allow cookies to be saved on your phone: •... -
Page 103: Vertu Services
3. Use the menu on the web site to select your choice of services. Accessing Vertu Feeds To use Vertu services, you also need to have internet settings on your Vertu phone, You can access Vertu Feeds in the following ways: and there must be GPRS network coverage in your current location. -
Page 104: City Brief
Vertu Select web site. • Last received Vertu Select feed. Select Open to view the story summary, if one is • Last visited city. Scroll to this required item, then select Open to view the page for available. - Page 105 Method 1 - by entering the web page address for a feed: rename channels or view feed information. You can also update all content within 1. Access Vertu Feeds. For information on accessing Vertu Feeds, see Accessing Vertu Feeds, access settings, and view information about the Vertu Feeds Vertu Feeds.
-
Page 106: Travel
1. Access a web page with RSS links. For information on accessing web pages, see Accessing web pages in Web. 2. Click on the RSS icon for the required feed. The Vertu Feeds application is opened. The Travel application provides access to the following information: •... -
Page 107: Vertu Concierge
• Assistance with using your Vertu phone. 1. Access the Currency screen of the Travel application. When you connect to Vertu Concierge, you can speak directly to a team of lifestyle 2. Enter a sum into the currency that you wish to convert from. The equivalent managers who are available 24 hours a day, 7 days a week to offer personalised amount is displayed for the other currencies on-screen. -
Page 108: Vertu Fortress
Whether transferring your contacts between phones, or creating a secure For information on GPRS coverage and roaming agreements, contact your service backup of your data, Vertu Fortress gives your personal data the highest levels of provider. protection it needs. This also provides the ultimate in secure storage for your phone's data in the event of loss, damage or theft of your device. -
Page 109: Navigate
• save locations. view to the sky. • send locations to compatible devices. 2. Set up a Bluetooth connection between your Vertu phone and the GPS receiver. For information on setting up Bluetooth connections, see Bluetooth in Settings. GPS and A-GPS 3. - Page 110 1. Select Options > Plan route from. The location is set as the starting point for a are imported. route plan. 4. Select Find. Your Vertu phone searches for the address and displays it in full. 2. Select the required destination for the route. 5. To view the address on a map, select View map.
-
Page 111: Navigation Settings
2. In the Voice guidance field, select the required language. Select OK when the confirmation message is displayed. NOTE: The first time you select a new language, you will need you wait for a short time while the language data is downloaded to your Vertu phone. -
Page 112: Camera
Vertu phone. The captured photo is highlighted. Your Vertu phone is equipped with a digital camera that can be used to take photos • Options > Rename - to rename the photo. Edit the name, then select OK. A and record video clips. -
Page 113: Photo Settings
Camera To set the brightness for the photo: To set the image preview time for photos: 1. From the camera, select Options > Brightness. 1. From the camera, select Options > Settings. 2. Move the Joystick up to increase the brightness or down to decrease the 2. -
Page 114: Recording A Video Clip
To set the brightness for the video clip: 1. From the video recorder, select Options > Brightness. TIP: The amount of video clip time that you can store on your Vertu phone 2. Move the Joystick up to increase the brightness or down to decrease the with the current settings is shown at the top right of the screen. -
Page 115: General Camera Settings
To personalise the title for saved photos and video clips: limited only by the storage space available on your Vertu phone. A confirmation 1. From the camera, select Options > Settings. -
Page 116: Gallery
To view the folders on the internal memory card: From the Home screen, select Menu Gallery > Media. The top level folders are Your Vertu phone has two internal memories - the phone memory and an internal > displayed.Viewing details of a folder memory card. - Page 117 Gallery 3. Enter a character. All folders and files with names beginning with that character Moving folders are displayed. To move a folder: 4. Enter more characters to filter the contents further. 1. Scroll to the required folder. 2. Select Options > Move folder. Adding folders 3.
-
Page 118: Gallery Files
Gallery To send multiple files: Gallery files 1. Scroll to the first required file. NOTE: Copyright protections may prevent some files from being copied, 2. Select Options > Mark. modified, transferred or forwarded. 3. Select the other required files by marking them. 4. -
Page 119: Folder And File Options
Gallery Folder and file options Deleting multiple gallery items To delete multiple folders and/or files: Copying multiple gallery items 1. Scroll to the first required item. To copy multiple folders and/or files: 2. Select Options > Mark. 1. Scroll to the first required item. 3. -
Page 120: Accessories
Battery Your device is powered by a rechargeable battery. The battery intended for use with this device is a BL-5C. Vertu may make additional battery models available for this 2. Connect the charger body to a device. This device is intended to be charged using an AC-31 charger. -
Page 121: Wall Charger
Vertu phone and a compatible printer that supports PictBridge. 1. When you look at the holospot on the label, you should see a Vertu symbol and three characters, similar to those shown below. To connect the data cable to your Vertu phone: Connect the micro-USB connector of the data cable to your Vertu phone as shown. -
Page 122: Troubleshooting
Troubleshooting Troubleshooting Problem Possible cause Possible solution Cannot switch phone on Battery out of power. Charge the battery (see page 119). Battery not installed correctly. Ensure that the battery is inserted correctly (see page 12). Phone switches off automatically Battery out of power. Charge the battery (see page 119). - Page 123 Troubleshooting Problem Possible cause Possible solution Poor call quality Network signal is weak. Move clear of any obstructions that may block the signal. Network signal is changing frequently, e.g. when travelling on a Wait until signal strength is consistently high before making or train.
-
Page 124: Specifications
Specifications Specifications Memory Audio/Video codecs Available memory 32 GB (Titanium) Audio Ringing tones: AAC, AMR, AMRWB, AWB, MID, MP3, (internal memory card) M4A, WAV, WMA 8 GB (Aluminium) Media player: AAC, AAC+, eAAC+, MP3, WMA Maximum number of contacts 2000 Video 3GP, H.263, H.264, MP4 Maximum number of messages 1000 (includes multimedia messages) -
Page 125: Menu Tree
Menu tree Menu tree Messages Create Inbox E-mail Drafts Outbox Delivery Voice Info Sent items Saved Message Serv. Delete message reports messages messages items settings commands messages General settings Text messages Multimedia messages E-mail messages Service messages Contacts Names Add new Settings Groups Speed dials... - Page 126 Bookmarks Go to address Last web addr. Web settings Clear the cache Display General Security Downloading sett. Configuration sett. Vertu Services Vertu Feeds Travel Vertu Concierge Vertu Fortress Register Navigate Last map Find address Saved locations Recent locations Current position...
-
Page 127: Warranty And Legal Information
Product, including use that is contrary to the instructions provided e.g. CD-ROM. by Vertu (e.g. as set out in the Product's User Guide) and/or e) other acts beyond As far as your national laws permit, the warranty period will not be extended or the reasonable control of Vertu. -
Page 128: Export Controls
To the extent permitted by applicable law, Vertu’s liability shall be limited to the services or range of the cellular or other network or system. Before Vertu or a Vertu purchase value of the Product. The above limitations shall not apply in case of gross... -
Page 129: Licenses
The third-party applications provided with your device may have been created by, and software is with you. Should MSNTP prove defective, you assume the cost of all may be owned by, persons or entities not affiliated with, or related to, Vertu. Vertu necessary servicing or repair. -
Page 130: Eu Recycling Notice
Should you wish Vertu to recycle your product at the end of its life, please either return is freely available from the University of Cambridge. -
Page 131: Vertu Concierge Terms And Conditions
Any subscription fee is non If Vertu is unable to deal with any request, it will inform you as soon as reasonably refundable. However, Vertu may, at its sole discretion, elect to refund any subscription practicable. - Page 132 18.Limited Warranty Vertu shall not be liable to you, or be deemed to be in breach of these Terms and Vertu warrants to you that Vertu shall use its reasonable endeavours to provide the...
-
Page 133: Passive Near Field Communication Device
Arbitration under these Terms and Any and all claims, except claims for monies due to Vertu, arising out of or relating to Conditions shall be conducted under the then prevailing Wireless Industry Arbitration... -
Page 134: Index
Index Numerics Automatic redialling 31 Index 3G 78 Backlight 80 Backup 83 About your phone 4 Battery 6, 8, 12, 119, 121 Access points 81 Battery, authentication 120 Accessories 80 Battery, charging 119 Accessory profile 80 Bluetooth 74, 82, 121, 123 Accurate Time 15, 69 Bluetooth connection settings 75 A-GPS 108... - Page 135 Index Contacts 30 Contacts memory 46 Cache, clearing 101 Contacts view 47 Calculator 85 Contacts, adding details 44 Calendar 55 Contacts, copying 50 Calendar notes 93 Contacts, default group 48 Calendar settings 95 Contacts, default phone number 44 Calendar views 95 Contacts, deleting 45 Call barring 25, 121 Contacts, finding 44...
- Page 136 Index Electronic devices 5 Gallery files 117 E-mail account, automatic setup 61 Gallery folders 115 E-mail account, manual setup 62 Games 84 E-mail message settings 64 General message settings 67 E-mail messages 61 Go to menu 20 E-mail messages, contents 64 GPS 108 E-mail messages, creating 63 Graphical smileys 67...
- Page 137 Minimap 100 MMS creation mode 59 Java 84, 123 MMS messages 122 JavaScript 101 Modem, using your Vertu phone as a 76 Joystick 13, 73 Multimedia message reception 59 Joystick shortcuts 20 Multimedia message sending options 57 Multimedia message settings 59...
- Page 138 Index Package contents 10 SAR Notice 6 Packet data 38, 75 Security code 27, 82 Phone memory 46 Security keyguard 28 Phone switch 82 Security level 27 Phone updates 78 Selection keys 13, 73 Photo settings 112 Sent messages 53, 67 PIN code 24 Server sync 83 PIN2 code 24...
- Page 139 Text input mode indicators 40 Vertu Fortress 83, 107 Text input modes 39 Vertu Mobile 99 Text message service centre 55 Vertu PC Suite 22, 76 Text message settings 55 Vertu phone, registering 21 Text message, forwarding 54 Vertu Select 103...
Need help?
Do you have a question about the ASCENT X and is the answer not in the manual?
Questions and answers