Table of Contents
Advertisement
Quick Links
Advertisement
Table of Contents

Related Manuals for Vertu Constellation Quest


Summary of Contents for Vertu Constellation Quest
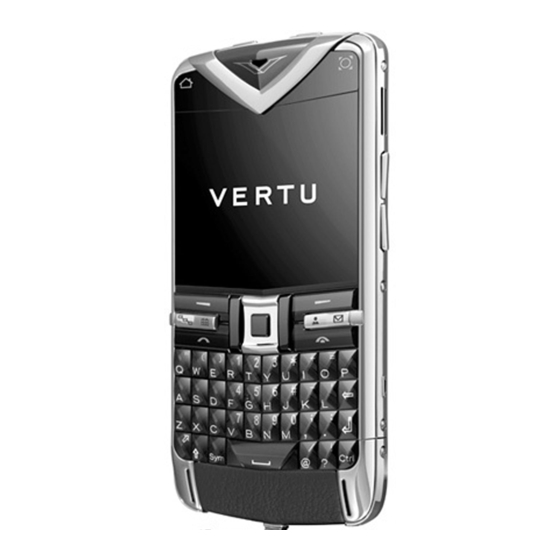
- Page 1 VERTU Constellation Quest Reference Manual...
-
Page 2: Table Of Contents
Metal ......................9 Speed dialing ....................38 Introducing your Vertu phone - - - - - - - - - - - - - - - - - - - - - 10 Answering a call ....................39 Access codes ....................10 In-call options ....................40... - Page 3 Dictionary ......................98 Vertu Services - - - - - - - - - - - - - - - - - - - - - - - - - - - - - - - - - 71 Notes ......................99 Intranet ......................99...
- Page 4 Media - - - - - - - - - - - - - - - - - - - - - - - - - - - - - - - - - - - - - - - 109 AV cable......................135 Vertu Wired Headset...................136 Radio......................109 Common accessory settings ...............136...
-
Page 5: Preface
DRM software to access DRM-protected content. With this Under no circumstances shall Vertu be responsible for any loss of data or income or device, you can access content protected with WMDRM 10 and OMA DRM 2.0. If any special, incidental, consequential, or indirect damages howsoever caused. -
Page 6: Health And Safety
• Do not touch the phone, battery, or wall charger with wet hands. • Switch your Vertu phone off in areas with potentially explosive atmospheres, such • Keep your Vertu phone and all parts and accessories out of the reach of small as fuel storage areas and spray paint facilities. -
Page 7: Battery Safety
• Do not touch the battery terminals. • Do not leave the battery in areas of extreme cold or heat. • Do not store your Vertu phone in, or near, direct heat sources such as radiators. This could cause the battery to overheat and explode. -
Page 8: Taking Care Of Your Phone
Taking care of your phone Your Vertu products have been crafted from some of the finest materials, and care • Only use a soft, clean cloth to clean your Vertu phone. Do not use chemicals, Taking care of your phone should be taken to keep them in good condition. -
Page 9: Metal
Taking care of your phone Metal Vertu metals are finished to a high standard and care needs to be taken to maintain their appearance. • Avoid contact between your Vertu phone and chemicals such as solvents, alkaline and acid solutions, cola-based drinks, and salt water. If contact occurs, wipe with a clean, soft cloth as soon as possible. -
Page 10: Introducing Your Vertu Phone
Introducing your Vertu phone missed calls. • Quick access to the Vertu City Brief feature allows you to quickly find information about your home or other city. • The Concierge button gives you access to the Concierge service and technical support. -
Page 11: Getting Help And Support
PIN code or PIN2 code, respectively. If the Your Vertu phone contains an internal Help system to assist you with using the phone. codes are not supplied with the SIM card, contact the network service provider 1. -
Page 12: Getting Started
Getting started Vertu package contents Vertu phone layout - front Getting started Vertu Constellation Quest phone RM-582V Battery: BP-4LV (Li-ion) Micro USB wall charger (multi-region) - AC31 V Collection wired stereo headset AV cable – CA-163V Polishing cloth Micro USB – USB data cables (one each for data connection and charger) –... - Page 13 Getting started Vertu phone layout – back Vertu phone – left and right views Top view...
-
Page 14: Setting Up Your Phone
Earpiece My Key Right Select key Removing the back cover With the back of the Vertu phone facing you, lift the D-ring with your fingernail. Contacts Hold the D-ring between your thumb and forefinger and turn it counterclockwise a Email quarter of a turn until the cover pops open. - Page 15 Getting started Slide the SIM card holder back into the body of the phone until it is fully inserted. Inserting the SIM card IMPORTANT: Always switch the phone off before inserting or removing the USIM/SIM card. Slide the SIM card tray backwards. Inserting the memory card IMPORTANT: Always switch the phone off before inserting or removing a memory card.
-
Page 16: Inserting The Battery
Getting started Push the card completely so that it locks into position. To retrieve the memory card, Replacing the back cover push the card further into the slot; it will then unlock and slide out to make it easy to Place the two tangs at the base of the back cover in their corresponding slots in the remove. -
Page 17: Locking And Unlocking The Keypad
Switching on your Vertu phone Locking and unlocking the keypad Press and hold the Power key (shown below) to switch on your Vertu phone. You can lock the keypad on your Vertu phone to prevent operating them accidentally. The keypad lock (shown above) slides to lock the keypad. Slide it again to free the keypad lock. -
Page 18: Home Key
Getting started Home key My Key The Home key is located at the top left of your phone. A single press of the Home key My Key is a user configurable key that you can set up to provide quick access to up brings you back to the Home screen from anywhere. -
Page 19: Dedicated Keys
QWERTY keyboard The Menu, Calendar, Contacts, and Email keys are the default dedicated keys. Your Vertu phone uses a QWERTY keyboard. You can change the software These dedicated keys give you quick access to certain applications and tasks. Each language. Refer to Menu > Ctrl. Panel > Settings > General > Personalization >... -
Page 20: Status Bar Icons
Getting started Status bar icons Battery is charging, but the battery state is low. Battery is charging and is now full. The charger can be disconnected. Top status bar Power saver mode active. (Press the Power key and select Activate Displays signals, data connectivity, and battery status icons along with the date. -
Page 21: Commands And Audible Indicators
Audible indicators snooze alarms by turning your phone face down. Your Vertu phone can be set to generate an audible signal when a particular event To define the turning options, select Menu > Ctrl. Panel > Settings and General >... -
Page 22: Setting Up Your Phone
Vertu Startup Wizard Setting up your phone When your Vertu phone is switched on for the first time, you are taken through a few simple steps to set up your phone. Prior to setup, you must insert a valid SIM card into your Constellation Quest and be in a location with cellular data connectivity. -
Page 23: Switch
If you cannot send an item, depending on the type of the other phone, you can add automatically activated, and transfer can take place. the item to the Vertu folder, to C:\Vertu or E:\Vertu in your phone. When you select the folder to transfer, the items are synchronized in the corresponding folder in the other phone, and vice versa. -
Page 24: Home Screen And Clock
Icons and indicators appear in the status bars, providing information about the status • WLAN scan off is displayed. This function provides access to the WLAN of your Vertu phone. application, which allows you to search for WLAN networks. Use the scroll keys to move the focus around the Home screen. - Page 25 Home Screen and Clock Clock To change the clock time and set alarms on the home screen The clock has the following features: To access the clock, scroll to the left or right to highlight the clock, then press the Middle Select key.
-
Page 26: Automatic Time Settings
2. When the setting is turned On, the following applies: World Clock and Dual Time • The Vertu clock automatically sets the time. The Clock allows you to see timings of different locations in the world clock. • The phone is in dual time handling mode. -
Page 27: Dynamic Information Area
Home Screen and Clock Dynamic Information area Media feeds This area shows either City Brief, Music Player, or Radio. If neither the Music Media Feeds allows you to easily follow news headlines and your favorite news feeds. Player or Radio is active, then the City Brief link is displayed. Media feeds are commonly found on news sites, blogs, and wiki pages. - Page 28 Home Screen and Clock Auto update of Media Feeds WARNING: When using Media feeds, outside of your home network, Turn Media Feeds off in the Settings menu. roaming charges may be imposed by the network operator. Such changes 1. Highlight Media feeds in the Home screen, then press the Middle Select key to can vary considerably depending on the operator.
-
Page 29: Menu
From spreadsheets, including a text editor, calculator, conversion here, you can access all functions and applications. program, and PDF reader, among others. Provides access to Vertu Select, City Brief, Vertu Vertu Concierge, Technical Support, Remote Assist, Download, and Registration. -
Page 30: Task Viewer
Task viewer Control panel Your Vertu phone can run more than one application at a time. Open applications are The Control panel provides access to the functions used for setting up your Vertu indicated with a small green and white circle at the top of the application, as shown phone. -
Page 31: Setting Up Your Personal And Business Preferences
Home Screen and Clock Set up a printer for your phone. Printers Access the setup wizard for registration and email setup. Sett. wizard Sets up VoIP services. Net settings Setting up your personal and business preferences You can switch between two home screen views, one for your personal use and another for business. -
Page 32: Security
SIM card. When the PIN code security feature is active, you must enter the PIN code each time you switch on your Vertu phone. If you previously used your SIM card in another phone, the code is the same. -
Page 33: Phone Autolock Period
Security PIN2 code Phone autolock period The PIN2 code is used to protect the advanced user functions of your SIM card, for To set a timeout after which the device is automatically locked and can be used only example, fixed dialing. The PIN2 code must not be the same as the PIN code. if the correct Lock code is entered. -
Page 34: Other Security Measures: Restricting Calls
NOTE: When outgoing calls are limited to closed user groups, calls may be Certificate manager possible to the emergency numbers programmed in your Vertu phone, for example, 000, 08, 110, 112, 118, 119, 911, and 999, or other official Select Menu > Ctrl. Panel > Settings > General > Security > Certificate emergency numbers. -
Page 35: Protected Content: Digital Rights Management (Drm)
Security Depending on the certificate, a list of applications that can use the certificate is View certificate details displayed. You can only be sure of the correct identity of a server when the signature and validity period of a server certificate have been checked. New Symbian operating system application. -
Page 36: View And Edit Security Modules
Security View and edit security modules Security modules usually contain security certificates and public and private keys and improve security of network connections. Security modules also allow you to use digital certificates. Select Menu > Ctrl. Panel > Settings > General > Security > Security module. •... -
Page 37: Call Functions And Call Log
Making an emergency call To make a call from the call logs: WARNING: Your Vertu phone, like any wireless phone, operates using radio signals, wireless and landline networks, and user-programmed 1. From the Home screen, press the Call key, and use the left and right scroll keys functions. -
Page 38: Speed Dialing
With the automatic redial feature activated, your To activate speed dialing: Vertu phone redials the number up to 10 times, and notifies you when the network is 1. Select Menu > Ctrl. panel > Settings > Phone > Call > Speed dialing. -
Page 39: Answering A Call
Call functions and Call Log Answering a call Call waiting You can answer a call while another call is in progress. To activate call waiting (network To answer an incoming call: service), select Menu > Ctrl. panel > Settings > Phone > Call > Call waiting. •... -
Page 40: In-Call Options
Call functions and Call Log In-call options Putting a call on handsfree If you have attached a compatible headset with Bluetooth connectivity, to route the Adjusting volume sound to the headset, select Options > Activate handsfree. To switch back to the To adjust the volume during a call, use the Volume keys on the side of your phone. -
Page 41: Voice Mail
Creating a conference call Call. Select the mailbox you want to call. You can create a conference call when you have two calls on your Vertu phone—one • To change the mailbox number, select Menu Ctrl. panel > Phone > Call >... -
Page 42: Call Barring
Call functions and Call Log Call barring Call settings Call barring functions are located in Menu Settings > Phone > Call > > Ctrl. panel To view call settings, go to: barring. Select Menu Settings > Phone > Call. > >... -
Page 43: Call Forwarding
TIP: To cancel call waiting, select Deactivate. • If not answered - Forward calls when you cannot answer them. • If out of reach - Forward calls when your Vertu phone is switched off or out of network coverage. • If not available - Forward unanswered calls or forward calls when your phone is busy or out of network coverage. -
Page 44: Network
Call functions and Call Log Call duration display Network This feature displays the call duration during each call. To activate the Show call duration feature: 1. Select Menu Settings > Phone > Call > Show call duration. > > Settings > Phone > Network >... -
Page 45: Licenses
Call functions and Call Log To activate a license, in the licenses main view, select Invalid licenses > Options > Licenses Get license. Establish a network connection at the prompt, and you are directed to a website where you can purchase rights to the media. To remove file rights, go to the desired file, and select Options >... -
Page 46: Call Log
Viewing call duration Viewing recent call information To view information about the duration of calls made and received by your Vertu phone: 1. Select Menu > Log > Call duration. To view recent call information: 2. -
Page 47: Making A Video Call
• To zoom your image in or out, select Options > Zoom. NOTE: The Vertu phone's camera is on the back of the phone, making the • To route the audio to a compatible headset with Bluetooth connectivity attached video call function more suited to showing other people or objects to the to your device, select Options >... -
Page 48: Video Sharing
Call functions and Call Log Video sharing Person-to-person connection settings A person-to-person connection is also known as a session initiation protocol (SIP) Use video sharing (network service) to send live video or a video clip from your connection. The SIP profile settings must be configured in your device before you can mobile device to another compatible mobile device during a voice call. -
Page 49: Accept An Invitation
Call functions and Call Log Sharing begins automatically when the recipient accepts the invitation. Options during video sharing Zoom the video (available for sender only). Adjust the brightness (available for sender only). Mute or unmute the microphone. Turn the loudspeaker on or off. Pause and resume video sharing. -
Page 50: Contacts
Contacts Creating a new contact Contacts To create and save a new contact to your Vertu phone: 1. Press the Contacts key to access your contacts. 2. Select Options > New contact. 3. Enter the contact information of the new contact in the panels that appear. -
Page 51: Editing A Contact
Contacts 4. Select the relevant option from the Via message, Via email, Via Bluetooth, or 3. Select Options > Add image (if there is already an image attached, you have Upload list. the option to View, Change, or Remove the image). 5. -
Page 52: Deleting A Contact
You can save other information for a contact, such as postal address, birthday, and You can also send messages to a group instead of adding contacts as message email addresses, to your Vertu phone. recipients one by one. To add information to a contact: 1. -
Page 53: Copy And Duplicate (Manage) Contacts
4. Scroll through the list of contacts. Select the contact(s) to add to the group using the Middle Select key to mark contacts. Contacts can be stored in various locations on your Vertu phone. You can store them on your SIM card or back them up to the phone's mass storage or removable memory 5. -
Page 54: Contacts Memory
Contacts memory stored on the SIM card. Contacts can be stored to your Vertu phone (E: Mass storage or F: Memory card, if NOTE: You can only view and call service numbers if this functionality is present) and SIM card. -
Page 55: Contacts Settings
Contacts Contacts settings To set up Contacts: 1. Access Contacts. 2. Select Options > Settings > Contacts and the following options shown in the table below appear. 3. Set up each option as desired. The options available may vary. Select the contacts you want displayed in the Contact list. Contacts to display Options include Phone memory, SIM memory, and Service numbers. -
Page 56: Messages
NOTE: Email messages can also be accessed through Messaging. Message alerts Text messages are automatically received when your Vertu phone is switched on. When your phone is off, messages are held by your service provider until the next Your Vertu phone contains a comprehensive messaging function, which enables you time your phone is connected to the network. -
Page 57: Messaging Folders
If messages cannot be sent, they are stored in the Outbox When you send a text message, your Vertu phone uses a profile that defines how the Outbox for later transmission. phone handles interaction with your service provider. In most cases, the profile will be set using information on the SIM card. -
Page 58: Multimedia Messages
Messages Replying to a message Multimedia messages With the message open: Only devices that have compatible features can receive and display multimedia messages. The appearance of a message may vary depending on the receiving 1. Press the Middle Select key > Reply > Via message. device. -
Page 59: Emails
Messages Emails Emails can be worked on in either the Messaging or Email functions. NOTE: The Message Sent icon or text on your device screen does not indicate that the message has been received at the intended destination. For detailed information about working with emails and setting up email accounts, refer to the Email chapter. -
Page 60: Speech Messages And Message Reader
Messages • To preview the presentation, select Options > Preview. Speech messages and Message Reader Multimedia presentations may only be viewed in compatible phones that support With Message Reader, you can listen to text, multimedia, audio, and email messages. presentations. They may appear different depending on the phone used. •... -
Page 61: Cell Broadcast
Messages Send service commands Cell broadcast You can send a service request message (also known as a USSD command) to your Select Messaging and Options > Cell broadcast. service provider and request activation of certain network services. Contact your With the cell broadcast network service, you can receive messages from your service service provider for the service request text. - Page 62 Messages Text message settings Select the default access point to connect to the multimedia Access point in message center. You may not be able to change the default Select Messaging and Options > Settings > Text message. access point if it is preset in your device by your service Select from the following: provider.
-
Page 63: Speech Settings
Messages Speech settings Service message settings Select Menu > Ctrl. Panel > Phone > Speech. Select Messaging and Options > Settings > Service message. With Speech, you can set the language, voice, and voice properties for Message Reader. • To allow your device to receive service messages from your service provider, select Service messages >... -
Page 64: Email
If pressing the Email key results in the inbox of your mailbox being displayed, for Exchange if you do not want to synchronize your Vertu.Me calendar, contacts, and press Back, then press the Email key once again to display the Email panel tasks. - Page 65 Lotus Notes Traveler Vertu users can connect to their corporate email accounts via IBM® Lotus Notes® Traveler. Lotus Notes Traveler provides two-way, over-the-air synchronization of information between mobile devices and corporate email accounts via Lotus Notes even while offline.
- Page 66 Email Replying to and forwarding an email Download attachments 1. To reply to a message, highlight it, then select Options > Reply. 1. To view the attachments in a received email message, scroll to the attachment field, then select Options > Actions. If there is one attachment in the message, 2.
-
Page 67: Switch Between Email Folders
Setting up your default mailbox Synchronizing email messages To set the default mailbox for your Vertu phone: Synchronize email messages between your phone and the email server as follows. 1. Select Messaging > Options > Settings > Email > Default mailbox. -
Page 68: Email Settings
Email Setting up Lotus Notes Traveler Global Settings Follow the instructions provided in the configuration wizard. You must enter your user Select whether the email messages in the inbox display one Message list ID, password, server name, and access point information, which may be your WLAN. or two lines of text. -
Page 69: Generic Mailbox Settings
Email Generic Mailbox Settings Enter the number of the port to use for connecting to the Port incoming email server. Options are Default Setting or User Highlight the relevant mailbox account, then select it with the Middle Select key. The Defined. - Page 70 Some accounts display account information related to that mailbox. Nokia Messaging automatically pushes email from your existing email address to your Vertu phone, which allows you to read, respond to, and organize your emails on The user name assigned to you by your email service provider.
-
Page 71: Vertu Services
To contact Vertu Concierge: Press the Vertu Concierge key (key 2) on the left side of your phone (screen facing you), select Vertu Concierge, then select Voice call or Send email. -
Page 72: Vertu Select
Vertu Select delivers original articles selected to inspire, inform, and entertain, When your Vertu phone is switched on for the first time, you are taken through a few based on your region, preferences, and passions. Written by selected experts and simple steps to set up your phone. -
Page 73: Calendar
Calendar • Memo entries are related to the whole day but not to a specific time of day. Calendar • Anniversary entries remind you of birthdays and special dates. They refer to a certain day but not a specific time of day. Anniversary entries are repeated every year. - Page 74 Calendar Creating a meeting entry Creating a meeting request To create a reminder for an event at a specific time: To create a new Calendar meeting request and invite other participants: 1. Press the Calendar key, then choose a date. 1.
- Page 75 Calendar Creating an anniversary entry Edit a Calendar item To create a reminder for an event at a specific time: To edit an existing Calendar item: 1. Press the Calendar key and choose a date. 1. Press the Calendar key. 2.
-
Page 76: Sending Calendar Items
4. Select Options > Send, then select Via Bluetooth. • As an attachment to a multimedia message. 5. Your Vertu phone will search for nearby Bluetooth devices and display them in a • As a Calendar note. list. (Alternatively, the phone displays the message Activate Bluetooth in •... -
Page 77: Calendar Settings
Calendar Calendar settings Calendar views The default Calendar view is the Month view. However, Calendar can also appear The Calendar Settings menu allows you to set up Calendar to suit your preferences. in Week view, Day view, Agenda view, and To-do formats. You can set up the following: •... -
Page 78: Default Mailbox
Calendar Default mailbox This option only displays when at least one mailbox has been set up. It allows you to connect your Calendar to a particular email address. 1. Press the Calendar key, then select Options > Settings. 2. Scroll to Default mailbox, then press the Middle Select key to display the list of available mailboxes. -
Page 79: Camera
Switches to video mode. Video mode Your Vertu phone is equipped with a digital camera you can use to take photos and record video clips. The camera can also capture panoramic views. Selects the scene mode in the toolbar. Scene Photos are saved in JPEG (.jpg) format, and video clips are saved in 3GPP (.3gp) -
Page 80: Panorama Mode
TIP: The number of photos that you can store on your Vertu phone with the To take an image in panoramic view, press the Middle Select key to take the first... -
Page 81: Camera Setup
Camera Flash setting Camera setup 1. Highlight the flash icon in the toolbar, then press the Middle Select key. A number of parameters can be set for taking still images or video clips; they are determined from the context-sensitive Options > Settings. The settings vary for 2. -
Page 82: Working With Captured Images And Videos
Camera Video settings Working with captured images and videos To modify video image settings, with the video camera selected, select Options > The images and videos you capture are automatically saved in Menu > Media > Settings and from the following: Gallery >... - Page 83 Camera For videos: Image Shortcuts Description Set the video clip as a ringtone for your Profile or a selection of Sets the white balance before capture to: Set as ringtone Wh. balance your Profiles. • Automatic Set the video clip as the ringtone for a specific contact. •...
-
Page 84: Connectivity
GSM or UMTS network, according to the network parameters and the roaming Your Vertu phone can be connected to the Internet or another compatible device or agreements between the wireless service providers. PC in a number of ways, which are described in this section. -
Page 85: Wireless Lan
Connectivity Wireless LAN WLAN wizard Your device can detect and connect to wireless local area networks (WLAN). Using a WLAN, you can connect your device to the Internet and compatible devices that have WLAN support. Select Menu > Ctrl. Panel > Connectivity > WLAN wiz. The WLAN wizard helps you connect to a wireless LAN (WLAN) and manage your About WLAN WLAN connections. -
Page 86: Active Data Connections
Connectivity WLAN settings Active data connections Select Menu > Ctrl. Panel > Connectivity > Conn. mgr. Select Menu > Ctrl. Panel > Settings > Connection > Wireless LAN. Select Active data connections. To have an indicator displayed when there is a Wireless LAN Show WLAN In the active data connections view, you can see the open data connections: (WLAN) available in your current location, select Show... -
Page 87: Bluetooth Connectivity
Viewing the synchronization log The synchronization log stores statistics about the data that has been transferred when synchronizing your Vertu phone with a computer or server. To view the synchronization log: On the home screen, select Menu > Ctrl. Panel > Phone > Sync. > Options > View... - Page 88 Connectivity Bluetooth settings Send data using Bluetooth connectivity Select Menu > Ctrl. Panel > Connectivity > Bluetooth. Several Bluetooth connections can be active at the same time. For example, if you are connected to a compatible headset, you can also transfer files to another When you open the application for the first time, you are asked to define a name for compatible device at the same time.
-
Page 89: Remote Sim Mode
Connectivity 3. Some audio enhancements connect automatically to your device after pairing. Remote SIM mode Otherwise, scroll to the enhancement, then select Options > Connect to audio Before the Remote SIM mode can be activated, the two devices must be paired and device. -
Page 90: Ovi Suite
This can be downloaded from the Vertu technical support site. For more information please visit the technical support page of the Vertu web site, select • To set the device to ask for the mode each time you connect the data cable to the “Software for MAC and PC”, then choose Constellation Quest and download iSync... -
Page 91: Working With The Internet
This option is available if History Network destinations list is activated. See Settings > General > History list. This feature allows your Constellation Quest to automatically select your preferred View the shortcut Options > Keypad shortcuts. To edit the shortcut keys, wireless access point for Internet use. - Page 92 Working with the Internet Navigate pages Block or allow the Options > Web page options > Block pop-ups or Allow automatic opening When browsing a large Web page, you can use Mini map or Page overview to view pop-ups. of multiple windows the page quickly.
-
Page 93: Media Feeds
Working with the Internet Media feeds Accessing media feeds The Media Feeds panel displays media feeds, including any feeds that have been added manually in the Latest headlines panel. Media feeds allow you to easily follow news headlines and your favorite news feed. 1. -
Page 94: Connection Security
Working with the Internet Content search Connection security With keyword search, you can quickly find the information you are looking for on a With a secure connection and security certificates, you can safely browse the Internet. Web page. If the security indicator (ICON) is displayed during a connection, the data •... -
Page 95: Web Settings
Working with the Internet Web settings Privacy settings To access the Web settings, select Menu > Web and Options > Settings, then Enable or disable automatic bookmark collection. If you want to Recently select the appropriate function from the following: continue saving the addresses of the visited Web pages into the visited pages Recently Visited Pages folder but hide the folder in Bookmarks... -
Page 96: Office Tools
TIP: If you temporarily do not want to see notes during phone calls, select Your Vertu phone contains a suite of useful tools in the Office folder. Office includes Show note during call > No. This way, you do not have to remove the links two note generators, calculator, conversion tool, file manager, ZIP manager, between notes and contact cards. -
Page 97: File Manager
Office Tools File manager Quickoffice Select Menu > Office > File mgr.. Select Menu > Office > Quickoffice. With File Manager, you can browse, manage, and open files from various locations. Quickoffice consists of Quickword for viewing Microsoft Word documents, It can be from the phone memory, mass storage, or memory card. -
Page 98: Zip Manager
Office Tools Set base currency and exchange rate Dictionary Select Menu > Office > Converter. When you change base currency, you must enter new exchange rates because all previously set exchange rates are cleared. Select Menu > Office > Dictionary. Before you can make currency conversions, you must choose a base currency and Dictionary allows you to look up word meanings as well as translate words from one add exchange rates. -
Page 99: Notes
Office Tools Installing languages Intranet You need an Internet connection to download language dictionaries. Select Options > Languages > Download languages. The phone connects to the Nokia language server, where the SIS (.sis) translation The intranet application allows you to connect to your company intranet. languages are stored. -
Page 100: Gallery
• To move or copy a file to another memory location, select a file Options > Move and copy. Gallery allows you to store and manage multimedia content on your Vertu phone. This includes images, video and sound clips, songs, streaming links, and presentations. -
Page 101: Songs
Gallery Songs Video clips Songs opens Music Player, displaying your music library. Refer to Media for more Videos opens Video Center. This allows you to view your videos classified in a information on Music Player. number of different ways. Videos contain the video clips taken from the camera as well as any videos watched Images over the Web. -
Page 102: Active Toolbar
Gallery Active toolbar View and edit file details Select Menu Media > Gallery > Images. Go to an item. To enable the active toolbar when you have selected an image or a video clip in a > view, press the Left Select key. 1. -
Page 103: Albums
Gallery • To view the list in alphabetical order, select Options > Alphabetical. Albums • To view the list in Most Frequently Used order, select Options > Most used. With albums, you can conveniently manage your images and video clips. •... -
Page 104: Edit Images
Gallery Edit images Edit videos The video editor supports 3GP and MP4 video file formats and AAC, AMR, MP3, and Image editor WAV audio file formats. • To edit images right after taking them or those already saved in Gallery, open It does not necessarily support all features of a file format or all the variations of file an image, then select Options >... - Page 105 Gallery Printer selection 1. To print images with Image Print, select the image, select Options > To Printer or Kiosk, then choose the print option. 2. When you use Image Print for the first time, a list of available compatible printers is displayed.
-
Page 106: Home Network
If you use the ad hoc operating mode to create a home network with a compatible Your Vertu phone is compatible with Universal Plug and Play (UPnP) and certified by device, enable one of the encryption methods in WLAN security mode when you the Digital Living Network Alliance (DLNA). -
Page 107: View And Share Media Files
Home Network Configure settings View and share media files To configure the settings for home network, select Options > Settings, then choose To share your media files with other UPnP-compatible devices in the home network, from the following: activate content sharing. If content sharing is deactivated in your device, you can still view and copy the media files stored in another home network device if it is allowed To set the device to ask for the home access point every time Access point... -
Page 108: Copy Media Files
Home Network To edit the transfer settings, select Options > Edit, then choose from the following: Copy media files • To copy or transfer media files from your device to another compatible device, Enter a new name for the list. List name such as a UPnP-compatible PC, select a file in Photos, then select Options >... -
Page 109: Media
To start a station search, use the Up or Down scroll key. If you have saved radio stations in your device, use the Left Select or Right Select Your Vertu phone contains a variety of media applications for both business and key to go to the next or previous saved station. -
Page 110: Favorite Stations
Media To view station information, select Options > Station information (not available if Save stations you have saved the station manually). To save a particular station, select Menu > Media > Radio > FM radio > Options > If you are listening to a station saved in your favorites, scroll left or right to listen to the Save station. -
Page 111: Music Player
Media • To modify the balance and stereo image, or to enhance the bass, select Options Internet radio settings > Settings. Select Menu > Media > Radio > Internet radio > Options > Settings. • To return to the home screen and leave the player playing in the background, To select the default access point to connect to the network, select Default access press the End key briefly. -
Page 112: Ovi Music
You can also view and send comments about the posts in these services transfer any data files to, connect to the computer with a compatible USB data and download content to your Vertu phone. cable or Bluetooth. If you are using a USB data cable, select Mass Storage as the The supported content types and the availability of the Share Online service may vary. - Page 113 Media To activate a service: One-Click Upload 1. Open the Share Online application in your device, then select a service and One-Click Upload lets you post images to an online sharing service immediately after Options > Activate. capturing them. 2. Allow the device to create a network connection. If you are prompted for an To use One-Click Upload, capture an image with your device camera, then select the Internet access point, select one in the list.
-
Page 114: Realplayer
Media RealPlayer Service provider settings Select Menu > Media > Share online. To view the list of service providers, select Options > Settings > Service providers. To check the details of a service, select the service in the list. To delete the selected Select Menu >... -
Page 115: Video Center
Media Video center The video center helps you manage the videos on your phone. Select Menu > Media > Video center. • Select Last watched to view the recent videos watched. • Select My videos to view all the videos on your phone. •... -
Page 116: Maps
Maps My position Maps View your location and the map See your current location on the map and browse maps of different cities and countries. Select Menu > Maps and My position. marks your current position, if available. Welcome to Maps Maps shows you what's nearby, helps you plan your route, and guides you to where indicates your last known position, if your current position is not available. -
Page 117: Change The Look Of The Map
Using the compass 3. Point of interest (for example, a railway station or museum) Your Vertu phone contains a compass. When activated, both the compass arrow and 4. Information area map rotate automatically in the direction the top of your phone is pointing to. -
Page 118: About Positioning Methods
Maps The compass has limited accuracy. Electromagnetic fields, metal objects, or other Find places external circumstances may also affect the accuracy of the compass. The compass should always be properly calibrated. Find a location Maps helps you find specific locations and businesses. To calibrate the compass Select Menu >... -
Page 119: Favorites
Maps To add a saved place to a collection: Favorites 1. Select Places and the place. Save places and routes 2. Select Organize collections. Save addresses, places of interest, and routes, so they can be quickly used later 3. Select New collection or an existing collection. Select Menu >... -
Page 120: Share Location
Maps Share location Drive and Walk Publish your current location to Facebook, together with text and a picture. Get voice guidance Your Facebook friends can see your location on a map. Voice guidance, if available in your language, helps you find your way to a destination, To share your location, you need a Nokia account and a Facebook account. -
Page 121: Get Traffic And Safety Information
Maps When you select Drive Home or Walk Home for the first time, you are prompted to Get traffic and safety information define your home location. To later change the home location, do the following: Enhance your driving experience with real-time information about traffic events, lane 1. - Page 122 Maps When you select Drive Home or Walk Home for the first time, you are prompted to To change the settings for a route: define your home location. To later change the home location, do the following: The route settings affect the navigation guidance and the way the route is displayed 1.
-
Page 123: Maps Shortcuts
Maps Maps shortcuts Map Settings Select Menu > Maps > Options > Settings. General shortcuts To return to your current location Options are Online or Offline. Internet Connection To change the map type Options are Internet, Multimedia Msg, or Network 2 or 8 To tilt the map WAP Services. - Page 124 Maps Options are Drive or Walk. Route Transport mode Options are Faster Route, Optimized, or Route selection Shorter Route. Options are Yes or No. Expressway Options are Yes or No. Tunnel Options are Yes or No. Ferry Options are Yes or No. Toll roads Options are Yes or No.
-
Page 125: Positioning
Positioning Assisted GPS (A-GPS) Positioning Your device also supports assisted GPS (A-GPS). A-GPS requires network support. Assisted GPS (A-GPS) is used to retrieve assistance data over a packet data connection, which assists in calculating the coordinates of your current location when your device is receiving signals from satellites. - Page 126 Positioning Tips on creating a GPS connection Landmarks If your device cannot find the satellite signal, consider the following: • If you are indoors, go outdoors to receive a better signal. • If you are outdoors, move to a more open space. With Landmarks, you can save the position information of specific locations in your •...
-
Page 127: Retrieve Position Information
Positioning GPS Data Retrieve position information Select Menu > Applications > GPS > GPS data > Position. In the position view, you can view the position information of your current location. An estimate of the accuracy of the location is displayed. Select Menu >... - Page 128 Positioning Positioning server To define an access point and positioning server for network-assisted positioning methods, such as assisted GPS or network-based positioning, select Positioning server. The positioning server may be preset by your positioning (GPS) service provider, and you may not be able to edit the settings. Notation preferences To select which measurement system you want to use for speeds and distances, select Measurement system >...
-
Page 129: Application Manager
You can transfer installation files to your device using a number of methods. Select application. Download apps. in App mgr. or Download in the Vertu menu, download files from • To see which software packages are installed or removed and when, select a compatible computer or while browsing, receive files in a multimedia message as Options >... -
Page 130: Remove Applications And Software
Application Manager After you install applications to a compatible memory card, installation files (.sis, .sisx) remain in the device memory. The files may use large amounts of memory and prevent you from storing other files. To free up memory space, use Ovi Suite to back up installation files to a compatible PC, then use the file manager to remove the installation files from the device memory. -
Page 131: Personal Settings
Personal Settings Select ringtones Personal Settings To set a ringtone for a profile, select Options > Personalize > Ringtone. Select a ringtone in the list, or select Download Sounds to open a bookmark folder containing a list of bookmarks for downloading ringtones using the browser. Any downloaded tones are saved to Gallery. -
Page 132: Personalize The Home Screen
Only the themes on the phone are currently available. Additional themes for 1. Select Menu > Ctrl. Panel > Modes > Current mode, then select Business. download may be provided in the future at Vertu’s discretion. 2. Select Menu > Ctrl. Panel > Modes > Email notifications and choose your primary and secondary email accounts. -
Page 133: Audio Themes
You can set sounds for various device events. The sounds can be tones, speech, or a combination of both. The Active audio theme is preset to the Vertu theme. To set a sound for an event, select an event group and the desired event. -
Page 134: Accessories
The amount of time a device is used for calls 1. When you look at the holospot on the label, you should see a Vertu symbol and affects standby time. Likewise, the amount of time the device is turned on and in three characters, similar to those shown below. -
Page 135: Data Cable
Connecting the data cable to your Vertu phone Copying data from the SD card Insert the data cable's micro-USB connector into the slot on the left side of your Vertu 1. Connect the phone to the PC using the USB cable. -
Page 136: Vertu Wired Headset
• All music controls are located within the phone. select the accessory and Default profile. Should you use the headset with a device other than your Constellation Quest, the • To set the device to answer phone calls automatically after five seconds when an 3.5-mm adaptor is required. -
Page 137: Maintenance
• Contact information. WLAN on your Vertu phone deactivates when you are not trying to connect, not connected to an access point, or not scanning for available networks. To further •... -
Page 138: Update Software
To receive a notification when new software is available for your device, register with Update via PC Update your device using a PC. This option replaces the Start Vertu. For more information, contact Vertu Concierge or go to www.vertu.com. update option when updates are only available using the Nokia Software Update PC application. -
Page 139: Printing
Printing Select the color mode. Printing Color mode Select the printer model. Printer model The available options may vary. Printing options Open a document, such as a file or message, then select Options > Printing options > Print. Printing Enter the following settings to print: You can print documents, such as files, messages, images, or Web pages, from your device. - Page 140 Printing Image print view After you select the printer and images to print, enter the printer settings. Select from the following: Select the layout of the images. Layout Select the paper size. Paper size Select the print quality. Print quality...
-
Page 141: Troubleshooting
Troubleshooting Troubleshooting Problem Possible cause Possible solution Cannot switch phone on Battery out of power. Charge the battery (see page 134). Battery not installed correctly. Ensure that the battery is inserted correctly (see page 16). Phone switches off automatically Battery out of power. Charge the battery (see page 134). - Page 142 Contact your service provider to check your subscription status. Service centre number is not correct. Ensure that the service centre number is correct (see “Vertu Technical Support” on page 71). To obtain the number, contact your service provider. Cannot send or receive MMS messages Your service provider is not enabling this service.
-
Page 143: Specifications
Specifications Specifications Specifications GPS and navigation Physical characteristics Integrated GPS, A-GPS receivers Dimensions (H × W × D) 116.3 x 60.8 x 12.85 mm Compass Integral Volume 87 cc Maps 3.0 SD card, depending on region Weight (including battery) 165–185 g, depending on version Memory C: Phone memory –... -
Page 144: Shortcuts
Select all Home screen Shortcuts Left selection key + Lock and unlock the keypad and keyboard. There are many shortcut keys available on your Vertu phone, which increase your right selection key efficiency. Call key Open the call log. Press and hold to open your home page in the Web browser. -
Page 145: Calendar Shortcuts
Shortcuts E-mail shortcuts Create a new e-mail message. Remove the selected e-mail messages. Create a reply message to the sender of the e-mail message. Create a reply message to the sender and all other recipients. Forward the e-mail message. Open the next e-mail message. Open the previous e-mail message. -
Page 146: Warranty And Legal Information
Information about service companies specified. authorized by Vertu can be found in the sales package or on local Vertu Web pages, 5. This limited warranty is not enforceable if the Product has been opened, where available. - Page 147 Vertu's proven negligence. accept responsibility under this warranty for the operation, availability, coverage, services, or range of the cellular or other network or system. Before Vertu or a Vertu NOTE: Your Product is a sophisticated electronic device. Vertu strongly...
-
Page 148: Sar Notice - Rm-582V
The FCC or Industry Canada can require you to stop using your phone if such interference cannot be eliminated. If you Your Vertu phone is a radio transmitter and receiver. It is designed not to exceed the require assistance, contact Vertu Concierge. -
Page 149: Declaration Of Conformity
Diversion contrary to U.S. law is prohibited. The third-party applications provided with your device may have been created by, and may be owned by, persons or entities not affiliated with, or related to, Vertu. Vertu Notices does not own the copyrights or intellectual property rights to the third-party applications. -
Page 150: Eu Recycling Notice
Rather, it should be appropriately recycled. If you want Vertu to recycle your product at the end of its life, either return it to the product point of purchase (if known) or return it to Vertu’s headquarters. -
Page 151: Glossary
Glossary GPRS Glossary General packet radio service. GPRS enables wireless access for cell phones to data 3rd generation mobile communications. A digital system for mobile communications networks (network service). GPRS uses packet data technology that sends that aims at global use and provides increased bandwidth. 3G lets mobile device information in short bursts of data over the mobile network. - Page 152 Glossary UPUK Personal identification number. The PIN code protects your device from unauthorized UPIN Unblocking Key. UPUK code is required to change a blocked UPIN code or use. The PIN code is supplied with the SIM card. If the PIN code request is selected, PIN2 code.
-
Page 153: Index
Automatic answer Sending Calendar items Automatic redial To do entry Automatic Time settings Calendar shortcuts AV cable Call Adjusting volume Answering a call Battery Anykey answer Charging the battery Automatic answer Prolong battery life Automatic redialing Vertu battery authentication Call barring... - Page 154 Making an emergency call Concierge Multiparty calls Conference calls Muting a call Connection security Private conversation Contact Vertu Record Contacts Sending an image or a video clip Adding an image to a contact Settings Adding contacts to a group Swapping between calls...
- Page 155 Creating a contact Email message Current location Read Email notifications Emergency calls Data cable Connecting the data cable to your Vertu phone Data connections File manager Active data connections Find and organize files Data connectivity icons Free memory Dedicated keys...
- Page 156 Index Incoming files Outgoing files Landmarks Settings Layout Synchronize media files Phone layout Licenses 45, 149 Listen to messages Icons Lock Images Keypad autolock period Edit images Lock code Organize images Remote phone locking Print images Security code View images Lotus Notes IMEI number Lotus Notes Traveler...
- Page 157 Removing the back cover Music Replacing the back cover Playlists Setting up your phone 14, 22 Music Player Switching on your Vertu phone Preset frequency settings Transfer content Music Store settings Shortcuts 23 Mute a call Transfer conflicts 23 My Key...
- Page 158 Index Pin code Red-eye reduction Pin code request Register your Vertu phone PIN2 code Registering your Vertu phone Playlists Registration Positioning (GPS) Rejecting or ending a call Assisted GPS (A-GPS) Remote Assist GPS data Remote phone locking Landmarks Remote SIM mode...
- Page 159 USB data connection Web shortcuts USB data connection options Slide show Software updates Vertu Concierge Songs Vertu Downloads Sound clips Vertu package contents Speakerphone Vertu Remote Assist Speech messages Vertu Select Speech settings Vertu Technical Support Speed dialing Vertu Wired Headset Activating speed dialing Vertu’s liability...
- Page 160 Index Video center Video clips Edit videos Organize videos View videos Voice Setting up voice commands Voice command Voice dialing Voice mail VoIP Volume in a call Walk Wall charger Wall charger safety Warranty Warranty service Web browser Web feeds Web settings Wireless LAN Wizard...
Need help?
Do you have a question about the Constellation Quest and is the answer not in the manual?
Questions and answers