
Related Manuals for Sunbeam Solus Digital Resilium SR7000


Summary of Contents for Sunbeam Solus Digital Resilium SR7000
- Page 1 Solus Digital Resilium ® ® Instruction Booklet SR7000 Please read these instructions carefully and retain for future reference.
-
Page 2: Table Of Contents
Contents Sunbeam’s Safety Precautions Features of your Solus Digital Iron ® Using your Solus Digital Iron ® The Safety Auto-Off Feature Care and Cleaning of your Solus Digital Iron ® Troubleshooting Ironing Tips & Tricks Ironing Chart Important instructions – retain for... -
Page 3: Sunbeam's Safety Precautions
• Do not leave the iron unattended while it is element if the iron has not been used for a plugged into the power outlet. certain period of time. Sunbeam is very safety conscious when • Never leave an appliance unattended while in designing and manufacturing consumer use. products, but it is essential that the product user • Do not use an appliance for any purpose also exercise care when using an electrical other than its intended use. -
Page 4: Features Of Your Solus ® Digital Iron
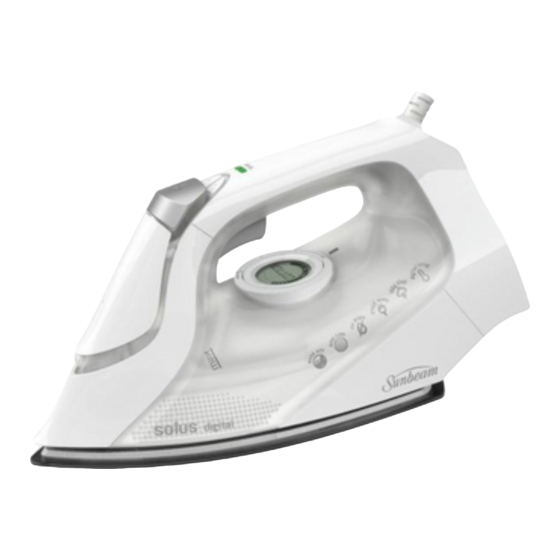
Features of your Sunbeam Ultura Iron Extreme shot of steam Squeezing the shot of steam trigger instantly produces a concentrated, high-pressure shot of steam to remove stubborn wrinkles. Vertical shot of steam Squeezing the shot of steam trigger with the iron in an upright position produces a vertical shot of steam, which is ideal for steaming curtains and suits, and removing creases from delicate fabrics. Fine spray mist Pressing the spray button provides a fine mist spray to dampen hard-to-iron fabrics. Water tank with easy-fill water inlet Holds 300ml of water for continual high steam performance without having to refill the tank regularly. Drip-stop steam system The drip-stop steam system automatically stops water flowing to the steam chamber should the temperature fall too low to generate steam. - Page 5 Digital thermostat The digital thermostat provides precise temperature control, allowing you to select the exact temperature recommended for each garment. It eliminates temperature overshoot and minimises temperature fluctuations. This ensures consistently superior results and prevents scorching. Temperature alert The light located on the iron handle indicates when the iron soleplate has reached the selected temperature. Green = ready to iron Orange = heating up Red = too hot, cooling down Temperature control Use the + and - buttons to select the desired temperature setting for each garment, as displayed on the LCD. LCD screen The illuminated LCD displays the selected fabric setting. Safety auto-off The iron automatically switches itself off if left in the ironing position (horizontal) for 30 seconds, or in the heel rest position (vertical) for 15 minutes. (For more information on the safety auto off feature see page 7). Variable steam dial Allows you to select the desired steam output for each garment. Alternatively, select the DRY setting to iron without steam. Anti-calc The built-in anti-calc cartridge removes minerals from tap water to prevent scale build up inside the soleplate and steam chamber,...
-
Page 6: Using Your Solus ® Digital Iron
Using your Sunbeam Solus Iron ® Before first use Using your iron Remove any adhesive stickers, plastic covers 1. I nsert the plug into a 230/240 volt power or cardboard sleeves from the soleplate. outlet and turn the power on. The LCD Ensure that all adhesive is removed by screen and the orange temperature alert rubbing the soleplate with a cloth light (located on top of the handle) will dampened with methylated spirits. illuminate to indicate that the iron is switched on and heating. Fill the water tank and empty the water. This will rinse out any foreign particles remaining 2. U se the temperature +/- buttons to select in the water tank from the manufacturing the desired temperature. The bars on the process. LCD will flash as the iron heats up to the selected temperature setting. As each NOTE: When turned on for the first time, incremental temperature is reached the bars your new iron may give off vapours for up will display solidly. When the temperature to 10 minutes. This is due to the initial alert light changes to green, the iron has heating of the materials used. It is safe, not... -
Page 7: The Safety Auto-Off Feature
Using your Sunbeam Solus Iron (continued) ® Using the shot of steam Note: If the tank has run dry, it may be necessary to re-prime the pump after filling The shot of steam can be used when dry the iron with water. or steam ironing, when the temperature is set above the two dot ( •• ) setting. Using the spray mist 1. E nsure the tank is at least 1/4 full of The spray mist can be used whether dry or water. steam ironing to pre-dampen hard to iron fabrics. 2. S elect the desired temperature and wait until the temperature alert light 1. E nsure the tank is at least 1/4 full of illuminates green. water. -
Page 8: Care And Cleaning Of Your Solus ® Digital Iron
Care and Cleaning After each use Cleaning the steam holes 1. T urn the power off and remove the plug To remove build up from the steam holes which may affect steam performance, from the power outlet. use a cotton wool tip moistened in 2. A llow the iron to cool before winding methylated spirits. the cord around the built-in cord wrap. Storage Cleaning the Resilium soleplate ® Always store the iron on its heel rest. Wipe with a soft damp cloth and wipe dry. Do not store the iron with the soleplate Caution: Do not use scouring pads, abrasives facing down, or in the carton. or harsh cleaners to clean your Resilium ® soleplate, as these will scratch and damage Cleaning the surface. To clean the exterior of your iron, wipe over with a damp soft cloth and wipe dry. Caution: Do not use harsh abrasives, chemical cleaners or solvents to clean the exterior of your iron as these will damage the... -
Page 9: Ironing Tips & Tricks
Ironing Tips and Tricks Tip # 27 - Iron shirts like a pro Tip # 13 - Ironing the seam Start with the collar, working from the outer Always press seams in the same direction edges into the middle. Iron the shoulder they were made. When a garment is next, followed by the cuffs and sleeves. produced, the fibres will naturally settle Place the collar at the narrow end of the in the direction they were initially pressed, so it’s best not to iron against the grain. board so that one front panel of the shirt is extended flat. Iron the front panel from Tip # 26 - Sort types of fabric shoulder to shirt tail. Rotate to iron the Sort articles to be ironed according to the back of the shirt. Rotate and complete the type of fabric. This will reduce the need to... -
Page 10: Ironing Chart
Ironing Chart TemperaTure Fabric ironing recommendaTion SeTTing minimum Acrylic Dry iron on wrong side. Dry iron on wrong side while still damp or use spray to Acetate dampen. Nylon Iron on wrong side while still damp or use spray to dampen. synthetic Polyester & Rayon Iron on wrong side of fabric. SYNTH Mainly dry iron. Steam can be used under manufacturer’s Viscose instructions. silk Iron on wrong side. Use an ironing cloth to prevent shine Silk marks. SILK Check label and follow manufacturer’s instructions. Cotton Blends Use setting for the fibre requiring the lowest setting. wool Wool & Wool Steam iron on wrong side or use an ironing cloth. WOOL Blends cotton Dry iron while still damp or use spray to dampen. Cotton Use steam medium to high. COTTON Corduroy Steam iron on wrong side or use an ironing cloth. - Page 11 2 years of purchase (3 months commercial use) due to faulty materials or manufacture, we will replace it for you free of charge. Should you experience any difficulties with In Australia you are entitled to a your appliance, please phone our customer replacement or refund for a major failure and service line for advice on 1300 881 861 in for compensation for any other reasonably Australia, or 0800 786 232 in New Zealand. foreseeable loss or damage. You are also Alternatively, you can send a written claim entitled to have the goods repaired or to Sunbeam at the address listed below. replaced if the goods fail to be of acceptable On receipt of your claim, Sunbeam will quality and the failure does not amount to seek to resolve your difficulties or, if the a major failure. appliance is defective, advise you on how Should your appliance require repair or to obtain a replacement or refund. service after the guarantee period, contact Your Sunbeam 2 Year Replacement your nearest Sunbeam service centre. Guarantee naturally does not cover misuse For a complete list of Sunbeam’s authorised...
- Page 12 Sunbeam Corporation Limited 2006. ABN 45 000 006 771 Units 5 & 6, 13 Lord Street Botany NSW 2019 Australia Unit 3, Building D 26 Vestey Drive Mt Wellington Auckland New Zealand 8/11 Sunbeam Corporation is a division of GUD Holdings Ltd.
Need help?
Do you have a question about the Solus Digital Resilium SR7000 and is the answer not in the manual?
Questions and answers