
Related Manuals for Sonnet Tempo SSD Pro 6Gb/s SATA PCIe Drive Card


Summary of Contents for Sonnet Tempo SSD Pro 6Gb/s SATA PCIe Drive Card
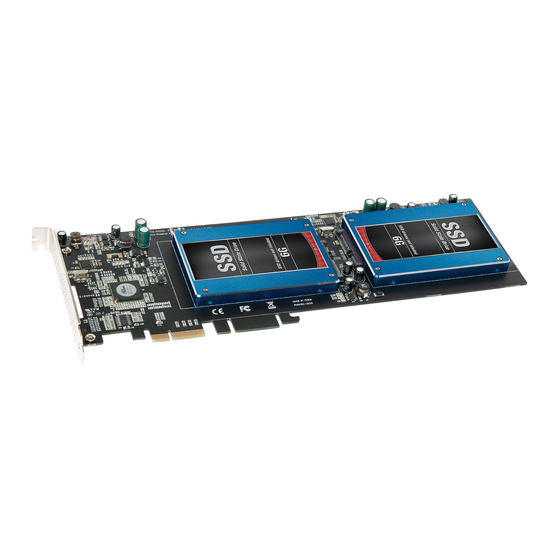
- Page 1 Quick Start Guide for Tempo SSD Pro Gb/s SATA PCIe Drive Card for SSDs ™ Tempo SSD Pro shown with SSDs attached; drives not included (sold separately) Windows...
- Page 2 This page left intentionally blank...
-
Page 3: Introduction And Package Contents
Introduction and Package Contents Congratulations on your purchase! Tempo SSD Pro provides a OS X , Windows and Thunderbolt compatible, this card ® ®, ™ handy way to install one or two 2.5-inch SATA SSDs (or HDDs) supports both operating systems’ RAID features and works in into a PCIe slot. - Page 4 Prior to attaching SSDs to the Tempo SSD Pro and installing the card, you should perform the steps below as necessary. Remove the Sonnet card from its packaging, handling the card by its edges and without touching any components or gold connector pins.
- Page 5 SSD Installation Steps Figure 3 SSD Installation 1. Remove the SSDs from their packaging. 2. Place an SSD label side up on top of the Tempo SSD Pro card with the SSD’s and card’s connectors aligned with each other (Figure 3). 3.
- Page 6 SSD Installation Steps Figure 6 9. Using the remaining four screws, secure the SSD to the card; do not overtighten the screws (Figure 6). 10. Tempo SSD is ready for installation; proceed to the next page.
-
Page 7: Driver Information
Tempo SSD Pro Card Installation Steps Hardware Installation Steps for All Users Formatting Drives 1. Shut down your computer or expansion chassis, disconnect OS X: its power cable, and then open it to access the expansion Use Disk Utility (found in the Utilities folder within the card area (PCI Express slots);... -
Page 8: Specifications
©2013 Sonnet Technologies, Inc. All rights reserved. Sonnet, the Sonnet logotype, Creativity Stored Here, Simply Fast, the Simply Fast logotype, Echo, Tempo, and xMac are trademarks of Sonnet Technologies, Inc. Mac, the Mac logo, Mac Pro, and OS X are trademarks of Apple Inc., registered in the United States and other countries. Thunderbolt and the Thunderbolt logo are trademarks of Intel Corporation in the U.S.
Need help?
Do you have a question about the Tempo SSD Pro 6Gb/s SATA PCIe Drive Card and is the answer not in the manual?
Questions and answers