
Subscribe to Our Youtube Channel
Related Manuals for Aphex EXCITER


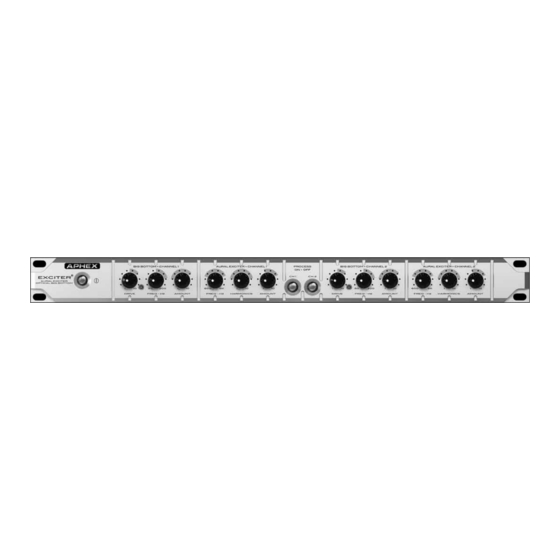
Summary of Contents for Aphex EXCITER
- Page 1 EXCITER® AURAL EXCITER® & OPTICAL BIG BOTTOM® LEGENDARY PROFESSIONAL AUDIO ENHANCEMENT OWNER’S MANUAL...
- Page 2 WARNING: The Exciter has been tested and meets the FCC, CE and European Union rules, regulations, and guid- lines for use. Do not attempt to modify or change the Exciter, as this could void the regulatory compliance, which would place you at risk of losing your authority to operate the Exciter.
- Page 3 In order to help you get maximum use and satisfaction from your new Exciter, we have tried our best to anticipate most of the questions and problems users are likely to encounter. You may find its various sections on wiring and connecting especially helpful.
-
Page 4: Table Of Contents
1.0 QUICK START 1.1 Unpacking and Inspecting 1.2 Simple Setup 1.3 Suggested Control Settings 2.0 INTRODUCTION 2.1 The Aural Exciter and Big Bottom Technologies Explained 2.2 Simplified Block Diagram 3.0 INSTALLATION AND INTERFACING 3.1 Installation 3.2 Rear Panel View 3.3 AC Line Connector 3.4 Input Connectors... -
Page 5: Quick Start
1.2 SIMPLE SETUP To get started fast, follow the wiring diagram for an in-line application shown below. If you need to run the Exciter with an insert patch instead, refer to section 5 for more information. Finally, refer to the control settings below to get your Exciter sounding great. -
Page 6: Suggested Control Settings
You are encouraged to experiment with the range of settings printed on the face of the unit. When testing the effect of Big Bottom, turn off the Aural Exciter Mix. Likewise, turn off the Big Bottom AMOUNT when testing the effect of the Aural Exciter. - Page 7 AURAL EXCITER HARMONICS CONTROL PROCESS ON/OFF SWITCH Sets the relative richness of harmonics created Turns Aural Exciter and Big Bottom off and on by the Aural Exciter. Use more for instrument simultaneously. Button glows green when on. tracks and less for voice tracks. What’s best for Each channel is switched independently.
-
Page 8: Introduction
It should be pointed out that the Aural Exciter is a “single-ended” process that can be inserted at any point within the audio chain. “Single-ended” means that the unit will receive the incoming audio signal, process the program material through Aphex’s patented Aural Exciter/Big Bottom technology, then output the effected signal with no further processing... -
Page 9: Simplified Block Diagram
Owner’s Manual Introduction Page 9... -
Page 10: Installation And Interfacing
3.3 AC LINE CONNECTOR Use only a power cord that carries approvals for use in your location. The Exciter’s internal power supply is designed to operate on nominal power sources from 100 to 240 volts a.c. at 50/60Hz without requiring the user to change any settings. -
Page 11: Wiring Diagrams
(male connectors). Note: Use only conventional 1/4” phone plugs with the Exciter. Professional patch bay cords using brass PJ055 telephone type plugs are designed to a different standard and will not make full contact with the Exciter phone jacks. -
Page 12: Controls And Indicators
Please note there are valid reasons for why the green LED may not pulse by the time this control reaches 2 o’clock. The Exciter’s Operating Level switch may be set to +4dBu though you have a -10dBV input signal. On the other hand, if the green LED is pulsing strongly at settings as low as 9 or 10 o’clock, you probably have the Operating Level switched to -10dBV though you have a +4dBu input... -
Page 13: Aural Exciter Frequency Control
The Aural Exciter Frequency control adjusts the corner frequency of the high pass filter, thus setting the range of frequencies being enhanced by the Aural Exciter. The range of the corner frequency is 600Hz (fully counter clockwise) and 5kHz (fully clockwise). The 12 o’clock setting is approximately 3kHz. -
Page 14: Operation And Applications
Insert Cables are more than ordinary “Y” cables. The single (TRS) side can accept a signal coming from two direc- tions when placed in a specially designed Insert jack on a console. The “Y” section is hooked up into the Exciter through the respective input and output jacks. -
Page 15: Effects Loop Patches
5.3 EFFECTS LOOP PATCHES As we stated early on, the Exciter was primarily designed as an in-line device. However, if you choose to use it with a post fader aux send, keep in mind that the Exciter has two independant processers labeled channel one and chan- nel two. -
Page 16: Optimizing Aural Exciter Effects
Configuring the Exciter as illustrated provides two independent mono processing channels. Let’s assign Effects (or AUX) Send 1 to the Aural Exciter on channel one and Effects (or AUX) Send 2 to the Big Bottom on channel two. Now turn the Aural Exciter MIX control all the way up (completely clockwise) and turn the Big Bottom Mix all the way off (fully counter clockwise) on channel I of the Exciter. -
Page 17: Optimizing Big Bottom Effects
4. Vary the Mix control and listen for how subtle or dramatic you can make the effect. The Aural Exciter is especially useful in creating the perception of high frequencies and greater dynamics with pre- processing, bringing more presence and clarity to the final product. -
Page 18: Live Concerts And Sound Reinforcement
Aural Exciter. If you use a compressor for smoothing out dynamics it should go into the audio chain before the Exciter. If you are using a limiter for system protection it should be the last thing in the audio chain before amplification. -
Page 19: Guitar, Bass And Keyboard Rigs
The Aural Exciter will give you a perceived increase in volume without putting your system into feedback. Put an Aural Exciter in line when the system is stable yet close to the point of feedback. The Aural Exciter may be the most viable option under these conditions. -
Page 20: Karaoke And Stereo Systems
The two channels in most Karaoke and consumer grade equipment are marked left (L) and right (R), rather than one (1) and two (2). Regardless of these markings, the Exciter can be used as a stereo component. Just make sure to match the settings of the controls on each channel for best results. -
Page 21: Frequency Chart
Owner’s Manual Operation & Applications RELATING THE FREQUENCY RANGES OF THE BIG BOTTOM AND AURAL EXCITER TO THE FUNDAMENTALS AND HARMONICS OF SOUND Big Bottom Range Aural Exciter Range Page 21... -
Page 22: Warranty And Service
Any and all warranties are limited to the duration of the warranty stated above. EXCLUSION OF CERTAIN DAMAGES Aphex Systems’ liability for any defective unit is limited to the repair or replacement of said unit, at our option, and shall not include damages of any other kind, whether incidental, consequential, or otherwise. -
Page 23: Specifications
Owner’s Manual 7.0 Specifications OPERATING LEVEL Switch Setting: +4dBu -10dBV INPUT Connector: XLR-3F and TRS 1/4” phone jacks Same Type: Transformerless, active balanced Same Balanced: 40KΩ 40KΩ Unbalanced: 20KΩ 20KΩ Nominal Level: +4dBu -10dBV (-7.8dBu) Maximum Level: +27dBu +12.5dBV (+14.8dBu) CMRR: >40dB >40dB... - Page 24 Exciter Patent Notice This product is protected under one or more of the following Aphex patents. 4,578,648 4,633,501 4,843,626 4,939,471 5,115,471 5,155,769 5,334,947 5,359,665 5,422,602 5,424,488 5,450,034 5,463,695 5,483,600 5,485,077 5,612,612 5,737,432 5,848,167 5,896,458 5,898,395 5,930,374 Page 24...
Need help?
Do you have a question about the EXCITER and is the answer not in the manual?
Questions and answers