Ford 2007 Explorer Quick Reference Manual
Ford motor company automobile quick reference guide
Hide thumbs
Also See for 2007 Explorer:
- Owner's manual (782 pages) ,
- Maintenance manual (48 pages) ,
- Owner's manual (369 pages)
Table of Contents
Advertisement
Quick Links
Essential Information
Location of Spare Tire and Tools:
rear bumper. The spare tire winch drive nut is located at the rear center of the cargo area, under
a lid. The jack, jack handle and lug nut wrench are located behind the rear seat, under the
carpeted lid in the cargo floor. The tools are contained in a bag attached to the jack.
Fuses:
If the vehicle's electrical components are not operating, a fuse may have blown. The fuse
panel is located below the instrument panel on the driver's side; remove the cover to view the
fuses. For more information regarding changing fuses, refer to the Roadside Emergencies
chapter of your Owner's Guide.
Fuel Information:
Use regular unleaded gasoline with an (R+M)/2 octane rating of 87. Ford Motor
Company does not recommend using regular unleaded gasoline with an octane rating of 86 or
lower in high altitude areas. The advertised fuel capacity of the fuel tank is equal to the rated
refill capacity of the fuel tank as listed in the Maintenance and Specifications chapter of the
Owner's Guide.
Tire Pressure:
Your vehicle's tire pressure is properly set by your authorized dealer according to
the recommended specifications found on the vehicle's tire label, located on the driver's door
jamb. Check your tire pressure during routine maintenance and seasonal changes. If the Tire Pres-
sure Monitoring System light stays illuminated after starting, immediately check the vehicle's tire
pressure.
Warning: Improperly inflated tires can affect vehicle handling and tire performance.
This Quick Reference Guide is not intended to replace your vehicle Owner's Guide which
contains more detailed information concerning the features of your vehicle, as well as
Fuel Pump Shut-Off Switch:
important safety warnings designed to help reduce the risk of injury to you and your
electric fuel pump when your vehicle has been involved in a substantial jolt. The switch is located
passengers. Please read your entire Owner's Guide carefully as you begin learning about
in the passenger's footwell, by the kick panel. After a collision, if the engine cranks but does not
your new vehicle and refer to the appropriate sections when questions arise.
start, the fuel pump shut-off switch may have been activated. For more information regarding
All information contained in this Quick Reference Guide was accurate at the time of
the fuel pump shut-off switch, refer to the Roadside Emergencies chapter of your Owner's Guide.
duplication. We reserve the right to change features, operation and/or functionality of
any vehicle specification at any time. Your Ford dealer is the best source for the most
Changing the Tires:
The spare tire is not equipped with a Tire Pressure Monitoring System (TPMS)
current information. For detailed operating and safety information, please refer to
sensor. The TPMS warning light will illuminate when the spare tire is in use. Replace the spare
your Owner's Guide.
tire with a road tire as soon as possible. If you get a flat tire while driving, do not apply the brake
heavily; instead, gradually decrease your speed, hold the steering wheel firmly and slowly move
Ford Motor Company
to a safe place on the side of the road.
Customer Relationship Center
P.O. Box 6248
Roadside Assistance:
During your Explorer's 3-year/36,000 mile limited warranty period, the
Dearborn, MI 48121
assurance and support of a 24-hour emergency roadside assistance program is included. Roadside
1-800-392-3673 (FORD)
assistance includes such services as fuel delivery, tire changes, jump starts and help when you are
(TDD for the hearing impaired: 1-800-232-5952)
locked out of your vehicle. Complete your roadside assistance identification card and keep it handy
(such as in your wallet) for quick reference. This identification card is located in your Ford Owner's
Information portfolio. To receive roadside assistance in the United States, call 1-800-241-3673.
*F7L2J-19G217-BA*
Rear Window Buffeting:
7L2J-19G217-BA
demonstrate a wind throb or buffeting noise; this noise is common among a wide range of
vehicles and can be eliminated by simply lowering a front window approximately two to
First Printing, June 2006
three inches.
This vehicle handles differently from an ordinary passenger car in driving conditions which may occur
on streets and highways and off-road. DRIVE WITH CARE AND WEAR A SAFETY BELT AT ALL TIMES.
Ford urges you to read the Owner's Guide and Driving Your SUV or Truck Supplement for detailed
information on safe driving precautions and instructions.
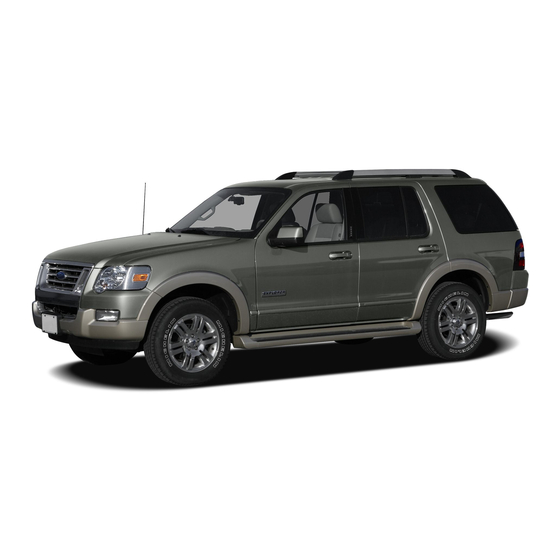
2007 EXPLORER
AUDIOPHILE AM / FM IN-DASH SIX CD / MP3 / SATELLITE COMPATIBLE SOUND SYSTEM*
A.
The spare tire is located under the vehicle, just forward of the
B.
D.
J.
K.
A. CD Eject:
Press and hold to
you may use the following
auto eject all CDs present in
functions:
the system. Press
and a
Press MENU until CATEGORY
memory preset to eject from
MODE appears in the display.
a specific slot.
Press
B. LOAD:
categories of music (country, rock,
Press LOAD and
a memory preset to load to a
etc.) and press and hold
or TEXT/SCAN to search for chan-
specific slot. Press and hold to
The fuel pump shut-off switch is a device intended to stop the
autoload up to six CDs.
nels playing that specific category
of music.
C. Tune / Disc Selector:
Press
Press
and release to manually advance
previous/next channels. Press and
up / down the radio frequency or
release TEXT/SCAN to display the
to select a desired disc. Press and
current song title. Press again to
hold for a fast advance through
scroll through current song title,
radio frequencies or all loaded
artist, channel category and
discs. Also use in menu mode to
the SIRIUS long channel name.
select various settings.
Press and hold for a brief sam-
D. CD:
Press to enter CD mode.
pling of the next channels. Press
If a CD is already loaded into
again to stop.
the system, CD play will begin
G. MEnU:
where it ended last. If no CD is
cycle through the following
loaded, NO DISC will appear in
the display.
modes: Autoset, Bass, Treble,
Balance, Fade, Occupancy mode,
E. MUTE / Phone:
Press to mute
Speed sensitive volume, Setting
the playing media. Press again to
the clock, RBDS (Radio Broadcast
return to the playing media.
Digital Signal), Track / Folder
SATELLITE RADIO COnTROLS: (if
Mode & Compression. For more
When one or both of the rear windows are open, the vehicle may
equipped)
information on these menu items,
F. AUX:
Press repeatedly to
refer to your Owner's Guide.
cycle through SAT1, SAT2, SAT3
H. SEEK:
(satellite radio mode if equipped),
previous strong station or track.
LINE IN (auxiliary audio mode), or
Press > to access the next strong
FES/DVD (if equipped). Once
station or track.
Satellite Radio mode is activated
Additional Features
Remote Entry System
C.
The remote entry system allows you to lock or unlock all vehicle
doors and the liftgate, open the liftgate window without a key,
and activate the panic alarm.
E.
Press control
C
and release to unlock the driver's door. Press
G.
and release again within three seconds to unlock the passenger
F.
doors, the liftgate and liftgate glass. Press control
A
and release
to lock all the doors and liftgate. Press control
D
to unlatch the
H.
I.
H.
liftgate window. Press control
B
to activate the alarm. The horn
will sound and the parklamps will flash for a maximum of three
minutes. Press the control again or turn the ignition to the on
L.
M.
N.
position to deactivate. The remote entry system can also control
the memory seat / adjustable pedals / easy entry-exit feature
O.
(if equipped). Press the
C
control to automatically move the seat and adjustable pedals to the
desired memory position (if equipped) (the seat position corresponds to the transmitter being
I. TEXT / SCAn:
Press and hold
used). For more information regarding the memory seats / adjustable pedals / easy entry-exit
for a brief sampling of radio
feature, refer to your Owner's Guide.
stations or CD tracks. Press again
to stop. In CD / MP3 mode, press
HomeLink® Wireless Control System
(if equipped)
The HomeLink® Wireless Control System, located on the overhead console,
TEXT to display track title, artist
/
to select from various
name and disc title.
provides a convenient way to replace up to three hand-held transmitters with a
single built-in device. This feature will learn the radio frequency codes of most
SEEK
J. REW (Rewind):
Press to
transmitters to operate garage doors, entry gate operators, security systems, entry
manually reverse in a CD or
door locks, and home or office lighting. To set the HomeLink® Wireless Control
MP3 track.
System, refer to your Owner's Guide. To operate, simply press and release the
K. FF (Fast Forward):
Press to
appropriate HomeLink® button. Activation will now occur for the trained product
SEEK
to access the
manually advance in a CD or
(garage door, gate operator, security system, entry door lock, home or office lighting, etc.).
MP3 track.
For convenience, the hand-held transmitter of the device may also be used at any time.
L. FOLDER:
In folder mode, press
navigation System
(if equipped)
to access the previous or next
Your vehicle may be equipped with a Navigation System. Refer to the Navigation Supplement for
folder on MP3 discs, if available.
further information on the operation of your system.
M. SHUFFLE:
Press to play the
tracks on the current disc in
Family Entertainment System (FES)
(if equipped)
random order.
Your vehicle may be equipped with a Family Entertainment System (Rear seat DVD player with
wireless headphones and remote control). Refer to the Family Entertainment System Supplement
n. PLAY / PAUSE:
This control is
Press repeatedly to
Guide for further information on the operation of your system.
operational in CD and DVD mode
(if equipped). When a CD or
Auxiliary Input Jack (AIJ)
DVD is playing in the Family
Entertainment System, press
Your vehicle is equipped with an Auxiliary Input Jack (AIJ) located inside the
console bin (E). This allows you to plug and play auxiliary audio devices. Press
this control to play or pause the
current CD / DVD. The CD / DVD
AUX repeatedly on your audio system to access. When LINE IN appears in the
display, plug in your auxiliary audio device. For more detailed information,
status will display in the
please refer to your Owner's Guide.
radio display.
O. Memory Presets:
To set a
Power Deployable Running Boards
(if equipped)
station, select frequency band AM
The deployable running boards automatically move when the doors are opened to assist with
Press < to access the
/ FM1 / FM2 , tune to a station,
entering and exiting the vehicle. With automatic power deploy, the running boards will extend
press and hold a preset button
out when the doors are opened, and with automatic power stow, the running boards will return
(1-6) until sound returns.
to the stowed position when the doors are closed. To enable / disable the power running board
feature, refer to the Message Center section of your Owner's Guide.
*If equipped.
Seating
To return to the upright
3rd Row Seats:
(if equipped)
(seating) position from cargo
Before folding the 3rd row
mode: 1.
Place your hand
seats, ensure that no objects
2nd Row Seats:
The second
under the seat bottom and
such as books, purses or
row seats are designed for
A.
C.
maximum utility. They can
lift the seat up (A moderate
briefcases are on the seat
be positioned in up to three
force may be required to
cushions and that the seat
move the seat).
2.
Return
belts are unbuckled.
unique configurations:
B.
D.
the seatback to the upright
the head restraints down by
Upright (seating) position,
Cargo mode, and E-Z entry
position.
note:
The seatback
pulling on the strap located
mode (if equipped with 3rd
cannot be returned to the
under the restraint.
upright position until the seat
up on the
row seat).
is returned from the cargo
handle
Before folding down the 2nd
mode position and latched. If
located
row seats, ensure that no
the seatback will not raise,
behind the
re-position the seat into cargo
seatback
objects such
mode and try lifting it again.
while
as books,
pushing the
purses, or
briefcases
To enter the 3rd row seat:
seatback forward and down
are on the
(if equipped)
1.
Fold the
into the seat cushion.
seatback
For 3rd row power folding
floor in
down (as
seat (if equipped), the control
front of or
under the seat.
1.
Lower the
indicated)
buttons are located on the
head restraints by pulling on
and release
driver-side rear quarter trim
the side
panel (accessible from the
the strap.
2.
Locate the handle
handle.
liftgate area). Be sure to fold
on the side of the seat cushion
by the door.
3.
Pull up on the
2.
Pull the
the head restraints before
handle and push the seatback
side handle up again until the
powering the 3rd row seat
rear of the seat releases from
into the folded position.
forward toward the front of
the floor.
3.
Rotate the seat
the vehicle.
upward and away from the
To return the 3rd row seats to
To place the 2nd row 60/40
3rd row.
the upright (seating)
seats in cargo mode:
position: 1.
Pull up on the
To return the 2nd row seat to
handle located on the
(if equipped with a 3rd row
the upright (seating) position
seatback, rotating the
seat)
1.
Fold down the 2nd
row seat as
from E-Z entry mode:
seatback upward until you
indicated.
1.
Return the seat from the
hear a click, locking it in the
E-Z entry position and latch it
upright position.
2.
2.
Pull the
to the floor with a moderate
on the head restraint until it
cargo mode
lever up and
speed.
2.
Bring the seatback
locks into its original position.
forward
to an upright position.
note:
E.
to release
If the seatback will not return
to the upright position,
the seat
tumble the seat forward
into a flat
load floor
again and then re-latch it
position. A
to the floor. Be sure that
cargo or other objects are not
moderate
trapped underneath
force may
be required to move the seat
the seatback.
forward and down.
2007 EXPLORER
qUICK REFERENCE GUIDE
1.
Fold
2.
Pull
note:
Lift up
Advertisement
Table of Contents

Related Manuals for Ford 2007 Explorer


Summary of Contents for Ford 2007 Explorer
- Page 1 Complete your roadside assistance identification card and keep it handy (such as in your wallet) for quick reference. This identification card is located in your Ford Owner’s Information portfolio. To receive roadside assistance in the United States, call 1-800-241-3673.
- Page 2 – tough enough to take on what the road ahead gives you, yet sophisticated. Please take a few moments to familiarize yourself with your new Ford Explorer by reading this quick Reference Guide, which discusses features, specifications and general information. For detailed information, consult your Owner’s Guide.
Need help?
Do you have a question about the 2007 Explorer and is the answer not in the manual?
Questions and answers