Table of Contents
Advertisement
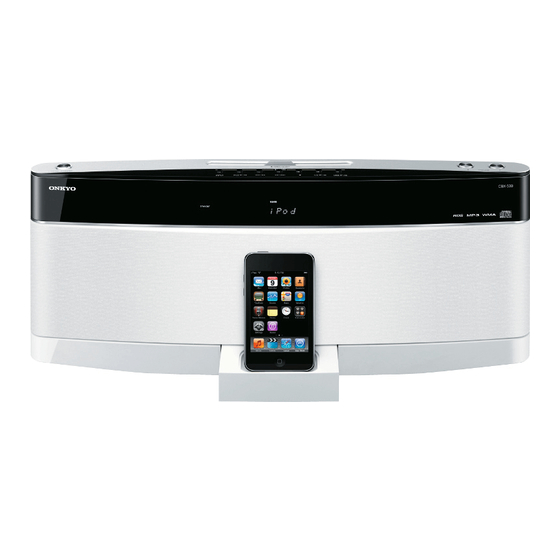
CD Tuner Audio System
CBX-500
CBX-600UKD
Instruction Manual
Thank you for purchasing an Onkyo CD Tuner Audio System.
Please read this manual thoroughly before making any
connections and plugging it in.
Following the instructions in this manual will enable you to obtain
optimum performance and listening enjoyment from your new CD
Tuner Audio System.
Please retain this manual for future reference.
Getting Started
............................En-
Clock and Timer
...................... En-
Miscellaneous
.......................... En-
2
14
18
20
29
33
45
53
E
n
Advertisement
Table of Contents

Related Manuals for Onkyo CBX-500


Summary of Contents for Onkyo CBX-500
-
Page 1: Table Of Contents
....En- Playing Your iPod ....En- Listening to the Radio ..En- Thank you for purchasing an Onkyo CD Tuner Audio System. Please read this manual thoroughly before making any connections and plugging it in. Clock and Timer ...... En-... -
Page 2: Important Safety Instructions
WARNING: WARNING AVIS RISK OF ELECTRIC SHOCK RISQUE DE CHOC ELECTRIQUE TO REDUCE THE RISK OF FIRE OR ELECTRIC DO NOT OPEN NE PAS OUVRIR SHOCK, DO NOT EXPOSE THIS APPARATUS The lightning flash with arrowhead symbol, within an TO RAIN OR MOISTURE. equilateral triangle, is intended to alert the user to the presence of uninsulated “dangerous voltage”... -
Page 3: Precautions
If water or any other liquid gets This unit contains a semiconductor laser system and is inside this unit, have it checked by your Onkyo classified as a “CLASS 1 LASER PRODUCT”. So, to dealer. -
Page 4: Declaration Of Conformity
• Consult the dealer or an experienced radio/TV tech- 82194 GROEBENZELL, GERMANY nician for help. declare in own responsibility, that the ONKYO product described in this instruction manual is in compliance with the corresponding technical standards such as EN60065, For Canadian Models EN55013, EN55020 and EN61000-3-2, -3-3. -
Page 5: Supplied Accessories
• FM/AM tuner (no AM on CBX-600UKD) AM loop antenna (CBX-500 only) • DAB tuner (CBX-600UKD only) • 40 FM/AM presets (CBX-500), 30 DAB/30 FM pre- sets (CBX-600UKD) • Preset naming (FM and AM only) • RDS (Radio Data System) (CBX-500 European... - Page 6 Supplied Accessories........5 Presetting FM Stations Automatically (Auto Preset)............37 Features .............. 5 Presetting FM/AM/DAB Stations Manually ..38 Getting to Know the CBX-500/CBX-600UKD..7 Selecting Preset Stations ......... 40 Top and Front Panels ..........7 Receiving RDS (CBX-500 European model and Display...............8 CBX-600UKD).............
-
Page 7: Getting To Know The Cbx-500/Cbx-600Ukd
Display buttons (21, 29, 40) Remote control sensor (11) Stop [ ] button (20) USB port (CBX-500 European model only) CD Play/Pause [/] button (20) (20) CBX-500 European model: USB Play/Pause [/] button (20) CBX-500 North American and CBX-600UKD... -
Page 8: Display
Getting to Know the CBX-500/CBX-600UKD—Continued Display Play and Pause indicators SLEEP indicator USB indicator TIMER indicators (CBX-500 European model only) Tuning indicators MP3 indicator RDS indicator (CBX-500 European model WMA indicator and CBX-600UKD only) FOLDER indicator FILE indicator... -
Page 9: Rear Panel
Getting to Know the CBX-500/CBX-600UKD—Continued Rear Panel • CBX-500 • CBX-600UKD The page numbers in parentheses show where you can find the main explanation for each item. PHONES jack (18) LINE IN jack (16) AM ANTENNA jack (14) FM ANTENNA jack (14, 15) -
Page 10: Remote Controller
REPEAT button (27, 30) MODE button (24, 25, 26, 46) SNOOZE button (51) DIMMER button (19) INPUT SELECTOR buttons (USB button: CBX-500 European model only.) MUTING button (19) VOLUME []/[] buttons (18, 22) S.BASS button (19) PLAYLIST/FOLDER []/[] buttons (24, 24, 30, 42) - Page 11 Getting to Know the CBX-500/CBX-600UKD—Continued Installing the Batteries Aiming the Remote Controller When using the remote controller, point it toward the CBX-500/CBX-600UKD’s remote control sensor, as shown below. Remote control CBX-500/ sensor CBX-600UKD 30° Notes: 30° • If the remote controller doesn’t work reliably, try replacing the batteries.
-
Page 12: Disc Notes
• Variable bitrates (VBR) between 32kbps and 320kbps are supported. The time information during VBR playback may not display correctly. Playback of WMA Discs * The CBX-500/CBX-600UKD supports CD-R and CD-RW ® • WMA stands for “Windows Media Audio”, an audio discs. - Page 13 Precautions for Inkjet Printable Discs Do not leave a CD-R/CR-RW having a label printed with an inkjet printer in the CBX-500/CBX-600UKD for a long time. The disc could get stuck in the CBX-500/ CBX-600UKD, or could damage the CBX-500/ CBX-600UKD.
-
Page 14: Connecting Antennas
Insert the plug fully into the jack. Once the CBX-500 is ready for use, you’ll need to tune into an FM radio station and adjust the posi- ■ Adjusting the AM Loop Antenna tion of the FM antenna to achieve the best possible Adjust the location and posi- reception. - Page 15 FM antenna, try a commercially available out- door FM antenna instead. DAB/FM ANTENA jack The adapter is not supplied with the CBX-500. You’ll need to purchase an adapter compati- Plug the DAB/FM antenna into the DAB/FM ble with the CBX-500’s FM antenna jack.
-
Page 16: Connecting A Portable Audio Device
• If you connect a portable audio device’s headphone output to the CBX-500/CBX-600UKD’s LINE IN jack, turn down the volume on the portable audio device before you connect it. • If the CBX-500/CBX-600UKD seems quiet even with the volume turned up, try increasing the volume on the portable audio device. -
Page 17: Connections
If this is a problem, plug the CBX-500/CBX-600UKD into a different branch circuit. • Do not use a power cord other than the one supplied with the CBX-500/CBX-600UKD. The supplied power cord is designed exclusively for use with the CBX-500/CBX-600UKD and should not be used with any other equipment. -
Page 18: Basic Operation
Press the [ON/STANDBY] button again to set the CBX-500/CBX-600UKD to Standby. The STANDBY *1. DAB can be selected only on the CBX-600UKD. *2. USB can be selected only on the CBX-500 European model. indicator lights up. Using Headphones Adjusting the Volume... -
Page 19: Muting The Cbx-500/Cbx-600Ukd
Normal Dimmer Tips: While the CBX-500/CBX-600UKD is muted: • Press the VOLUME []/[] buttons on the CBX-500/ CBX-600UKD or pressing the VOLUME []/[] buttons on the remote controller will unmute the CBX-500/CBX-600UKD. • If you turn the CBX-500/CBX-600UKD off, the next time you turn it on, the CBX-500/CBX-600UKD will be unmuted. -
Page 20: Playing Cds And Usb Flash Drives
CD door and eject a CD while it’s iPod playback. When your iPod is connected via USB, on Standby. it will not be charged when the CBX-500 is on Standby. • To eject the CD while the CBX-500/CBX-600UKD is on Standby, open the CD door, and push the CD door •... - Page 21 Playing CDs and USB Flash Drives* —Continued ■ Information Displayed When Playback is Selecting Tracks Stopped: To return to the beginning of the track currently playing, • Audio CD press the Previous [/] “DISC TOTAL” lights up. button. Press the Previous [/] button repeatedly to select earlier tracks.
-
Page 22: Using The Remote Controller
Press to stop playback Press to start playback Press to select tracks Pressing this button while the CBX-500/ CBX-600UKD is on Standby will turn on • Press the Previous [] button to locate the beginning of the currently the CBX-500/CBX-600UKD and start playing or paused track. -
Page 23: Displaying Cd Information
Playing CDs and USB Flash Drives* —Continued Displaying CD Information During playback or while playback is paused, press the remote controller’s [DISPLAY] button repeatedly to display the following CD information. Remote controller No indicator. The elapsed time is normally displayed. “REMAIN”... -
Page 24: Selecting Mp3/Wma Files
You can select any folder that contains MP3/WMA cally, with folders containing files and subfolders, as files. shown below. On the CBX-500/CBX-600UKD, all fold- To play the first file in the selected folder, go to ers appear at the same level, making it easy to select fold- Step 3. -
Page 25: Playing The Mp3/Wma Files In Only One Folder
• If there is no data, “Unknown Title,” “Unknown Art- ist,” or “Unknown Album” will be displayed. • You can also use the CBX-500/CBX-600UKD’s [DISPLAY] button to display this information. • To display the disc name, press the [DISPLAY] button while playback is stopped. -
Page 26: Memory Playback
To start memory playback, press the Play/ Pause [/] button. MENU ENTER Track currently playing On the CBX-500/CBX-600UKD, press the Play/ MODE Pause [/] button to start memory playback. ■ Selecting Other Tracks During Memory Playback To select other playlist tracks during memory playback, use the Previous and Next []/[] buttons. -
Page 27: Random Playback
Playing CDs and USB Flash Drives* —Continued Random Playback Repeat Playback With random playback, all of the tracks on the disc are With repeat playback, you can play an entire CD repeat- played in random order. edly, play one track repeatedly, or combine it with mem- ory playback to play the playlist repeatedly, or random playback to play all of the tracks on the disc in random order repeatedly. -
Page 28: Setting Mp3/Wma Preferences
—Continued Playing CDs and USB Flash Drives* Preferences Setting MP3/WMA Preferences Below, the name of each preference is followed by its With the MP3/WMA preferences, you can change the options in parentheses, with the default option in bold. way MP3/WMA file information is displayed and the way MP3/WMA CDs or USB flash drives are played. -
Page 29: Playing Your Ipod
To return to the beginning of Notes: the track that’s currently play- • Before using your iPod with the CBX-500/ ing or paused, press the Previ- CBX-600UKD, be sure to update your iPod with the ous [/]button. latest software, available from the Apple Web site. -
Page 30: Using The Remote Controller
• Operation using the remote controller is explained below. Using the Remote Controller Displaying music file information Select the iPod as the source Start or pause playback Pressing this button while the CBX-500/ CBX-600UKD is on Standby will turn on the CBX-500/CBX-600UKD and start playback. Pause playback... -
Page 31: Navigating The Ipod Menus With The Remote Controller
Note: • The volume level is adjusted by using the VOLUME Elapsed time: The length of time that []/[] buttons on the CBX-500/CBX-600UKD or its the current music file has been playing. remote controller. Adjusting the volume on your iPod has no effect. -
Page 32: Ipod Preferences
Playing Your iPod Settings iPod Preferences Charging? The iPod preferences determine how the CBX-500/ This preference determines how your iPod is charged CBX-600UKD works with your iPod. when it’s inserted in the CBX-500/CBX-600UKD’s iPod dock and the CBX-500/CBX-600UKD is on Standby. -
Page 33: Listening To The Radio
Listening to the Radio Tuning into FM/AM Radio Stations Note: • Only the CBX-500 supports AM. TUNER SNOOZE TUNING INPUT MODE When tuned to a station, the Tuned indicator Press the [TUNER] button, or the [INPUT] appears. When receiving a stereo FM signal, the FM ST button on the top panel, repeatedly to select indicator appears as well. -
Page 34: Listening To Dab Digital Radio (Cbx-600Ukd Only)
—Continued Listening to the Radio Listening to DAB Digital Radio (CBX-600UKD only) TUNER SNOOZE MENU INPUT ENTER Using the Auto Scan Function Manually Press the [TUNER] button repeatedly to select If a new DAB station is introduced, or you move to a new “DAB”. - Page 35 Listening to the Radio —Continued Selecting DAB Stations If you select a station that cannot be received prop- erly, “NotAvailable” is displayed. DISPLAY Displaying DAB Radio Information Press the remote controller’s [DISPLAY] button repeatedly to display more information about the selected DAB station.
- Page 36 —Continued Listening to the Radio 7. Sensitivity Use the Fast Reverse and Fast Forward []/[] buttons to select other multiplexes (Band III: 5A–13F). Display the sensitivity of reception. Keep 100% for good reception. Multiplex Number G (Good) or B (Bad) ■...
-
Page 37: Presetting Fm Stations Automatically (Auto Preset)
Listening to the Radio —Continued Presetting FM Stations Automatically (Auto Preset) With the Auto Preset function, you can automatically preset all of the FM radio stations available in your area in one go. Presets make it easy to select your favorite stations and eliminate the need to tune the radio manually each time you want to change stations. -
Page 38: Presetting Fm/Am/Dab Stations Manually
Listening to the Radio Presetting FM/AM/DAB Stations Manually Notes: • Only the CBX-500 supports AM. • Only the CBX-600UKD supports DAB. With the Preset Write function, you can manually preset individual FM and AM radio stations. Presets make it easy to select your favorite stations and eliminate the need to tune the radio manually each time you want to change stations. - Page 39 Repeat steps 1 to 5 to preset more radio sta- tions. Note: (CBX-500 European model and CBX-600UKD) • If the current FM station supports RDS and PS (Pro- gram Service Name), the station’s name will be dis- played instead of the frequency. (See page 41 for more on RDS.)
-
Page 40: Selecting Preset Stations
Tip: • If you press the remote controller’s [TUNER] button Use the Previous/Next []/[] buttons while the CBX-500/CBX-600UKD is on Standby, it to select a preset. will turn on automatically and the station that you lis- Press the Previous [] button to select the previ- tened to last time will be heard. -
Page 41: Receiving Rds (Cbx-500 European Model And Cbx-600Ukd)
Listening to the Radio —Continued Receiving RDS (CBX-500 European model and CBX-600UKD) RDS is only available on the unit, only in areas where Remote controller RDS broadcasts are available. What is RDS? RDS stands for Radio Data System and is a method of transmitting data in FM radio signals. -
Page 42: Naming Presets (Fm/Am Only)
Listening to the Radio —Continued • Selecting letters: Naming Presets (FM/AM only) Press the Up/Down []/[] buttons repeatedly to select the available letters. You can name presets for easy identification. The preset name may contain up to eight characters. Character Available characters group ABCDEFGHIJKLMNOPQRSTU... -
Page 43: Copying Presets (Fm/Am Only)
Listening to the Radio —Continued Copying Presets (FM/AM only) To copy the preset, press [ENTER]. If no station has yet been stored in the destination With the Preset Copy function, you can organize your preset, the station is copied and “Complete” presets in the order you want. -
Page 44: Erasing A Preset's Name (Fm/Am Only)
Press the [MENU] button, and then use the You can also use the [DISPLAY] button on the top panel Up/Down []/[] buttons to select of the CBX-500 (except European model) or “NameErase?”. CBX-600UKD to display this information. Frequency FM/AM To erase the preset’s name, press the... -
Page 45: Setting The Clock
ENTER Press [ENTER]. • CBX-500 North American model If you have a CBX-500 North American model, use the following procedure to set the clock. If you have a CBX-500 European model or CBX-600UKD, the clock • CBX-500 European model and CBX-600UKD... -
Page 46: Accuclock With A Specific Station (Cbx-500 European Model And Cbx-600Ukd)
To cancel the time display, press the [DISPLAY] button again. Press [ENTER]. If the CBX-500/CBX-600UKD is on Standby, pressing the [DISPLAY] button will display the day and time for 8 seconds. The frequency of a station that the unit has previ- AccuClock with a Specific Station ously searched for may appear on the display. -
Page 47: Using The Timers
The CBX-500/CBX-600UKD has five timers: four pro- Timer Indicators grammable timers for automated playback, and a sleep When a timer has been set, the timer for turning the CBX-500/CBX-600UKD off after a TIMER indicator TIMER indicator and the number specified period. -
Page 48: Programming The Timers
• If you don’t operate any buttons for 60 seconds while FM, AM, USB, LINE, CD, or iPod programming a timer, the procedure will be cancelled • CBX-500 North American model and the previous display will reappear. FM, AM, LINE, CD, or iPod •... - Page 49 Use the Up/Down []/[] buttons again to Notes: select the last day, and then press [ENTER]. • Be sure to set the CBX-500/CBX-600UKD to Standby, otherwise the timed operation will not work. • While a timed operation is in progress, you can cancel it by pressing the [TIMER] or [SLEEP] button.
-
Page 50: Turning Timers On And Off
—Continued Using the Timers Turning Timers On and Off Checking Timer Settings Once a timer has been programmed, you can turn it on or Press the [TIMER] button repeatedly to off as necessary. For example, while you’re on holiday, select timer 1, 2, 3, or 4, and then press you may want to turn off the timer you use as an early- [ENTER]. -
Page 51: Using The Snooze Function
SNOOZE ON/STANDBY function is used. TIMER Notes: • If you press a [SNOOZE] button while the CBX-500/ CBX-600UKD is snoozing, the snooze period will start again. • To cancel snooze while the CBX-500/CBX-600UKD is snoozing, press the [ON/STANDBY] button. The timer will be turned off and the CBX-500/ CBX-600UKD will go on Standby. -
Page 52: Using The Sleep Timer
—Continued Using the Timers Using the Sleep Timer With the sleep timer, you can set the CBX-500/ CBX-600UKD so that it automatically turns off after a specified period. SLEEP Press the [SLEEP] button repeatedly to select the required sleep time. -
Page 53: Troubleshooting
• Unplug the power cord from the wall outlet, wait 5 seconds or more, then plug it in again. The CBX-500/CBX-600UKD turns off unexpectedly. • If the sleep timer has been set and the SLEEP indicator is shown on the display, the CBX-500/CBX-600UKD will turn off automatically after a specified period (see page 52). - Page 54 (see page 29). • Make sure the CBX-500/CBX-600UKD is turned on, the input source is set to iPod, and the volume is not set too low. • Make sure that your iPod is compatible with the system (see page 5).
- Page 55 • Make sure that the USB indicator on the display is on. If it’s not, make sure that the USB flash drive is compatible and plugged in correctly (see pages 20 and 21). • The CBX-500 (European model only) supports USB flash drives only. Note, however, that playback may not be possible with some USB flash drives.
- Page 56 The timers don’t work. • Make sure the clock has been set correctly (see page 45). • Timed operation will fail if the CBX-500/CBX-600UKD is on at the specified On time, so make sure it’s set to Standby (see page 49).
-
Page 57: Specifications
+10 dB, –10 dB, 10 kHz (TREBLE) Weight 4.9 kg (10.8 lbs.) +5 dB/+8 dB/+16 dB, 80 Hz (S.BASS 1/2/3) CBX-500 European model and CBX-600UKD: Signal to noise ratio 70 dB (LINE, IHF-A) Power supply AC 230 V, 50/60 Hz... - Page 58 Memo...
- Page 59 Memo...
- Page 60 Unit 1&12, 9/F, Ever Gain Plaza Tower 1, 88, Container Port Road, Kwai Chung, N.T., Hong Kong Tel: 852-2429-3118 Fax: 852-2428-9039 http://www.ch.onkyo.com/ I1007-1 SN 29400180 (C) Copyright 2010 ONKYO CORPORATION Japan. All rights reserved. * 2 9 4 0 0 1 8 0 *...
Need help?
Do you have a question about the CBX-500 and is the answer not in the manual?
Questions and answers