Table of Contents
Advertisement
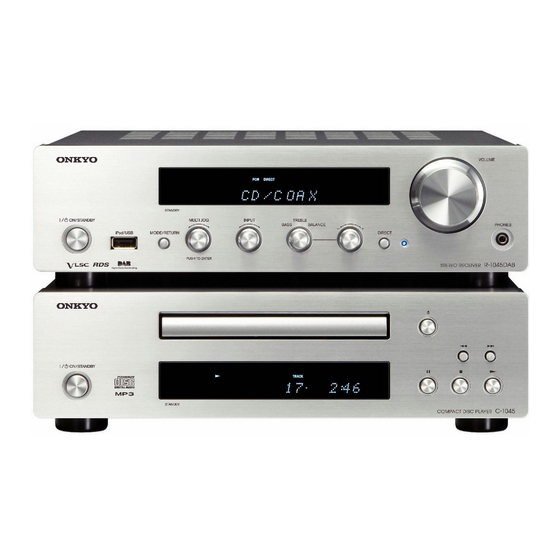
CD Mini HiFi Components
PHA-1045
R-1045 (Stereo Receiver)
C-1045 (CD Player)
PHA-1045DAB
R-1045DAB (Stereo Receiver)
C-1045 (CD Player)
Instruction Manual
Thank you for purchasing an Onkyo R-1045 Stereo
Receiver and C-1045 CD Player.
Please read this manual thoroughly before making
connections and plugging in the unit.
Following the instructions in this manual will enable
you to obtain optimum performance and listening
enjoyment from your new R-1045/C-1045.
Please retain this manual for future reference.
Contents
Getting Started
Connections
Basic Operations
Disc Playback
iPod/iPhone Playback
USB Playback
Listening to the Radio
Clock and Timer
Miscellaneous
How to reset to factory default?
Troubleshooting
Specifications
2
16
25
27
38
40
43
55
62
62
62
67
E
n
Advertisement
Table of Contents

Related Manuals for Onkyo PHA-1045


Summary of Contents for Onkyo PHA-1045
-
Page 1: Instruction Manual
C-1045 (CD Player) USB Playback Instruction Manual Listening to the Radio Clock and Timer Thank you for purchasing an Onkyo R-1045 Stereo Miscellaneous Receiver and C-1045 CD Player. Please read this manual thoroughly before making How to reset to factory default? connections and plugging in the unit. -
Page 2: Important Safety Instructions
WARNING: WARNING AVIS RISK OF ELECTRIC SHOCK RISQUE DE CHOC ELECTRIQUE TO REDUCE THE RISK OF FIRE OR ELECTRIC DO NOT OPEN NE PAS OUVRIR SHOCK, DO NOT EXPOSE THIS APPARATUS TO The lightning flash with arrowhead symbol, within an RAIN OR MOISTURE. -
Page 3: Precautions
If water or any other liquid gets inside this unit, have it checked by your Onkyo dealer. If condensation does occur, remove all discs and leave this Preventing Hearing Loss unit turned on for two to three hours. - Page 4 We, ONKYO EUROPE ELECTRONICS GmbH LIEGNITZERSTRASSE 6, 82194 GROEBENZELL, GERMANY declare in own responsibility, that the ONKYO product described in this instruction manual is in compliance with the corresponding technical standards such as EN60065, EN55013, EN55020 and EN61000-3-2, -3-3. GROEBENZELL,...
-
Page 5: Features
USB Interface *1 VLSC and the VLSC logo are registered trade- * About FAT marks of Onkyo Corporation. • Supports FAT16 and 32. *2 iPhone, iPod, iPod classic, iPod nano, and iPod • Supports up to 499 files per folder. -
Page 6: Supplied Accessories
Supplied Accessories Make sure you have the following accessories: Remote controller and two batteries (R03/AAA) The battery is not supplied with products for China. Indoor FM antenna AM loop antenna DAB antenna (R-1045DAB) Coaxial digital audio cable (1 m) cable (80 cm) •... -
Page 7: Table Of Contents
Contents Getting Started Disc Playback Important Safety Instructions........2 Disc Playback ............27 Precautions ............3 Using the Remote Controller......28 Displaying CD Information ......28 Features ..............5 Selecting Files (MP3/WMA CDs) ....29 Supplied Accessories ..........6 Selection a Folder during Playback (Search Before Using the Stereo Receiver ...... -
Page 8: Before Using The Stereo Receiver
Before Using the Stereo Receiver Installing the Batteries Using the Remote Controller When you operate the remote controller, point it at the stereo receiver’s remote control sensor, as shown To open the battery compartment, below. press the small hollow and slide open the cover. -
Page 9: Getting To Know The Stereo Receiver And Cd Player
Getting to Know the Stereo Receiver and CD Player Names of Each Part (Stereo Receiver) Front Panel STANDBY LED MULTI JOG DISPLAY INPUT VOLUME BASS/TREBLE/BALANCE ON/STANDBY iPod/USB DIRECT MODE/RETURN DIRECT LED PHONES Rear Panel AM ANTENNA PHONO IN DAB ANTENNA LINE1 IN R-1045DAB only LINE2 OUT... -
Page 10: Names Of Each Part (Cd Player)
Getting to Know the Stereo Receiver and CD Player—Continued Names of Each Part (CD Player) Front Panel ON/STANDBY Display Disc tray Pause [ ] button Open/Close[ ] button Stop [ ] button ] buttons Play [ ] button STANDBY LED Rear Panel ANALOG AUDIO OUTPUT REMOTE CONTROL... - Page 11 Getting to Know the Stereo Receiver and CD Player—Continued Display R-1045/1045DAB REPEAT SLEEP indicator REPEAT 1 Play [ ] and pause [ ] indicators TIMER indicators USB indicator TIMER File format indicators 1, 2, 3, 4 Tuning indicators AUTO FOLDER indicator FM ST DIRECT indicator DAB (R-1045DAB only)
-
Page 12: Remote Controller
Getting to Know the Stereo Receiver and CD Player—Continued Remote Controller... - Page 13 Getting to Know the Stereo Receiver and CD Player—Continued ON/STANDBY Used to set the stereo receiver to On or Standby. Used to rewind or fast forward CD, USB play back and adjust the radio tuning. SLEEP VOLUME Used to set and release the setting and display the status of sleep timer.
-
Page 14: Disc Notes
Disc Notes Precautions for Playback Notes Compact discs (CDs) with the following logo on the • A disc recorded with a recorder or personal label surface can be used. computer may not play in some cases. (Cause: Disc’s Do not use discs designed for purposes other than characteristics, damaged or dirty disc, dirt on audio, such as CD-ROMs for PC use. - Page 15 Disc Notes—Continued Handling Discs Hold discs by the edge, or by the center hold and edge. Avoid touching the playback surface (surface with nothing printed on it). Label surface (printed surface) Playback surface Do not attach paper or stickers, or write on the playback or label surface of the disc.
-
Page 16: Connections
Connecting the CD Player C-1045 Connections • Don’t connect the power cord until you’ve • To prevent interference, keep audio cables away completed and double-checked all connections. from power cords and speaker cables. • Use the coaxial cable included in the package. Analog audio Left (white) The analog audio cable can be used instead. -
Page 17: Connecting Antennas
Connecting Antennas Connecting the AM Loop Antenna This section explains how to connect the supplied indoor FM antenna and AM loop antenna, and how to connect commercially available outdoor FM and AM The supplied indoor AM loop antenna is for indoor use antennas. -
Page 18: Connecting An Outdoor Fm Antenna
Connecting Antennas—Continued Connecting an Outdoor FM Antenna Outdoor AM antennas work best when installed horizontally outside, but good results can sometimes be obtained indoors by mounting horizontally above a If you cannot achieve good reception with the supplied window. Note that the AM loop antenna should be left indoor FM antenna, try a commercially available connected. -
Page 19: Connecting Speakers
Connecting Speakers Connecting Your Speakers • Connect the right speaker to the stereo receiver’s right (R) SPEAKERS terminals. Connect the left speaker to the left (L) SPEAKERS terminals. • Connect the positive (+) terminal on each speaker to the corresponding positive (+) terminal on the stereo receiver. Connect the negative (–) terminal on each speaker to the corresponding negative (–) terminal on the stereo receiver. -
Page 20: Connecting Other Components
Connecting Other Components About Connections Cables and Jacks No connecting cables are included with the stereo receiver. Cable Jack Description This cable carries analog audio. Analog audio cable This cable carries digital audio. Optical digital audio OPTICAL cable This cable carries digital audio. COAXIAL COAXIAL digital audio cable... -
Page 21: Connecting A Digital Playback Component
Connecting Other Components—Continued Connecting a Digital Playback Component Notes • The unit supports 16/24 bit, 32/44.1/48/96 kHz PCM signal digital input. • Inputting an incompatible signal may result in noise. • Do not input a DTS-CD digital audio signal. (not supplied) Optical IN Coaxial IN Caution... -
Page 22: Connecting The Power Cord
Connecting the Power Cord Plug the power cord into a suitable wall outlet. The STANDBY LED lights up. To wall outlet Power cord (The figure varies from country to country.) To wall outlet Notes • Before connecting the power cord, connect all of your speakers and other components. •... -
Page 23: First Time Setup
First Time Setup Setting the Clock with the AccuClock Function RDS is only for the area where RDS broadcasts are available. To use the AccuClock function, the stereo receiver must be able to receive RDS radio stations, which means an FM antenna must be connected. -
Page 24: Setting Apd (Auto Power Down)
First Time Setup—Continued Setting APD (Auto Power Down) This section explains how to set APD (Auto Power Down) function to set the R-1045/R1045DAB and C-1045. „ R-1045/R-1045DAB „ C-1045 It is basically activated when no sound or control is For CD playback, it is activated when the playback is output from/to the receiver for 30 minutes stopped for 30 minutes;... -
Page 25: Basic Operations
Basic Operations STANDBY LED VOLUME ON/STANDBY INPUT PHONES Turning On the Stereo Receiver Adjusting the Volume Stereo Remote Stereo receiver Remote receiver controller controller To turn on the stereo receiver, press the [ON/ Turn the [VOLUME] control clockwise to increase the STANDBY] button on the stereo receiver or the remote volume or counterclockwise to decrease it. -
Page 26: Using Headphones
Basic Operations—Continued Using Headphones Turn down the volume, then connect your stereo headphones to the [PHONES] minijack. You can adjust the volume and mute the sound, by using the [VOLUME] control. The speakers output no sound while the headphones are connected. PHONES jack BASS/TREBLE/BALANCE DIRECT... -
Page 27: Disc Playback
Disc Playback Disc tray To Select Tracks Press the [ ] button to select the next track or the Press the Open/Close [ ] button to ] button to select the previous track. open the disc tray. • If you press the [ ] button during playback or Place the CD on the tray with the while playback is paused, the beginning of the... -
Page 28: Using The Remote Controller
Disc Playback—Continued Using the Remote Controller DISPLAY button Press to display more CD information Pause [ ] button ] buttons Selects the last or next track Play [ ] button Stop [ ] button ] buttons During playback, fast forwards or fast reverses the track. -
Page 29: Selecting Files (Mp3/Wma Cds)
Disc Playback—Continued During playback or while playback is Selecting Files (MP3/WMA CDs) paused For MP3/WMA CDs, files (MP3/WMA files) may be Elapsed file time: organized in a hierarchically, with folders containing The length of time that the current file files and subfolders, as shown below. has been playing (default display). - Page 30 Disc Playback—Continued Selecting Files in Navigation Mode Selecting Files in All Folder Mode In Navigation mode, you can select files by navigating In All Folder mode, you don’t have to navigate the through the folder hierarchy. This mode can only be folder hierarchy because all folders that contain files used while playback is stopped.
-
Page 31: Selection A Folder During Playback (Search Mode)
Disc Playback—Continued Selecting a Folder during Playback Press the [ ] button. (Search Mode) The first file name inside the folder appears. Use the [ ] buttons to select the This section explains how to select MP3/WMA folders files within the folder. CD (MP3/WMA) : 1, 2, 5 : 1, 2, 3, 4, 5 •... -
Page 32: Displaying Mp3/Wma Information
Disc Playback—Continued Displaying MP3/WMA Information Notes • To display the disc name, press the [DISPLAY] You can display various information about the MP3/ button while playback is stopped. WMA file currently playing, including ID3 tags such • If a file or folder name contains any characters that as title name, artist name, and album name. -
Page 33: Various Playback Modes
Various Playback Modes Memory Playback (For Audio CDs) You can select the following playback modes: • Random playback • Memory playback In memory playback, you can create a playlist of up to • Repeat playback 25 files. Random Playback DISPLAY In random playback, all of the files on the disc are played in random order. -
Page 34: Memory Playback (For Mp3/Wma Cds)
Various Playback Modes—Continued Memory Playback (For MP3/WMA Notes CDs) • If the total playing time is more than 99 minutes and 59 seconds, “– –:– –” Memory playback can be set only when the playback is appears. stopped. • You can add up to 25 files to the playlist. To Change the Display If you try to add more, the message While the memory setting operations, press the... -
Page 35: Repeat Playback
Various Playback Modes—Continued Repeat Playback Press the Play [ ] button. Memory playback starts. In repeat playback, you can play an entire CD repeatedly, play one track repeatedly, or combine it with memory playback to play the playlist repeatedly, Memory Playback in All Folder Mode or random playback to play all of the tracks on the disc in random order repeatedly. -
Page 36: Setting For Mp3/Wma
Setting for MP3/WMA Setting MP3/WMA Preferences In Navigation mode (see page 30), the file name scrolls across the display regardless of this setting. FOLDER NAME (Scroll/Not) With the MP3/WMA preferences, you can change the This preference determines whether or not the folder way MP3/WMA file information is displayed and the name scrolls across the display when an MP3/WMA way MP3/WMA CDs are played. - Page 37 Setting for MP3/WMA—Continued The following table shows a few examples of numbered file and folder names and how they will appear with the DISABLE and ENABLE options. File/folder name DISABLE ENABLE 01 POPS 01 POPS POPS 10-ROCK 10-ROCK ROCK 16_JAZZ 16_JAZZ JAZZ 21TH CENTURY...
-
Page 38: Ipod/Iphone Playback
iPod / iPhone Playback Before using your iPod/iPhone with the stereo receiver, be sure to update your iPod/iPhone with the latest software, available from the Apple Web site. If you leave your iPod/iPhone paused when using it on its own, eventually it will go into hibernation. If you connect it to the USB port in this state, you’ll need to wait a few moments before your iPod/iPhone is ready for use. -
Page 39: Playing Ipod/Iphone
/ iPhone Playback—Continued Playing iPod/iPhone Notes • During playback on the iPod nano or iPod (5th generation), “ONKYO” is displayed on the iPod Connect your iPod/iPhone to the display and the quick wheel cannot work. USB connector on the front panel of When the playback stops, the “ONKYO”... -
Page 40: Usb Playback
USB Playback This section explains how to play music files on a USB Flash device. Connect a USB Flash device as shown below. DISPLAY iPod/USB iPod/USB Notes Insert USB Flash device. When all music files of a USB Flash device have been played, playback will repeat from the top music file in the folder organization. -
Page 41: Random Playback
USB Playback—Continued Random Playback Select the type of Repeat Playback With random playback, all of the music files on the When playing back USB Flash device music files, all USB Flash device are played in random order. files on the USB Flash device will be played according to repeat playback (the REPEAT indicator is already appears). -
Page 42: Displaying Mp3/Wma/Aac Information
USB Playback—Continued Displaying MP3/WMA/AAC Elapsed time: The length of time that the current Information MP3, WMA or AAC file has been playing (default display). If the elapsed You can display various information about the MP3/ time is more than 99 minutes and 59 WMA/AAC files currently playing, including ID3 tags seconds, “–... -
Page 43: Listening To The Radio
Listening to the Radio Tuning into FM/AM Radio Stations Press the [TUNER] button repeatedly to select “FM” or “AM”. Press the [MODE/YES] button TUNER repeatedly to select “Auto” or “Manual”. • Auto Tuning Mode The AUTO indicator appears and stereo radio reception is possible. -
Page 44: Displaying Radio Information
Listening to the Radio—Continued Displaying Radio Information DISPLAY Press the remote controller’s [DISPLAY] button repeatedly to display more radio information. Frequency FM/AM/DAB *1 R-1045DAB only *2 If the selected preset has no name, “No Name” appears briefly and then the frequency is displayed. Preset name See “Naming Presets”... -
Page 45: Listening To Dab Digital Radio (R-1045Dab Only)
Listening to the Radio—Continued Listening to DAB Digital Radio (R-1045DAB only) Selecting DAB for the Very First Time The very first time you select DAB, the Auto Tuning MENU/NO function automatically scans the DAB Band III for the multiplexes (i.e., stations) available in your area. MODE/YES Once the scanning process is complete, the first station that was detected is selected. - Page 46 Listening to the Radio—Continued Selecting DAB Stations • Once a DAB station has been preset, these front panel controls will select presets, in Preset mode. To use them to select DAB stations, select DAB as the DISPLAY input source, and then press the Stop [ ] button for 3 seconds until “Station Mode”...
- Page 47 Listening to the Radio—Continued DAB Setup „ DRC Setting? With the DRC (Dynamic Range Control) setting, you can reduce the dynamic range of DAB digital radio so MODE/YES that you can still hear quiet parts even when listening at low volume levels—ideal for listening to the radio late at night when you don’t want to disturb anyone.
-
Page 48: Presetting Fm/Am Stations Automatically (Auto Preset)
Listening to the Radio—Continued Presetting FM/AM Stations Automatically (Auto Preset) With the Auto Preset function, you can automatically preset all of the FM or AM radio stations available in your area in one go. Presets make it easy to select your favorite stations and eliminate the need to tune the radio manually each time you want to change stations. -
Page 49: Presetting Fm/Am/Dab Stations Manually (Dab Is Only Available In R-1045Dab)
Listening to the Radio—Continued Presetting FM/AM/DAB Stations Manually (DAB is only available in R-1045DAB) With the Preset Write function, you can manually preset individual FM, AM and DAB radio stations. Presets make it easy to select your favorite stations and eliminate the need to tune the radio manually each time you want to change stations. -
Page 50: Selecting Preset Stations
Listening to the Radio—Continued After Storing Presets You Can: • Select them (see page 50) • Name them for easy identification (see page 51) • Copy them (see page 52) • Erase them (see page 54) Selecting Preset Stations You must store some presets before you can select Use the [TUNER] or [INPUT] knob to them (see pages 48 to 49). -
Page 51: Naming Presets
Listening to the Radio—Continued Naming Presets You can name presets for easy identification. The Press the [DISPLAY] button preset name may contain of up to eight characters. repeatedly to select one of the following character groups: • “A” for uppercase letters. DISPLAY •... -
Page 52: Copying Presets
Listening to the Radio—Continued Copying Presets When you’ve finished entering the name, press the [MODE/YES] button. The preset is named and “Complete” With the Preset Copy function, you can organize your appears on the display. presets in the order you want. When you copy a preset, its name is also copied. -
Page 53: Erasing A Preset's Name
Listening to the Radio—Continued Erasing a Preset’s Name To copy the preset, press [ If no station has yet been stored in the destination preset, the station is copied and “Complete” appears. MENU/NO MODE/YES If a station has already been stored in the destination preset, the message “Overwrite?”... -
Page 54: Erasing Presets
Listening to the Radio—Continued Erasing Presets MENU/NO MODE/YES Select the preset you want to erase (see page 50). Press the [MENU/NO] button, and then use the Previous and Next ] buttons to select “PresetErase?”. Press [ ] or [MODE/YES]. A message requesting confirmation appears. -
Page 55: Setting The Clock
Setting the Clock Setting AccuClock Using a Specific Station RDS is only available in areas where RDS broadcasts are available. The AccuClock function normally uses the FM station with the strongest signal to set the clock. However, if the clock cannot be set properly using that station, you can specify the FM station the which AccuClock function uses. -
Page 56: Setting The Clock Manually
Setting the Clock—Continued Setting the Clock Manually The time can be displayed in either 24- or 12-hour Press [ format. ON/STANDBY CLOCK CALL DISPLAY To cancel the Manual Adjust function at this point, press the [MENU/NO] button. Use the Previous and Next [ ] (1step) or [ ]/[ ] (scan) buttons to set the time. -
Page 57: Using The Timers
Using the Timers Timer Priority The stereo receiver has five timers: four programmable timers for automated playback or recording, and a If two or more timers are set to the same On time, the sleep timer for turning the stereo receiver off after a lowest numbered timer has priority. -
Page 58: Programming The Timers
Using the Timers—Continued Programming the Timers Notes If you selected “FM”, “AM” or “DAB” (R-1045DAB only), use the Previous • You must set the clock before you can program the and Next [ ] buttons to select timers. the radio preset, and then press [ •... - Page 59 Using the Timers—Continued If you selected “Days Set”, use the TIMER indicator 1, 2, 3, or 4 will stop Previous and Next [ flashing and light up. buttons to select the first day, and TIMER indicator then press [ Number of programmed timer Use the Previous and Next [ Press the [ON/STANDBY] button to ] buttons again to select the last...
-
Page 60: Turning Timers On And Off
Using the Timers—Continued Turning Timers On and Off Checking Timer Settings Once a timer has been programmed, you can turn it on or off as necessary. For example, while you’re on Press the [TIMER] button repeatedly holiday, you may want to turn off the timer you use as to select Timer 1, 2, 3, or 4, and then an earlymorning alarm. -
Page 61: Using The Sleep Timer
Using the Timers—Continued Using the Sleep Timer With the sleep timer, you can set the stereo receiver so that it automatically turns off after a specified period. SLEEP Press the [SLEEP] button repeatedly to select the required sleep time. With the [SLEEP] button, you can set the sleep time from 90 to 10 minutes in 10 minute step. -
Page 62: Troubleshooting
If you have any trouble using the CD Player, look for a solution in this section. If you can’t resolve the issue yourself, try resetting the CD Player before contacting your Onkyo dealer. To reset the CD Player to its factory defaults, turn it on and, while holding down the [ button, press the [ ] button. - Page 63 Troubleshooting—Continued The sound quality is not good. • Make sure the speaker cables are connected with the correct polarity (see page 19). • Make sure all audio connecting plugs are pushed in all the way (see page 16). • The sound quality can be affected by strong magnetic fields, such as that from a TV. Try moving any such devices away from the stereo receiver.
- Page 64 Troubleshooting—Continued CD Player SETUP Can’t find a SETUP menu in need. • If any track has been selected even when the CD Player is stopped, you must place it into the full stop state by pressing the [MENU] button before you can view all the SETUP menus. USB Flash Device Playback Can't access the music files on a USB Flash device.
-
Page 65: External Components
Other • Do not control Cover Flow during playback. Otherwise, the receiver may generate noise. • During playback on the iPod nano or iPod (5th generation), "ONKYO" is displayed on the iPod display and the quick wheel cannot work. External Components No sound is heard from a connected component. - Page 66 • If you press the [SLEEP] or [TIMER] button while a timed operation is in progress, the timer will be cancelled. Onkyo is not responsible for damages (such as CD rental fees) due to unsuccessful recordings caused by the unit’s malfunction.
-
Page 67: Specifications
Specifications R-1045 / R-1045DAB Analog Inputs 3 (LINE) 1 (PHONO) „ Audio Outputs Amplifier Section 1 (LINE) Analog Outputs Subwoofer Pre Outputs Rated Output Power (IEC) 2ch ×70 W at 4 , 1 kHz, 2ch Speaker Outputs SP-L, R Driven 1 (3.5I) Phones THD (Total Harmonic Distortion) - Page 68 Tel: +44-(0)1628-473-350 Fax: +44-(0)1628-401-700 ONKYO CHINA LIMITED Unit 1 & 12, 9/F, Ever Gain Plaza Tower 1, 88, Container Port Road, Kwai Chung, N.T., Hong Kong. Tel: 852-2429-3118 Fax: 852-2428-9039 http://www.ch.onkyo.com/ W1007-1 SN 29400414 (C) Copyright 2010 ONKYO CORPORATION Japan. All rights reserved.
Need help?
Do you have a question about the PHA-1045 and is the answer not in the manual?
Questions and answers