Advertisement
Quick Links
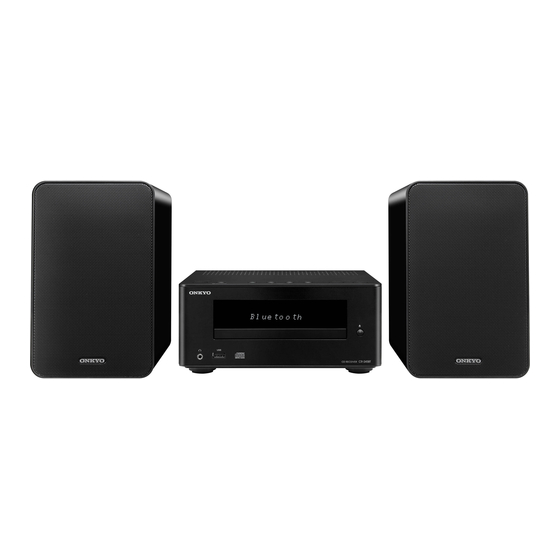
CD Receiver System
CS-355
CD Receiver (CR-245BT)
Speakers (D-T05)
Instruction Manual
Thank you for purchasing an Onkyo CD Receiver System.
Please read this manual thoroughly before making any
connections and plugging it in.
Following the instructions in this manual will enable you to
obtain optimum performance and listening enjoyment from
your new CD Receiver System.
Please retain this manual for future reference.
Manuel d'instructions
Merci d'avoir porté votre choix sur système d'Ampli-tuner CD
de Onkyo. Veuillez lire attentivement ce manuel avant de
connecter l'appareil et de le mettre sous tension.
Observez les instructions données dans ce manuel afin de
pouvoir profiter pleinement de votre nouveau système
d'Ampli-tuner CD.
Conservez ce manuel afin de pouvoir le consulter
ultérieurement.
Manual de instrucciones
Muchas gracias por el sistema Receptor de CDs Onkyo.
Antes de realizar las conexiones y de conectar la
alimentación, lea detenidamente este manual.
Si sigue las instrucciones de este manual, logrará el óptimo
rendimiento y el máximo placer de escucha de su nuevo
sistema de Receptor de CDs.
Guarde este manual para futuras referencias.
English
Français
Getting Started ............................
Premiers pas.................................
Primeros pasos ...........................
Connections ..............................
Branchements ............................
Conexiones ................................
Basic Operations.......................
Fonctionnement de base...........
Funcionamiento básico ............
Playing CDs ...............................
Lecture de CD.............................
Reproducción de CDs...............
Playing Back via Bluetooth ......
Listening to the Radio ..............
Écoute de la radio ......................
Escuchar la radio ......................
Playing a USB Flash Drive........
Lecture d'une clé USB ...............
Clock and Timer ........................
Horloge et minuterie ..................
Reloj y Temporizador ................
Miscellaneous............................
Divers ..........................................
Varios .........................................
Español
2
En-
2
Fr-
2
Es-
13
En-
13
Fr-
13
Es-
17
En-
17
Fr-
17
Es-
19
19
Fr-
19
Es-
22
22
Fr-
22
Es-
23
En-
23
Fr-
23
Es-
24
En-
24
Fr-
24
Es-
26
En-
26
Fr-
26
Es-
26
En-
26
Fr-
26
Es-
29
En-
29
Fr-
29
Es-
E
F
E
n
r
s
Advertisement
Chapters

Subscribe to Our Youtube Channel
Related Manuals for Onkyo CS-355


Summary of Contents for Onkyo CS-355
-
Page 1: Table Of Contents
Playing CDs ....... Lecture de CD......Reproducción de CDs....Instruction Manual Thank you for purchasing an Onkyo CD Receiver System. Playing Your iPod/iPhone/iPad ... Please read this manual thoroughly before making any Lecture d’un iPod/iPhone/iPad ..connections and plugging it in. -
Page 2: Getting Started
WARNING: AVIS WARNING RISK OF ELECTRIC SHOCK RISQUE DE CHOC ELECTRIQUE TO REDUCE THE RISK OF FIRE OR ELECTRIC DO NOT OPEN NE PAS OUVRIR SHOCK, DO NOT EXPOSE THIS APPARATUS The lightning flash with arrowhead symbol, within an TO RAIN OR MOISTURE. equilateral triangle, is intended to alert the user to the presence of uninsulated “dangerous voltage”... -
Page 3: Precautions
“CLASS 1 LASER PRODUCT”. So, to are wet or damp. If water or any other liquid gets use this model properly, read this Instruction Manual inside this unit, have it checked by your Onkyo carefully. In case of any trouble, please contact the store dealer. - Page 4 —Continued Precautions THIS PRODUCT UTILIZES A LASER. USE OF Part 15 of the FCC Rules. These limits are designed to CONTROLS OR ADJUSTMENTS OR provide reasonable protection against harmful PERFORMANCE OF PROCEDURES OTHER THAN interference in a residential installation. THOSE SPECIFIED HEREIN MAY RESULT IN This equipment generates, uses and can radiate radio HAZARDOUS RADIATION EXPOSURE.
- Page 5 —Continued Precautions Before Using Your New Speakers • Place the speakers on sturdy, flat surfaces. Putting them on uneven or unstable surfaces where they may fall and cause damage will affect the sound quality. • Do not keep water or other liquids close to the speakers.
-
Page 6: Package Contents
Package Contents Make sure you have the following items: When using the remote controller, point it toward the CD receiver’s remote control sensor, as shown below. CD Receiver (CR-245BT) CR-245BT Remote controller (RC-854C) Remote control sensor Indoor FM antenna AM loop antenna Power cord (Connector type varies from country to country.) Speakers (D-T05) -
Page 7: Features
• AM/FM tuner owned by Bluetooth SIG, Inc . and any use of such marks by Onkyo is under license. Other trademarks and trade names are • 30 AM/FM Presets those of their respective owners. - Page 8 Contents Getting Started Playing Your iPod/iPhone/iPad Important Safety Instructions........2 Playing Your iPod/iPhone/iPad........22 Precautions..............3 Playing an iPod/iPhone/iPad via USB....22 Package Contents ............. 6 Navigating the iPod Menus with the Remote Using the Included Floor Pads for speakers..6 Controller ............22 Using the Remote Controller .........
-
Page 9: Getting To Know The Cd Receiver
Getting to Know the CD receiver Top and Front Panels Top Panel Front Panel For detailed information, see the pages in parentheses. ON/STANDBY button (17, 23, 27, 28, 29) Headphones [ ] jack (17) Bluetooth PAIRING button (23) USB port (26) INPUT button (17, 23) Display Previous [... -
Page 10: Display
—Continued Getting to Know the CD receiver Display SLEEP indicator TIMER indicators Play and Pause indicators Tuning indicators USB indicator FILE indicator Bluetooth indicators TRACK indicator FOLDER indicator Message area S.BASS indicator DISC, TOTAL, and REMAIN indicators MUTING indicator Playback mode indicators Rear Panel FM ANTENNA jack AM ANTENNA jack... -
Page 11: Remote Controller
—Continued Getting to Know the CD receiver Remote Controller For detailed information, see the pages in parentheses. CLOCK CALL button (26) DIMMER button (18) MUTING button (17) SHUFFLE button (21, 22) TIMER button (26, 27, 28) PLAYLIST [ ]/[ ] buttons (22) Input Selector buttons (17, 22, 24, 25, 26) On/Standby [ ] button (17, 27, 28) Stop [ ] (19, 22),... -
Page 12: Disc (Audio Cd And Mp3) And Usb Flash Drive (Mp3) Notes
Disc (Audio CD and MP3) and USB Flash Drive (MP3) Notes Precautions for Playback Playback from USB Flash Drives Compact discs (CDs) with the following logo on the MP3 files recorded on a USB flash drive can be played label surface can be used. with the CD receiver. -
Page 13: Connections
—Continued Disc (Audio CD and MP3) and USB Flash Drive (MP3) Notes Precautions for Inkjet Printable Discs Caring for Discs Do not leave a CD-R/CR-RW having a label printed with If the disc is dirty, the CD receiver will have a hard time an inkjet printer in the CD receiver for a long time. -
Page 14: Connecting The Antennas
Connecting the Antennas This section explains how to connect the supplied indoor FM antenna and AM loop antenna. The CD receiver won’t pick up any radio signals if no antenna is connected, so you must connect the antenna to use the tuner. -
Page 15: Connecting An Outdoor Fm Antenna
—Continued Connecting the Antennas Connecting an Outdoor FM Antenna If you cannot achieve good reception with the supplied indoor FM antenna, try a commercially available outdoor FM antenna instead. Note: • Outdoor FM antennas work best outside, but usable results can sometimes be obtained when installed in an attic or loft. -
Page 16: Connecting Other Components
Connecting Other Components CD receiver Analog audio cable (RCA) Powered subwoofer To wall outlet (Connector type varies from e.g., country to country.) cassette tape deck About Connections Connecting the Power Cord • Before making any connections, read the manuals Connect the CD receiver’s power cord to a suitable wall supplied with your other components. -
Page 17: Basic Operations
Basic Operations This section describes the procedure for using the Selecting the Input Source remote controller, unless otherwise specified. You can select CD, iPod (USB), FM, AM, Bluetooth, or LINE, which can be an external component. Turning On the CD receiver To select the input source, use the remote controller’s Press the On/Standby [ ] button. -
Page 18: Adjusting The Bass And Treble
—Continued Basic Operations Adjusting the Bass and Treble Press the [BASS] or [TREBLE] button, and then use the [ ]/[ ] buttons to adjust the bass or treble, respectively. The default setting is “0”. You can adjust the bass and treble from –5 to +5. -
Page 19: Playing Cds
Playing CDs Selecting Tracks This section describes the procedure for using the remote controller, unless otherwise specified. To return to the beginning of the track currently playing, press the Previous [ ] button. Playing CDs Press the Previous [ ] button repeatedly to select earlier tracks. -
Page 20: Selecting Mp3 Files
—Continued Playing CDs ■ Pausing Playback Selecting MP3 Files To pause playback, press the Play/Pause [ / ] button. The files on an MP3 CD can be located at the disc’s root To resume playback, press it again. level or within a folder. ■... -
Page 21: Random Playback
—Continued Playing CDs Random Playback Repeat Playback With random playback, all of the tracks on the disc are With repeat playback, you can play an entire CD played in random order. repeatedly or play one track repeatedly. Random playback can also be used in conjunction with Repeat playback can also be used in conjunction with repeat playback. -
Page 22: Playing Your Ipod/Iphone/Ipad
Playing Your iPod/iPhone/iPad Tip: This section describes the procedure for using the • When connecting your iPod/iPhone/iPad with a USB remote controller, unless otherwise specified. cable, we recommend you use an official USB cable • Before using your iPod/iPhone/iPad with the CD from Apple Inc. -
Page 23: Playing Back Via Bluetooth
Tip: enabled device, and then select the • Alternatively, you can use the remote controller’s “Onkyo CR-245BT” as the audio output device. [ /LINE] button. • The CD receiver can store the pairing information of up to 8 Bluetooth devices. If the pairing is done for the... -
Page 24: Listening To The Radio
Listening to the Radio This section describes the procedure for using the Presetting FM Stations Automatically remote controller, unless otherwise specified. (Auto Preset) With the Auto Preset function, you can automatically Tuning into Radio Stations preset all of the FM radio stations available in your area When tuned to a station, the Tuned ( ) indicator in one go. -
Page 25: Presetting Am/Fm Stations Manually
—Continued Listening to the Radio Presetting AM/FM Stations Manually Erasing Presets With the Preset Write function, you can manually preset Select the preset you want to erase. individual AM and FM radio stations. Presets make it easy to select your favorite stations and eliminate the Press and hold down the [CLEAR] button to need to tune the radio manually each time you want to erase the preset. -
Page 26: Playing A Usb Flash Drive
Playing a USB Flash Setting the Clock Drive This section describes the procedure for using the remote controller, unless otherwise specified. This section describes the procedure for using the remote controller, unless otherwise specified. Setting the Clock Press the [iPod] button to select “iPod”. Press the [TIMER] button repeatedly until Alternatively, you can use the CD receiver’s “Clock”... -
Page 27: Using The Timer
Using the Timer This section describes the procedure for using the Use the arrow [ ]/[ ] buttons to select the remote controller, unless otherwise specified. source, and then press [ENTER]. You can select the following sources: The CD receiver has a programmable timer for AM/FM, CD, iPod (USB), LINE. -
Page 28: Turning Timer On And Off
—Continued Using the Timer Note: Turning Timer On and Off • If the timer turns the power on, the “SLEEP” Once a timer has been programmed, you can turn it on or indication will light. If you perform any operation, the off as necessary. -
Page 29: Miscellaneous
If you have any trouble using the CD receiver, look for a solution in this section. If you can’t resolve the issue yourself, try resetting the CD receiver before contacting your Onkyo dealer. To reset the receiver to its factory defaults, turn it on and, while holding down the CD receiver’s Previous [... - Page 30 —Continued Troubleshooting Audio performance. • Audio performance will be at its best about 10 to 30 minutes after the CD receiver has been turned on and had time to warm up. • Using cable ties to bundle audio cables with speaker or power cables may degrade the sound quality, so don’t do it. CD Playback The disc will not play.
- Page 31 —Continued Troubleshooting Bluetooth Bluetooth connection cannot be built. • When building a Bluetooth connection between the CD receiver and your device for the first time, if the connection is fail, you need to power off your device and power on again to clear the device name, and build the connection again (see page 23).
- Page 32 CD receiver enters standby mode. Onkyo is not responsible for damages (such as CD rental fees) due to unsuccessful recordings caused by the unit’s malfunction. Before you record important data, make sure that the material will be recorded correctly.
-
Page 33: Specifications
Specifications Amplifier General Rated output power 15 watts minimum continuous Power supply AC 120 V, 60 Hz All channels: power per channel, 6 ohm loads, Power consumption 30 W 2 channels driven at 1 kHz, with a No-sound power consumption 7.9 W maximum total harmonic (when not charging iPod/iPhone) distortion of 10% (FTC) - Page 34 1301, 555 Tower, No.555 West NanJin Road, Jin an, Shanghai, China 200041, Tel: 86-21-52131366 Fax: 86-21-52130396 http://www.cn.onkyo.com/ Y1207-1 SN 29401312 (C) Copyright 2012 Onkyo Corporation Japan. All rights reserved. * 2 9 4 0 1 3 1 2 *...
Need help?
Do you have a question about the CS-355 and is the answer not in the manual?
Questions and answers