Table of Contents
Advertisement
CBX-100_En.book Page 1 Friday, September 15, 2006 9:34 AM
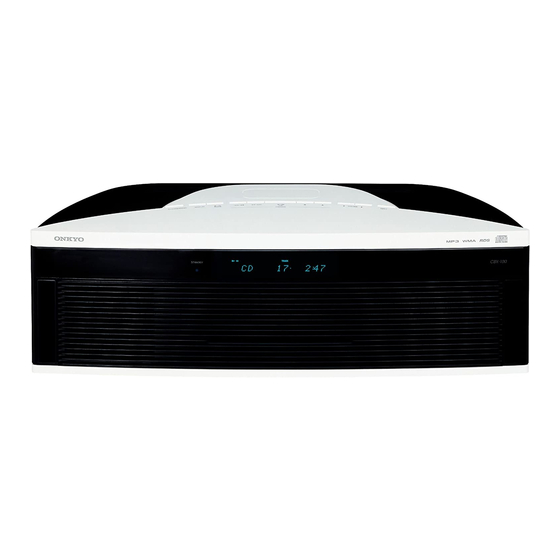
CD Tuner Audio System
CBX-100
Instruction Manual
Thank you for purchasing an Onkyo CD Tuner Audio
System.
Please read this manual thoroughly before making
any connections and plugging it in.
Following the instructions in this manual will enable
you to obtain optimum performance and listening
enjoyment from your new CD Tuner Audio System.
Please retain this manual for future reference.
Contents
Getting Started .......................... 2
Connections ............................ 15
Basic Operation ...................... 20
Playing a Disc.......................... 22
Listening to the Radio ........... 30
Clock and Timer ...................... 38
Miscellaneous ......................... 47
E
n
Advertisement
Table of Contents

Related Manuals for Onkyo CBX-100


Summary of Contents for Onkyo CBX-100
- Page 1 Basic Operation ...... 20 Playing a Disc......22 Listening to the Radio ... 30 Clock and Timer ...... 38 Thank you for purchasing an Onkyo CD Tuner Audio System. Please read this manual thoroughly before making any connections and plugging it in.
-
Page 2: Important Safety Instructions
CBX-100_En.book Page 2 Friday, September 15, 2006 9:34 AM WARNING: WARNING AVIS TO REDUCE THE RISK OF FIRE OR ELECTRIC RISK OF ELECTRIC SHOCK RISQUE DE CHOC ELECTRIQUE DO NOT OPEN NE PAS OUVRIR SHOCK, DO NOT EXPOSE THIS APPARATUS TO RAIN OR MOISTURE. -
Page 3: Precautions
5. Never Touch this Unit with Wet Hands — Never handle this unit or its power cord while your hands are wet or damp. If water or any other liquid gets inside this unit, have it checked by your Onkyo dealer. 6. Handling Notes •... - Page 4 LIEGNITZERSTRASSE 6, The wires in the mains lead are coloured in accordance 82194 GROEBENZELL, with the following code: GERMANY declare in own responsibility, that the ONKYO product Blue: Neutral described in this instruction manual is in compliance with the Brown:...
-
Page 5: Supplied Accessories
CBX-100_En.book Page 5 Friday, September 15, 2006 9:34 AM Supplied Accessories Features Make sure you have the following accessories: General • CD tuner audio system • Built-in stereo hi-fi speakers • RI-Dock compatible remote controller • 3-preset equalizer settings • Line input for RI Dock or other audio source •... -
Page 6: Table Of Contents
Using the Snooze Function ........44 Top and Front Panels ..........7 Using the Sleep Timer..........45 Display..............8 Using the CBX-100 with an Onkyo RI Dock ...46 Rear Panel..............9 Using the Remote Controller ........46 Remote Controller ..........10 Troubleshooting ..........47 Disc Notes............ -
Page 7: Getting To Know The Cbx-100
RI Dock. Adjust the volume level. DOCK Play/Pause [ ] button (46) INPUT button (20, 33, 46) Starts or pauses playback on an Onkyo RI Dock. Used to select the input source. Previous and Next [ SNOOZE (44) buttons (22, 33) -
Page 8: Display
FOLDER indicator nal. Lights up while the number and name of an MP3/WMA folder is being displayed. RDS: Lights up when the CBX-100 is tuned to a radio station that supports RDS (Radio Data Sys- MUTING indicator tem). Flashes while the CBX-100 is muted. -
Page 9: Connections
This stereo minijack is for connecting a pair of ste- reo headphones for private listening. INPUT DOCK/LINE jacks (17, 18) This analog audio input is for connecting an Onkyo RI Dock or other external audio source. REMOTE CONTROL jack (17) -
Page 10: Remote Controller
STANDBY/ON button (20) Sets the CBX-100 to On or Standby. SLEEP button (45) Sets the Sleep timer, which turns off the CBX-100 after a specified time. DISPLAY button (23, 26, 34, 35, 46) Used to change the information shown on the dis- play. - Page 11 Sets repeat playback. PRESET EQ button (21) Selects the preset equalizer settings. TUNER button (30, 31, 33) Selects FM or AM radio as the input source. See page 46 for how to control an Onkyo RI Dock with the remote controller.
- Page 12 fluorescent lights. Keep this in mind when installing. • If another remote controller of the same type is used in the same room, or the CBX-100 is installed close to equipment that uses infrared rays, the remote control- ler may not work reliably.
-
Page 13: Disc Notes
However, some CD-R and CD-RW discs may not • The CBX-100 supports up to 499 MP3 files and fold- work properly for any of the following reasons: disc ers. Files and folders in excess of this cannot be burner characteristics, disc characteristics, the disc is played. - Page 14 CBX-100_En.book Page 14 Friday, September 15, 2006 9:34 AM Disc Notes —Continued About WMA Handling Discs WMA stands for Windows Media Audio and is an audio • Never touch the underside of a disc. Always hold discs compression technology developed by Microsoft Corpo- by the edge, as shown.
-
Page 15: Connecting Antennas
Push Insert wire Release Once the CBX-100 is ready for use, you’ll need to tune into an FM radio station and adjust the posi- tion of the FM antenna to achieve the best possi- ble reception. Use thumbtacks or something similar to fix the FM antenna into position. - Page 16 It’s best not to use the same antenna for both FM and TV reception, as this can cause interference problems. If cir- cumstances demand it, use a TV/FM antenna splitter, as shown. TV/FM antenna splitter To CBX-100 To TV (or VCR)
-
Page 17: Connecting An External Audio Source
• To use with an Onkyo RI Dock, the Input Display for the INPUT DOCK/LINE jacks must be set to DOCK. Since this is the default setting, unless you’ve changed it, it can be left as it is (see page 21). -
Page 18: Connecting Other Components
CBX-100_En.book Page 18 Friday, September 15, 2006 9:34 AM Connecting an External Audio Source —Continued Connecting Other Components Connect the CBX-100’s INPUT DOCK/LINE jacks to the other component’s audio output jacks. Cassette deck DVD player MD recorder CBX-100’s rear panel etc. -
Page 19: Connecting The Power Cord
If this is a problem, plug the CBX-100 into a different branch circuit. • Do not use a power cord other than the one supplied with the CBX-100. The supplied power cord is designed exclu- sively for use with the CBX-100 and should not be used with any other equipment. -
Page 20: Basic Operation
Using Headphones Tip: Turn down the volume, then connect your stereo head- When you turn on or start playback on an Onkyo RI phones to the PHONES minijack. Dock that’s connected to the CBX-100 with an You can adjust the volume and mute the sound as nor- cable and analog audio cable, the CBX-100 turns on mal. -
Page 21: Muting The Cbx-100
The previous display will reappear remote controller will unmute the CBX-100. after 2 seconds. • If you turn the CBX-100 off, the next time you turn it on, the CBX-100 will be unmuted. Preset EQ With the CBX-100’s three preset equalizer settings, you can change the tone of the sound. -
Page 22: Playing Cds
CBX-100_En.book Page 22 Friday, September 15, 2006 9:34 AM Playing CDs Using the Top Panel Buttons Display Disc slot Insert the CD into the disc slot with “DISC TOTAL” lights up • Audio CD Display the label-side facing up. while the disc informa- tion is being displayed. -
Page 23: Using The Remote Controller
Press to start playback edly to select subsequent tracks. Pressing this button while the CBX-100 For MP3/WMA CDs, you can select files is on Standby will turn on the CBX-100 s (see page 24). in other folder and start playback. -
Page 24: Selecting Mp3/Wma Files
files and subfolders, as and “Root” appears on the display. shown below. On the CBX-100, there are two modes for selecting MP3/WMA files: Navigation mode and All Folder mode . In Navigation mode, you can select MP3/WMA files by navigating through the folder hier-... - Page 25 Press the [FOLDER] button for 2 seconds to The CBX-100 enters All Folder mode enter All Folder mode. and the name of the first folder appears Use the number buttons as shown in the examples on the display.
-
Page 26: Displaying Mp3/Wma Information
MP3/WMA files in that folder have been played. Notes: • You can also use the CBX-100’s [DISPLAY] button to display this information. • To display the disc name, press the [DISPLAY] button while playback is stopped. -
Page 27: Memory Playback
Play [ ] button. ENTER YES/MODE Track currently playing On the CBX-100, press the Play/Pause Memory playback can be set only when the input source ] button to start memory play- is set to CD and playback is stopped. back. -
Page 28: Random Playback
[YES/MODE] button repeatedly until the RANDOM Repeat playback is cancelled when the CD is removed or indicator disappears. the CBX-100 is set to Standby. Random playback is cancelled when the CD is removed or the CBX-100 is set to Standby. -
Page 29: Setting Mp3/Wma Preferences
CBX-100_En.book Page 29 Friday, September 15, 2006 9:34 AM Playing CDs —Continued Preferences Setting MP3/WMA Preferences Below, the name of each preference is followed by its With the MP3/WMA preferences, you can change the options in parentheses, with the default option in bold. way MP3/WMA file information is displayed and the way MP3/WMA CDs are played. -
Page 30: Listening To The Radio
CBX-100_En.book Page 30 Friday, September 15, 2006 9:34 AM Listening to the Radio Tuning into Radio Stations Press the [TUNER] button repeat- edly to select FM or AM. TUNING YES/MODE Use the TUNING [ ] buttons TUNER to tune into a station. Each time you press a TUNING button, the frequency changes 0.05 MHz for FM and 9 kHz for AM. -
Page 31: Presetting Fm Stations Automatically (Auto Preset)
CBX-100_En.book Page 31 Friday, September 15, 2006 9:34 AM Listening to the Radio —Continued Presetting FM Stations Automatically (Auto Preset) With the Auto Preset function, you can automatically preset all of the FM radio stations available in your area in one go. Presets make it easy to select your favorite stations and eliminate the need to tune the radio manually each time you want to change stations. -
Page 32: Presetting Fm/Am Stations Manually
CBX-100_En.book Page 32 Friday, September 15, 2006 9:34 AM Listening to the Radio —Continued Presetting FM/AM Stations Manually With the Preset Write function, you can manually preset individual FM and AM radio stations. Presets make it easy to select your favorite stations and eliminate the need to tune the radio manually each time you want to change stations. FM stations can also be preset automatically (see page 31). -
Page 33: Selecting Preset Stations
Number Preset #22 buttons Used to enter numbers over 10. PRESET ■ Selecting Presets on the CBX-100 Top Panel 1 Use the [INPUT] button to select FM or AM. 2 Use the Previous and Next [ ] buttons to TUNER select a preset. -
Page 34: Displaying Radio Information
DISPLAY Press the remote controller’s [DISPLAY] button repeatedly to display more radio information. You can also use the [DISPLAY] button on the CBX-100’s top panel to display this information. FM/AM Frequency * If the selected preset has no name, “No Name” appears *Preset name briefly and then the frequency is displayed. -
Page 35: Naming Presets
CBX-100_En.book Page 35 Friday, September 15, 2006 9:34 AM Listening to the Radio —Continued Naming Presets • Selecting letters: Press the number buttons repeatedly You can name presets for easy identification. The preset to select the available letters. For name may contain of up to eight characters. example, press the [2] button repeat- edly to select: A, B, or C. -
Page 36: Copying Presets
CBX-100_En.book Page 36 Friday, September 15, 2006 9:34 AM Listening to the Radio —Continued Copying Presets To copy the preset, press [ENTER]. With the Preset Copy function, you can organize your If no station has yet been stored in the presets in the order you want. -
Page 37: Erasing A Preset's Name
CBX-100_En.book Page 37 Friday, September 15, 2006 9:34 AM Listening to the Radio —Continued Erasing Presets Select the preset you want to erase (see page 33). EDIT/NO Press the [EDIT/NO] button, and then use the Previous and Next YES/MODE ] buttons to select ENTER PresetErase?. -
Page 38: Setting The Clock
] buttons to select the day of The AccuClock function sets the clock automatically the the week. very first time the CBX-100 is plugged into a wall outlet You can select: SUN, MON, TUE, WED, (see page 19). THU, FRI, or SAT. -
Page 39: Accuclock With A Specific Station
2 A.M., 3 A.M., Press [ENTER]. and 2 P.M., but only when the CBX-100 is on Standby. • If you’ve set the AccuClock function, but it’s not updating the time automatically, make sure a strong signal is being received from the specified RDS sta-... -
Page 40: Using The Timers
CBX-100 every morning, just like a radio alarm clock. Notes: • The timers work only if the CBX-100 is on Standby. If About the Timers it’s on when a timer is supposed to start playback, nothing will happen. -
Page 41: Programming The Timers
CBX-100_En.book Page 41 Friday, September 15, 2006 9:34 AM Using the Timers —Continued Programming the Timers Notes: Use the Previous and Next [ • You must set the clock before you can program the ] buttons to select the source, timers. - Page 42 [ENTER]. Press the [STANDBY/ON] button to set the CBX-100 to Standby. Notes: • Be sure to set the CBX-100 to Standby, Use the Previous and Next [ otherwise the timed operation will not ] buttons again to select the work.
-
Page 43: Turning Timers On And Off
CBX-100_En.book Page 43 Friday, September 15, 2006 9:34 AM Using the Timers —Continued Turning Timers On and Off Checking Timer Settings Once a timer has been programmed, you can turn it on or Press the [TIMER] button repeat- off as necessary. For example, while you’re on holiday, edly to select timer 1, 2, 3, or 4, and you may want to turn off the timer you use as an early- then press [ENTER]. -
Page 44: Using The Snooze Function
1 to 30 minutes. of times. SNOOZE Notes: • If you press a [SNOOZE] button while the CBX-100 is snoozing, the snooze period will start again. • To cancel snooze while the CBX-100 is snoozing, press the [STANDBY/ON] button. The timer will be turned off and the CBX-100 will go on Standby. -
Page 45: Using The Sleep Timer
CBX-100_En.book Page 45 Friday, September 15, 2006 9:34 AM Using the Timers —Continued Using the Sleep Timer With the sleep timer, you can set the CBX-100 so that it automatically turns off after a specified period. SLEEP Press the [SLEEP] button repeat- edly to select the required sleep time. -
Page 46: Using The Cbx-100 With An Onkyo Ri Dock
CBX-100_En.book Page 46 Friday, September 15, 2006 9:34 AM Using the CBX-100 with an Onkyo RI Dock • See page 17 for how to connect an Onkyo RI Dock. • Press the remote controller’s INPUT [ ] but- tons repeatedly to select the DOCK input source. On •... -
Page 47: Troubleshooting
• Unplug the power cord from the wall outlet, wait 5 seconds or more, then plug it in again. The CBX-100 turns off unexpectedly. • If the sleep timer has been set and the SLEEP indicator is shown on the display, the CBX-100 will turn off automat- ically after a specified period. -
Page 48: Clock And Timer
• The volume may be too loud. Turn down the volume (see page 20). Can’t add tracks to the playlist for memory playback. • Make sure there’s a disc in the CBX-100. Also, you can only add valid track numbers. For example, if the CD contains 11 tracks, you cannot add track #12. - Page 49 • Make sure the clock has been set correctly (see page 38). • Timed operation will fail if the CBX-100 is on at the specified On time, so make sure it’s set to Standby (see page 42). • The timer may overlap with another timer. If you program several timers, make sure they don’t overlap (see page 40).
-
Page 50: Specifications
CBX-100_En.book Page 50 Tuesday, September 19, 2006 3:01 PM Specifications General Power supply AC 220–230 V, 50/60 Hz Power consumption 26 W Standby power consumption 0.25 W* × × × × × × Dimensions (W 231.5 mm (17-1/8" 5-7/16" 9-1/8") Weight 4.2 kg (9.3 lbs.) * Note that having the time displayed in Standby mode will consume more power. - Page 51 CBX-100_En.book Page 51 Friday, September 15, 2006 9:34 AM Memo...
- Page 52 Unit 1&12, 9/F, Ever Gain PlazaTower 1, 88, Container Port Road, Kwai Chung, N.T., HONG KONG Tel: 852-2429-3118 Fax: 852-2428-9039 http://www.ch.onkyo.com/ I0609-1 SN 29344345 (C) Copyright 2006 ONKYO CORPORATION Japan. All rights reserved. * 2 9 3 4 4 3 4 5 *...
Need help?
Do you have a question about the CBX-100 and is the answer not in the manual?
Questions and answers