DH Instruments RPM4 Operation And Maintenance Manual
Reference pressure monitor
Hide thumbs
Also See for RPM4:
- Operation and maintenance manual (148 pages) ,
- Installation instructions (1 page)

Related Manuals for DH Instruments RPM4

Summary of Contents for DH Instruments RPM4
- Page 1 RPM4™ Reference Pressure Monitor Operation and Maintenance Manual © 2004-2007 DH Instruments, a Fluke Company...
- Page 2 Products described in this manual are manufactured under international patents and one or more of the following U.S. patents: 5,142,483; 5,257,640; 5,331,838; 5,445,035. Other U.S. and international patents pending. AutoRange, AutoZ, DH Instruments, DH, DHI, CalTool, COMPASS, RPM4, QDUT, Q-RPT, RPM4 and SDS are trademarks, registered and otherwise, of DH Instruments, a Fluke Company.
-
Page 3: Table Of Contents
MAIN RUN SCREEN...15 3.1.2 FUNCTION / DATA KEYPAD LAYOUT AND PROTOCOL...17 3.1.3 REMOTE [ENT] (ENTER) FOOTSWITCH ...18 3.1.4 SOUNDS ...18 GENERAL OPERATING PRINCIPLES ...18 3.2.1 PRESSURE READY/NOT READY ...18 Page I © 2004-2007 DH Instruments, a Fluke Company TABLE OF CONTENTS... - Page 4 COMPENSATION FOR ATMOSPHERIC PRESSURE ...19 3.2.3 MULTIPE RANGES (Q-RPTS, AUTORANGE AND INFINITE RANGING) ...20 3.2.4 PARALLEL MEASUREMENT MODE...21 3.2.5 USING RPM4 WITH A PPC3 CONTROLLER/CALIBRATOR...21 3.2.6 USE OF THE 12VDC BATTERY/CHARGER PACK ...23 3.2.7 SDS SELF DEFENSE SYSTEM ...24 3.2.8 DIRECT FUNCTION KEYS SUMMARY ...25...
- Page 5 5.5.3 DRIVER BOARD ...128 5.5.4 ON-BOARD BAROMETER...128 5.5.5 Q-RPT MODULE...128 5.5.5.1 HI Q-RPT MODULE ...128 5.5.5.2 LO Q-RPT MODULE ...128 5.5.6 DISPLAY ...128 Q-RPT MODULE PNEUMATIC SCHEMATICS ...129 TABLE OF CONTENTS Page III © 2004-2007 DH Instruments, a Fluke Company...
- Page 6 G L O S S A R Y ..............1 3 9 © 2004-2007 DH Instruments, a Fluke Company...
-
Page 7: Tables
Table 1. Reference Pressure Transducer (Q-RPT) Module Designations and Ranges ... 3 Table 2. RPM4 Packing List... 7 Table 3. Position Designators of Q-RPTs in an RPM4 System... 20 Table 4. Settings and What They Are Specific To (Range, Measurement Mode, Q-RPT, System) ... 21 Table 5. - Page 8 Figure 6. Status Register Schematic ... 109 Figure 7. Internal View ... 127 Figure 8. Pneumatic/hydraulic schematics of RPM4 with Single Q-RPT Module ... 129 Figure 9. Pneumatic/hydraulic schematics of RPM4 with Two Q-RPT Modules... 130 Figure 10. Remote [ENT] Connector Schematic ... 135 ©...
-
Page 9: A B O U T T H I S M A N U Al
Before using the manual, take a moment to familiarize yourself with the Table of Contents structure: Sections 1, 2 and 3 should be read by all first time RPM4 users. Section 3 is most important for those using the local front panel interface but should be read over by all users to familiarize themselves with general RPM4 operating principles. - Page 10 RPM4™ OPERATION AND MAINTENANCE MANUAL © 2004-2007 DH Instruments, a Fluke Company Page VIII...
-
Page 11: I N T R O D U C T I On
ASCII character command strings transmitted over its standard RS232 or IEEE-488.2 interface. RPM4 models are available in ranges from as low as - 3 to 3 kPa (0.4 psi) to as high as 280 MPa (40 000 psi) in absolute, gauge, compound gauge and differential measurement modes. -
Page 12: Specifications
1.2.2 PRESSURE MEASUREMENT SPECIFICATIONS 1.2.2.1 RPM4 can be configured with one or two quartz reference pressure transducer (Q-RPT) modules to measure pressure. The type (Axxx, Gxxx, BGxxx, BAxxx) and range of the Q-RPT module(s) determines the RPM4 measurement specifications. All Q-RPTs whose maximum pressure is over 200 kPa (30 psi) are of the absolute pressure type (Axxx) using an evacuated, permanently sealed reference. -
Page 13: Table 1. Reference Pressure Transducer (Q-Rpt) Module Designations And Ranges
Q-RPTs of A10M and lower are available with two different performance levels, STANDARD class and PREMIUM class. See the product label on the RPM4 rear panel, the Q-RPT module label on the rear panel and/or the product calibration reports to determine the class of the Q-RPT(s) installed in RPM4. -
Page 14: On-Board Barometer
G15K and BG15K Q-RPTs. There is no on-board barometer in RPM4s that have G100K or G200K Q-RPTs only”. © 2004-2007 DH Instruments, a Fluke Company 30 minute temperature stabilization recommended from Warm Up Time cold power up. -
Page 15: Battery And Charger Pack
Battery Voltage Typical: Battery Capacity Min: Charge Time Full charge from empty, 14 to 16 hours approx. Approx. Run Time, Full Charge 8 to 12 hours 9000 mAh 8200 mAh Page 5 © 2004-2007 DH Instruments, a Fluke Company 1. INTRODUCTION... - Page 16 RPM4™ OPERATION AND MAINTENANCE MANUAL © 2004-2007 DH Instruments, a Fluke Company Page VI...
-
Page 17: 2. Installation
UNPACKING AND INSPECTION 2.1.1 REMOVING FROM PACKAGING RPM4 is delivered in a corrugated container with polyethylene inserts to hold it in place; or in the optional molded, medium density polyethylene shipping case with a custom foam insert for holding the RPM4. -
Page 18: Site Requirements
SITE REQUIREMENTS Install RPM4 on a flat, stable surface at a convenient height. The front feet can be extended so that the unit can be inclined for easier viewing. The RPM4 can also be mounted in a standard 19 in. rack mount using the optional rack mount kit. -
Page 19: Rear Panel
BATTERY PACK Charge the battery pack fully (see Section 3.2.6). Connect the RPM4 12VDC power connection on the rear panel of the RPM4 to the 12 VDC power connection on the battery/charge pack using the cable supplied with the pack. -
Page 20: Remote [Ent] Connection (Footswitch Or Other Switch)
Using a pressure connecting hose or tube of appropriate pressure rating, connect the device or system to be tested to the RPM4 TEST(+) port. The RPM4 TEST(+) connection is 1/8 in. NPT female (Q-RPTs of A70M or lower) or DH500 F (Q-RPTs higher than A70M). -
Page 21: The Vent Or Atm Port
2.3.6 THE VENT OR ATM PORT RPM4 Q-RPT modules of A7M and lower have a VENT port. The VENT port is connected to the TEST(-) port when SDS is CLOSED (see Section 5.6, Figure 8). For Axxx and BGxxx Q-RPTs, the RPM4 on-board barometer, is connected to the VENT port when SDS is CLOSED. -
Page 22: Turn Off Absolute And Negative Gauge Mode (Axxx Rpt)
2.4.1 SWITCH POWER ON Actuate the power switch on the RPM4 rear panel (if a 12 VDC power supply is already connected to the 12 VDC connection, RPM4 power is already on). Observe the front panel display as RPM4 initializes, error checks and goes to the MAIN RUN screen (see Section 3.1.1). -
Page 23: Check Pressure Measurement Operation
(see Section 1.2.2.1) Repeat this process for both Axxx (absolute) Q-RPTs if there are two in the RPM4. . If a Q-RPT does not agree within tolerance, it may need to be AutoZeroed (see Section 3.3.9), calibrated (see Section 5.2) or repaired. -
Page 24: Short Term Storage
RPM4™ OPERATION AND MAINTENANCE MANUAL SHORT TERM STORAGE The following is recommended for short term storage of RPM4: Vent the RPM4 test port Switch power OFF. © 2004-2007 DH Instruments, a Fluke Company Page 14... -
Page 25: O P E R A T I O
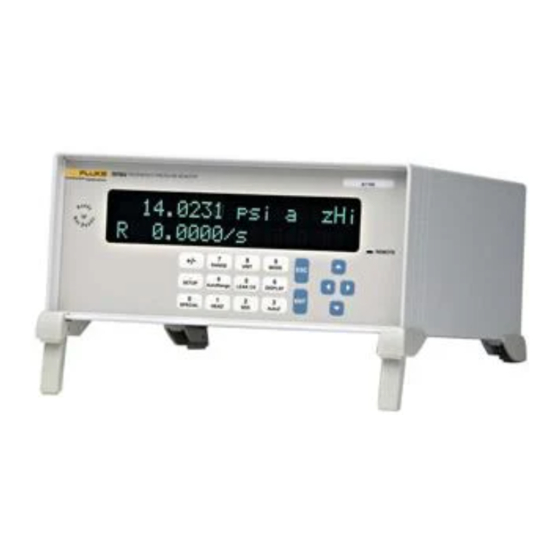
Figure 3 and its legend summarize the RPM4 MAIN RUN screen fields and their functions. RPM4 has a screen saver function which causes the display to dim if no key is pressed for 10 minutes. Pressing a key restores full power to the display. The screen saver time can be changed or screen saving can be completely suppressed (see Section 3.5.5.1). -
Page 26: Figure 3. Main Run Screen Display Fields
© 2004-2007 DH Instruments, a Fluke Company P R E S S U R E 1 U N I T M h z R R D D I S P L A Y F U N C I O N n n / n n... -
Page 27: Function / Data Keypad Layout And Protocol
3.1.2 FUNCTION / DATA KEYPAD LAYOUT AND PROTOCOL The RPM4 has a function/data keypad for local operator access to direct functions, function menus and for data entry. 1. The Function/Data keys allow very commonly used functions to be accessed directly by a single keystroke when pressed from the MAIN RUN screen (see Section 3.1.1). -
Page 28: Remote [Ent] (Enter) Footswitch
The optional remote ENTER function is a switch that duplicates the function of the front panel [ENT] key. The remote ENTER function is serviced by a connector on the RPM4 rear panel. An optional footswitch is available to activate remote entry hands free or a different switch may be used. -
Page 29: Gauge And Negative Gauge Modes With An Axxx (Absolute) Q-Rpt, Dynamic Compensation For Atmospheric Pressure
P Q-RPT’s absolute reading using AutoZ (see Section 3.2.2). The AutoZ routine that measures , is run by pressing [AutoZ] whenever RPM4 is in the vented condition. This assures offset,G... -
Page 30: Multipe Ranges (Q-Rpts, Autorange And Infinite Ranging)
(see Section 3.4.1). AN RPM4 range is identified by a range screen showing the Q-RPT used by the range, its current unit of measure and its full scale pressure in gauge and absolute (if available) measurement modes. -
Page 31: Parallel Measurement Mode
Close SDS on all Q-RPT modules on which SDS is available (see Section 3.2.7). Head If the RPM4 TEST port is at a different level than the PPC3’s TEST port AND the RPM4 will be used in absolute measurement mode, set the RPM4 head height to the PPC3’s TEST port level so that RPM4 is corrected to indicate the pressure at... - Page 32 <PPC3 EXT DEV: ACTIVE> (if RPM4 is initialized by PPC3 and is currently in use) After using an RPM4 as an external device for a PPC3, cycle power to return to the previous RPM4 settings, restore front keypad capability and return to the normal main run screen.
-
Page 33: Use Of The 12Vdc Battery/Charger Pack
OFF for 12VDC power to be output). When RPM4 is connected to both a 12 VDC source and an AC source,if the RPM4 power switch is OFF, the 12VDC source supplies the RPM4; if the RPM4 power switch is ON, the 12 VDC source is disconnected and the AC source supplies the RPM4. -
Page 34: Sds Self Defense System
10 MPa (1 500 psi). When an RPM4 is used as an external device to a PPC3 pressure controller, PPC3 controls the RPM4’s SDS to isolate the RPM4 Q-RPTs from the test pressure when they are not in use. -
Page 35: Direct Function Keys Summary
An RPM4 range is defined as a pressure span and associated settings (see Section 3.2.3). An RPM4 may have multiple ranges. Each Q-RPT in the RPM4 system has a default range which is its maximum span. Additional ranges, lower than the Q-RPT’s maximum span, may also be created using AutoRange (see Section 3.3.4). -
Page 36: Unit]
Section 3.3.3. PRINCIPLE RPM4 allows the unit of measure in which pressure values are displayed to be changed. RPM4 supports 15 standard pressure units of measure as well as user defined units. To simplify operation, quick access to six units is made available under the [UNIT] key. -
Page 37: Mode]
The default pressure units of measure available under the UNIT function depend on whether the RPM4 has been set up as an SI or US version (indicated by SI or US at bottom right of introduction screen). The choice of six units available under the UNIT function can be customized from a wider selection by the user (see Section 3.5.6). - Page 38 [MODE] from the MAIN RUN screen while the range is active. The display depends upon the type of Q-RPT that is active. © 2004-2007 DH Instruments, a Fluke Company In RPM4s with two Gxxx Q-RPTs, differential measurement Measurement mode:...
-
Page 39: Differential Measurement Mode Operation
<Gauge RPT, gauge mode only> is displayed. If the Hi Q-RPT is active in its default range (<DF>), and the RPM4 has two Q-RPTs of the same type (Axxx, Gxxx, BGxxx), differential measurement mode is available in addition to the other modes (see Section 3.3.3.1). -
Page 40: Autorange]
To automatically set up RPM4 to optimize its measurement characteristics and features for specific, user specified range of operation. PRINCIPLE RPM4 is designed to support the calibration and test of a very wide variety of test ranges in various measurement modes. © 2004-2007 DH Instruments, a Fluke Company... -
Page 41: Table 6. Settings Made By Autorange
AutoRange or erased when another range is selected. Press [ENT] from the main run screen in RATE mode to use the [AutoTest] function to AutoRange RPM4 based on DUT tolerance (see Section 3.3.10). Table 6. Settings Made by AutoRange... - Page 42 Gauge mode only if the Q-RPT is a Gxxx or BGxxx or an Axxx with absolute mode turned off. If the RPM4 has two Q-RPTs and you would like to select the other one for the AutoRange, the cursor control keys may be used to toggle between Q-RPTs selections if both Q-RPTs can handle the specified AutoRange.
-
Page 43: Leak Ck]
The LEAK CHECK function is provided as a means of checking and quantifying the leaks that may be present in the system connected to the RPM4’s active Q-RPT test port. The principle of the LEAK CHECK function is the measurement of the natural decrease or increase of pressure in a fixed volume over time. -
Page 44: Display]
To view the results of the most recently completed leak check, press <2view>. If NO leak check data is stored (i.e., if the RPM4 has never run a leak test or a reset has cleared previous leak test results), the results screen displays <Data NOT available> briefly and returns to MAIN RUN screen. - Page 45 CLEAN Blanks out the second line of the display (see Section 3.3.6.7). This function is used when a simple display of pressure measured by the RPM4 active range without additional information is desired. OPERATION To set the DISPLAY function press [DISPLAY] from the main run screen.
-
Page 46: Avg (Average)
<PPC3 EXT DEV: IDLE> <PPC3 EXT DEV: ACTIVE> After using an RPM4 as an external device for a PPC3, cycle power to return to the previous RPM4 settings, restore front keypad capability and return to the normal main run screen. -
Page 47: Rate
PURPOSE To activate the Rate DISPLAY. See Section 3.3.6 [DISPLAY], The AutoTest function (see Section 3.3.10) to AutoRange RPM4 based on DUT characteristics and run an automated test sequence is accessed by pressing [ENT] from the Rate run screen. OPERATION To activate the Rate DISPLAY press [DISPLAY], <2Rate>. -
Page 48: Dev (Deviation)
It is NOT converted. To go to a DISPLAY other than Deviation, press [DISPLAY] and make a new DISPLAY choice (see Section 3.3.6). © 2004-2007 DH Instruments, a Fluke Company Dev (Deviation) Principle. D = current pressure - target pressure... -
Page 49: Rpt
[DISPLAY], <4RPT> is pressed. If the RPM4 is in parallel (<HL>) (see Section 3.5.7.3) mode in which both Q-RPTs are used simultaneously, when <4RPT> is selected, the Q-RPT to display on the lower display line must be specified. -
Page 50: Hi/Lo
If the pressure measurement unit, mode or range is changed while the Hi/Lo DISPLAY is active, Hi/Lo resets. To go to a DISPLAY other than Hi/Lo, press [DISPLAY] and make a new DISPLAY choice (see Section 3.3.6). © 2004-2007 DH Instruments, a Fluke Company Hi/Lo Principle.. Page 40 99.1135 psi a... -
Page 51: Freeze
Freeze DISPLAY activated). Pressing [ENT] causes the current pressure measured by the active RPM4 Q-RPT to be captured and displayed. If the pressure measurement unit, mode or range is changed while the Freeze DISPLAY is active, the Freeze value defaults back to zero. -
Page 52: Head]
PURPOSE To cause a pressure fluid head correction to be added to or subtracted from the pressure measured by the RPM4 reference pressure transducer in order to predict the pressure at a height other than the RPM4’s reference level. PRINCIPLE RPM4 measures gauge or absolute pressure at the height of the rear panel TEST(+) port. -
Page 53: Sds] (Self Defense System)
RPM4 and negative if it is lower. The HEAD function is NOT range specific. The HEAD ON or OFF status remains the same as Q-RPTs and ranges are changed. - Page 54 TEST(+) port to be measured. The [SDS] key is used to OPEN SDS. The SDS function can also be used to CLOSE SDS as might be desired when leaving RPM4 at rest or when a possible overpressure situation is anticipated. Pressing [SDS] always CLOSES any SDS systems that are OPEN.
- Page 55 SDS can be permanently opened so operation is as if SDS were not present (see Section 3.5.4.2). Pmax! 350 kPa a Open SDS? Page 45 © 2004-2007 DH Instruments, a Fluke Company 3. OPERATION 1no 2yes Use this feature to...
-
Page 56: Sds In Differential And Parallel Measurement Modes
In differential and parallel measurement modes, opening SDS opens SDS for BOTH the Hi and Lo Q-RPTs. Before opening SDS, be certain that the pressure applied to both the Hi and Lo RPM4 TEST(+) ports is less than the maximum pressure of the Lo Q-RPT. -
Page 57: Autoz] In Gauge And Negative Gauge Mode
Before running AutoZ in gauge mode, ensure that the pressure applied to the Q-RPT is truly zero gauge (atmospheric pressure). If running AutoZ in gauge mode results in a zero offset that RPM4 considers unusually large, <Confirm 0 gauge P!> is displayed when AutoZ is pressed. Check that zero... -
Page 58: Autoz] In Absolute Mode
DHI RPMx connected to RPM4’s COM2 communications port. Selecting <3Lo RPT> is shown only if the active Q-RPT is Hi and there is a Lo Axxx Q-RPT in the RPM4. This selection allows the value of P Q-RPT to be read automatically from the RPM4s Lo Q-RPT. - Page 59 Enter the value of the AutoZ reference (P top line display and press [ENT]. RPM4 logs the reading and calculates a new AutoZ offset value. The next display is: Press [ENT] to activate the new value of...
- Page 60 AutoZ by Lo RPT is available only if the active Q-RPT is the Hi Q-RPT and there is an Axxx Lo Q-RPT. AutoZ by Lo RPT allows the Lo Q-RPT in an RPM4 to serve as the AutoZ reference (source of P The Lo Q-RPT is read and the new P To access run AutoZ by Lo RPT press [AutoZ], <3Lo RPT>.
-
Page 61: Autoz In Differential Mode
3.3.10 [ENT] (RUN AUTOTEST) PURPOSE To run the AutoTest function which AutoRanges the RPM4 and runs a calibration test based on user entries of pressure unit, measurement mode, full scale, increment and DUT tolerance. Run AutoTest is accessed by pressing [ENT] from the Rate or Clean DISPLAY mode (see Section 3.3.6.2). -
Page 62: Setup]
Feature not available at the time of release of this manual. [SETUP] PURPOSE [SETUP] accesses a menu of functions and features commonly used in setting up and using RPM4. OPERATION To access the SETUP menu, press [SETUP] from the MAIN RUN screen. -
Page 63: Deleting Autorange Ranges
PRINCIPLE The resolution with which RPM4 displays pressure values can be adjusted. This feature can be used to reduce the resolution when lower precision measurements are being made and excess resolution might confuse or distract the operator. -
Page 64: 3Stab
See Section 3.2.1 Pressure Ready/Not Ready Indication. PRINCIPLE RPM4 continuously monitors the rate of change of pressure measured by the active RPT and range and compares this rate to the stability limit to make a Ready/Not Ready determination (see Section 3.2.1 Pressure Ready/Not Ready Indication). The stability function allows the stability limit to be adjusted by the user to increase or decrease the stability required for a Ready condition to occur. -
Page 65: 4Ul> (Upper Limit)
This feature is often used to help protect an external device or system on which RPM4 is being used to measure pressure. For example, it might be set just over the full scale of a device under test (DUT) that is being calibrated. - Page 66 3 seconds on/2 seconds off intervals. Change the pressure applied to RPM4 so that it is within the upper and/or lower limit to return to normal operation. Upper limit values are specific to each range and measurement mode. Be careful not to assume that the upper limit set in one measurement mode will apply to the other.
-
Page 67: Over Pressure Function
RPM4 embedded software releases and manual updates. [SPECIAL] PURPOSE [SPECIAL] accesses a menu of RPM4 functions and features that are less commonly used or not normally used in regular operation. OPERATION Press [SPECIAL] from the MAIN RUN screen to access the SPECIAL menu. -
Page 68: 1Autoz
PRINCIPLE AutoZ Purpose and Principle The main component of the change over time of the RPM4 Q-RPTs is change in zero or offset, independent of span. Offsetting or “rezeroing” RPM4 Q-RPTs relative to a reference between recalibrations allows measurement uncertainty specifications to be maintained with less frequent full calibrations. - Page 69 AutoZeroed. For higher range Q-RPTs, this is easily accomplished with a variety of digital barometers or with a Lo Q-RPT in the RPM4. For lower range Q-RPTs, a piston gauge or other standard may be required to provide P...
-
Page 70: Table 7. Autoz On And Off
In gauge measurement modes, AutoZ is run when initiated by the operator pressing [AutoZ] when the RPM4 is vented. This assures the regular automated updating of the P AutoZ in differential measurement mode RPM4s with two Q-RPTs of the same type (Axxx, Gxxx, BGxxx) support differential measurement mode (see Section 3.3.3.1) in which the measured pressure is the difference... - Page 71 (such as a DHI PG7601) applying atmospheric pressure to the RPM4 test port. The best day to day reference is a properly calibrated DHI RPM4 with a BA100K Q-RPT interfaced directly as an external device to the RPM4 COM2 port.
-
Page 72: Edit Autoz
COM2 communications. To select the remote programming communications format. PRINCIPLE The RPM4 has two RS-232 communications ports referred to as COM1 and COM2 and a single IEEE-488 (GPIB) port. COM1 or the IEEE-488 port is for communicating with a host computer (see Section 4), and COM2 is reserved for communicating with an external device (e.g. -
Page 73: 1Com1, 2Com2
The receiving terminating character must be a line feed and EOI. Carriage returns are ignored if received. The RPM4 sends a line feed and asserts the EOI line to terminate a reply. These settings are fixed to agree with IEEE Std. 488.2. If you change the address, the IEEE interface will reset (PON) and become idle. -
Page 74: 5Rs232 Self-Test
RPM4™ OPERATION AND MAINTENANCE MANUAL 3.5.2.4 The RS232 self-test is provided to check the RPM4 COM ports and the interface cable independently of an external device or computer. If you are having difficulty communicating with RPM4 from a host computer using RS232, the RS232 self test can help establish that the RPM4 COM1 port you are trying to communicate with and the interface cable you are using are good. -
Page 75: 4Sds
SDS on either the Hi or Lo Q-RPT (see Section 3.5.4.1), and; b) turning OFF SDS so that it is open full time and RPM4 can be operated as if SDS were not installed (see Section 3.5.4.2). -
Page 76: 2Full Time On/Off
SDS overpressure function (see Section 3.4.4.1) remains active. To turn SDS full time ON or OFF for a Q-RPT module, press [SPECIAL], <4SDS>, <2full time on/off >. If the RPM4 has two Q-RPTs and both have SDS, the Q-RPT must then be selected. The next display is: The cursor is on the current state of SDS for the designated Q-RPT. -
Page 77: 1Scrsvr
To adjust the idle time after which RPM4’s SCREEN SAVER activates. PRINCIPLE RPM4 has a SCREEN SAVER function which causes the display to dim after a front panel key is NOT pressed for a certain amount of time. The default is for the screen saver to activate after 10 idle minutes. -
Page 78: 4Id
TIME and DATE function to set your local time and date. 3.5.5.4 PURPOSE To view or edit the RPM4 user ID and to view the RPM4 serial number. OPERATION To access the ID function press [SPECIAL] and select <5prefs>, <2ID>. - Page 79 RPM4 is delivered with the security level set at low to avoid inadvertent altering of critical internal settings but with access to changing security levels unrestricted.
-
Page 80: Table 8. Security Levels
[SPECIAL], <8cal> [SPECIAL], <8cal>, <2edit> under any selection [SPECIAL], <4reset> [SPECIAL], <4reset>, <4cal> [SPECIAL], <4reset>, <5all> Remote communications disabled © 2004-2007 DH Instruments, a Fluke Company Table 8. Security Levels FUNCTION “•” indicates the function/menu is NOT accessible. Page 70 MEDIUM HIGH •... -
Page 81: 6Punit
The first field, <nnnn>, is the serial number of the RPM4, followed by a second field, <xx>, that represents the number of times that a secondary password has been used. The second field, <xx>, increments each time a secondary password is used. -
Page 82: Table 9. Unit Function - Available Units Of Measure
The [UNIT] function key makes available a choice of six default pressure units (US or SI units depending on whether the RPM4 has been factory set as US or SI) (see Section 3.3.2). RPM4 also supports many commonly used units other than those included in the default set up. -
Page 83: 7Internal
View the RPM4 incident log (see Section 3.5.7.5). 3.5.7.1 <1BARO> PURPOSE To view the value of atmospheric pressure as measured by the RPM4 on-board barometer. There is no on-board barometer in RPM4s that have G100K or G200K Q-RPTs only”. PRINCIPLE RPM4’s that include an Axxx (absolute) and/or BGxxx (bi-directional gauge) -
Page 84: 2Readrt
RPM4™ OPERATION AND MAINTENANCE MANUAL OPERATION RPM4’s that have only G100K or G200K Q-RPTs (no Axxx, G15K or BG15K) are NOT equipped with an on-board barometer. To view the current reading of the on-board barometer press [SPECIAL], <7internal>, <1baro>. The display is in the active pressure unit of measure (see Section 3.3.2). - Page 85 Selecting <2off> turns OFF the automated reading rate and returns to the MAIN RUN screen. The default RPM4 condition is auto read rate ON. The read rate can be set to a fixed value between 200 ms and 20000 ms using the remote command “READRATEn”...
-
Page 86: 4Lo Vnt
Hi and Lo Q-RPTs. 3.5.7.4 PURPOSE To cause an RPM4’s Gxxx or BGxxx Q-RPT TEST(-) vent valve to stay open or closed rather than open and close automatically. This feature is active only when the active Q-RPT is a Gxxx (gauge) or BGxxx (bi-directional gauge) Q-RPT. -
Page 87: 5Log
(<Auto TEST(-) vent>) or has been set manually (<Manual TEST(-) vent>) followed by the current valve status (<Open> or <Close>). If the RPM4 is being used as an external device to a PPC3 pressure controller (see Section 3.5.7.4), the Lo Vent setting may be changed from the PPC3 (see the PPC3 Operation and Maintenance Manual). -
Page 88: 9Reset
This clears any settings that the user has made, and should be used only to restore the RPM4 to a known state. RPM4 goes through its power up sequence after any type of reset is executed. -
Page 89: Units
PURPOSE Sets the six pressure units available under the UNIT function to the SI or US default selections depending on whether the RPM4 has been factory set for SI or US (see Section 3.3.2). Sets the user defined unit to 1.000/Pa (see Section 3.5.6). -
Page 90: All
Combines all resets in one global reset command that clears the entire user section of non-volatile memory except the ID function (see Section 3.5.5.4) and the security level password (see Section 3.5.5.5) returning RPM4 to the “as delivered” condition. The Reset – All resets are itemized in Table 13. -
Page 91: Remote Operation
Sending a program message to the RPM4 places it into remote mode. The remote indicator to the right of the display window lights when the RPM4 is in remote mode. It also flickers when a program message is received. The menus usually accessed from the front panel are locked out while in remote. The [ESC] key returns the RPM4 to local operation unless the <REMOTE>... -
Page 92: Ieee-488
The main difference between the “classic” and “enhanced” formats is that when using the IEEE-488 interface, a query operator “?” must be included in an enhanced command to yield a reply from the RPM4. When using the COM1 port in classic or enhanced mode or using the IEEE-488 port in classic mode, every command has a reply which the host must wait for before continuing. -
Page 93: Classic Program Message Format
RPM4 in the form of comma delimited arguments. This data is usually a setting of some sort that is stored in the RPM4. If data is specified, it must be preceded by at least one white space from the program message header and be within the range and format described in the program message description. -
Page 94: Using Query Type Commands
Placing the query operator “?” immediately after the command creates a query. You must wait for a reply with a query. message to the RPM4 after a query before receiving a reply, the program message is discarded and an error is generated. Errors are reported using the IEEE Std. -
Page 95: Commands
The “RANGE” or “ARANGE” command can be used to select the “Active” Q-RPT. There are some limitations to use of the suffix when the RPM4 is in differential mode (see Section 3.3.3.1) or the “HL” Q-RPT is active (see Section 3.2.4). See the program message descriptions for suffix use with a specific command. -
Page 96: Error Messagess
ERR# 45 ERR #46 ERR #52 ERR# 53 © 2004-2007 DH Instruments, a Fluke Company DESCRIPTION Read or set the upper limit for the current range. Read or set the pressure unit of measure for the current range. Read the RPM4 software version. -
Page 97: Program Message Description Overview
“Active Q-RPT” is the Q-RPT that is currently displayed on the top line of the front panel of the RPM4, and is identified by the text label in the upper right of the pressure display screen. The last Q-RPT ranged or selected using the “RANGE” or “ARANGE” commands is the “Active” Q- RPT. -
Page 98: Program Message Descriptions
The RPM4 COM2 port can be used to communicate to another RS232 device (such as another RPM4). This allows the user to use a single COM port or IEEE-488 port on the host computer to communicate with the RPM4 and another RS232 device. A carriage return and a line feed (<CR><LF>) are added to the string. - Page 99 The optional suffix or the “RptLabel” argument can be used to specify which Q-RPT you wish to use for the AutoRange range instead of allowing the RPM4 to pick the best Q- RPT. By using this option you can override the internal logic that picks the most suitable Q- Q-RPT.
- Page 100 ‘state’: Remarks The RPM4 AutoZ function can be turned ON and OFF. There is a separate AutoZ flag for the gauge, absolute, and differential measurement modes for each Q-RPT. command sets the AutoZ status for the current mode of the specified or the active Q-RPT only.
- Page 101 COM1 settings. A 250ms or longer delay after receiving the reply to this command will ensure that the RPM4 has changed the COM port settings and is ready for communications at the new settings.
- Page 102 Q-RPT’s measurement without further queries. This continues until the next query is received by the RPM4, or if the ABORT” or “*CLS” command is received. The frequency of the measurements is determined by the readrate of the Q-RPT. The data returned includes the pressure of the specified or active Q-RPT, current unit of measure and measurement mode.
- Page 103 The fluid type. This must be “N2”, “Air”, “He”, “Oil”, “H2O”, or “User”. gas: Remarks The RPM4 can make a fluid head correction to allow it to display the pressure at a level other than the reference level of the RPM4. Example Cmd sent: “HEAD? 10,in,N2”...
- Page 104 Remarks The user can select the type of remote command format using these simplified commands. There is no query format. This format must agree with the format sent to the RPM4. This command is a replacement for the “MSGFMT” command.
- Page 105 “MEM” Remarks The RPM4 system memory stores the user settings (units, resolution) and retains them when the unit is OFF. On power-up, this memory is checked. If this memory is corrupted, all user settings are reset to default , and the MEM status is set to reflect this.
- Page 106 Gxxx or BGxxx Q-RPTs each have a low vent valve that is used to vent the TEST(-) port. This valve is normally controlled automatically depending on current RPM4 operation but it can be commanded to open or close using the “NVENT” command.
- Page 107 After receiving this program message, the RPM4 replies back with the data after a new pressure measurement cycle is complete. This can take up to the current read rate period (1.2 seconds by default).
- Page 108 The measured rate of pressure change for the active Q-RPT in the current pressure unit per second. This is followed by the current pressure unit of measure. The pressure measured by the RPM4 on-board barometer in the current pressure unit (and always absolute). This is followed by the current pressure unit.
- Page 109 Q-RPTs selected with this command are used with their full default pressure range. The reply indicates the active range in psi if the RPM4 is a “US” version or in kPa if the RPM4 is an “SI” version. Used as a simple query, the active range is returned, which can be an AutoRanged range or a default range (see “ARANGE”...
- Page 110 “period ": Remarks The RPM4 can have the speed in which it integrates each measurement (“read rate”) automatically adjusted based on the rate, or it can manually set to a fixed period. Increasing the read rate increases the reply time for pressure and rate queries. In differential mode and when using the HL Q-RPT, the Lo Q-RPT read rate is always set to the same read rate as the Hi.
- Page 111 “RESET” Remarks The RPM4 has user settings (units, resolution, etc.) that can be reset to factory defaults. remote “RESET” program message corresponds to the front panel “Reset - Sets”. calibration coefficients and communications settings are not affected. The reset cycle takes up to 3 seconds to complete.
- Page 112 Up to two (three including the HL Q-RPT which is a combination of the Hi and Lo) internal Q- RPTs can be available for use in an RPM4. You can query the RPM4 for information about each particular Q-RPT. The Q-RPT data is returned in the following format:...
- Page 113 SDS is closed. If a Q-RPT’s SDS is full time “OFF”, then it is not be affected by this command. The status of the active Q-RPT’s SDS system is replied. If the RPM4 is in differential mode or the HL Q-RPT is active, then this command opens or close both the Hi and Lo SDS at the same time, unless the SDS is full time “off”.
- Page 114 RPM4™ OPERATION AND MAINTENANCE MANUAL Purpose To read the serial number of the RPM4. Query “SN?” Classic “SN” Remarks The RPM4 is serialized. The serial number can be read using this program message. Example Query sent: (enhanced) Query reply: Example Sent: (classic)
- Page 115 Specify the HL Q-RPT if the HL Q-RPT is active Remarks The RPM4 handles all pressure values internally in Pascal. equivalent of 1 Pa in the current pressure unit of measure. This program message allows the user to convert pressures...
- Page 116 “limit": Remarks The RPM4 has an upper limit for each range and for each measurement mode (gauge, absolute, and differential). If the pressure does exceed the upper limit, the pressure display flashes. This feature should always be used to prevent accidental over pressure of a device under test.
- Page 117 “VER?” Classic “VER” Remarks The software version of the RPM4 can be read. This is useful for checking for the presence of the RPM4 and for reference purposes. It indicates the internal Q-RPT(s) and software version. Example Query sent: “VER?”...
-
Page 118: Status Reporting System
4.5.1 ERROR QUEUE The RPM4 keeps track of remote errors by using an error queue. If an error occurs, it is pushed onto the Error Queue. If you are using the COM1 port, the error number is immediately replied in the form “ERR#nn where nn is the error code from 0 to 99. The “ERR?” (or “ERR”) query can then be used to pull the error from the Error Queue in it’s descriptive text format. -
Page 119: Figure 6. Status Register Schematic
Indicates that the SRQ line of the IEEE-488 interface has been asserted by the RPM4. This bit is cleared when a serial poll is performed on the RPM4, and is a part of the Status Byte Register when read using a serial poll. This bit does not apply if the COM1 port is being used. -
Page 120: Standard Event Register
ESB bit. The description of these bits are given as: Power On Bit 7 (128) Indicates that the RPM4 power has been cycled since the last time this bit was read or cleared. -
Page 121: Ieee Std. 488.2 Common And Status Program Messages
IEEE STD. 488.2 COMMON AND STATUS PROGRAM MESSAGES The RPM4 supports a set of commands that are common to all instruments conforming to IEEE Std. 488.2. These command make it easy to perform basic function for any device that supports these commands. -
Page 122: Program Message Descriptions
“∗OPC” Query “∗OPC?” Remarks This Command enables the RPM4 to set the OPC bit in the Standard Event Status Register when it has completed all pending functions. The Query replies with a “1” when all functions are complete. Example Sent:... - Page 123 (as if the “∗RST” program message was executed), and the ∗TST query will return a non zero value. If the RPM4 passed the test on power-up OR if the ∗TST query was used at least once since the RPM4 was powered up the reply will be a ‘0’.
- Page 124 RPM4™ OPERATION AND MAINTENANCE MANUAL © 2004-2007 DH Instruments, a Fluke Company Page 114...
-
Page 125: Maintenance, Adjustments A N D C A L I B R A T I O
For rapid assistance in specific situations see Chapter 6 for troubleshooting information. RPM4 is covered by a limited one (1) year warranty. Unauthorized service or repair during the warranty period is undertaken at the owner’s risk and may cause damage that is not covered under warranty and/or may void the warranty. -
Page 126: Pa And Pm Coefficients
PM values can cause out of tolerance measurements. A new RPM4 is delivered with PA and PM values set to zero and 1 for all ranges. This does not mean that the RPM4 has not been calibrated. In the original factory calibration, privileged factory coefficients are used for calibration with the user PA and PM set to zero and 1. -
Page 127: Equipment Required
Q-RPT prior to running the calibration. The current PA, PM and P Axxx Q-RPTs) can be viewed by pressing [SPECIAL], <8cal>, <1view>. 5.2.2 EQUIPMENT REQUIRED The recommended calibration standards for RPM4 Q-RPTs are DHI PG7000 piston gauges (PG7102, PG7202, PG7601 for gas; PG7302 for oil). Contact DHI for additional information. 5.2.2.1... -
Page 128: Set-Up And Preparation
SET-UP AND PREPARATION To set-up and prepare an RPM4 for calibration of a Q-RPT: Set the RPM4 on a stable surface near the calibration standard at a height as close as possible to the calibration standard’s reference height. Consider the connections that may need to be made to the rear panel and access to the front panel display and keypad. -
Page 129: Recommended Calibration Point Sequence
Standard or Premium Class (see Section 1.2.2.1). RPM4 Q-RPTs is indicated in the model number on the product label and on the rear panel Q-RPT label (<s> for standard, <p> for premium, for example A7Ms or A7Mp). -
Page 130: Premium Class Q-Rpts
Q-RPT span. For example, verify an A7M Q-RPT in the default range of 0 to 7 MPa (1 000 psi) and in the AutoRange range of 2.1 MPa (300 psi). © 2004-2007 DH Instruments, a Fluke Company Table 23. Calibration Point Sequence, Standard Class,... -
Page 131: Table 25. Calibration Point Sequence, Premium Class, Axxx And Gxxx Q-Rpts
Premium Class gauge mode (Gxxx) calibration point sequence (see Table 25). BGxxx Q-RPTs calibrated in gauge measurement mode only should not be used in negative gauge mode. Page 121 © 2004-2007 DH Instruments, a Fluke Company POINT 10 % 15 % 20 % 30 %... -
Page 132: Turning Off Absolute And Negative Gauge Measurement Modes For Axxx (Absolute) Q-Rpts
<1no> causes absolute and negative gauge modes to be unavailable for the Q-RPT. 5.2.6 Q-RPT CALIBRATION USING CALTOOL FOR RPTS SOFTWARE To calibrate RPM4 Q-RPTs using CalTool software, refer to Sections 5.2.1, PRINCIPLE, 5.2.2, and 5.2.3 in this manual and then refer to the CalTool for RPTs Software Manual. CalTool General Accessories Disk and can be downloaded from www.dhinstruments.com. - Page 133 (see Section 3.5.5.5). A new RPM4 is delivered with PA and PM values set to zero and 1 for all ranges. This does not mean that the RPM4 has not been calibrated. In the original factory calibration, privileged factory coefficients are used for calibration with the user PA and PM set to zero and 1.
-
Page 134: Q-Rpt Calibration/Adjustment Without Caltool For Rpts Software
5.2.8 Q-RPT CALIBRATION/ADJUSTMENT WITHOUT CALTOOL FOR RPTS SOFTWARE PRINCIPLE The RPM4 Q-RPTs can be calibrated and adjustments made without using CalTool for RPTs software. This requires: • Applying pressures with a calibration standard and recording the pressures measured by RPM4. -
Page 135: Adjustment Of On-Board Barometer
ADJUSTMENT OF ON-BOARD BAROMETER PURPOSE To adjust the output of the on-board barometer (see Section 1.2.2.2). RPM4’s that have only G100K or G200K Q-RPTs (no Axxx or G15K or BGxxx) are NOT equipped with an on-board barometer. PRINCIPLE The on-board barometer output can be adjusted using PA and PM values in the same manner as Q-RPTs (see Section 5.2.1.1). -
Page 136: Reloading Embedded Software Into Flash Memory
MEMORY RPM4 uses FLASH memory. This allows the embedded software that controls RPM4 operations and functions to be loaded into RPM4 over its COM1 port from a computer with a simple FLASH loading utility program. To replace corrupted software or upgrade your software, access the DHI worldwide web site at www.dhinstruments.com and go to SOFTWARE. -
Page 137: Subassembly Description And Location
The micro board supports a Motorola 68302 micro-controller, EPROM, EEPROM, 128k x 16 bit NVRAM, 8 Mbit flash memory; RS-232 and IEEE-488.2 communications; keypad and display control. An I/O port controls other ports and devices in RPM4. 5.5.2 POWER SUPPLY MODULE + 12 V DC (±... -
Page 138: Driver Board
See Figure 8 for pneumatic schematics of different Q-RPT module configurations. 5.5.5.1 RPM4 is always equipped with a Hi Q-RPT module. The Hi Q-RPT module is in the Hi Q-RPT position. It is always the higher range in two Q-RPT RPM4s. -
Page 139: Q-Rpt Module Pneumatic Schematics
SDS Closed Power off Gxxx or BGxxx Q-RPT VALVE STATE CONDITION SDS Open SDS Closed Power off Figure 8. Pneumatic/hydraulic schematics of RPM4 with Single Q-RPT Module 5. MAINTENANCE, ADJUSTMENTS AND CALIBRATIONS Page 129 © 2004-2007 DH Instruments, a Fluke Company... -
Page 140: Figure 9. Pneumatic/Hydraulic Schematics Of Rpm4 With Two Q-Rpt Modules
RPM4™ OPERATION AND MAINTENANCE MANUAL The pneumatic schematic for RPM4’s with two Q-RPT modules is the same as for the single Q-RPT modules in Figure 8 with the following exceptions: • If both modules use the barometer, the barometer is connected to teed to both module barometer connection points. -
Page 141: T R O U B L E S H O O T I N
RPM4 operation. This troubleshooting guide is intended as an aid in identifying the reason for RPM4 behavior and determining whether the behavior is due to normal operation or an internal or external problem. - Page 142 3.5.7.3 Adjust stability setting or correct other conditions. 3.4.3, 3.2.1 Operation is normal. 3.3.3 If RPM4 has two Q-RPTs of the same type, set the default range of the Hi Q-RPT. 3.3.3.1 Check that absolute/negative gauge is ON for the Q-RPT.
- Page 143 NOT is flashing over the pressure getting to the Q-RPT. indication. RPM4 may have two TEST(+) ports and the pressure to be measured is connected to the wrong Q-RPT’s port Is NOT reading pressure applied to the TEST(+) port.
- Page 144 RPM4™ OPERATION AND MAINTENANCE MANUAL © 2004-2007 DH Instruments, a Fluke Company Page 134...
-
Page 145: Remote [Ent]
The RPM4 remote ENTER function operates by detecting the open or closed status of the REMOTE ENTER switch. The normal status of the ENTER switch is OPEN. When RPM4 detects a CLOSED condition held for 300 ms, it is interpreted as equivalent to a press of the [ENT] key. -
Page 146: Unit Conversion
UNIT CONVERSION 7.2.1 PRESSURE RPM4 performs all internal calculations in SI units. Numerical values input or output in other units are converted to SI immediately after entry and back to other units just before output as needed. Table 28 provides the conversion coefficients used by RPM4 to convert numerical values expressed in SI units to corresponding values expressed in other units. -
Page 147: Warranty
The provisions of this warranty and limitation may not be modified in any respect except in writing signed by a duly authorized officer of DH Instruments. The above warranty and the obligations and liability of DH Instruments, a Fluke Company and its Authorized Service Providers exclude any other warranties or liabilities of any kind. - Page 148 RPM4™ OPERATION AND MAINTENANCE MANUAL © 2004-2007 DH Instruments, a Fluke Company Page 138...
-
Page 149: G L O S S Ar
A DISPLAY function in which the highest and lowest pressure measurements since HiLo reset are recorded and displayed. The designation of a single Q-RPT in an RPM4, or, if there are two, the one that has the Hi Q-RPT highest full scale default range. - Page 150 PPC3. PPC3 automates RPM4 pressure control. The transducer used by RPM4 for low uncertainty pressure measurement. May be designated as Hi, Lo or HL depending on its position and role in t he RPM4. Q-RPT (Quartz Reference...
Need help?
Do you have a question about the RPM4 and is the answer not in the manual?
Questions and answers