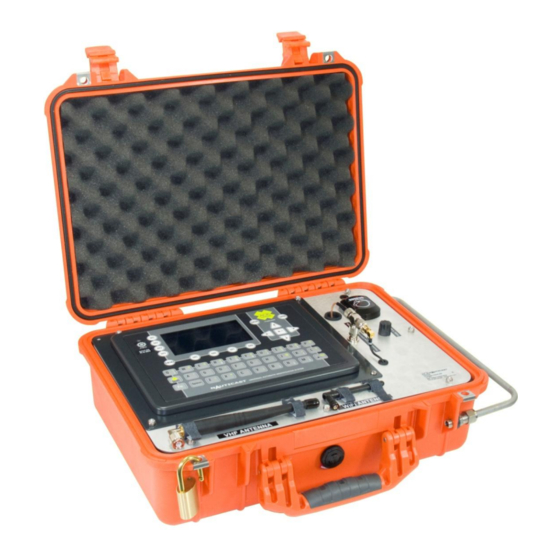
Summary of Contents for ACR Electronics NAUTICAST 2645
- Page 1 PRODUCT SUPPORT MANUAL ADDENDUM NAUTICAST™ Portable AIS (SOLAS and Inland AIS) // Automatic Identification System Product No.: 2645 (Inland), 2657 (SOLAS) Y1-03-0243 Rev.D...
- Page 2 Although ACR strives for accuracy in all its publications; this material may contain errors or omissions, and is subject to change without prior notice. ACR shall not be made liable for any specific, indirect, incidental or consequential damages as a result of its use. ACR components may only be used in safety of life devices or systems, with the express written approval of ACR, as the failure of such components could cause the failure of the ACR device or system.
-
Page 3: Table Of Contents
NAUTICAST™ Portable AIS Product Support Manual Addendum Index Page Number Introduction Unpacking the Portable AIS ....................5 Options ........................... 6 External connections ....................... 6 First steps ..........................7 Pre-charging ..........................7 Initial configuration ......................... 7 Power Supply / Charging ..................... 7 Portable AIS power switch functions .................. - Page 4 Update Warranty and Service Info C. Wahler History of Software Versions This revision of the manual is valid for the software version (s) below stated and future versions unless otherwise noted (ref.: www.acrelectronics.com / www.acr-europe.com). AIS Software Date Status Comments Responsible...
-
Page 5: Introduction
Fairway views to display surrounding traffic and their ships’ data. Selectable range zoom functions along with target sorting provide customizable views of surrounding traffic. The ACR NAUTICAST™ Portable AIS transponder fully complies with the technical specifications for the Universal Automatic Identification System (UAIS) transponder issued by the International Maritime Organization (IMO). -
Page 6: Options
2.1 Options For complex installation situations, the following additional accessories are available as options: ACR Part Number Accessory 2639 Secondary remote GPS antenna with 16.4 ft (5m) cable. For use when built- in antenna will not acquire GPS data due to location 2647 GPS extension cable, 66.6 ft (20m) -
Page 7: First Steps
First steps 3.1 Pre-charging NOTE: Prior to charging your Portable AIS, place the power mode switch in the OFF position and remove the fuse from plastic bag that is taped to the top cover inside the portable AIS case. Remove the fuse cap cover as illustrated in Figure 1, page 5 and insert into the fuse holder and place the fuse holder cap back in place. -
Page 8: Operating From Ship's Dc Power (18 - 36V)
4.3 Operating from Ship’s DC Power (18 – 36V) To properly power the transponder from ships power: Confirm that the power switch is in the center OFF position Confirm that power source is active Attach the DC Power Cable to ships DC power supply and then to the External DC Input socket ... -
Page 9: Step 2: Enable And Connect To The Wireless Device
Software type Location on web Device Installer http://www.lantronix.com/device-networking/utilities-tools/device-installer.html COM Port redirector http://www.lantronix.com/device-networking/utilities-tools/com-port- redirector.html 5.4 STEP 2: Enable and connect to the wireless device Power on your wireless device. Then re-boot your PC. Ensure your wireless port is enabled. Most laptops will default to OFF when under battery power or if not in use for long periods of time. -
Page 10: Step 4: Assign A Tcp/Ip Address
5.6 STEP 4: Assign a TCP/IP Address Assign TCP/IP Address to your Wi-Fi™ device to match your PC. Open device installer program. Search for device. Software will automatically find Matchport wireless device and display it in the directory tree. NOTE: If the Matchport Wi-Fi™ device is not found, please open and close the program and try again. If you opened the program before the link was established, it will not find the module during the search routine. -
Page 11: Step 6: Rs232 Com-Port Emulation
Power off and on the Portable AIS Unit. Verify that White LED stays ON upon application of power (This indicates that it has automatically connected to test PC and is ready to go). Open Hyper terminal and connect via RS232 to Com 100, Verify ECDIS Data is present in terminal window. -
Page 12: Antennas
5.9 Antennas 5.9.1 External VHF-Antenna Always connect your VHF rubber duck antenna to the connector labeled VHF. If another external VHF antenna is used, connect it to the same port. You will need to ensure your antenna connection is converted to TNC Male to mate to the VHF antenna port. Ensure antenna is connected before powering unit on. -
Page 13: Mounting Strap
WARNING: Do not remove the waterproof caps without attaching cables or antennas. This will leave the unit vulnerable and will potentially damage it if exposed to water. If the NAUTICAST™ Portable AIS is not in use, leave waterproof caps on at all times. 6.2 Mounting strap There is a strap to tie the unit down. -
Page 14: Support, Warranty, And Notices
This product is warranted against factory defects in material and workmanship for a period of 1 (one) year* from date of purchase or receipt as a gift. During the warranty period ACR Electronics, Inc. will repair or, at its option, replace the unit at no cost to you for labor, materials and return transportation from ACR. -
Page 15: Appendix: Drawings
7.2 Appendix: Drawings Portable AIS Manual Addendum Y1-03-0243D...


Need help?
Do you have a question about the NAUTICAST 2645 and is the answer not in the manual?
Questions and answers