Table of Contents
Advertisement
Advertisement
Table of Contents

Related Manuals for La Crosse Technology C86234


Summary of Contents for La Crosse Technology C86234
-
Page 1: Weather Center
C86234 Wireless Professional Weather Center Operations Manual Revision: 7... -
Page 2: Table Of Contents
Heavy Weather Pro software allows you to use a PC to monitor and record weather data received from the La Crosse Technology® wireless weather station via a proprietary USB device that was provided. Monitor and record a variety of data collected by the weather station including both indoor and external values sampled by the various weather station sensors. - Page 3 Date set: ........................... 11 °F/°C temperature unit: ......................12 Wind speed unit: ........................12 Rainfall unit: ..........................12 Relative air pressure unit: ...................... 12 Relative pressure reference value: ..................13 Weather tendency sensitivity: ....................13 Storm Warning Sensitivity: ....................13 Storm Alarm on/ off set: ......................
- Page 4 Relative Humidity ........................24 Wind Chill-Equivalent Temperature ..................24 Wind Gust ..........................24 MOUNTING AND PLACEMENT OF SENSORS AND DISPLAY ........25 Wind sensor ..........................26 Rain sensor ..........................26 Thermo-hygro sensor ......................27 Display Station and Heavy Weather PC Software ............27 SPECIFICATIONS ........................
-
Page 5: Inventory Of Contents
INSTANT TRANSMISSION is the state-of-the-art new wireless transmission technology, exclusively designed and developed by La Crosse Technology®. INSTANT TRANSMISSION offers you an immediate update of all the outdoor data measured from the transmitters: follow the climatic variations in real-time! -
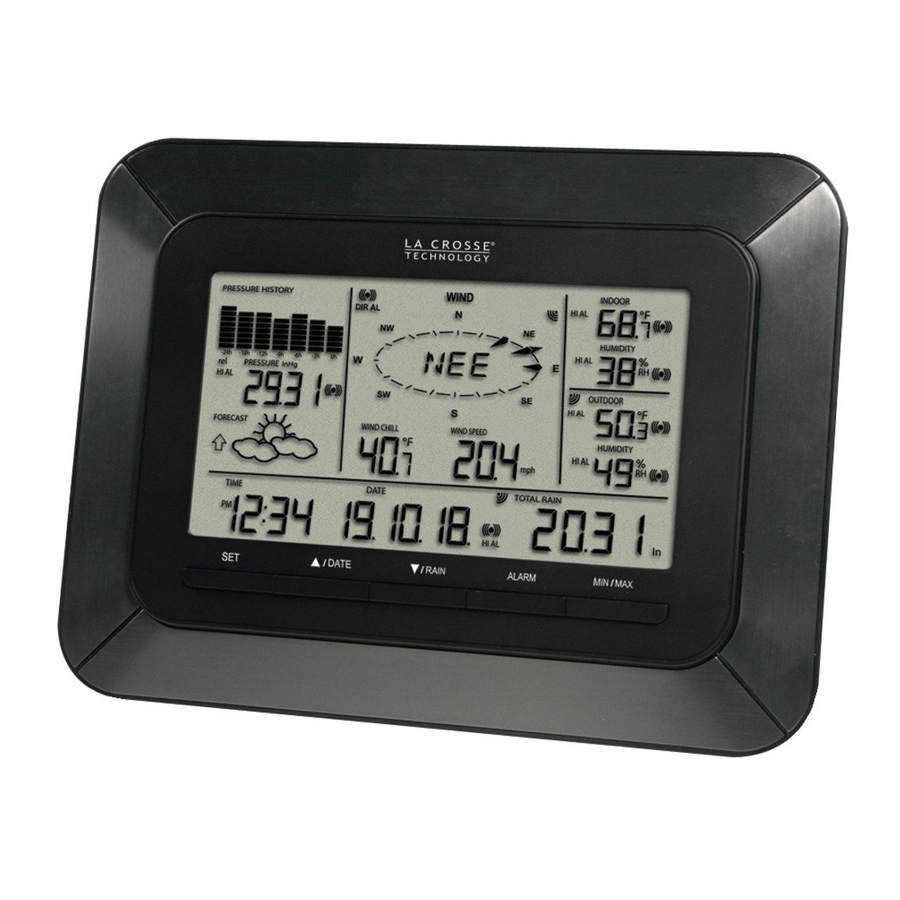
Page 6: Features
FEATURES WIRELESS DISPLAY C86234 Weather station works with or without a computer • 12/24 hr. time & calendar with date, month & year • Manual time (without PC computer) or automatic time/date when using USB transceiver to sync to PC time/date •... -
Page 7: Wireless Solar Powered Wind Sensor (Tx63U-It)
Vista, Windows 7 Windows 8 Download software from: www.lacrossetechnology.com/c86234 OPTIONAL REMOTE MONITORING Remotely monitor home & backyard weather from your smartphone, tablet or computer: * • Backyard temp. & humidity • Wind, rain & barometric pressure • Indoor temp. & humidity •... -
Page 8: Setup Instructions Step By Step
SETUP INSTRUCTIONS STEP BY STEP IMPORTANT: Make sure to observe the correct polarity when inserting batteries. The "+" markings on the batteries must line up with the diagrams inside the battery compartments. Inserting the batteries incorrectly may result in permanent damage to the units. During the setup process, place the wireless display and the outdoor sensors on a surface with 5-10 feet between each sensor and the display. -
Page 9: Function Buttons
SETUP TROUBLESHOOTING: If the sensor data fails to display for any of the outdoor sensors within 10 minutes, (“- - -“are displayed), remove the batteries from all units for 1 minute and start the Setup procedure again at Step 1. FUNCTION BUTTONS ... -
Page 10: Min/Max
Stop the alarm when the time alarm or weather alarm rings Press to exit max/ min record display mode Stop the weather alarm when ringing MIN/MAX Press to display minimum and maximum records of various weather data ... -
Page 11: Lcd Contrast Set
10. Weather tendency threshold value 11. Storm warning threshold value 12. Alarm On/ Off setting 13. Wind direction display type 14. Factory Reset LCD CONTRAST SET The LCD contrast can be set within 8 levels; from "Lcd 1" to "Lcd 8" (default setting is "Lcd 5"): 1. -
Page 12: F/°C Temperature Unit
4. Press the SET button to confirm the month and enter the date setting mode. The date digit will flash. 5. Press the ▲/DATE button or ▼/RAIN button to set the date. 6. Press the SET button to confirm and to enter the °F/°C TEMPERATURE UNIT. °F/°C TEMPERATURE UNIT: The temperature can be displayed in °F or °C. -
Page 13: Relative Pressure Reference Value
RELATIVE PRESSURE REFERENCE VALUE: Note: For an exact measurement, it is necessary to adjust the barometer to the local relative air pressure (related to elevation above sea level). Ask for the current air pressure of the home area (local weather service, the World Wide Web, calibrated instruments in public buildings, airport). -
Page 14: Storm Alarm On/ Off Set
STORM ALARM ON/ OFF SET: The storm warning display (flashing downward weather tendency arrow) can be accompanied by a ring of the alarm. Switch the acoustic storm warning alarm On (AON) or Off (AOFF) (Default OFF). 1. The digit "AOFF" will flash. 2. -
Page 15: To Exit The Manual Setting Mode
4. After waiting for 10 minutes, insert the batteries into the thermo-hygro sensor, and rain sensor making sure to align the "+" symbol on the batteries with the markings on the battery cover and inside the battery compartment. 5. Within 2 minutes of inserting the batteries into the sensors, insert the batteries into the display, making sure to align the "+"... -
Page 16: Default Weather Alarm Values
DEFAULT WEATHER ALARM VALUES: 28.35 inHg Wind gust High 62.0mph Pressure High 30.71 inHg Wind Direction North Rainfall in 24 High 1.96 in 32F hours Temperature (In or High 104F Out) Relative Humidity (In or Out) High PRESSURE ALARMS: 1. In the normal display mode, press the ALARM button once. The high-pressure alarm display will be shown. -
Page 17: Indoor Humidity Alarms
6. Press the ALARM button once. The low outdoor temperature alarm display will be shown. 7. Press and hold the SET button for about 2 seconds. The temperature digit will flash. 8. Press the ▲/DATE button or ▼/RAIN button to set the low indoor temp alarm value. -
Page 18: Outdoor Humidity Alarms
8. Press the ▲/DATE button or ▼/RAIN button to set the low outdoor temp alarm value. Hold the arrow button in to change the value faster. 9. Press the ALARM button to confirm the setting. The digit will flash. 10. Press the SET button to switch the alarm on or off. The ((())) icon indicates the alarm is switched on. -
Page 19: 24 Hour Rainfall Alarm
4. Press the SET button to set a wind direction alarm value. A pointer icon will appear inside of the compass circle to indicate an alarm setting for that wind direction. 5. To remove an alarm setting for a wind direction, press the SET button again to remove the selected wind direction alarm. -
Page 20: Display Modes
DISPLAY MODES MODE 1 Press and release the SET button to toggle between Mode 1 and Mode 2 display: Pressure history graph displays 24 hour history Outdoor temperature displayed in the outdoor section Wind speed displayed in the wind section MODE 2 Press and release the SET button to toggle between Mode 1 and Mode 2 display: ... -
Page 21: Weather Tendency Indicator
check in the setting mode –see WEATHER TENDENCY SENSITIVITY in the manual settings above. The displayed icon forecasts the weather in terms of getting better or worse and not necessarily sunny or rainy as each icon indicates. For example, if the current weather is cloudy and the rainy icon is displayed, it does not mean that the product is faulty because it is not raining. -
Page 22: Wind Direction And Wind Speed Measurement
The vertical bars are plotted at each of the seven steps and give the trend over the recorded period. The 0 hour vertical bar will always display at the midline height to indicate the current air pressure. The varying height of bars in other columns on the graph indicates a relative change in air pressure up or down from the 0 hour. -
Page 23: Rainfall Measurement
RAINFALL MEASUREMENT The 1hour, 24-hour, week, month or total rainfall measurement is displayed on the LCD, in the unit of inch or mm. For all measurements, it is important time and date are set correctly on your display. 1-HOUR RAIN: The 1-hour rain reflects rain that has fallen from current time and back 1- hour. -
Page 24: Reset Total Rainfall Amount
RESET TOTAL RAINFALL AMOUNT The total rainfall measurement is displayed in the unit of mm or inch. It shows the total rainfall accumulated since last reset of the total rainfall amount. In either Mode 1 or Mode 2 display, press and release the MIN/MAX button until the display shows the Total Rainfall value. -
Page 25: Mounting And Placement Of Sensors And Display
MOUNTING AND PLACEMENT OF SENSORS AND DISPLAY IMPORTANT: Ensure that all of the sensor data can be received at the intended mounting locations before you drill mounting holes. The outdoor sensors have a wireless range of 200- feet. Keep in mind that the 200-foot range equates to an open-air scenario with no obstructions. Each obstruction (roof, walls, floors, ceilings, etc.) will reduce the range. -
Page 26: Wind Sensor
WIND SENSOR The wind sensor must be installed with the front of the sensor (the solar panel) facing true South, or the reported wind direction will not be accurate. Mount within the 200-foot wireless range of the thermo-hygro sensor and on the same side of the house. -
Page 27: Thermo-Hygro Sensor
3. Computer-connected weather station with remote monitoring and alerts – Connect the USB transceiver to your computer for use with Heavy Weather Pro PC software. Download and install the latest versions of the Heavy Weather Pro and La Crosse Alerts PC software at http://www.lacrossetechnology.com/c86234... -
Page 28: Specifications
SPECIFICATIONS INDOOR TEMPERATURE 41°F to 104°F (5°C to 40°C) (“OF.L” displayed if outside this range) INDOOR HUMIDITY 3% to 99% (“- -” displayed if < 1%, "99" displayed if 99%) OUTDOOR TEMPERATURE / DEW POINT -40°F to 139.8°F (-40°C to 59.9°C) (“OF.L”... -
Page 29: Air Pressure
AIR PRESSURE Relative pressure pre-set range: 27.17 to 31.90 inHg (919 to 1080 hPa) Measured every 15 seconds TRANSMISSION RANGE Rain to Thermo-hygro: 200 feet in open space Wind to Thermo-hygro: 200 feet in open space Thermo-hygro to Display: 200 feet in open space Display to USB Transceiver: 80 feet in open space POWER CONSUMPTION WEATHER CENTER... -
Page 30: Care And Maintenance
CARE AND MAINTENANCE Do Not Mix Old and New Batteries Do Not Mix Alkaline, Lithium, Standard, or Rechargeable Batteries Extreme temperatures, vibration and shock should be avoided as these may cause damage to the unit and give inaccurate forecasts and readings. ... -
Page 31: Fcc Statement
La Crosse Technology, Ltd or La Crosse Technology, Ltd’s authorized service center. La Crosse Technology, Ltd will repair or replace this product, at our option and at no charge as stipulated herein, with new or reconditioned parts or products if found to be defective during the limited warranty period specified above. - Page 32 The La Crosse Technology, Ltd warranty covers all defects in material and workmanship with the following specified exceptions: (1) damage caused by accident, unreasonable use or neglect (including the lack of reasonable and necessary maintenance); (2) damage occurring during shipment (claims must be presented to the carrier); (3) damage to, or deterioration of, any accessory or decorative surface;...
Need help?
Do you have a question about the C86234 and is the answer not in the manual?
Questions and answers