Table of Contents
Advertisement
Quick Links
UGRiiiid
CareGuide
ROPER'"
-. EzoIneAppliances
FGS397X
Thank
you for choosing
a
Roper appliance.
This Use and Care Guide will help you
operate and mainta.in your new, quality-
built Roper range. Keep this Use end
Care Guide in a safe place for future
reference.
Complete
and mail the
Product
Registration
Card.
This
card enters your warranty
into our
warranty system that ensures efficient
claim processing, can be used as a proof
of purchase for insurance claims and
helps Roper to contact you immediately
in the unlikely event of a product-safety
recall.
You are responsible
for
It is your responsibility to be sure that
your range:
Has been properly installed where
it is protected from the elements,
and on a floor strong enough to
support its weight. (See the
Installation Instructions.)
Is not used by anyone unable to
operate it properly.
Is properly maintained.
Is used only for jobs expected of a
home range.
Is secured by properly installed
anti-tip bracket(s), with rear
leveling leg(s) positioned under
bracket(s).
TO THE INSTALLER:
PLEASE LEAVE
THIS INSTRUCTION
BOOK WITH THE UNIT.
TO THE CONSUMER:
PLEASE READ AND KEEP THIS BOOK
FOR FUTURE REFERENCE.
Contents
Page
-2
PaitsAndFeatuies
i
4
4
:
5
Usinu the electronic oven control
s
Usin the oven
10
10
Cleaning chart
ii
WkUTEUl~
::
How to get service or assistance
-16
Advertisement
Table of Contents

Related Manuals for Roper FGS397X


Summary of Contents for Roper FGS397X
-
Page 1: Table Of Contents
This Use and Care Guide will help you operate and mainta.in your new, quality- Has been properly installed where built Roper range. Keep this Use end it is protected from the elements, Care Guide in a safe place for future and on a floor strong enough to reference. -
Page 2: Important Safety Iusauctions
Important Safety Instructions Gas ranges have been thoroughly tested for safe and efficient operation. However, as with any appliance, there are specific operation. installation and safety precautions which must be followed to ensure safe and satisfactory To reduce the risk of fire, electrical shock, injury to persons, or damage when using the range, follow basic precautions, including the following: . - Page 3 DO NOT use oven cleaners. No if available, a multipurpose dry DO NOT leave children alone or commercial oven cleaner or oven chemical or foam-type unattended in area where the liner protective coating of any extinguisher. range is in use. They should never kind should be used in or around be allowed to sit or stand on any Never leave surface burners...
-
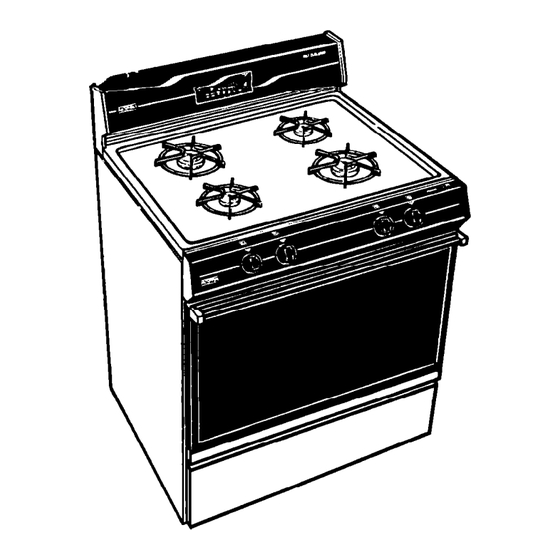
Page 4: Using Your Range
Using Your Range Right uont Surface burner marker Right rear display/clock Digital control knob control knob When you are not using the oven, this is an accurate digital clock. When using Left koit L&rear Oven light SW%& the oven or Minute Timer, the display control knob control knob will show the time, temperature settings... -
Page 5: Setting The Clock
Time/Temp Set Kuob Using the electronic Minute Using the oven Timer Beking/roasting 1. Position the rack(s) properly before turning on the oven. To change rack position, pull rack out to stop, raise front edge and lift out. When using one rack, the rack should be placed so the top food will be centered in the oven. - Page 6 Refer to “Broiling chart” below for Broiling tips Broiling correct broiling tunes. . Use the broiler pan and grid for After broiling, remove the broiler broiling. They are designed to dram pan from the oven when you excess liquid and fat away from the cooking surface to help prevent remove the food.
- Page 7 To cancel the oven control Using the electronic oven To delay start and stop setting: automatically: control Push the SetlCancel button or turn 1. Position the oven rack(s) properly The electronic oven control will turn the the Time/Temp Set Knob until and place the food in the oven.
-
Page 8: The &En Vent
Replacing the storage drawer: The oven vent The storage drawer The storage drawer is for storing pots and pans. The drawer can be removed to make it easier to clean under the range, and to check for installation of the anti- tip bracket(s). -
Page 9: Caringforyourrange
Caring For Your Range soiled or clogged, use a cotton The surface burner grates swab or a soft cloth to clean the area. If needed, use swab or cloth with ammonia, white vinegar or Bum, Electrical Shock, Fire And warm water. For cooked-on soil, Explosion Hazard use a medium- to stiff-bristle tooth .Make sure all controls are OFF... -
Page 10: The Oven Burner
9. Turn the burner on to determine if 4. If you want the oven racks to Using the Self-Cleaning cycle remain shiny, remove from the it wik light. If the burner does not The Self-Cleaning cycle uses very high oven and clean them by hand. light after cleaning, contact an heat to burn away soiL Before you start, Otherwise, put oven racks on... - Page 11 special tips the controls Setting 6. After the self-Cleaning cycle is completed, the CLEAN indicator Keep the kitchen well ventilated will go off and the time-of-day will during the Self-Cleaning cycle to show in the large display. help get rid of heat, odors and smoke.
- Page 12 Burn And Electrical Shock Hazard Make sure all controls are OFF and the range is cool before cl-g. Failure to do so fan result in burns or electrical shock. HOW TO CLEAN PART WHAT TO USE Wipe off regularly when range is COOL Exterior surfaces (other Warm, soapy water and a soft Do not allow food containing acids (such as...
-
Page 13: The Oven Light
To replace the oven light: The oven light The oven light will come on when you push the Oven Light Switch on the control panel. Push the switch again to turn off the light. Ektrical Shock And Personal Injury Hazard 1. -
Page 14: Before You Call For Service
Before You Call For Service If you are having an operating problem, check the chart to see what the cause might be before you call for assistance. WHATTOJIO OPERATING PROBLEM CHECK IF operates. Contact an authorized Rope? service techni- Nothing m Range is properly connected to gas cian to reconnect range to gas and/or electri- and electrical supplies. - Page 15 WHATTODO OPERATING PROBLEM CHECK IF Control knob(s) will not Push in knob(s) before turning. YOU pushed in knob(s) before trying to turn. If the Self-Cleaning cycle Reset clock if necessary. . The clock shows the correct time of will not operate. day.
- Page 16 E. Any labor costs during the limited warranties. This Roper appliance is warranted by Whirlpool Corporation. Under no circumstances shall it be liable under this warranty for incidental or consequential damages and all implied warranties are limited to the same tune periods stated in the express warranties for Roper Brand Appliances.
Need help?
Do you have a question about the FGS397X and is the answer not in the manual?
Questions and answers