Table of Contents
Advertisement
Quick Links
Advertisement
Table of Contents

Subscribe to Our Youtube Channel
Related Manuals for Roland LX-10F


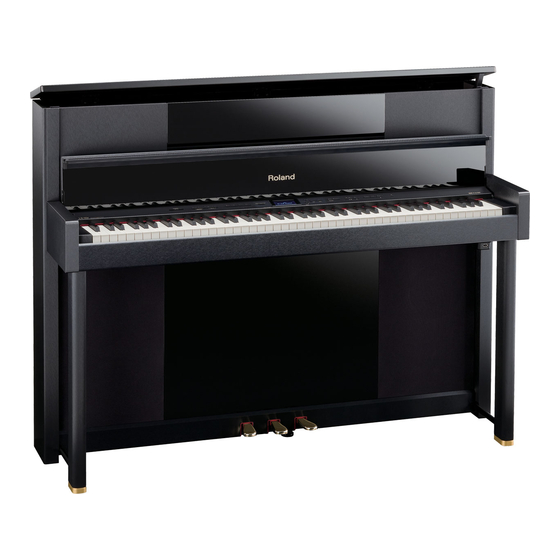
Summary of Contents for Roland LX-10F
-
Page 3: Important Safety Instructions
Copyright © 2010 ROLAND CORPORATION All rights reserved. No part of this publication may be reproduced in any form without the written permission of ROLAND CORPORATION. Roland is a registered trademark or trademark of Roland Corporation in the United States and/or other countries. - Page 4 Lessons at home! Play together with your family Dividing the keyboard for two-person performance (Twin Piano) • • • p. 27 Check your own performance Recording your performance • • • p. 41 Play along with a metronome Performing with the metronome • • • p. 22...
- Page 5 Select and listen to the song you want to play! Listening to songs • • • p. 37 Playing back songs on external media • • • p. 62 Play along with the song one hand at a time Playing parts individually • • • p. 38 Now I can play it! Now I can play it! Night-time or early morning lessons...
-
Page 6: Table Of Contents
Contents USING THE UNIT SAFELY ..... 8 Adjusting the Piano Sound to Your Taste (Piano Designer) ...... 34 IMPORTANT NOTES ......10 What is Piano Designer?..........34 Using Piano Designer............34 Names of Things and What They Do 12 Piano Designer Settings ..........35 Before You Play........ - Page 7 (Damper Pedal Part) ..........58 Connecting to MIDI Devices .........67 Changing How the Pedals Work Connecting a MIDI Sequencer to the LX-10F ..67 (Center/Left Pedal Func) ......... 58 Producing Sounds from a MIDI Sound Switching On/Off the Display of Lyrics (Lyrics)..58 Module by Playing the LX-10F ......67...
-
Page 8: Using The Unit Safely
Refer all servicing capable of producing sound levels that could cause to your retailer, the nearest Roland Service Center, or permanent hearing loss. Do not operate for a long an authorized Roland distributor, as listed on the period of time at a high volume level, or at a level that “Information”... - Page 9 Before using the unit in a foreign country, consult • Raise the adjusters on the stand (p. 20). with your retailer, the nearest Roland Service Center, • Close the lid. or an authorized Roland distributor, as listed on the ..............................“Information” page. •...
-
Page 10: Important Notes
• Never use benzine, thinners, alcohol or solvents of any kind, to avoid the data, and Roland assumes no liability concerning such loss of the possibility of discoloration and/or deformation. data. -
Page 11: Additional Precautions
Unfortunately, it may be impossible to restore the contents of data that was stored on a unit’s memory or a USB memory once it has Write been lost. Roland Corporation assumes no liability concerning such (can write new data onto disk) loss of data. -
Page 12: Names Of Things And What They Do
Names of Things and What They Do [Volume] slider [Piano Designer] button Adjusts the overall volume of the LX-10F (p. 17). Allows you to adjust the piano sound to your taste, for example by adjusting the string resonance [Reverb] button (p. - Page 13 You can connect an audio device or external (p. 60). powered speakers here to reproduce the LX-10F’s Pedals sound (p. 66). • These are used mainly when playing piano (p. 20).
-
Page 14: Before You Play
To open the lid, use both hands to lift it lightly. Connecting the Pedal Cord The lid of the LX-10F is designed to close softly even if you remove your hands from it. However, it will close quite abruptly if it has been opened only slightly. Be Plug the pedal cord extending from the stand into the Pedal careful not to pinch your fingers in the gap. -
Page 15: Opening/Closing The Top Lid
Before You Play To close the lid, use both hands to gently lower it. Using the Music Rest You can place music books or sheet music on the top edge of the opened lid. If you need to move the piano, make sure the lid is closed first to prevent accidents. -
Page 16: Turning The Power On/Off
Before You Play Turning the Power On/Off Once the connections have been completed (p. 14), turn on power to your various devices in the order specified. By turning on devices in the wrong order, you risk causing malfunction and/or damage to speakers and other devices. Turning the Power On Turning the Power Off Move the [Volume] slider all the way to the left to... -
Page 17: Adjusting The Sound's Volume
Turning the knob toward the right will increase the volume, and turning it toward the left will decrease the volume. Adjusting the Brightness of the Display You can adjust the brightness of the LX-10F’s display. Turn the [Display Contrast] knob to adjust the brightness. -
Page 18: Using The Headphones
Before You Play Using the Headphones You can use headphones to enjoy the LX-10F without disturbing those around you, such as at night. Connecting the Headphones Using the Headphone Hook The LX-10F has two headphone jacks, two people can also Whenever you are not using the headphones, you can hang use headphones simultaneously. -
Page 19: Listening To Demo Songs
Before You Play Listening to Demo Songs The LX-10F comes with demo songs. * You won’t be able to play back demo songs if there is an unsaved performance. You’ll need to either delete or save your performance before playing demo songs (p. 42). -
Page 20: Using The Pedals
About the Adjuster Sostenuto Pedal If you feel that the pedal is unstable (for example if you’ve moved the LX-10F to a different location), you can adjust the Damper Pedal adjuster located on the bottom of the pedals as follows. -
Page 21: Performing
Performing with Various Sounds In addition to piano sounds, the LX-10F lets you enjoy performing with many other sounds (over 300 types). These sounds are called “Tones.” The Tones are divided into four groups, each of which is assigned to a different Tone button. -
Page 22: Performing With The Metronome
Performing with the Metronome You can sound the metronome while you perform. The LX-10F contains a versatile metronome feature. You can change the metronome’s volume and time signature, or change the way in which it divides the beats. While the song plays, the metronome will sound at the tempo and time signature of the song. -
Page 23: Changing The Metronome's Time Signature
Performing Changing the Metronome’s Time Signature Press the [Metronome] button. The metronome will sound. Press the [Song] (Tempo) button. The [Song] (Tempo) button will light orange, and the display will indicate the time signature. Press the [-] or [+] button. If you specify “0/4”... -
Page 24: Adding A Count-In To Synchronize Your Performance (Count-In)
Performing Adding a Count-in to Synchronize Your Performance (Count-in) A series of sounds rhythmically played to indicate the tempo before a song starts is called a “count-in.” If you sound a count-in, it will be easier for you to synchronize your own performance to the tempo of the playback. fig.Panel Press the [Metronome] button. -
Page 25: Adding Reverberation To The Sound (Reverb)
* The reverb effect is not applied if Twin Piano mode (p. 28) is set to “individual.” What are Effects? In addition to reverb, the LX-10F provides a wide variety of other “effects” that can modify the sound in various ways. An appropriate effect is selected for each different tone. -
Page 26: Performing With Two Layered Tones (Dual Play)
Performing Performing with Two layered Tones (Dual Play) You can play two tones simultaneously from each note of the keyboard. This feature is called “Dual Play.” As an example, here’s how to layer piano and strings tones. fig.Panel Hold down the [Piano] button and press the [Strings] button. Tone 1 Tone2 Both buttons will light. -
Page 27: Dividing The Keyboard For Two-Person Performance (Twin Piano)
Performing Dividing the Keyboard for Two-person Performance (Twin Piano) You can divide the keyboard into left and right zones so that two people can play the same range of pitches, just as though there were two pianos. This function is called “Twin Piano.” For example, you could use Twin Piano to allow a student to play along with their teacher. -
Page 28: Changing The Way In Which The Sound Is Heard (Twin Piano Mode)
Performing Changing the Way in Which the Sound is Heard (Twin Piano Mode) fig.Panel Hold down the [Twin Piano] button and press the [-] or [+] button. Setting Description The sound of the right-hand keyboard zone will be heard more loudly from the right speaker than from the left speaker. Pair The sound of the left-hand keyboard zone will be heard more loudly from the left speaker than from the right speaker. -
Page 29: Playing Different Tones In The Left And Right Sides Of The Keyboard (Split Play)
Performing Playing Different Tones in the Left and Right Sides of the Keyboard (Split Play) You can play different tones in the left and right sides of the keyboard, divided at a certain key. This feature is called “Split Play,” and the key at which the keyboard is divided is called the “Split Point.” fig.Panel Press the [Twin Piano] button a number of times. -
Page 30: Changing The Tones Of The Left And Right Zones
Performing Changing the Tones of the Left and Right Zones Changing the right-hand tone fig.Panel Press a tone button. The number and name of tone currently selected for the right-hand zone are shown. Press the [-] or [+] button. A different tone is selected. Changing the left-hand tone fig.Panel Hold down the [Twin Piano] button and press a tone button. -
Page 31: Changing The Keyboard's Split Point
Performing Changing the Keyboard’s Split Point fig.Panel Range in which you can specify the split point (B1–B6) Split Point Power-up default: F 3 The Split Point belongs to the left-hand section of the keyboard Hold down the [Twin Piano] button and press the key that you want to be the new split point. -
Page 32: Transposing The Keyboard (Transpose)
“0”). The LX-10F allows you to transpose both the keyboard and the song, or just the keyboard, or just the song (p. 56). With the factory settings, the keyboard and the song will be transposed together. -
Page 33: Disabling The Buttons (Panel Lock)
Performing Disabling the Buttons (Panel Lock) The Panel Lock setting lets you disable all of the LX-10F’s buttons. In this state, the settings will not change even if you inadvertently press a button while performing. fig.Panel Hold down the [Right] button for a while. -
Page 34: Adjusting The Piano Sound To Your Taste (Piano Designer)
(Piano Designer) What is Piano Designer? The LX-10F lets you adjust the piano sound to your taste by modifying various aspects of a grand piano’s sound, such as its strings, pedal, and keyboard resonances, as well as the keyboard touch sensitivity. -
Page 35: Piano Designer Settings
If you select “Preset,” a standard tuning curve created for the LX-10F will be used. If you select “User,” you’ll be able to edit the stretched Off, Preset, User tuning yourself. - Page 36 Adjusting the Piano Sound to Your Taste (Piano Designer) Temperaments Temperament Qualities In this tuning, each octave is divided into twelve equal steps. Every interval produces about the same Equal amount of slight dissonance. This tuning eliminates ambiguities in the fifths and thirds. It is unsuited to playing melodies and cannot Just Major be transposed, but is capable of beautiful sonorities.
-
Page 37: Listening To Songs
Listening to Songs Playing Back Songs Here’s how to listen to the built-in songs. The LX-10F provides 74 built-in piano songs. You can also play back songs from a separately sold floppy disk drive, CD drive, or USB memory (p. 62). -
Page 38: Playing Parts Individually
Press the [Right] button. LX-10F will play go out The button will go out. Press the [ ] button. The LX-10F will play the left-hand part and accompaniment part, allowing you to practice the right- hand part separately. Left-hand Right-hand... -
Page 39: Playing All Songs Consecutively (All Songs Play)
Listening to Songs Playing All Songs Consecutively (All Songs Play) You can have the LX-10F play all internal songs (or all songs in internal memory, or all songs in USB memory) repeatedly in succession. This function is called “All Songs Play.”... -
Page 40: Changing The Song's Tempo
“0”). The LX-10F allows you to transpose both the keyboard and the song, or just the keyboard, or just the song (p. 57). With the factory settings, the keyboard and the song will be transposed together. -
Page 41: Recording Your Performance
Press the [ ] button. The [ ] button will light, the [ ] button will blink, and the LX-10F will enter recording-standby mode. If you decide not to record, press the [ ] button once again. Starting/stopping recording fig.Panel Press the [ ] button or play the keyboard. -
Page 42: Listening To The Recorded Performance
Recording Your Performance Listening to the recorded performance fig.Panel Press the [ ] button. You will return to the beginning of the recorded performance. Press the [ ] button. The recorded performance will play. Playback will stop when you press the [ ] button once again. -
Page 43: Erasing Your Recorded Performance
Recording Your Performance Erasing Your Recorded Performance Here’s how to erase your recorded performance. fig.Panel Hold down the [Song] (Tempo) button and press the [ ] button. A confirmation message will appear. If you decide not to erase the performance, press the [ ] button. -
Page 44: Saving Your Recorded Performance
Saving Your Recorded Performance If you’ve recorded a performance, your recorded performance will be lost if you turn off the LX-10F’s power before saving the song. If you want to keep your recorded performance, it is convenient to save it in internal memory. Songs saved in internal memory will not be lost when you turn off the power. - Page 45 Recording Your Performance Editing the song name fig.Panel Select the character to change Switches the type Inserts Deletes Change of character a character a character the character • Letters • Symbols • Numerals Use the buttons shown in the illustration above to edit the song name. Press the [ ] button to finalize the song name.
-
Page 46: Deleting A Saved Song
Recording Your Performance Deleting a Saved Song Here’s how to delete a song that you saved to internal memory. If you want to delete all the songs that are saved in internal memory, initialize the memory (p. 61). You can also delete songs from USB memory (sold separately) or a floppy disk (sold separately) (p. -
Page 47: Deleting The Song
Recording Your Performance Choosing the song to delete fig.Panel Press the [▼] button. Press the [-] or [+] button to select the song that you want to delete. Deleting the song fig.Panel Press the [ ] button. A confirmation message will appear. Press the [ ] button. -
Page 48: Advanced Recording Methods
The [ ] button will light, the [ ] button and the button of the track to be recorded will blink, and the LX-10F will enter recording-standby mode. If you decide not to record, press the [ ] button once again. - Page 49 Press the button of the track that you want to record, so it’s blinking. The [ ] button will light, the [ ] button will blink, and the LX-10F will enter recording-standby mode. If you decide not to record, press the [ ] button once again.
- Page 50 Recording Your Performance Press the [ ] button. You’ll hear a two-measure count, and then recording will begin. Alternatively, you can start recording by playing the keyboard instead of pressing the [ ] button. In this case, there will be no count-in. When recording begins, the [ ] button and [ ] button will light.
-
Page 51: Recording A Performance You Play Along With A Song
With this setting, you will be listening to the selected song while you record. The [ ] button will light, the [ ] button will blink, and the LX-10F will enter recording-standby mode. If you decide to cancel recording, press the [ ] button once again. - Page 52 Recording Your Performance Recording and stopping fig.Panel Press the [ ] button. You’ll hear a two-measure count, and then recording will begin. Alternatively, you can start recording by playing the keyboard instead of pressing the [ ] button. In this case, there will be no count-in.
-
Page 53: Various Settings
Various Settings Basic Operation in Function Mode “Function mode” lets you make various settings for playback and recording. Entering Function mode fig.Panel Press the [Function] button. Press the [▲] or [▼] button to choose the setting that you want to edit. The [Function] button will light, and you’ll be in Function mode. -
Page 54: Adjusting The Keyboard Sensitivity (Key Touch)
Various Settings Settings you can change Adjusting the Keyboard Sensitivity (Key Touch) Function Page Key Touch p. 54 You can change the touch sensitivity, or response of the keys. Save Song p. 44 You can adjust the keyboard touch as appropriate for the playing strength of the person who is performing. -
Page 55: Sounds Settings
Various Settings Sounds Settings Press the [ ] button. Adjusting the Sound’s Brilliance (Brilliance) fig.d-EQ-Param.eps Here’s how to adjust the brilliance of your keyboard playing or the playback brilliance of an internal song or USB memory song. Increasing the value will make the sound brighter. Setting Use the [▲] or [▼] buttons to select an item. -
Page 56: Volume Settings
If you are playing the LX-10F through a connected external system, internal preset songs. It will not affect internal preset songs. there may be cases in which the volume from your external system is too low even when the LX-10F’s volume is turned to the Setting Description maximum setting. -
Page 57: Metronome Setting
Various Settings Metronome Setting Performing Settings Changing How the Metronome Marks the Specifying What the Transpose will Affect Beat (Metronome Pattern) (Transpose Mode) You can set the metronome to play at even smaller intervals. This setting specifies what the transpose will affect. The metronome will sound when you enter the setting screen. -
Page 58: Pedal Settings
Setting the Type of CD To be Played Back (CD/Audio Type) Changing How the Pedal Effects Are The LX-10F may be unable to correctly recognize the type of CD Applied (Damper Pedal Part) being used. In such instances, you can specify the type of CD manually. -
Page 59: Storing Your Settings (Memory Backup)
Memory Backup function to be restored to the state they were even when you turn off the power. in when you purchased the LX-10F. Enter Function mode, choose “Memory Backup,” and When you execute “Factory Reset,” all stored settings will be press the [ ] button (p. -
Page 60: Connecting To Other Devices
Play back SMF music files, save performance data, and play back audio files * If you’re using new USB memory, you’ll need to initialize (format) it on the LX-10F. For details, refer to “Initializing the Memory” (p. 61). Installing the CD Drive... -
Page 61: Initializing The Memory (Format Media)
(format) the USB memory or a floppy disk The entire contents of the selected memory will be erased. before using it. The LX-10F can’t use USB memory or a floppy disk that has not been initialized. Caution when Initializing the Memory •... -
Page 62: Playing Back Songs On External Media
Connecting to Other Devices Playing Back Songs on External Media You can play back songs from a CD, USB memory, or a floppy disk. You can play back songs that are music data (p. 80) or audio files (p. 73). Prepare the external media that contains the song you Select the song that you want to play back. -
Page 63: Adjusting The Volume Of An Audio File Or Music Cd
Changing the Playback Pitch of a Song You can set the LX-10F so that the recommended tones are (Playback Transpose) automatically assigned or not assigned. -
Page 64: Saving Your Recorded Performance On External Memory
Connecting to Other Devices Saving Your Recorded Performance on Deleting a Song From External Memory External Memory Here’s how to delete a song that you saved on USB memory or a floppy disk. Here’s how to save your recorded performance to USB memory or a floppy disk. -
Page 65: Copying The Song
] button. Songs saved in internal memory can be copied to external memory, such as USB memory. fig.aaaa Selecting the song to copy LX-10F Save Save Recorded Song Press the [-] or [+] button to select either “External Memory” or “Disk.”... -
Page 66: Connecting To Audio Equipment
Connecting to Audio Equipment If you connect the LX-10F to powered speakers or to an audio system that has line input jacks, you’ll be able to hear the LX-10F’s sound from your powered speakers or audio system. If you connect your portable audio player or other audio playback device to the LX-10F, you’ll be able to hear its sound via the LX-10F. -
Page 67: Connecting To Midi Devices
MIDI, short for “Musical Instrument Digital Interface,” was developed as a universal standard for the exchange of performance data between electronic instruments and computers. The LX-10F is equipped with MIDI connectors to let it exchange performance data with external devices. These connectors can be used to connect the LX-10F to an external device for even greater versatility. -
Page 68: Preventing Doubled Notes When Connected To A Sequencer (Local Control)
MIDI Sound (MIDI Transmit Ch.) Generator Memory This setting specifies the MIDI channel on which the LX-10F will MIDI MIDI transmit. MIDI uses sixteen “MIDI channels,” which are numbered 1 through 16. By connecting MIDI devices and specifying the Soft Thru On... -
Page 69: Connecting A Computer
USB connector of your (USB Driver) computer. • You can use the LX-10F to play sounds from SMF music files played Normally, you don’t need to install a driver in order to connect the back with MIDI software. -
Page 70: Using The V-Link Function
Using the V-LINK Function Connecting the LX-10F to a V-LINK compatible image device allows you to control the images with the LX-10F. * To prevent malfunction and/or damage to speakers or other devices, always turn down the volume, and turn off the power on all devices before making any connections. -
Page 71: Troubleshooting
Power does not turn on Is the power cord connected correctly? p. 14 Since the LX-10F uses a liquid crystal screen, it may happen that no text or graphics appear in the screen if the Nothing appears in the screen —... - Page 72 Tone 2 (when using Dual play) or the left-hand tone (when using Split play). The LX-10F’s piano sound faithfully simulates the depth and resonance of an acoustic piano, and this may give the Reverberation remains even if You defeat the impression of reverberation even if you’ve defeated the Reverb effect.
- Page 73 You cannot record audio files. — Your recorded performance will disappear if you switch off the LX-10F’s power or select a song. The recorded performance disappeared There is no way to recover the lost performance. Before you turn off the power, save your recorded performance p.
-
Page 74: Error Messages
Please use 44.1 kHz 16-bit linear WAV format audio files. Error: 30 The internal memory capacity of the LX-10F is full. The LX-10F cannot deal with the excessive MIDI data sent from the external MIDI device. Error: 40 Reduce the amount of MIDI data sent to the LX-10F. -
Page 75: Tone List
Tone List Piano Others Name Name Name Piano 1 Grand Piano1 ChurchOrgan1 Piano 1w Piano + Str. ChurchOrgan2 Piano 1d Harpsichord Combo Jz.Org Piano 2 Grand Piano2 Ballad Organ Piano 2w Piano + Pad Accordion Piano 3 Grand Piano3 Nason flt 8’ Piano 3w MagicalPiano Gospel Spin... - Page 76 Tone List Name Name Name Church Org.3 Attack Pulse AnalogBrass2 Reed Organ Violin Soprano Sax Puff Organ Slow Violin Alto Sax Accordion 1 Viola Tenor Sax Accordion 2 Cello Baritone Sax Harmonica Contrabass Oboe Bandoneon Tremolo Str. English Horn Nylon-str.Gt PizzicatoStr Bassoon Ukulele...
- Page 77 Tone List Name Name Synth Mallet Telephone 1 Atmosphere Telephone 2 Brightness DoorCreaking Goblins Door Echo Drops Scratch Echo Bell Wind Chimes Echo Pan Helicopter Star Theme Car Engine Sitar 1 Car Stop Sitar 2 Car Pass Banjo Car Crash Shamisen Siren Koto...
-
Page 78: Internal Song List
Robert Alexander Schumann * Songs marked by an asterisk (*) are original songs composed for Moments Musicaux 3 Franz Peter Schubert the Roland Corporation. The copyrights to these songs are owned by the Roland Corporation. Prèlude, op.28-15 Fryderyk Franciszek Chopin Harmonious Blacksmith Georg Friedrich Händel... -
Page 79: Parameters Stored In Memory Backup
Parameters Stored in Memory Backup Parameter Page p. 35 Master Tuning p. 35, p. 55 Damper Resonance p. 35 Key Touch p. 35, p. 54 Key Touch Offset p. 35 Hammer Noise p. 35 Hammer Response p. 35 Piano Designer Settings Duplex Scale p. -
Page 80: Music Files That The Lx-10F Can Use
Regarding Copyright Use of the song data contained in the LX-10F or any other song data supplied with it for any purpose other than private, personal enjoyment without the permission of the copyright holder is prohibited by law. Additionally, this data must not be copied, nor used in a secondary copyrighted work without the permission of the copyright holder. -
Page 81: Main Specifications
Main Specifications LX-10F: Digital Piano <Keyboard> Keyboard 88 keys (PHA III Ivory Feel Keyboard with Escapement) Touch: 100 levels, Fixed Touch Touch Sensitivity Hammer Response: 10 levels Keyboard Mode Whole, Dual (volume balance adjustable), Split (split point adjustable), Twin Piano <Sound Generator>... -
Page 82: Internal Memory
1410 (W) x 453 (D) x 1124 (H) mm (with top lid open) 55-9/16 (W) x 17-7/8 (D) x 44-1/4 (H) inches Weight (including piano stand) 93.6 kg/206 lbs 6 oz Owner’s Manual, Power Cord, Roland 60 Classical Piano Masterpieces, Headphones Hook, Accessories Cord Clamps (*1), Stabilizer (*1), Felt (*1) Options... -
Page 83: Index
Index AC inlet ..................... 13 General MIDI ................... 80 Adjuster ................... 20 General MIDI 2 ................80 All Songs Play ................39 Generic ..................... 69 Arabic ....................36 GS Format ..................80 Audio Equipment ................. 66 Audio file ..................73 Hammer Noise ................ - Page 84 Index Transpose Mode ............. 54, 57, 79 Tuning ....................35 Octave Shift ................54, 57 Twin Piano ..................27 Opening/Closing [Twin Piano] button ..............12 Lid ....................14 Twin Piano Mode ..............28, 79 Original .................... 69 Output jack ..................13 USB connector ................
- Page 85 For EU Countries For China...
- Page 86 This product contains chemicals known to cause cancer, birth defects and other reproductive harm, including lead. For the USA DECLARATION OF CONFORMITY Compliance Information Statement Model Name : LX-10F Type of Equipment : Digital Piano Responsible Party : Roland Corporation U.S. Address : 5100 S. Eastern Avenue, Los Angeles, CA 90040-2938 Telephone : (323) 890-3700...
- Page 87 Information When you need repair service, call your nearest Roland Service Center or authorized Roland distributor in your country as shown below. PHILIPPINES CURACAO URUGUAY POLAND JORDAN AFRICA G.A. Yupangco & Co. Inc. Zeelandia Music Center Inc. Todo Musica S.A.
Need help?
Do you have a question about the LX-10F and is the answer not in the manual?
Questions and answers