Advertisement
One-year limited warranty
Visit www.rocketfishproducts.com for details.
© 2009 Best Buy Enterprise Services, Inc. All rights reserved. ROCKETFISH is a trademark
of Best Buy Enterprise Services, Inc. Registered in some countries. All other products and
brand names are trademarks of their respective owners.
ENGLISH 09-0441
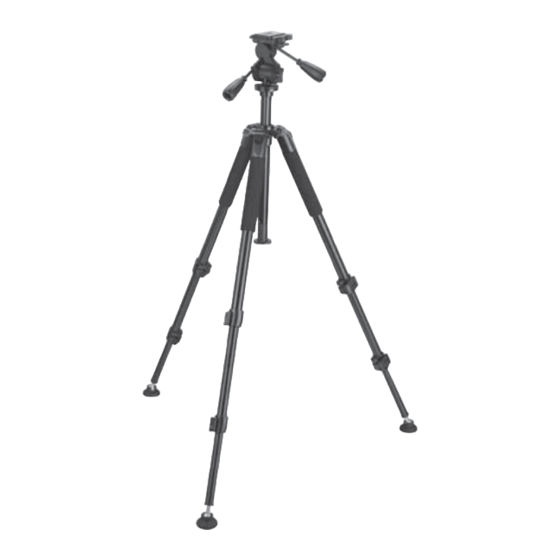
RF-TRP65C I Rocketfish 65" Carbon Fiber Tripod
Quick Setup Guide
Important safety instructions
• Make sure that all levers, handles, knobs, and leg locks
are correctly tightened, and that all three legs are fully
opened before use.
• Do not carry or transport the tripod with camera
equipment attached (for example, over your shoulder
or cradled in your arms).
• Do not store or expose your tripod to excessive heat or
cold, or use near any flame or fire.
• Do not oil or grease any part of the tripod.
• Do not use any solvents or thinners to clean your tripod.
Use only a mild detergent and wipe dry with only a soft,
lint-free cloth.
• Do not exceed the load limit of this product. Load limit
is 17.6 lbs. (8 kg).
Using your tripod
To set up your tripod:
1 Open the flip-lever leg locks on each leg (two per leg, for
a total of six) and extend the legs to the desired length.
2 Close the flip-lever leg locks to lock the legs at the
selected length.
Caution: Incorrectly securing a leg lock can cause the tripod
leg to retract unexpectedly and could result in damage to
the tripod or to the attached camera or camcorder.
3 Press the variable leg angle release at the top of each
tripod leg to spread the legs to the first preset angle.
When each leg has been locked into the first preset
angle, set the tripod on a firm surface.
4 Adjust the center column by releasing the center
column locking knob, raising the center column
to the desired height, then tightening the center
column's quick-release clamp knob.
5 To remove the mounting plate, press down on
the quick-release clamp knob, then press the
safety lock pin and lift the plate away from the head.
6 Secure your camera to the mounting plate with the
1/4" screw on the bottom of the plate. Tighten the
screw firmly to avoid unintended lateral movement of your device.
Package contents
• Tripod with pan head
• Mounting plate
Note: mounting plate is
on pan head.
• Wrenches (2)
• Handles (2)
• Two center column end caps
Note: one is already attached
to the center column.
• Quick Setup Guide
Advertisement
Table of Contents

Related Manuals for RocketFish RF-TRP65C

Summary of Contents for RocketFish RF-TRP65C
- Page 1 5 To remove the mounting plate, press down on © 2009 Best Buy Enterprise Services, Inc. All rights reserved. ROCKETFISH is a trademark the quick-release clamp knob, then press the of Best Buy Enterprise Services, Inc. Registered in some countries. All other products and safety lock pin and lift the plate away from the head.
- Page 2 7 Insert the mounting plate into the tripod head and lock it into place by pressing up on the quick-release clamp knob. 8 Make final adjustments with the two angle adjustment knobs. To adjust the tripod leg spread: • Press down on the variable leg angle release on each leg to open the leg to the next preset angle (three available).
Need help?
Do you have a question about the RF-TRP65C and is the answer not in the manual?
Questions and answers