Table of Contents
Advertisement
Advertisement
Table of Contents

Subscribe to Our Youtube Channel
Related Manuals for RIDGID SeekTech SR-60


Summary of Contents for RIDGID SeekTech SR-60
- Page 1 SeekTech SR-60 ® Pipe, Cable and Sonde Locator Patents Pending Operator’s Manual WARNING! Read this operator’s manual carefully before using this tool. Failure to understand and follow the contents of this manual may result in electrical shock, fire and/or serious personal injury.
-
Page 2: Table Of Contents
SeekTech SR-60 Table of Contents GENERAL SAFETY INFORMATION......................2 SR-60 C ..........................5 OMPONENTS INTRODUCTION TO THE SR-60 ......................... 6 ............................6 ETTING TARTED ............................. 6 ISPLAY LEMENTS ..............................11 ET UP LINE TRACING WITH THE SR-60......................13 ..........................13... -
Page 3: Seektech Sr
SeekTech SR-60 SeekTech SR-60 ® Pipe, Cable and Sonde Locator SeekTech SR-60 ® Record the Serial Number of your unit below and retain for your records. See Information screen for serial number and software version. Serial Number Software Version Ridge Tool Company Elyria, Ohio U.S.A... -
Page 4: General Safety Information
SeekTech SR-60 charger can overheat and rupture the General Safety Information battery. • Properly dispose of the batteries. WARNING Exposure to high temperatures can cause the battery to explode, so do not dispose of in a fire. Some countries Read and understand all instructions. Failure to... - Page 5 SeekTech SR-60 instructions may create a risk of SR-60 Use and Care electrical shock or injury. • • Follow instructions for changing Use equipment only as directed. Do accessories. Accidents are caused by not operate the SR-60 unless you have poorly maintained equipment.
- Page 6 SeekTech SR-60 DANGER Important Notice The SR-60 is a diagnostic tool that senses electromagnetic fields emitted objects underground. It is meant to aide the user in locating these objects by recognizing characteristics of the field lines and displaying them on the screen. As...
-
Page 7: Sr-60 Components
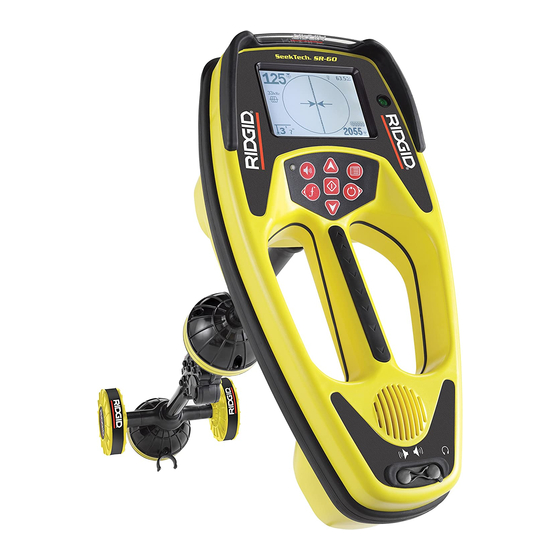
SeekTech SR-60 SR-60 Components Figure 1: SR-60 Components Ridge Tool Company Elyria, Ohio U.S.A www.seektech.com... -
Page 8: Introduction To The Sr-60
SeekTech SR-60 NOTE: Avoid dragging the lower antenna node on Introduction to the SR-60 the ground while locating with the SR-60. It may cause signal noise which will interfere with Getting Started results, and may eventually damage the antenna Installing/Changing Batteries To install batteries into the SR-60, turn the unit over to access the battery compartment. - Page 9 SeekTech SR-60 Common Display Elements Display Elements: Line Trace Mode Figure 4: Common Display Elements Figure 5: Display Elements (Line Trace Mode) The display screen in Active Line Trace, Passive Line In Active Line Trace Mode, the following features will...
- Page 10 SeekTech SR-60 • Display Elements: Sonde Mode Guidance Line Shows the alignment of the target line and helps determine when the locator is directly over the target line. It will be longest when directly aligned with the target line. Rotation Arrows will appear to indicate which way the SR-60 should be turned to align it with the field.
- Page 11 SeekTech SR-60 the Main Menu, they will not appear when using the Keypad Frequency Key to cycle through frequencies. Frequencies which appear in the Main Menu and are checked for activation are called “Checked-Active”. Frequencies that are “Checked-Active” can be cycled through simply by pressing the Frequency Key (see Figure 7).
- Page 12 After pressing the Power Key on the keypad, the Operation Time RIDGID logo displays, and the software version number will appear in the lower right corner of the Using alkaline cells, typical operation time is from screen. about 12 to 24 hours depending on sound volume and how often the backlight is on.
-
Page 13: Set Up
SeekTech SR-60 Each frequency is activated by choosing it from a list Set up in the Main Menu (See Figure 14). Frequencies are Once the SR-60 is up and running, the next step is to grouped by category: set up the frequencies needed to match the... - Page 14 SeekTech SR-60 for activation, see “Frequency Selection Control” on Figure 15: Highlighting a Desired Frequency (8 kHz) page 33. 3. Press the Select Key (shown below) to A long press on the Frequency Key will bring up a check the box for each frequency to be used.
-
Page 15: Line Tracing With The Sr-60
SeekTech SR-60 locator receiver is getting closer or further away from vest on either shoulder. Stereo sound from the the Sonde. speakers will fade to the left or right. The louder side indicates the direction toward the center of the If desired, force the sound to re-center at a medium detected field. - Page 16 SeekTech SR-60 meter, or other point. Important: The connection between the transmitter and the conductor must be a clean, firm connection. The transmitter is also connected to a ground stake providing a strong open path ground. Important: weak ground connection is the most frequent cause of a poor tracing circuit.
- Page 17 SeekTech SR-60 node is placed closer and closer to the target utility. Rechecking the Measured Depth and position periodically during the excavation process can help avoid damage to a target utility and may identify additional utility signals that were not noticed prior to excavation.
-
Page 18: Depth Warnings
SeekTech SR-60 Measuring Depth (Line Tracing Modes) Depth Warnings The SR-60 calculates Measured Depth by comparing NOTE: Exposing the utility is the only way to the strength of the signal at the lower antenna to that verify its existence, location, and depth. -
Page 19: Operating Tips For Active Line Tracing
SeekTech SR-60 Current and Signal Angle Reading Operating Tips for Active Line Tracing The Current Strength ( ) and Signal Angle indicator ( ) in the upper right corner of the screen 1. The SR-60 quickly identifies distorted fields. If the... - Page 20 SeekTech SR-60 overcome resistance and inject more 7. Higher frequencies bleed over to adjacent utilities current onto the line. more readily, but may be needed to overcome breaks in tracer wires or go over insulating e. Re-locate the ground connection for a couplers.
- Page 21 SeekTech SR-60 Figure 28: Screen Display in Different Locations (Line Tracing) Ridge Tool Company Elyria, Ohio U.S.A www.seektech.com...
-
Page 22: Passive Line Tracing
SeekTech SR-60 The SR-60 has multiple Passive Line Trace Passive Line Tracing frequency settings. Power frequencies (identified passive mode, SR-60 looking with the power icon ) are used to locate signals electromagnetic “noise” that has found its way onto a... -
Page 23: Omniseek Locating
SeekTech SR-60 In general, directly connected Active Line Tracing is more reliable than Passive Line Tracing. WARNING In Passive Line tracing, or when signals are extremely weak, the Measured Depth will generally read too deep, and the actual buried depth may be much shallower. -
Page 24: Sonde Locating
SeekTech SR-60 Operating Tips for Passive Line Tracing Sonde Locating 1. In Passive Locating if you are looking for a known line, be sure you are using the best The SR-60 can be used to locate the signal of a frequency for the line in question. -
Page 25: Location Methods
SeekTech SR-60 a constant height above the ground as distance affects Signal Strength. • Note the Signal Strength and move away from the high point in all directions. Move the SR-60 far enough in all directions to verify that the Signal Strength drops significantly on all sides. -
Page 26: Tilted Sondes
If the Sonde is vertical what is seen on the screen is a single Pole at the point of maximum Signal Strength. (The Ridgid Floating Sonde is designed to have a single Pole “visible” and is weighted to maintain the Sonde on a vertical axis. -
Page 27: Measuring Depth (Sonde Mode)
SeekTech SR-60 that the signal falls away on every side of the Some modern pushcable and camera systems are maximum signal location. equipped to inject the 33 kHz signal onto the pushcable automatically. If you are using an earlier pushcable and camera system, you can inject the 33... - Page 28 SeekTech SR-60 Figure 39: Screen Display in Different Locations (Sonde) Ridge Tool Company Elyria, Ohio U.S.A www.seektech.com...
- Page 29 SeekTech SR-60 Figure 40: Tilted Sonde, Poles, and Equator Note the right-hand Pole is closer to the Equator, due to tilt. Ridge Tool Company Elyria, Ohio U.S.A www.seektech.com...
-
Page 30: Custom User Frequencies
SeekTech SR-60 Custom User Frequencies transmitters. Pressing Select will automatically fill in the user-defined frequency values with the highlighted SR-60 users can set and use custom frequencies. By number. setting the SR-60 to a user-defined frequency, you A list of frequencies used by various manufacturers’... -
Page 31: Menus And Settings
SeekTech SR-60 Menus and Settings Pressing the Menu Key brings up a series of choices which let the operator configure the SR-60 as preferred (see Figure 47).The menu is a context-sensitive list of options. The entry point into the menu list is set to the currently active frequency. - Page 32 SeekTech SR-60 Display Elements Control (Sub- Currently Available Radio Frequencies menus will display when selected for Sonde or line tracing modes.) As with other frequency categories, these items will appear in the “Checked-Active” set when checked. Frequency Selection Control See the Frequency List on page 9.
-
Page 33: Optional Features
SeekTech SR-60 Display Elements Menu Advanced features of the SR-60 can be enabled by using the Menu Key to show the menu tree. Select the Display Elements selection menu. Then select the mode (Line Trace or Sonde) you want to change. - Page 34 SeekTech SR-60 traveling along the Race Track (Figure 54). The Watermark is a graphic representation of the highest Signal Strength reached (in Sonde mode) or the highest Proximity Signal level reached (in Line Tracing modes). It is “chased” by a solid Level which shows the current Signal Strength.
- Page 35 SeekTech SR-60 Available” – that is, selected to appear in the Main Menu. From there, they can be set to “Checked-Active” status to make them available by use of the Frequency Key Checking a frequency to add it to the Main Menu will set the unit to operating in that frequency and place it in Checked-Active status.
-
Page 36: Information Screen And Restoring Defaults
SeekTech SR-60 version, serial number of the receiver, and its calibration date (Figure 61). Figure 60: Setting a Frequency to “Currently Available” Status To switch to a “Currently Available” frequency that is Figure 61: Information Screen not yet “Checked-Active”, press the Menu Key Restore Factory Defaults and scroll down to the desired frequency;... -
Page 37: Menu Tree
SeekTech SR-60 Menu Tree Operating With the Distortion Line The following figure shows options and controls built into the SR-60 menus. If the Tracing Line’s distortion response (blurring) is disabled, the detected field will be shown with two lines, Activated Frequencies... -
Page 38: Informational Locating
SeekTech SR-60 particular line or pipe is visual inspection, such as by Informational Locating potholing. The normal shape of a field around a long conductor Compound or complex fields will produce different such as a pipe or cable is circular (cylindrical in three indications on the SR-60 that will show what is dimensions). - Page 39 SeekTech SR-60 underground lines (electrical conductors like metal “split opportunities” or sudden changes of cables and pipes) or Sondes (actively transmitting direction in the utility being traced. Turns or tees beacons). When fields simple can cause a sudden increase in the Distortion undistorted, then the information from sensed fields is Indicator response.
-
Page 40: A Better Way Of Locating
SeekTech SR-60 be able to make the correct decision rapidly and Advantages of the Omnidirectional accurately. Antenna A Better Way of Locating Unlike the coils used in many simple locator devices, the Omnidirectional antenna detects fields on three separate The SR-60 gives the operator a picture of the axes, and can combine these signals into a “picture”... -
Page 41: Sr-60 Maintenance
SeekTech SR-60 Orientation to the Signal More on Informational Locating Because of the SR-60’s advanced processing and Because of the multiple signals being processed by display, the information provided by the SR-60 makes it each Omnidirectional antenna, the target’s signal clear when a locate is reliable, and when one is suspect. -
Page 42: Service And Repair
3456. We will establish a plan of action to get your Remove batteries entirely before SR-60 working for you. shipping. Service and Repair Important Instrument should be taken to a RIDGID Independent Authorized Service Center or returned to the factory. Remove batteries before shipping. Ridge Tool Company Elyria, Ohio U.S.A... -
Page 43: Icons And Symbols
SeekTech SR-60 Icons and Symbols Figure 72: Icons and Symbols Ridge Tool Company Elyria, Ohio U.S.A www.seektech.com... -
Page 44: Glossary -- Definitions
SeekTech SR-60 Glossary -- Definitions A mode of locating using a Line Transmitter to inject a chosen frequency onto a hidden Active Line Tracing conductor; the frequency is then detected by the SR-60 to trace the conductor Active View Area The area within the circle in the center of the operating screen, where the Tracing Line or Sonde Pole and Equator symbols appear. - Page 45 SeekTech SR-60 Glossary -- Definitions The impact of near-by fields, other conductors, magnetic flux, or other interference on a circular electro-magnetic field. Distortion is detected by comparing the information from Distortion the SR-60’s Tracing Line, Proximity Signal, Signal Strength, Measured Depth Display, and Signal Angle readings.
- Page 46 SeekTech SR-60 Glossary -- Definitions The display screen of the instrument as seen when locating. It includes an Active View area, where the Tracing Line appears in Line Trace modes, and where Pole and Operating Screen Equator icons appear in Sonde mode. It also includes Measured Depth, Signal Strength, Signal Angle, current and Proximity Signal values, depending on the mode and choice of options in use.
-
Page 47: Trouble Shooting Guide
SeekTech SR-60 Trouble Shooting Guide PROBLEM PROBABLE FAULT LOCATION SR-60 locks up during Power the unit off, and then back on. Remove the batteries if the unit will not switch off. use. If batteries are low, replace them. SR-60 will not pick up Check that the correct mode and frequency is set. -
Page 48: Specifications
60°C) • Float Sonde 19783 The SeekTech SR-60 is protected under U.S. Patents 7009399, 7136765, and other Patents Pending. Frequencies Table The following table shows the frequencies available in the SR-60. The default frequencies shown are in Checked- Active status as shipped. Optional frequencies may be added as described on page 33. -
Page 49: Manufacturers Frequency Table
SeekTech SR-60 Manufacturers Frequency Table Displayed Available Exact Company Model Notes Option Frequencies frequency (Hz) 577Hz 200 KHz not present 8kHz 8192 Dyna 3M Dynatel ™ 2273 in European model 33kHz 32768 of the ST-510. 200kHz 200012 820Hz Fish FISHER 8.2kHz... - Page 50 SeekTech SR-60 Displayed Available Exact Company Model Notes Option Frequencies frequency (Hz) 512Hz 200k changed to 8kHz 8192 93khz in European RIDGID (Old) Ridge Tool Co. 33kHz 32768 model of the ST- 51kHz 51712 510. 200kHz 200000 128 Hz 1 kHz...
- Page 51 RIDGID® tools are warranted to be free of defects in workmanship and material. How long coverage lasts This warranty lasts for the lifetime of the RIDGID® tool. Warranty coverage ends when the product becomes unusable for reasons other than defects in workmanship or material.
Need help?
Do you have a question about the SeekTech SR-60 and is the answer not in the manual?
Questions and answers