Table of Contents
Advertisement
Available languages
Available languages
Quick Links
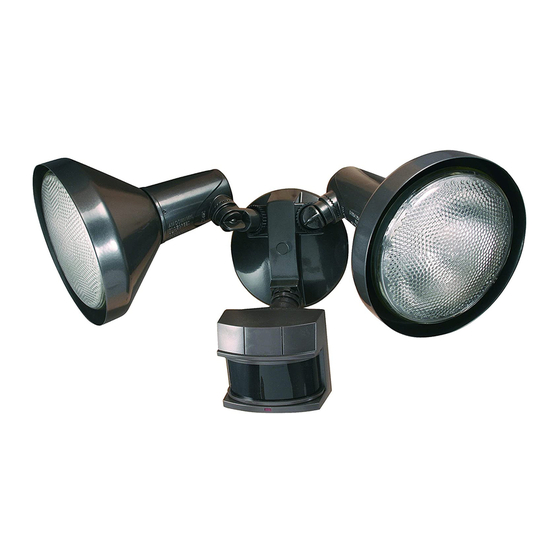
Motion Sensor
Light Control with
Protective Lamp
Shields
Model CB-2010
Features
• Turns on lighting when motion is detected.
• Automatically turns lighting off.
• Photocell keeps the lighting off during daylight hours.
This package includes:
Lamp
Holders
Cover
Plate
Light Control
Mounting Bolt
2 Wire
Connectors
2 PAR Lamps
Requirements
•
The Light Control requires 120-volts AC.
•
If you want to use the Manual Mode, the control
must be wired through a switch.
•
Some codes require installation by a qualified
electrician.
•
This product is intended for use with the enclosed
gasket and with a junction box marked for use in
wet locations.
© 2000 Heath Co. a div. of DESA International
Mounting Strap
Rubber Plug
Sensor
Plastic Hanger
Gasket
6 Screws
(3 sizes included)
OPERATION
Mode:
On-Time:
Test
5 Sec
Auto
1, 5, 20 min.
Manual Until Dawn*
* resets to Auto Mode at dawn.
Note: When first turned on wait about 12 minutes
for the circuitry to calibrate.
Put ON-TIME switch on the sensor
bottom to TEST.
Put the ON-TIME switch in the 1, 5 or
20 minute position.
MANUAL MODE
Manual mode only works at night
because daylight returns the sensor
to AUTO.
Flip the light switch off for one second
then back on to toggle between AUTO
and MANUAL MODE.
Manual mode works only with the
ON-TIME switch in the 1, 5, or 20
position.
Mode Switching Summary
TEST
AUTO
MANUAL MODE
* If you get confused while switching modes, turn
the power off for one minute, then back on. After
the calibration time the control will be in the
AUTO mode.
Works: Day
x
TEST
ON-TIME
TEST 1 5 20
AUTO
ON-TIME
TEST 1 5 20
1 Second OFF
then...
... back on.
Move ON-TIME Switch
to 1, 5 or 20 minutes
Flip light switch off
for one second then
back on*
598-1090-00
Night
x
x
x
Advertisement
Table of Contents

Related Manuals for Heath Zenith CB-2010


Summary of Contents for Heath Zenith CB-2010
- Page 1 Note: When first turned on wait about 12 minutes for the circuitry to calibrate. Shields TEST ON-TIME Put ON-TIME switch on the sensor Model CB-2010 bottom to TEST. Features TEST 1 5 20 • Turns on lighting when motion is detected. AUTO •...
-
Page 2: Installation
Page 2 Twist the junction box wires and fixture wires together INSTALLATION as shown. Secure with wire connectors. For easy installation, select an existing light with a wall White to Black to Mounting switch for replacement. White Black Strap 1 2 3 4 5 6 7 8 9 0 1 2 3 4 5 6 7 8 9 Rubber 1 2 3 4 5 6 7 8 9 0 1 2 3 4 5 6 7 8 9 1 2 3 4 5 6 7 8 9 0 1 2 3 4 5 6 7 8 9... -
Page 3: Test And Adjustment
Page 3 Loosen the clamp screw in TEST AND ADJUSTMENT Clamp the sensor ball joint and gen- Screw tly rotate the sensor. Turn on the circuit breaker and light switch. Walk through the coverage Ball NOTE: Sensor has a 12 minute warm up period area noting where you are Joint before it will detect motion. -
Page 4: Troubleshooting Guide
Page 4 TROUBLESHOOTING GUIDE If you experience a problem with your Light Control, first follow this guide. You may also want to visit our Web site at: www.desatech.com. For additional assistance call 1-800-858-8501 8:00 am to 4:30 PM Central Time, weekdays. SYMPTOM POSSIBLE CAUSE SYMPTOM... - Page 5 TIME), al fondo del detector, en la posición de prueba (TEST). protectores de lámpara TEST 1 5 20 Para AUTOMATICO: Modelo CB-2010 ON-TIME Ponga el control de tiempo (ON- TIME) en la posición de 1, 5 ó 20 Características minutos.
- Page 6 Page 2 Conecte los cables de la caja de empalme con los INSTALACION cables del aparato de luz, como se muestra. Tuérazalos Para una fácil instalación escoja una luz con un juntos y asegúrelos con un conector de cables. interruptor de pared. 1 2 3 4 5 6 7 8 9 0 1 2 3 4 5 6 7 8 9 Blanco a 1 2 3 4 5 6 7 8 9 0 1 2 3 4 5 6 7 8 9...
-
Page 7: Prueba Y Ajuste
Page 3 Tornillo PRUEBA Y AJUSTE Afloje el tornillo sujetador en Sujetador la unión esférica y gire Prenda el cortacircuitos y el interruptor de luz. despacio el detector. Unión NOTA: El detector tiene un período de cerca de Camine por el área a Esférica minutos de calentamiento antes de detectar protegerse y dése cuenta... -
Page 8: Guia De Investigacion De Averias
Esta garantía no incluye reembolso por inconveniencia, instalación, tiempo de montaje, pérdida por uso, o servicio no autorizado.Esta garantía cubre solamente los productos ensamblados por Heath Zenith y no se extiende a otros equipos o componentes que el consumidor usa junto con nuestros productos. - Page 9 Revient au mode automatique au lever du soleil lampe ESSAI Placer l'interrupteur de temps en dircuit ON-TIME (ON-TIME) à la base du capteur à Modèle CB-2010 TEST. TEST 1 5 20 Caractéristiques • Allume l’éclairage lorsqu’un mouvement est détecté. AUTOMATIQUE •...
- Page 10 Page 6 INSTALLATION Torsader les fils de la boîte de jonction avec ceux de la commande d’éclairage. Les fixer ensemble à Pour faciliter l’installation, choisir un appareil d’éclairage l’aide de serre-fils. devant être remplacé et qui est déjà commandé par un interrupteur.
-
Page 11: Essais Et Réglages
Page 7 ESSAIS ET RÉGLAGES Desserrer la vis de blocage de la rotule et faire pivoter le Vis de Mettre en circuit le disjoncteur et l’interrupteur détecteur pour pointer. blocage d’éclairage. Marcher dans la zone de l’appareil est mis en circuit ou changé de mode, couverture et noter à... -
Page 12: Guide De Dépannage
Cette garantie ne comprend pas le remboursement pour dérangement, installation, temps de montage, perte d’utilisation ou service non autorisé. La garantie ne couvre que les produits assemblés Heath Zenith et ne s’étend pas aux autres équipements et composants que le client pourrait utiliser conjointement avec nos produits.
Need help?
Do you have a question about the CB-2010 and is the answer not in the manual?
Questions and answers