Advertisement
Quick Links
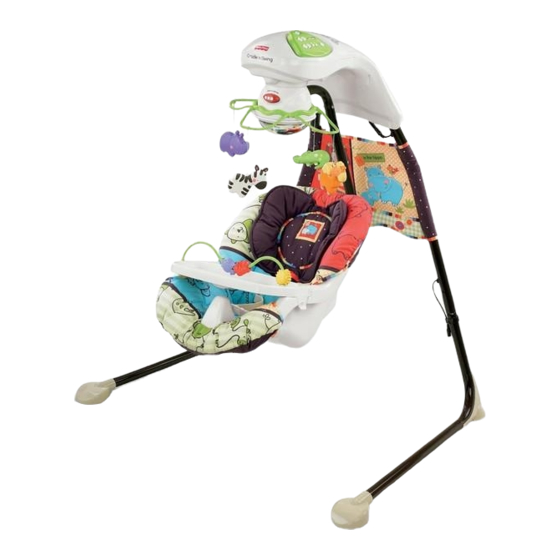
Swing
Swing
(Seat moves
front to back)
Columpio
Columpio
(el asiento
se mueve
de adelante
para atrás)
Balancelle
Balancelle
(le siège bouge
d'avant en arrière)
www.fisher-price.com
www.fi sher-price.com
Cradle
Cradle
(Seat moves
side to side)
Cuna
Cuna
(el asiento
se mueve de
lado a lado)
Berceau
Berceau
(le siège bouge
d'un côté à l'autre)
V1179
Advertisement

Related Manuals for Fisher-Price V1179


Summary of Contents for Fisher-Price V1179
- Page 1 Balancelle Balancelle (le siège bouge d’avant en arrière) Cradle Cradle (Seat moves side to side) Cuna Cuna (el asiento se mueve de lado a lado) Berceau Berceau (le siège bouge d’un côté à l’autre) www.fisher-price.com www.fi sher-price.com V1179...
- Page 2 DANGER To prevent electric shock, do not immerse in water; wipe clean with damp cloth. Para evitar descargas eléctricas, no sumergir el producto; limpiarlo con un paño húmedo. Pour éviter tout choc électrique, ne pas immerger le produit dans l’eau; le nettoyer avec un linge humide.
-
Page 3: Consumer Information
Consumer Information • Please read these instructions before use of this swing. Keep this instruction sheet for future reference, as it contains important information. • Adult assembly is required. • Tools needed for assembly: Allen Wrench (included) and Phillips screwdriver (not included). •... - Page 4 Consumer Information FCC Statement (United States Only) This equipment has been tested and found to comply with the limits for a Class B digital device, pursuant to Part 15 of the FCC Rules. These limits are designed to provide reasonable protection against harmful interference in a residential installation.
- Page 5 Motorized Frame Armazón motorizado Boîtier du moteur 2 Upper Legs 2 patas superiores 2 sections supérieures de montants Lower Seat Tube Tubo de asiento inferior Tube inférieur du siège 2 Lower Legs 2 patas inferiores 2 sections inférieures de montants All Shown Actual Size Se muestra a tamaño real Dimensions réelles...
- Page 6 NO usar el producto si falta o está rota alguna pieza. Ponerse en contacto con la oficina Fisher-Price más próxima a su localidad para obtener piezas de repuesto e instrucciones, de ser necesario. No usar piezas de otras marcas.
- Page 7 Hole Orificio Trou Straight End Button Botón del extremo recto Bouton • While pressing the button on the a lower leg, insert the lower leg into an upper leg. Make sure the button on the lower leg “snaps” into the hole in the upper leg. •...
- Page 8 Elbow Foot Base esquinada Pied de coude Button Botón Bouton • Locate the R and L on the underside of each elbow foot. The R indicates the right leg. The L indicates the left leg. • While pressing the upper button on the right leg, fit it into the tube in the motorized frame.
- Page 9 • Plug the power cord from the motor assembly into the power cord in the frame assembly. • Enchufar el cable eléctrico de la unidad del motor en el cable eléctrico de la unidad del armazón. • Brancher le cordon d'alimentation du boîtier du moteur sur le cordon d'alimentation de la structure.
- Page 10 Clavija Cheville Hole Orificio Hole Trou Orificio Trou Elastic Loops Ganchos elásticos Boucles élastiques • Fold the top of the pad down. • Insert the two elastic loops on the pad through the holes in the seat bottom. • While holding the elastic loops in place, turn the seat face down. •...
- Page 11 • Fit the pad edges around the rim of the seat. • Hook the two fastener straps on each side of the pad onto the rim on each side of the seat. • Ajustar los bordes de la almohadilla alrededor del borde del asiento.
- Page 12 Lower Seat Tube Tubo de asiento inferior Tube inférieur du siège Short Tube Tubo corto Tube court • Fit the lower seat tube into the short tube on the seat back. • Ajustar el tubo de asiento inferior en el tubo corto del respaldo. •...
- Page 13 Upper Seat Tube Tubo de asiento superior Tube supérieur du siège Lower Seat Tube Tubo de asiento inferior Tube inférieur du siège • Tip the assembly on it’s side on a flat surface. • Fit the lower seat tube into the upper seat tube. •...
- Page 14 Battery Installation Hint: Install batteries if you need to use this swing away from an outlet. We recommend using alkaline batteries for longer battery life. Nota: instalar las pilas para usar este columpio donde no haya tomacorrientes eléctricos. Se recomienda usar pilas alcalinas para una mayor duración.
- Page 15 Información de seguridad sobre las pilas Conseils de sécurité concernant les piles In exceptional circumstances, batteries may leak fluids that can cause a chemical burn injury or ruin your product. To avoid battery leakage: • Do not mix old and new batteries or batteries of different types: alkaline, standard (carbon-zinc) or rechargeable (nickel-cadmium).
- Page 16 Set-Up and Use Preparación y uso Installation et utilisation WARNING AVERTISSEMENT ADVERTENCIA To prevent serious injury or death from falls and being strangled in the restraint system: • Always use restraint system. Never rely on the tray to restrain child. •...
-
Page 17: Setup And Use
Set-Up and Use Button Botón Bouton Pata Montant To Unfold • Firmly pull the legs outward. Make sure the buttons snap into the notches in the motorized frame. • Check to be sure the legs are locked into position. Para desplegar •... - Page 18 Set-Up and Use Restraint System Sistema de sujeción Système de retenue • Tighten each waist belt so that the restraint system is snug against your child. Please refer to the next section for instruc- tions to tighten the waist belts. •...
- Page 19 Set-Up and Use PRESS PRESIONAR APPUYER Seat Tube Tubo del asiento Tube du siège TURN GIRAR TOURNER Cradle Cuna Berceau You can adjust the motion of the swing: side to side or front to back. • Press the seat tube button to unlock the seat tube. •...
- Page 20 Set-Up and Use AC Power Use • Place the swing near a standard wall outlet. • Plug the AC adaptor into the power cord extending from the back of a leg. • Plug the AC adaptor into the wall outlet. •...
- Page 21 Storage Button Botón Bouton Lower Leg Buttons Botón de la pata inferior Bouton de la section inférieure de montant Storage • Press the buttons on the back of the motorized frame while pushing the legs inward. Almacenamiento • Oprimir los botones del dorso del armazón motorizado mientras presiona las patas hacia adentro.
- Page 22 Swing Use Power Switch Interruptor de encendido Bouton de mise en marche Swing Speed Buttons Botones de velocidad de columpio Boutons de vitesse de balancement Volume Buttons Botones de volumen Boutons de volume Music Button Botón de música Bouton de la musique Swing •...
- Page 23 Swing Use Uso como columpio Utilisation de la balançoire Balancelle • Mettre le bouton de mise en marche à la position MARCHE. • Appuyer sur les boutons de vitesse de balancement pour choisir l'une des six vitesses • Toujours éteindre la balancelle quand elle n’est pas utilisée.
- Page 24 CONSUMER ASSISTANCE AYUDA AL CONSUMIDOR SERVICE À LA CLIENTÈLE 1-800-432-5437 (US & Canada) Fisher-Price, Inc., 636 Girard Avenue, East Aurora, NY 14052. Hearing-impaired consumers/Clientes con problemas auditivos/ Pour les malentendants : 1-800-382-7470. En México: 59-05-51-00 Ext. 5205 ó 01-800-463-59-89 VENEZUELA Mattel de Venezuela, C.A., RIF J301596439, Ave.
Need help?
Do you have a question about the V1179 and is the answer not in the manual?
Questions and answers