
Related Manuals for Fisher-Price P6946


Summary of Contents for Fisher-Price P6946
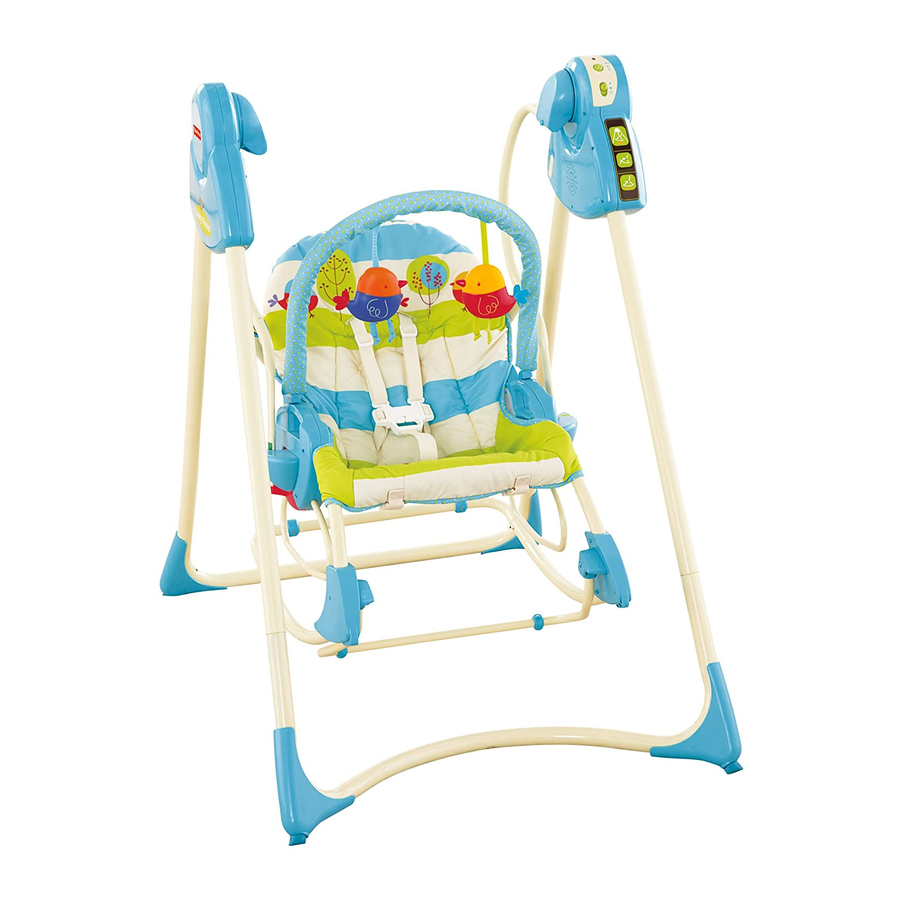
- Page 1 P6946 Rocker Swing WARNING IMPORTANT! KEEP INSTRUCTIONS FOR FUTURE REFERENCE. Infant Seat www.fi sher-price.co.uk...
-
Page 2: Consumer Information
WARNING To prevent injury or death from falls or being strangled in the restraint system • Never leave child unattended. When used as a Swing: • Always use the restraint system. • Never use with an active child who may be able to climb out of the product. -
Page 3: Parts
M5 x 2,9 cm Screw – 4 IMPORTANT! Before assembly, inspect this product for damaged hardware, loose joints, missing parts or sharp edges. DO NOT use if any parts are missing or broken. Contact Fisher-Price for replacement parts and instructions if needed. Never substitute parts. -
Page 4: Infant Seat/Rocker Assembly
CAUTION This package contains small parts in its unassembled state. Adult assembly is required. Cross Brace Side Rails • While pressing the tab on each end of the cross brace, insert the cross brace into the side rails, as shown. Make sure you hear a “snap”... - Page 5 Seat Back Tube Sockets • Insert the seat back tube into the socket in each side rail. • While pressing the tabs on the ends of the seat back tube, continue to insert the seat back tube into the sockets in each side rail until the tabs “snap”...
-
Page 6: Swing Frame Assembly
Infant Seat/Rocker Assembly Pad Buckles • Fasten the pad buckles on the front edge of the pad and underneath the seat. Make sure you hear a “snap” on both sides. PRESS SEAT BACK Pad Buckles • Fasten the pad buckles around each side rail. •... - Page 7 Hubs Back Base Front Curved Base • Place the front curved base on a flat surface so that it curves away from you. • Place the back base on a flat surface, behind the front curved base. • Position the leg assemblies so that the hubs are facing each other.
- Page 8 Hubs • Insert the ends of the seat tubes into the sockets in the hubs. • Push the seat tubes in until you hear a “snap” (for each). • Insert a #4 x 3,18 cm screw into each hub and tighten. Swing Frame Assembly Seat Tubes •...
-
Page 9: Battery Installation
Swing Frame Assembly Retainer with Lock Nut • Fit a retainer with lock nut onto the end of the screw and to the seat tube support. Hint: A lock nut has been factory assembled to the retainer. During shipment, the lock nut may have fallen out of the retainer. If it has, please fit it into the hexagonal hole in the retainer so that the rounded side of the lock nut faces out. -
Page 10: Setup And Use
IMPORTANT! Before each use, inspect this product for damaged hardware, loose joints, missing parts or sharp edges.DO NOT use if any parts are missing or broken. Contact Fisher-Price replacement parts and instructions if needed.Never substitute parts. Setup and Use Infant Seat (See page 13) ®... -
Page 11: Swing
Seat Tubes Seat Tube Hub • Rotate the kickstand up. • Push down on the seat bottom to be sure the kickstand is in position. • Grasp the handles on the seat. • Slide the seat between the seat tubes. •... - Page 12 IMPORTANT! Do not place the seat on top of the seat tube support! The seat is not secure. Please remove the seat. Re-read and repeat steps 1 - 3. Plug • Fit the plugs on each end of the toy bar into the sockets in each side rail.
-
Page 13: Infant Seat
Infant Seat • Rotate the kickstand out. • Push down on the seat bottom to be sure the kickstand is in position. Plugs • Fit the plugs on each end of the toy bar into the sockets in each side rail. Kickstand •... -
Page 14: Securing Your Child
Restraint Strap Restraint Pad • Place your child in the seat. Position the restraint pad between your child’s legs. • Fasten the restraint straps to the restraint pad. Make sure you hear a “click” on both sides. • Check to be sure the restraint system is securely attached by pulling it away from your child. -
Page 15: Removing Seat From Swing
Removing the Seat from the Swing Handles Seat Tube Hubs • Grasp handles on the seat. • Lift the seat from the seat tube hubs A. • Pull the seat forward B. - Page 16 Storage • Press the button on each housing and push the rear legs toward the front legs. Stand the frame against a wall for storage. ©2008 Mattel, Inc. All Rights Reserved. ® and ™ designate U.S. trademarks of Mattel, Inc. PRINTED IN CHINA •...
Need help?
Do you have a question about the P6946 and is the answer not in the manual?
Questions and answers