Table of Contents
Advertisement
Advertisement
Table of Contents

Subscribe to Our Youtube Channel
Related Manuals for Harman Kardon BDS


Summary of Contents for Harman Kardon BDS
- Page 1 Integrated home theater system Owner’s Manual...
-
Page 2: Table Of Contents
RECEIVER REARPANEL CONNECTIONS SUBWOOFER CONTROLS AND CONNECTIONS REMOTE CONTROL FUNCTIONS PLACING THE SPEAKERS BDS 800, BDS 700, BDS 400 AND BDS 300 SYSTEMS PLACING THE SPEAKERS BDS 600 SYSTEM MOUNTING OPTIONS FOR SATELLITE AND CENTER SPEAKERS CONNECTIONS PREPARING THE REMOTE CONTROL... -
Page 3: Introduction
If there is a Region Code on a disc other than the one your BDS player is designed for, it Remove the protective plastic film from the front-panel lens. Leaving the film in place will will not play in your BDS receiver. -
Page 4: System Components
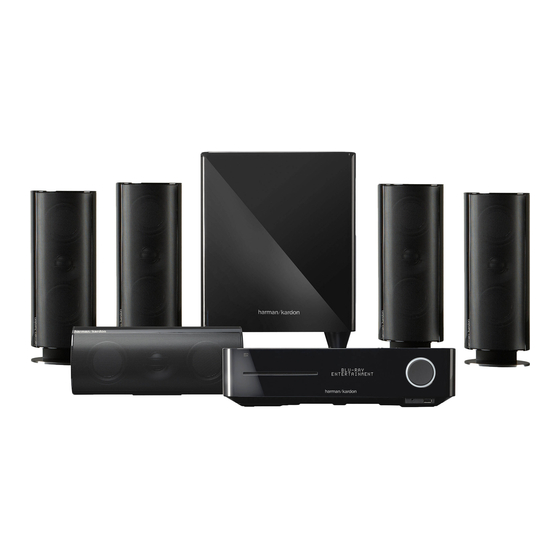
Two 10-meter (32.8-foot) speaker cables for rear satellites – BDS 300 System subwoofer – purple connectors gray and blue color bands (BDS 700 system only) 1 x BDS 2 2.1-channel Blu-ray Disc receiver 2 x SAT-TS11 satellite speakers 1 x HKTS200SUB powered subwoofer Supplied Accessories If any of these items are missing, please contact harman kardon Customer Service via www. -
Page 5: Receiver Front-Panel Controls
AC power, the LED turns amber to indicate that the receiver is in Standby mode Orient the device’s plug so it fits all the way into the BDS receiver’s USB connector. You may (ready to be turned on). When you turn the BDS receiver on (by the Standby button or the insert or remove the device at any time –... -
Page 6: Receiver Rear-Panel Connections
IMPORTANT: Your BDS receiver is in compliance with HDCP (High-Definition Copy Protection). right. Your TV must also be HDCP-compliant to be used with the BDS receiver’s HDMI output. For best results, we do not recommend HDMI connections in excess of ten feet (about 3 meters) See Connections, on page 14, for more information. -
Page 7: Subwoofer Controls And Connections
Line-Level In L/R Connectors: NOTE: These connectors are NOT used with the Bass-Boost Switch: Set this switch to “On” to enhance the subwoofer’s low-frequency BDS receiver. If you connect the subwoofer to a different unit that does not have a dedicated, performance. Set this switch to “Off” for normal low-frequency performance. -
Page 8: Remote Control Functions
Pressing this button also puts the remote control into the disc player control mode. See Using Radio Button the Disc Player, on page 24, for details. NOTE: Pressing this button when the BDS receiver is in iPod Button the Standby mode will switch it on. - Page 9 Volume +/– Buttons: Press these buttons to increase or decrease the volume of the BDS receiver’s speaker outputs. NOTE: The Volume +/– buttons do not change the volume of OK Button: Press this button to select the highlighted item on the on-screen menu.
-
Page 10: Placing The Speakers (Bds 800, Bds 700, Bds 400 And Bds 300 Systems)
Placing the Speakers (BDS 800, BDS 700, BDS 400 and BDS 300 Systems) Placing the Speakers (BDS 800, BDS 700, BDS 400 and Placing the Subwoofer BDS 300 Systems) Front Left Front Right Speaker Speaker Subwoofer Placing the Front Left and Front Right Speakers... -
Page 11: Placing The Speakers (Bds 600 System)
Shelf Placement You can place the satellite and center speakers on shelves. BDS 800 and BDS 400 satellite speakers have built-in bases for shelf placement. If you want, you can remove a base by pulling it straight off its speaker. Apply even pressure to both sides of the base and smoothly slide it off the speaker. - Page 12 Mounting Options for Satellite and Center Speakers Attach the wall portion of the wall-mount bracket onto the wall using hardware that is CAUTION: Before making speaker connections, be sure that the BDS receiver is appropriate for the wall’s construction and materials. We recommend first anchoring the turned OFF and, preferably, its AC cord is unplugged from the AC outlet.
- Page 13 Placing the Speakers (BDS 800, BDS Using Long Bolt 700, BDS 400 and BDS 300), on page 10, for more information.) If possible, position the speakers so that the mounting screws (not included; use size #8) can be installed directly into a wall stud. If that is not possible, use optional wall anchors that are rated...
-
Page 14: Connections
If that is not possible, use optional wall anchors that are rated The BDS 2 receiver uses white to denote the left channel (+) terminal and red for the to support at least 25 lb (11.3kg) and are appropriate for the construction and materials right channel (+) terminal. - Page 15 Connections Connecting the Satellite and Center Speakers (BDS 700 and BDS 300 Connecting the Speaker Terminals (BDS 800 and BDS 400 systems) systems) Center Front Right Front Left – – – – – Front Left Cable Front Right Cable Center Cable...
- Page 16 NOTE: The HDMI connection will deliver both video and audio to your TV or video display. We suggest disabling your TV or video display’s audio system to take full advantage of your BDS IMPORTANT: Do not plug the subwoofer’s AC power cord into an AC outlet at this system’s superior audio reproduction.
- Page 17 NOTE: To hear a TV show through your BDS system, you need to connect the audio output of your TV to the BDS receiver. If your TV has a digital-audio output, you can connect it to one of the BDS receiver’s digital inputs (see below). If your TV does not have a digital-audio output, you will need to connect the TV’s analog-audio output to the BDS receiver’s Analog Audio...
-
Page 18: Preparing The Remote Control
The remote has a range of about 20 feet (6.1m), depending on the lighting conditions. You can use the remote at an angle of up to 30° to either side of the BDS receiver. If the remote seems to operate intermittently, or if pressing a button on the remote does not SURROUND cause one of the buttons to light up, make sure that the batteries are inserted correctly. -
Page 19: Setting Up The Receiver
Next somewhat from the actual displays. To set up your BDS system, you will use the remote to navigate through all of the on-screen After selecting your TV’s highest resolution, press the OK button and the Wizard’s aspect-ratio menus and make selections from them. - Page 20 BDS receiver with a CRT or plasma TV. cases should be left set to “Disabled.” Auto Power Off: This option sets the amount of time the BDS receiver remains on while idle until it automatically enters the Standby mode.
- Page 21 (a process known as compression). Compression lets you turn up On: The BDS receiver outputs 36-bit Deep Color if your TV supports it. If your TV does the volume so you can hear the quiet parts without the loud parts disturbing others. NOTE: not, the receiver will output 30-bit color.
-
Page 22: Information Menu
R (0.0 dB, 3 ft) repeat Steps 2 – 6 again for the center speaker, and if you have a BDS 800 or BDS 700 system, repeat Steps 2 – 6 again for the surround left and surround right speakers. -
Page 23: Using The Receiver
OK button. To adjust a different speaker, use the cursor buttons to highlight it and NOTE: Before using your new BDS system, be sure to set the speaker distances, as explained press the OK button. The Level and Distance selection screen will appear. -
Page 24: Using The Disc Player
Reference code information. If there is a region code on a disc other than the one your BDS receiver is designed for, it will To switch between the available surround-sound modes for the program currently playing, not play in the receiver’s disc player. - Page 25 You can find a location by title, chapter or time. The BDS receiver can play the following types of discs (in 5"/12cm and 3"/8cm size): See Top Menu Button (below) for more information. NOTE: Not all discs allow searching by BD-Video (single-layer or double-layer) title.
-
Page 26: Listening To Your Ipod/Iphone
Playing Music CDs play (albums), Random play (songs), Random off. When the BDS is playing a music CD, the top bar shows the current playback mode icon, the Repeat Button: Pressing the Repeat button will cycle the iPod between Repeat Song, type of disc, the track currently playing, the number of total tracks on the disc and the time Repeat All, Repeat Off. -
Page 27: Listening To Audio Sources
Playing Files from USB Devices and CD Data Discs for details. Your BDS receiver can play MP3 (up to 320kbps bitrate) audio files, display JPEG photos and Home Button: Pressing the Home button will switch the TV to the Home screen while the radio continues to be heard through the BDS system. - Page 28 Playing Files from USB Devices and CD Data Discs Viewing Photos Thumbnail (yellow) Button: Pressing this button while playing a slide show displays thumbnail images of all photos in the slide show. Use the Cursor and OK buttons to highlight In the top directory, select “Photo.”...
-
Page 29: Using Playlists
See Remote Control Functions, on page 8, for more information about the functions of these buttons. When the BDS is playing video files from a USB device or CD data disc, the Repeat and Options functions are slightly different from playing Blu-ray Disc recordings and DVDs: Repeat Button: Pressing this button cycles through the following repeat modes: 1 (current video), All (folder), Off. -
Page 30: Troubleshooting
Troubleshooting Troubleshooting If your BDS system isn’t performing the way you think it should, check to see if the problem is covered in this section before calling your dealer or contacting a harman kardon representative. Problem Solution The receiver won’t power up (the Power indicator is not lit): Check that the receiver’s Power cord is properly plugged into the receiver’s AC Power Input... -
Page 31: Aux Component Remote-Control Code List
Aux Component Remote-Control Code List Aux Component Remote-Control Code List TV/DVR TV/DVR Manufacturer Code Numbers Manufacturer Code Numbers ADMIRAL 0192 0123 1088 1105 DAYTRON 0132 0128 AIWA 1110 DECCA 1091 1032 AKAI 1011 1020 1022 1042 1053 1056 DECCA (UK) 1038 1089 1093... - Page 32 Aux Component Remote-Control Code List TV/DVR TV/DVR Manufacturer Code Numbers Manufacturer Code Numbers MEMOREX 0128 0069 TANDY 0077 METZ 0084 TATUNG 0063 2018 0128 0123 0115 TECHNICS 0181 MITSUBISHI 0168 0167 0160 0128 0123 0115 TECHWOOD 0128 0077 TEKNIKA 0132 0128 0123 0115...
- Page 33 Aux Component Remote-Control Code List Cable Tuners Cable Tuners Manufacturer Code Numbers Manufacturer Code Numbers 3011 3001 PACE 3179 ALLEGRO 3111 PANASONIC 3214 3189 3177 3176 3053 AMERICAST 3212 PANTHER 3114 ARCHER 3112 PHILIPS 3090 3085 3020 3019 3013 4023 BELCOR 3113 PIONEER...
- Page 34 Aux Component Remote-Control Code List Satellite Tuners Satellite Tuners Manufacturer Code Numbers Manufacturer Code Numbers AIWA 6041 HUMAX 6007 AKAI 6033 6067 ALBA 6001 6011 ITT-NOKIA 6067 AMSTRAD 6032 JANIEL 5066 ANKARO 6021 JERROLD 5084 5068 5054 ASTRO 6076 6077 6078 6079 6080...
- Page 35 Specifications Satellite Tuners Satellite Tuners Manufacturer Code Numbers Manufacturer Code Numbers PREMIERE 6008 STAR CHOICE DBS 5059 PRESIDENT 5004 5081 STARCAST 5047 QUADRAL 6066 6067 6068 6069 6070 6071 SUPER GUIDE 5023 5027 QUELLE 6090 TECHNISAT 6047 RADIOLA 6053 TEECOM 5009 5093 5091...
-
Page 36: Specifications
Specifications Specifications BDS 5 receiver (BDS 800, BDS 700, BDS 600 systems) BDS 2 receiver (BDS 400, BDS 300 systems) Audio Section Continuous average power, stereo mode (BDS 5, BDS 2): 65 watts per channel, 20Hz – 20kHz, @ <0.1% THD, both channels driven into 6 ohms Multichannel power (BDS 5 only): 65 watts per channel, 20Hz –... - Page 37 Specifications SAT-TS60 Satellites CEN-TS60 Center (BDS 800 and BDS 400 systems) (BDS 800 system) Midrange transducer: Two x 3" (75mm) flat-panel drivers, video-shielded Two x 3" (75mm) flat-panel drivers, video-shielded High-frequency transducer: 1" (25mm) CMMD® Lite dome, video-shielded 1" (25mm) CMMD Lite dome, video-shielded Recommended power: 10 –...
- Page 38 Harman Consumer, Inc. 8500 Balboa Boulevard, Northridge, CA 91329 USA 516.255.4545 (USA only) Made in P.R.C. © 2010 Harman International Industries, Incorporated. All rights reserved. Features, specifications and appearance are subject to change without notice. harman kardon and CMMD (patent nos. 6,327,372 and 6,404,897) are trademarks of HARMAN International Industries, Incorporated, registered in the United States and/or other countries.
Need help?
Do you have a question about the BDS and is the answer not in the manual?
Questions and answers