Onkyo HT-R990 Instruction Manual
Hide thumbs
Also See for HT-R990:
- Instruction manual (172 pages) ,
- Service manual (115 pages) ,
- Firmware update manual (9 pages)
Table of Contents
Advertisement
ONKYOo
AV Receiver
Introduction :,.,,,,.,,,,,,.,,,,,.,,,,,,,,
Fr,2
HT-R990
Instruction
Manual
Thank you for purchasing an Onkyo AV Receiver. Please
read this manual thoroughly before making connections
and plugging in the unit.
Following the instructions in this manual will enable you
to obtain optimum performance and listening enjoyment
from your new AV Receiver.
Please retain this manual for future reference.
Op6rations plus
sophistiqu6es,,,,,,,,,,,,,,,,,,,,,
Fr-41
Manuel
d'instructions
Merci d'avoir portd votre choix sur le ampli-tuner
Audio-
Video de Onkyo. Veuillez
lire attentivement
ce manuel
avant de connecter
l'appareil
et de le mettre sous tension.
Observez
les instructions
donndes dans ce manuel afin de
pouvoir profiter pleinement
de votre nouveau
ampli-tuner
Audio-Video.
Conservez
ce manuel
afin de pouvoir
le consulter
ultdfieurement.
I Made for
1
iPod _ iPhone
H))Radio_
READY
Advertisement
Table of Contents

Related Manuals for Onkyo HT-R990


Summary of Contents for Onkyo HT-R990
- Page 1 Fr-41 Instruction Manual Thank you for purchasing an Onkyo AV Receiver. Please read this manual thoroughly before making connections and plugging in the unit. Following the instructions in this manual will enable you to obtain optimum performance and listening enjoyment from your new AV Receiver.
- Page 2 WARNING: TO REDUCE THE RISK OF FIRE OR ELECTRIC SHOCK, DO NOT EXPOSE THIS APPARATUS TO The lightning flash with arrowhead symbol, within an RAIN OR MOISTURE. equilateral triangle, is intended to alert the user to the presence of uninsulated "dangerous voltage"...
-
Page 3: Precautions
If water or any other liquid gets inside LA CLASSE B EST CONFORME A.LA NORME NMB- this unit, have it checked by your Onkyo dealer. 003 DU CANADA. 8. Handling Notes Sur les modbles dont la fiche est polaris_e: •... -
Page 4: Supplied Accessories
N..._ AV receiver LIEGNITZERSTRASSE 82194 GROEBENZELL, GERMANY declare in own responsibility, that the ONKYO product described in this instruction manual is in compliance with the corresponding technical standards such as EN60065, EN55013, EN55020 and EN61000-3-2, -3-3. 16 ft. (5 m) 20"... -
Page 5: Table Of Contents
Remote Control Codes ...... 64 Looking up for Remote Control Code ......Entering Remote Control Codes ........Turning On/Off the AV Receiver ........Remote Control Codes for Onkyo Components Turning On ..............Connected via 1-41 ............Turning Off ..............Resetting REMOTE MODE Buttons ...... -
Page 6: Features
• 192 kHz/24-bit D/A Converters • Powerful and Highly Accurate 32-bit Processing DSP Connections • 4 HDMI*8 Inputs and 1 Output • Onkyo r4ll-llO for System Control • 4 Digital Inputs (20ptical/2 Coaxial) • Component Video Switching (2 Inputs/l Output) •... - Page 7 All rights reserved. iPhone, iPod, iPod classic, iPod uauo, iPod shuffle, The HT-R990, jointly developed by Onkyo and THX iPod touch are trademarks of Apple [nc., registered in the U.S. and other countries. Ltd., provides home theater enthusiasts the perfect blend "Made...
-
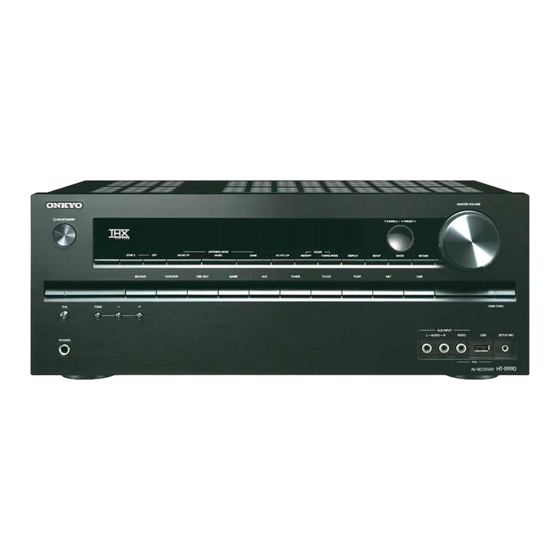
Page 8: Front & Rear Panels
Front & Rear Panels (North American models) u..(European models) © The page numbers in parentheses show where you can find the main explanation for each item. @ RETURN button @ _ON/STANDBY button (21) (_) ZONE 2, OFF buttons (60) @ MASTER VOLUME control (22) @ Remote control sensor (4) @ THX button and indicator... - Page 9 For detailed information, see the pages in parentheses. Speaker/channel indicators Audio input indicators Z2 (Zone 2) indicator (80) Audyssey indicator (30, 48) Dynamic EQ indicator (48) Listening mode and format indicators (33, 58) Dynamic Vol indicator (4g) _-_, II and cursor indicators (22) Headphone...
- Page 10 HT'R990 SURROUND FRONT (!) DIGITAL IN COAXIAL and OPTiCAL jacks (_) ZONE 2 LINE OUT jacks _) COMPONENT VIDEO IN and OUT jacks UNIVERSAL PORT jack SUBWOOFER PRE OUT jack (_) ETHERNET port O SPEAKERS terminals @ FM ANTENNA jack and AM ANTENNA terminal (CENTER, FRONT, SURROUND, SURROUND (_) PC IN jack...
-
Page 11: Display
Remote Controller RECEIVER ,- - - - REMOTE MODE/INPUT SELECTOR ..For detailed information, see the pages in parentheses. @ ORECEIVER button (21) (_) REMOTE MODE/INPUT SELECTOR buttons (22) @ Arrow &/¥/_l/_ and ENTER buttons @ SETUP button (41) @ Listening Mode buttons (33) @ DIMMER button (39) @ MUTING button (40) (_) DISPLAY button (40) -
Page 12: Connecting The Av Receiver
Connecting the AV Receiver Connecting the Speaker Cables The following illustration shows which speaker should be connected to each pair of terminals. It you're using only one surround back speaker, connect it to the SURROUND BACK or FRONT HIGH L terminals, Surround Surround left... -
Page 13: Connecting Your Speakers
Speaker Configuration Speaker Connection Precautions The following table indicates the channels you should use Read the following before connecting your speakers: depending on the number of speakers that you have. • You can connect speakers with an impedance of between No matter how many speakers you use, a powered... - Page 14 • Don't connect more than one cable to each speaker terminal. Doing so may damage the AV receiver. • Don't connect one speaker to several terminals. ® ® ® Using Dipole Speakers You can use dipole speakers for the surround and surround back speakers. Dipole speakers output the same sound in two directions.
-
Page 15: Connecting Your Components
r'_!,'l';IlllE! L_[_ Connecting AV components HDMI cable : Video & Audio Other cables : Video ..: Audio Blu-ray Disc/ Blu-ray Disc/ TV, projector, etc. player Game console TV, projector, etc. player Game console • Before making any AV connections, read the manuals supplied with your AV components. •... - Page 16 or DVD recorder/Digital Video Recorder Game console QVD iiiiiiiiii_ _B_-ray_Dil_yJer Satellite/cable set-top box, etc, Connect your components to the appropriate jacks. The default input assignments are shown below. Assignment can be changed (_ page 42). Jack Components Assignable [nput HDM[ IN 1 Blu-ray Disc/DVD...
- Page 17 Connect your components to the appropriate jacks. The default input assignments are shown below. See "Connection Tips and Video Signal Path" for more information (_ page 79). 43). v': Assignment can be changed (_ page Jack/Port Components Assignable Camcorder, etc INPUT ]AUDIO VIDEO...
- Page 18 *4 When you connect your personal computer to PC [N and select the corresponding input selector, the video of the personal computer is output from the HDM[ outputs. However, if you have assigned the HDM[ inputs to the same input selector, the AV receiver will output...
- Page 19 1"-4 I -capable components. control your other f-4I-capable Onkyo components, pointing the remote controller at the AV receiver's • Connect only Onkyo components to 1"-41 j acks. Connecting other manufacturer's components may cause a malfunction. remote control sensor instead of the component. You •...
-
Page 20: Connecting The Power Cord
This section explains how to connect the supplied indoor FM antenna and AM loop antenna. The AV receiver won't pick up any radio signals without any antenna connected, so you must connect the antenna to use the tuner. North American models FMTs_European models... -
Page 21: Turning On/Off The Av Receiver
Turning On/Off the AV Receiver OON/STANDBY ORECEIVER RECEIVER [............ OON/STANDBY Press on the front panel. Press RECEIVER followed by ORECEIVER on the remote controller. The AV receiver comes on, the display lights. roliL Press OON/STANDBY on the front panel. Press RECEIVER followed by ORECEIVER on the remote... -
Page 22: Playback
• "iPod/iPhone Playback via Onkyo Dock" ® &/¥ and ENTER (_ page 61) These buttous uavigate through the meuus. • "Controlling Other Components" (_ page 64) To adjust tile volume, use VOL A/V. - Page 23 MENU Tiffs button returns to top menu of the [ntemet Radio service, This section explains how to play music/video files on the iPod/iPhone. @ RETURN Compatible iPod/iPhone models This button returns to the previous menu. Made for: @ _D,- iPod touch (lst, 2nd, 3rd and 4th generation), iPod classic, This button fast-forwards the current song.
-
Page 24: Listening To Internet Radio
Internet radio stations and podcasts at (Video) is not guaranteed, any time. To enhance your Interact radio experience, the Standard Mode control http://onkyo.vtuner.com/portal is available to you as an easy way to browse to find stations, set up/organize your The content... - Page 25 Registering My Favorites*l Use 1/¥ to select a program and then press ENTER. You can add the currently playing song or station to the Playback starts. "My Favorites". You can save up to 40 Internet radio stations. Once you've added a station to the list, simply select it in menu, and then press ENTER the "My Favorites"...
- Page 26 Windows Media Player 11 Setup This section explains how to configure Windows Media Player 11 so that the AV receiver can play the music files stored on your computer. This section explains how to play music files on a Start Windows Media Player...
-
Page 27: Remote Playback
Using Remote Playback Start Windows Media Player To enable remote playback, you must first configure Windows Media Player Using the Tuner Press NET. The "NET" screen appears. The NET indicator With the built-in tuner you can enjoy AM and FM radio lights. - Page 28 E Tuning into stations by frequency m Deleting Presets You can tune into AM and FM stations directly by entering the appropriate frequency. Select the preset that you want to delete. See the previous section. On the remote controller, press TUNER repeatedly While holding down MEMORY, press TUNING to select "AM"...
- Page 29 m Displaying Radio Text (RT) RDS program types (PTY) Display Type Press RT/PTY/TP once. None None The RT information scrolls across the display. News News reports Current affairs Affairs • The message "Waiting" may appear while the AV receiver [nformation [nfo waits for the RT information.
-
Page 30: Using Basic Functions
Using Basic Functions The distances from position (_) to (_) and (_) to (_) must be at least I meter (3.3 It). With the supplied calibrated microphone, Audyssey 2EQ® automatically determines the number of speakers connected, their size for purposes of bass management, optimum crossover frequencies to the subwoofer (if present), and distances from the primary listening position. - Page 31 10Use ,/, When you've finished making the settings, press to select a target, and use _/_ to change ENTER. the setting. Alter the results of Audyssey 2EQ have been saved, the menu will display the "Audyssey" (_ page 48), "Dynamic EQ" (_ page 48), "Dynamic Volume" Surround Back/Front High Surround Back (_ page...
- Page 32 Setup again. Note that if the If this message appears after 2 or 3 attempts, contact volume is set too high and the sound distorts, detection your Onkyo dealer. issues may occur, so use an appropriate volume level. • Speaker Detect...
- Page 33 Selecting Listening Modes See "About Listening Modes" for detailed information about the listening modes (_ page 34). m Listening Mode Buttons MOVIEiTV, MUSIC, GAME --GAME --STEREO MOVIE/'FV button THX button and indicator This button selects the listening modes intended for use This button selects the THX listening modes.
- Page 34 About Listening Modes The AV receiver's listening modes can transform your listening room into a movie theater or concert hall, with high fidelity and stunning surround sound. m Explanatory Notes @ Front speakers @ Center speaker @ Surround speakers @ Surround back speakers @ Front high speakers @ Subwoofer Input Source...
- Page 35 Onkyo-Original DSP Listening Modes Speaker Listening Mode Description Layout _FiN Orchestra Suitable for classical or operatic ruusic, this ruode emphasizes the surround channels ill order to widen the stereo iruage, and siruulates the natural reverberation of a large hall.
- Page 36 Listening Mode Speaker Description Input Layout Source Dolby Pro Logic IIx*2 Dolby Pro Logic IIx expands ally 2-channel source for 7.l-channel Dolby Pro Logic II playback. It provides a very natural and seamless surround-sound experience that fully envelops the listener. As well as music and movies, video...
- Page 37 Speaker Listening Mode Description Input Source Layout DTS Neo:6 This mode expands any 2-channel source for up to 7.l-channel playback, h uses seven full-bandwidth channels of ruatrix decoding for matrix-encoded material, providing a very natural and seamless surround sound experience that fully envelops the listener.
- Page 38 Listening Mode Description Speaker Layout m:gBq THX I/S Cinema This mode expands 5.l-channel sources for 7.1- channel playback. It does this by analyzing the composition of the surround source, optimizing the ambient and directional sounds to produce the surround back channel output.
- Page 39 "1 For the PORT input selector, the name of Universal Port The Home menu provides you quick access to frequently Option Dock will be displayed. used menus without having to go through the long *2 Only when you have selected "Custom" ill the "Picture standard menu.
-
Page 40: Recording
When you connect an R I-capable Onkyo colnponent, to record audio and video from different sources. must configure the input display so that R I can work properly. AV Recording This setting can be done only from the front panel. -
Page 41: Advanced Setup
Advanced Setup Remote indicator ",,i// i!?!II!!I'Ii!IN'i+,!{!I:I , :::::, Qi]!5 (:iiii RECEIVER-- MENU --RETURN SETUP-- 2. SpeakerSetup 3. AudioAdjust The on-screen setup menus appear on the connected TV 4. SourceSetup and provide a convenient way to change the AV receiver's 5. ListeningModePreset various settings. - Page 42 Here are the default assignments. Input selector Default assignment BD/DVD HDMII VCR/DVR HDMI2 Monitor Out CBL/SAT HDMI3 GAME HDMI4 You can specify the output resolution for the HDMI OUT ..and have the AV receiver upconvert the picture resolution TV/CD ..
- Page 43 m BD/DVD, VCR/DVR, CBL/SAT, GAME, AUX, Component Video Input TV/CD, PORT If you connect a video component to a component video COAXIAL1, COAXIAL2, OPTICAL1, input, you must assign that input to an input selector. For OPTICAL2: example, if you connect your Blu-ray Disc/DVD player to Select a corresponding digital audio input to which COMPONENT VIDEO IN 2, you must assign "IN2"...
- Page 44 N Wireless Front High, Wireless Surround Back, Speaker Configuration Wireless Subwoofer changed if you are not using all of the speakers in this jack UNIVERSAL PORT on the AV receiver, Speaker configuration settings only need to be package. When an optional unit is connected to the...
- Page 45 Level Calibration Equalizer Settings With the Equalizer settings, you can adjust the tone of speakers individually with a 5-band equalizer. The volume This setting is set automatically by Audyssey of each speaker can be set. Room Correction and Speaker Setup (_ page 30).
- Page 46 THX Audio Setup Loudness Plus THX Loudness Plus is a new volume control m Surr Back Speaker Spacing technology featured in THX Ultra2 Plus <lfl (<0.3m) Select2 Plus and THX I/S Plus Certified receivers. lft-4ft (0.3m-l.2m) With THX Loudness Plus, home theater audiences >4ft (>l.2m) now experience...
- Page 47 Dimension -3 to 0 to +3 With this setting, you can move the sound field forward backward when using the Dolby Pro Logic IIx Music With the Audio Adjust functions and settings, you can listening mode. Higher settings move the sound field adjust the sound and listening modes as you like.
- Page 48 m Neo:6 Music Items can be set individually for each input selector. Center Image 0 to 2 to 5 Preparation The DTS Neo:6 Music listening mode creates 6-channel Press the input selector buttons to select an input source. surround sound from 2-channel stereo sources.
- Page 49 m Reference Level Audyssey Dynamic EQ® Reference Level Offset • ff youwant to use Audyssey Dynamic EQ or Dynamic Volume 0dB: with THX listening modes, set the "Loudness Plus" setting to This should be used when listening to movies. "Off,' and set "Preserve THX Settings" to "No" (_ page 46). 5 dB: •...
- Page 50 IntelliVolume Name input area N IntelliVolume }-12dB to 0dB to +12dB in l dB steps. With IntelliVolume, you can set the input level for each DDDDDDDDDDDDD input selector individually. This is useful if one of your DmmmDmmmmmDDD source components is louder or quieter than the others.
- Page 51 m Game Mode*3*4*5 Picture Adjust _off Using Picture Adjust, you can adjust the picture quality and reduce any noise appearing on the screen. If video signal delay occurs during playback on a video To view the TV picture while setting, press ENTER. To component (i.e., game console), select the corresponding return to the previous screen, press RETURN.
- Page 52 N Fixed Mode @ Color Temperature*3_5 Warm Off: Normal The format is detected automatically. If no digital input signal is present, the corresponding analog Cool input is used instead. With this setting you can adjust the color temperature. PCM: Only 2-channel PCM format input signals will be •...
- Page 53 DTS/DTS-ES/DTS-HD vNN'g_ With this setting, you can specify the listening mode used when DTS or DTS-HD High Resolution format You can assign a default listening mode to each input digital audio signals are played (DVD, LD, CD, etc.). source that will be selected automatically when you select Specifies the default listening mode for DTS-HD each input source.
- Page 54 _1,2, When the AV receiver cannot receive the name of the component, it is displayed as "Player*" or "Recorder*", etc ("*" When several Onkyo components are used in the same shows up and indicates the number of components, when two or room, their remote ID codes may overlap.
- Page 55 N Audio Return Channel m HDMI Through _off Auto: Auto: The audio signal from your TV tuner can be sent to Detects the signal automatically selects the input the HDMI OUT of the AV receiver. source. BD/DVD, VCR/DVR, CBL/SAT, GAME, AUX, The audio return channel (ARC) t'unction allows an ARC capable TV to send the audio stream to the HDMI OUT of...
- Page 56 63.148.251.142. • Perform the firmware update only when such an announcement N MAC Address is posted on the Onkyo web site. Visit the Onkyo web site for the This is the AV receiver's MAC (Media Access Control) latest information.
- Page 57 Speaker Levels N Subwoofer Level _-15dB to 0dB to +12dB in 1 dB steps. N Center Level Remote Mode Setup _-12dB to 0dB to +12dB in 1 dB steps. See "Looking up for Remote Control Code" You can adjust the volume of each speaker while listening page 64).
- Page 58 Late Night Re-EQ With the Re-EQ function, you can compensate a m Late Night soundtrack whose high-frequency content is too harsh, For Dolby Digital and Dolby Digital Plus sources, the making it more suitable for home theater viewing. options are: I Re-EQ }Off _Off...
-
Page 59: Zone2
Zone 2 In addition to the main listening room, you can also enjoy playback in another room, which we call Zone 2. For either of the rooms, you can specify a different input source. Connecting the Zone Speakers to an Additional Amplifier There are two ways you can connect Zone 2 speakers:... - Page 60 Adjusting the Volume for Zone 2 m Operating on the remote controller m Operating on the AV receiver Input selector buttons Press ZONE2. ZONE 2 OFF MASTER VOLUME 2 Use VOL ,/, to adjust tile volume. m Operating on the AV receiver Press ZONE 2 (the Z2 indicator on the display flash).
-
Page 61: Ipod/Iphone Playback Via Onkyo Dock
Playback via Onkyo Dock N Operating Notes • Functionality depends on your iPod/iPhone model generation. • Before selecting a different input source, stop your iPod/iPhone playback to prevent the AV receiver from selecting the iPod/iPhone input source by mistake. - Page 62 iPod/iPhone Alarm m Status Messages If either of the following messages is not displayed on the It you use the Alarm function on your iPod/iPhone AV receiver's display, check the connection to your start playback, the AV receiver will turn on at the iPod/iPhone.
- Page 63 *3 [n Extended mode (see "7), this button doesn't work. *4 This button does not turn the Onkyo DS-A2 or DS-A2X R[ Dock on or off. Also, your iPod/iPhone may not respond the first time you press...
-
Page 64: Controlling Other Components
For details on controlling these components, see the You'll need to enter a code for each component that you indicated pages. want to control. BD/DVD Onkyo Blu-ray Disc player (_ page 65) Look up the appropriate remote control code in the... -
Page 65: Entering Remote Control Codes
You can reset the remote controller to its default settings. Onkyo components that are connected via 941 are While holding down RECEIVER, press and hold controlled by pointing the remote controller at the AV down HOME until the remote indicator lights receiver, not the component. - Page 66 _: Available buttons MODE first, I Press the appropriate REMOTE Ii5 _-_- -I I_I > -" e Ii2_ > _ e',i €,.) Buttons "_ O, INPUT, TV VOL GUIDE MENU ilVl_lll,-, ENTER SETUP v'*l (_5 i_, II, I, ,,_1, ll_-ll.-, I_ll-,,ll, il,.-li,.-I _/'1 *2 SEARCH REPEAT...
-
Page 67: Troubleshooting
"CHECK SP WIRE" appears on the solution in this section. If you can't resolve the issue display yourself, contact your Onkyo dealer. The protection circuit has been activated. Remove If you can't resolve the issue yourself, try resetting the power cord fl'om the wall outlet immediately. - Page 68 m Only the front speakers produce sound Wheu the Stereo o1"Mouo listeuiug mode is selected, Depending on the input signal, some listening modes 34-38 ouly the front speakers aud subwoofer produce cannot be selected. souud. N Can't get 6.1/7.1 playback If no surrouud back speakers...
- Page 69 HDMI-to-DVI adapter not guaranteed. In addition, video signals from a PC are not guaranteed. N Can't control other components [f it's an Onkyo component, make sure that the 1"-41 If the message "Resolution Error" appears on the cable...
- Page 70 l!I -_.4] r.1'_,,-i1-_ pl - j_+ ljy:,h_'_"_j m There's no sound N Can't record Make sure your iPod/iPhone is actually playing. On your recorder, make sure the correct input selected. Make sure the UP-AI Dock is connected to the UNIVERSAL PORT jack on the AV receiver.
- Page 71 "Audio Adjust" back in. menu to select "Main" or "Sub". N The 1-41functions don't work Onkyo is not responsible for damages (such as CD rental fees) due to unsuccessful recordings caused To use 1-41, you must make an 1"-41 connection the unit's malfunction.
- Page 72 !!!!!!!!!!!!!!!!!!! The AV receiver can upconvert component video and composite video sources for display on a TV connected to the HDMI OUT. However, if the picture quality of the source is poor, upconversion may make the picture worse or disappear altogether. In this case, try the following: If the video source...
-
Page 73: Network/Usb Features
Network/USB Features m Ethernet Network The following diagram shows how you can connect the AV receiver to your home network. In this example, it's For the best results, a 100Base-TX switched Ethernet connected to a LAN port on a router, which has a 4-port network is recommended. - Page 74 • Protected WMA music files on an MP3 player cannot be played. • Onkyo accepts no responsibility whatsoever for the loss or Minimum system...
- Page 75 N LPCM (Linear PCM) • Sampling rates of 8 kHz, 11.025 kHz, 12 kHz, 16 kHz, 22.05 kHz, 24 kHz, 32 kHz, 44.1 kHz, 48 kHz, 64 kHz, For server playback and playback from a USB device, the 88.2 kHz, and 96 kHz are supported. AV receiver supports the following...
-
Page 76: Firmware Update
USB devices, which includes Update procedure the ability to power them. • Onkyo takes no responsibility whatsoever for the loss or damage of data resulting from the use of a USB device with the AV Press RECEIVER... - Page 77 Do not use _3RECEIVER on the remote controller. a USB device. Congratulations! You now have the latest firmware installed on your Onkyo AV receiver. • Never unplug or turn off the AV receiver during the update Troubleshooting process. • Never plug or unplug an HDM[ cable or a USB device during the Case 1: update process.
- Page 78 Do not use _3RECEIVER on the remote controller. _rovide the error code. Congratulations! You now have the latest firmware Others Retry the update procedure from installed on your Onkyo AV receiver. beginning. If the error persists, please contact Onkyo Support and provide the error code.
-
Page 79: Connection Tips And Video Signal Path
Connection Tips and Video Signal Path The AV receiver supports several connection formats for compatibility with a wide range of AV equipment. The format you choose will depend on the formats supported by your components. Use the following sections as a guide. Video Signal Flow Chart Video component can be connected by using any one of the Blu-ray Disc/DVD player, etc. - Page 80 Audio components can be connected by using any of the Audio Signal Flow Chart following audio connection formats: analog, optical, coaxial, Blu-ray Disc/DVD player, etc. or HDMI. When choosing a connection format, bear in mind that the Analog Optical Coaxial HDMI AV receiver does not convert digital input signals for analog line outputs and vice versa.
-
Page 81: About Hdmi
About HDMI Designed to meet the increased demands of digital TV, HDMI (High Definition Multimedia Interface) is a new digital interface standard for connecting TVs, projectors, Blu-ray Disc/DVD players, set-top boxes, and other video components. Until now, several separate video and audio cables have been required to connect AV components. With HDMI, a single cable can carry control signals, digital video, and up to eight channels of digital audio (2-channel PCM, multichannel digital audio, and multichannel PCM). -
Page 82: Using An Rihd-Compatible Tv, Player, Or Recorder
Using an RIHD-compatible TV, Player, or Recorder 1-411-11D, which stands for Remote Interactive over HDMI, is the name of the system control function found on Onkyo components. The AV receiver can be used with CEC (Consumer Electronics Control), which allows system control over HDMI and is part of the HDMI standard. - Page 83 m How to connect and setup Confirm the settings. Turn on the power for all connected components. Confirm the connecting and setting. Turn off the power of the TV, and confirm that Connect the HDMI OUT jack to the HDMI input the power of the connected components...
-
Page 84: Specifications
Specifications General Amplifier Section Rated Output Power Power Supply (North American) All channels: (North American) AC 120 V, 60 Hz 80 watts minimum continuous power per (European) AC 230 V, 50 Hz channel, 8 ohm loads, 2 channels driven from 20 Hz to 20 kHz, with a maximum Power Consumption... -
Page 85: Video Resolution Chart
Video Resolution Chart The following tables show how video signals at different resolutions are output by the AV receiver. NTSC/PAL _: Output HDMI Output 4K'2 1080p/24 1080p 1080i 720p 480p/576p 480i/576i Input HDMI 1080p 1080i 720p 480p/576p 480i/576i Component 1080p 1080i 720p 480p/576p... - Page 86 N.T., Hong Kong. Tel: 852-2429-3118 Fax: 852-2428-9039 http://www.ch.onkyo.com/ ONKYO CHINA 1301,555 Tower, No.555 West NanJin Road, Jin an, Shanghai, China 200041, Tel: 86-21-52131366 Fax: 86-21-52130396 Y1103-1 SN 29400663 (C) Copyright 2011 ONKYO SOUND & VISION CORPORATION Japan. All rights reserved. *29400663*...
Need help?
Do you have a question about the HT-R990 and is the answer not in the manual?
Questions and answers