Table of Contents
Advertisement
Mitea
SKW
Blade
d,amefe,
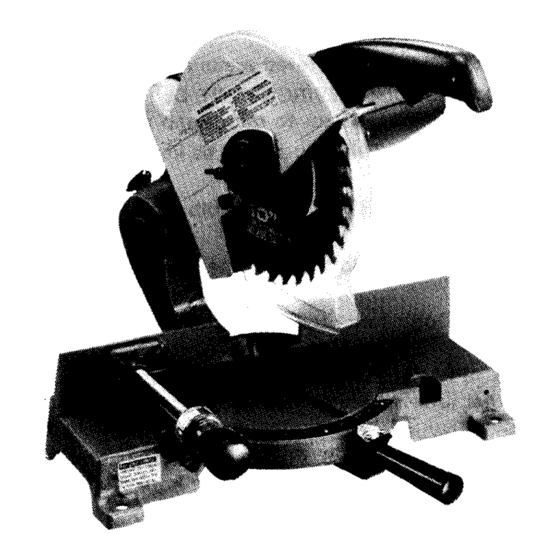
255 mm (10") MODEL LSlOOO
Equipped with Electrical Blade Brake
Ne1
weigh1
M a x
c u i t i n q
capacifies
IH
x
WI
D i r n e r i i i o n ~ IL x
W
x
HI
Hole diamerer
Cross c u t I0"I
1
Miter cut
145"l
INSTRUCTION MANUAL
DOUBLE
INSULA1 'ION
SPEC
I F I CAT I
0
N S
2 5 5 mm
1
15 88 mm and
2 5
mm
I
7 0 mm
x
122
m m
7 0
mm x
90 mm
4.100
496
mm
x
470 mm
x
442 mm
18 0
kg
12
3/4"
x
4 3 ) 4
I
I
12
3,4"
x 3 112")
I
Rlmin
1
119
112"
x 18 1
2"
x
1 7 3r8"I
I
140lbsl
1lO"l
15,8"
and
31
3 2 I
*
Manufacturer reserves the right to change specifications without notice.
*
Note: Specifications may differ from country to country.
Advertisement
Table of Contents

Related Manuals for Makita LS1000


Summary of Contents for Makita LS1000
- Page 1 Mitea 255 mm (10") MODEL LSlOOO Equipped with Electrical Blade Brake INSTRUCTION MANUAL DOUBLE INSULA1 'ION SPEC I F I CAT I M a x c u i t i n q capacifies Blade D i r n e r i i i o n ~ IL x Hole diamerer weigh1 d,amefe,...
- Page 2 BEFORE CONNECTING YOUR TOOL TO A POWER SOURCE Be sure you have read all GENERAL POWER TOOL SAFETY RULES GENERAL SAFETY PRECAUTIONS Tools) (For KNOW YOUR POWER TOOL. Read the owner's manual carefully. Learn the tools applications and limitations, as well as the specific potential hazards peculiar t o it.
- Page 3 REDUCE THE RISK OF UNINTENTIONAL STARTING. Make sure switch is in off position before plugging in. 17. USE RECOMMENDED ACCESSORIES. Consult the owner's manual for recommended accessories. The use of improper accessories may cause risk of injury t o persons. NEVER STAND ON TOOL.
- Page 4 ADDITIONAL SAFETY RULES Don't use the tool in the presence of flammable liquids or gases. Check the blade carefully for cracks or damage before operation. Replace cracked or damaged blade immediately. Use only flanges specified for this tool. Be careful not t o damage the arbor, flanges (especially the installing sur- face) or bolt.
- Page 5 HOW TO USE Handle latch This tool is equipped with a handle latch Handle latch which is used to lock the handle in the lowered position. To release from the lowered position, lower the handle slightly and turn the handle latch to the released position.
- Page 6 *When installing the blade, make sure that the direction of the arrow on the surface of the blade i s compatible with that on the blade case. Use only the Makita socket wrench to install or remove the blade. Safety cover When cutting operations are performed, the safety cover rises as a result of contact with the workpiece.
- Page 7 Maintaining maximum cutting capacity Unplug the tool before any adjustment is attempted. This tool is factory adjusted to provide the max. cutting capacity for 255" 0") saw blade. When the diameter of the blade has been reduced due to sharpening, loosen the hex nut the rear of the gear housing.
- Page 8 Positioning for miter angle Loosen the grip by turning counterclock- wise. Press down the latch spring. This allows the turn base to turn freely. When you have moved the grip to the position where the pointer indicates the desired angle on the miter scale, release the latch spring and securely tighten the grip clock- wise.
- Page 9 Emptying dust bag When the dust bag about half full, re- move the dust bag from the tool and pull the fastener out. Empty the dust bag of i t s contents, tapping lightly so remove as to particles adhering to the insides which might hamper collection.
- Page 10 Switch action To prevent the trigger from being acciden- tally pulled, a lock-off button is provided as a safety feature. To start the tool, press in the lock-off button and pull the trigger. Release the trigger to stop. Fig. 18 CAUTION : Before plugging in the tool, always check to see that the trigger switch actuates properly and returns to the "OFF"...
- Page 11 Take out the worn carbon brushes, insert the new ones and secure the brush holder caps. To maintain product SAFETY and RELIABILITY, repairs, any other maintenance or adjustment should be performed by Makita Authorized or Factory Service Centers, always using Makita replacement parts.
- Page 12 ACCESSORIES CAUTION: These accessories or attachments are recommended for use with your Makita tool specified in this manual. The use of any other accessories or attachments might present a risk of injury to persons. The accessories or attachments should be used only in the proper and intended manner.
- Page 13 Oci -04-'85 (IO") @ m a MITER SAW Model LSIOOO...
- Page 14 Note: The switch, noise suppressor and other part configurations may differ from country country.
- Page 15 MACHINE MACHINE nail Beallng 6 2 0 3 ~ ~ 8 Spindle Lock Ishaft Lock) Bearing Baffle Plate B O X Gear 41 Helical Ring Retaining Ring S Ball Bearing 6 Z O I L L 6 Needle Bearing 1210 Fan 92 Gear Housing...
- Page 16 ONE YEAR WARRANTY Warranty Policy Every Makita tool is thoroughly inspected and tested before leaving the factory. It is warranted to be free of defects from workmanship and materials for the period of ONE YEAR from the date of original purchase. Should any trouble develop during this one-year period, return the COMPLETE tool, freight prepaid, to one of Makita’s Factory or Authorized Service Centers.
Need help?
Do you have a question about the LS1000 and is the answer not in the manual?
Questions and answers