Kogan Agora User Manual
Hide thumbs
Also See for Agora:
- User manual (41 pages) ,
- Quick start manual (3 pages) ,
- Startup manual (3 pages)
Table of Contents
Advertisement
Advertisement
Table of Contents

Related Manuals for Kogan Agora


Summary of Contents for Kogan Agora
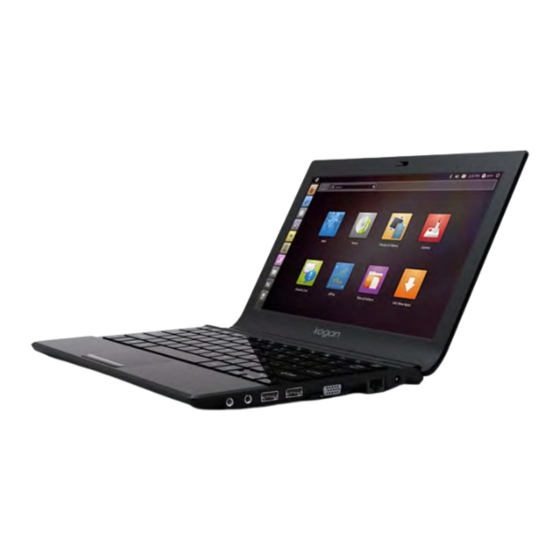
- Page 1 Agora-Laptop USER MANUAL...
-
Page 2: Table Of Contents
Table of Contents Overview ..................1 Security menu..............26 About this book................1 Exit menu................27 Typographics................2 Replacing the memory ..............28 Getting started................3 FAQ and troubleshooting .............33 Battery and power ..............33 Getting your ready for use............3 Connection ................34 Expanding the capabilities of your Notebook......6 System ..................35 Touring your .................. -
Page 3: Overview
Overview About this book Information about frequently FAQ and asked questions and troubleshooting This book provides you the main information about various troubleshooting components in your Notebook and demonstrates how to use Information about cleaning and them. The following are the major chapters of this book. Cleaning and battery battery maintenance maintenance... -
Page 4: Typographics
Typographics The usage of notes, tips, and warnings in this manual is specifically for different purposes, which are described as follows: Icon/ Item Meaning Symbol Warning Information mainly to prevent the damage to components, data, or personal injury caused by misuse and improper operation or behavior. -
Page 5: Getting Started
Getting started Getting your Notebook Depending on the model of your Notebook, the appearance may be different from the illustrations shown in this manual. ready for use Package contents 1. Installing the battery pack Before using your Notebook for the first time, please check if you have all the items with you. -
Page 6: Connecting The Power
2. Connecting the power 3. Opening your Notebook Gently lift up the latchless lid that allows you to open the case easily. a. Connect the power cord to the power adapter. 4. Performing initial setup b. Connect the power adapter to the power jack on your Notebook . - Page 7 on-screen instructions to complete the initial Operating system setup. • The actual operating system that comes with your Notebook may vary. For details, refe r to the Product Specification label on the product carton. Getting started...
-
Page 8: Expanding The Capabilities Of Your Notebook
Expanding the capabilities of your Notebook Pay attention to the plug direction when making the following connections. Incorrect direction may cause damage to the device. Connect an external display device (such as a monitor or projector) to the 15-pin D-sub video jack of your Notebook with a VGA cable. - Page 9 Connect HDMI peripherals to the HDMI ports of your Notebook. Insert a SD or MMC memory card following the direction indicated on the card to exchange files. Connect USB peripherals to the USB ports of your Notebook. Connect a microphone to the microphone input jack to record sounds.
- Page 10 Connect an earphone to the audio output jack to output sounds. Getting started...
-
Page 11: Touring Your
Touring your Notebook Front view Front components Built-in microphone Receives sounds and voices for recording. Built-in webcam A built-in 1.3 megapixel webcam that allows you to capture still images, record videos, and chat online. LED BL panel Keyboard Offline mode swictch Turn on/off your notebook network. - Page 12 Indicators Refer to "Indicators" on page 15 for details. Power button Turns your Notebook on or off. Wireless LAN (WLAN) botton Refer to "Indicators" on page 15 for details. E-mail button Open your default e-mail program. Touring your Notebook...
-
Page 13: Left Side View
Left side view (2) (3) (4) Left-side components Vents HDMI port Connects an optional video or audio device,such as Dissipate heat and keep your Notebook at an optimal a high-definition television,or any compatible digital temperature. or audio component . To prevent overheating, do not obstruct the vents. For example, do not use the Notebook in bed where a USB port blanket may inadvertently cover the vents and block... - Page 14 Four-in-One memory card slot Support the following optinal digital card formats: Secure digital (SD) memory card,MutiMediaCard(MMC),Memory Stick(MS),Memory Stick Pro(MSP). Touring your Notebook...
-
Page 15: Right Side View
Right side view (5) (6) Right-side components 15-pin D-sub video jack monitors and projectors. Microphone input jack Connects to a microphone for recording sounds. LAN (Local Area Network) port (RJ-45 connector) This jack is for 3.5mm analog audio plugs. It accepts both mono and stereo plugs. -
Page 16: Bottom View
Bottom view Wi-Fi module and Memory module compartment Contains the Wi-Fi module and two memory slots that support replaceable memory modules. Hard drive bay Holds the internal hard drive. Battery retainers Secure the battery in place. Speakers module (option) Contains the 3G module slots. Battery pack Supplies power to the Notebook when external Bottom components... -
Page 17: Indicators
Indicators Indicators Indicators Caps Lock indicator Lights up in blue when the <CapsLock> key is Power indicator enabled. When the system is on, it lights up in blue. When the system is in Sleep mode, it flashes in Num Lock indicator blue. -
Page 18: Using Your Notebook
Using your Notebook Using the touchpad Component Function Touchpad Moves the pointer, selects or activates items on the screen. Left touchpad Equivalent to the left button of button an optional external mouse. Right touchpad Equivalent to the right button button of an optional external mouse. - Page 19 Function Left Right Touchpad touchpad touchpad button button Select Click once. Tap once. Execute Click twice Tap twice quickly. quickly. Drag Click once Tap twice and hold the quickly and item, and hold the then use item, and your finger then move on the your finger...
-
Page 20: Using The Keyboard
Using the keyboard Function hotkeys You can use the function hotkeys to access commonly used functions or make quick settings. To use the hotkeys, press and hold the <Fn> (Function) key at the lower left corner of the keyboard, and then press the desired hotkey. The appearance of the keyboard legend may vary depending on the country/region of your purchase. - Page 21 Function hotkey Description Function hotkey Description <Fn> + <Esc> Puts your Notebook into Sleep mode. <Fn> + <F1> Turns 3G on or off.(3G option) <Fn> + <F2> Turns Bluetooth on or off.(bluetooth option) Decreases volume. <Fn> + <F3> <Fn> + <F4> Increases volume.
-
Page 22: Windows Key Shortcuts And Other Keys
Windows key shortcuts and other keys You can access features of the Windows operating system quickly using Windows key combinations. To use the shortcut combinations, press and hold the Windows key, and then press the other shortcut key. Using your Notebook... - Page 23 Function hotkey Description Function hotkey Description Windows key Activates the dialog box. + <R> Provides quick access to the Start menu. Opens/closes Windows Mobility Opens the window for Computer + <X> + <E> Center. browsing disks and files. Minimizes all open windows that Cancels minimization of all + <M>...
-
Page 24: Using Built-In Wireless Connectivi Ty (Select Models Only)
Using built-in wireless connectivity Connect to a network With the built-in wireless connecti vity of your Notebook, you 4. From the pop-up menu, click can access other wireless network enabled devices (such as Access Point network stations, Notebook computers, Personal Digital Assistants, or digital projectors) wirelessly without the constraints of network cables. - Page 25 there will be a successful message showing that you have connected to the network. • To connect to some networks that require security authentication, you may have to undergo another authorization process and enter username and password. For details, please consult your network administrator. •...
-
Page 26: Using Bios Setup
Using BIOS setup BIOS (Basic Input/Output System) is a layer of software, called • You want to modify some specific settings to optimize system firmware, that translates instructions from other layers of performance. software into instructions that the Notebook hardware can understand. -
Page 27: Navigating The Bios Setup Screen
The BIOS setup main screen will appear as follows. • Keyboard instructions for moving around and making selections. Navigating the BIOS setup screen Keyboard information can be found on the right column of the screen. A brief description of keyboard usage is listed below: Function Left and right Selects a menu title. -
Page 28: Main Menu
Main menu Removable Drives: • specifies the Boot Device Priority sequence from removable disks that are available. Main menu contains the basic configuration settings of the PXE SUPPORT: • supports to boot from LAN. system and shows some system information, such as the BIOS version, CPU type and speed, and the system memory, etc. -
Page 29: Exit Menu
Exit menu Exit menu displays ways of exiting BIOS setup. After finished with your settings, you must save and exit so that the new settings can take effect. Save Changes and Exit: • saves the changes you have made and exits BIOS setup. After finishing with your settings, you must save and exit so that the new settings can take effect. -
Page 30: Replacing The Memory
Replacing the memory You can replace the existing memory module with a higher- 1. Shut down your Notebook completely. Disconnect the capacity one. Before you upgrade or replace memory, please power adapter and turn over your Notebook. check on the our web site to determine the module which can be used, or contact our distributor or customer service center. - Page 31 3. Slide “Battery retainer B” to the left (1) and, while still 4. The memory door is secured with two screws. Use a screwdriver holding the retainer, remove the battery from its to remove the screws. compartment (2). HDD & Memory door Battery retainer B To remove the screws, a small Phillips head screwdriver is...
- Page 32 5. Remove the back cover. 6. Release the existing memory module by pushing aside the memory holders, and remove the memory. 7. Remove the memory. Ground yourself to your Notebook with professional grounding equipment like an anti-static wristband, or touch the metal surface on the inside of your Notebook to discharge any static electricity.
- Page 33 8. Align the memory module with the slot, and then insert it. 10. Replace the memory door, and use a screwdriver to secure the memory door with the screws. When inserting, pay attention to the direction of the memory module. Memory door 9.
- Page 34 12.Place the battery on its original position (1), and then slide “Battery retainer A” to the left (2). Connect the power adapter. When you start the Notebook, it will automatically Battery retainer A It is recommended that you go into BIOS to load setup defaults after installing additional memory.
-
Page 35: Faq And Troubleshooting
FAQ and troubleshooting The chapter describes situations that you may encounter during The battery icon in the notification area on my Notebook suggests that the battery is fully charged. However, when I check use of the Notebook, along wi th basic troubleshooting steps. If you are not able to resolve the issue, contact a nearest service it from the Power Manager in Windows, the battery level is only center for assistance immediately. -
Page 36: Connection
Connection What should I do if the battery gets hot in my Notebook? Take the battery out and let it cool down for a while. If the problem persists when the battery is inserted again into your Notebook later, the battery could be defective and it may need What is a Wireless LAN (WLAN)? to be replaced. -
Page 37: System
Advanced 4. The Properties window will pop up. Click the Windows uses disk space for operations, such as caching and tab, and then click the Speed & Duplex item on the left. virtual memory. The Notebook may not run reliably if the 5. - Page 38 Edit Paste 8. Select the commands in the folder 1. Press + R to display the dialog box. window. The icons that were cut from the Startup folder are now placed in the folder. Open 2. Type "msconfig" in the field.
- Page 39 Start 5. Click Why does the keyboard and/or palm rest get warm? 6. Restart your Notebook . It may take a long time to Typically, the Notebook tends to be warm slightly. The complete. location of the hard disk is typically underneath the palm rest To run Disk Defragmentation in Windows Vista: and as a result, the palm rest gets warm.
- Page 40 Why is the hard disk capacity displayed by the OS different from Furthermore, when a hard disk is partitioned, the system will its nominated capacity? reserve some space on the drive for system files. Therefore, the total capacity of a hard disk displayed by the OS will never be the You may have discovered that the capacity of a 10GB hard disk same as its nominated capacity.
-
Page 41: Display
vents. For example, do not use the Notebook in bed where a • If it lights up in white, th e Notebook is being supplied blanket may inadvertently cover the vents and block the airflow. normally with power. There are two possible causes for the problem. - Page 42 How can I judge if my LCD panel is out of order and what should I do if this happens? Contact your dealer if you encounter the following situations: • The screen flickers when the system starts up normally. • Fonts displayed on the screen are unclear and strange codes appear.
-
Page 43: Cleaning And Battery Maintenance
Cleaning and battery maintenance Battery maintenance Cleaning your Notebook 1. Fully charge/discharge battery up to 4 cycles before When cleaning the Notebook , follow the steps below: achieving full capacity of a new battery. 1. Turn off the Notebook, disconnect the power adapter, and 2. -
Page 44: Appendix
Appendix General safety information 9. Do not use your Notebook near water, for example near a bathtub, wash bowl, kitchen sink or laundry tub, in a wet basement or near a swimming pool. When setting up or operating your Notebook , please pay 10. -
Page 45: Safety Information About The Power Adapter
Safety information about the Disposal of Waste Electrical power adapter and Electronic Equipment by users in private households in • Use only the power adapter supplied with your Notebook . Use of another type of power adapter will result in the European Union. -
Page 46: Safety Instructions For Poland, Romania, Slovenia, Bulgaria, Latvia, And Croatia
Safety instructions for Poland, Romania, Slovenia, Bulgaria, Latvia, and Croatia Polski România 1. Należy upewnić się, że zastosowano się do wszystkich 1. Asiguraţi-vă că respectaţi toate instrucţiunile şi instrukcji i ostrzeżeń dotyczących systemu. avertismentele privitoare la sistem. 2. Nie należy umieszczać komputera w miejscach 2. - Page 47 Български Slovensko 1. Следвайте всички инструкции и предупреждения 1. Glede sistema sledite navodilom in opozorilom. относно системата. 2. Raèunalnika ne postavljajte na mesta z moènim magnetnim 2. Не слагайте компютъра на място със силно магнитно poljem. поле. 3. V primeru nepravilne namestitve akumulatorja obstaja 3.
- Page 48 Latviski Hrvatski 1. Sekojiet visām sistēmai atbilstošajām norādēm un 1. Pridržavajte se svih uputa i upozorenja u vezi sa sustavom. brīdinājumiem. 2. Ne postavljajte računalo u područje jakih magnetskih polja. 2. Nenovietojiet datoru tuvu spēcīgiem magnētiskajiem 3. Nepravilna zamjena baterije izazvat će opasnost od laukiem.
- Page 49 <Memo> Appendix...
Need help?
Do you have a question about the Agora and is the answer not in the manual?
Questions and answers